
 Pin it
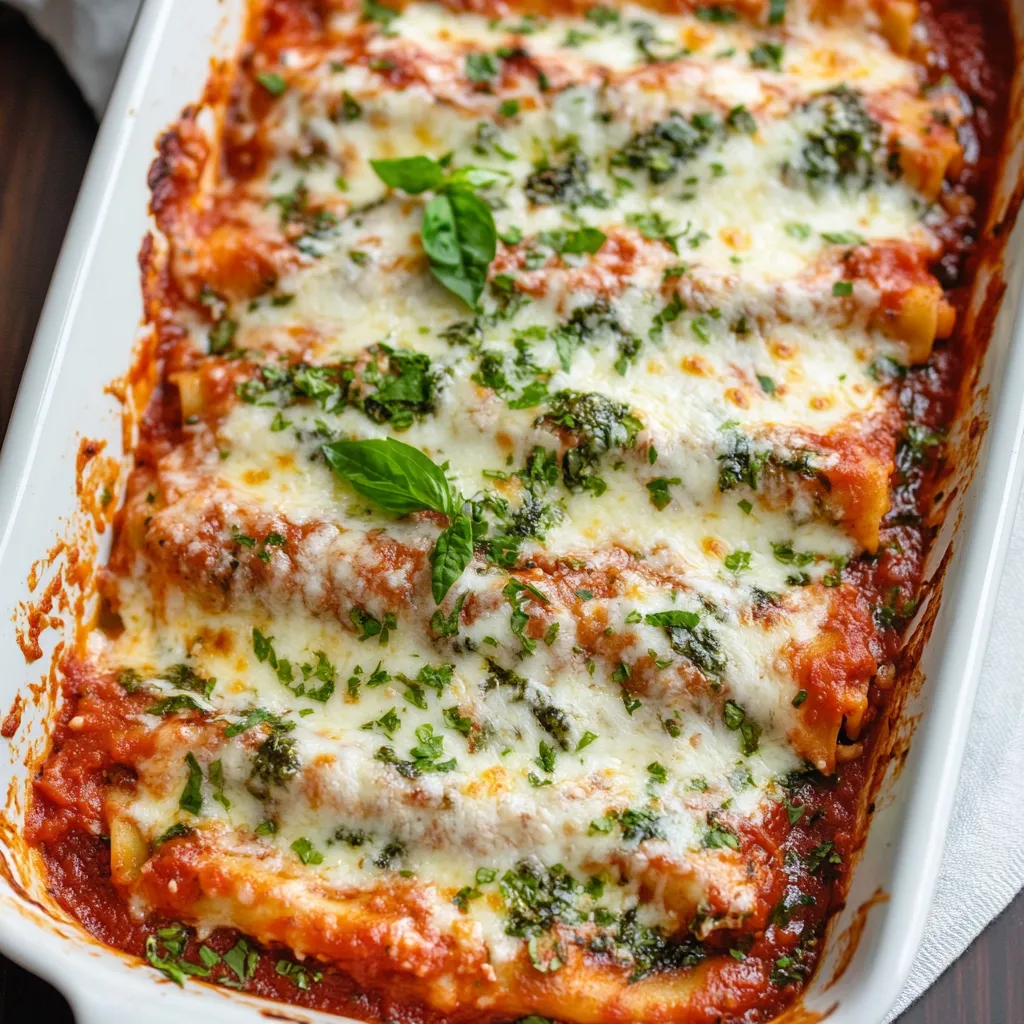
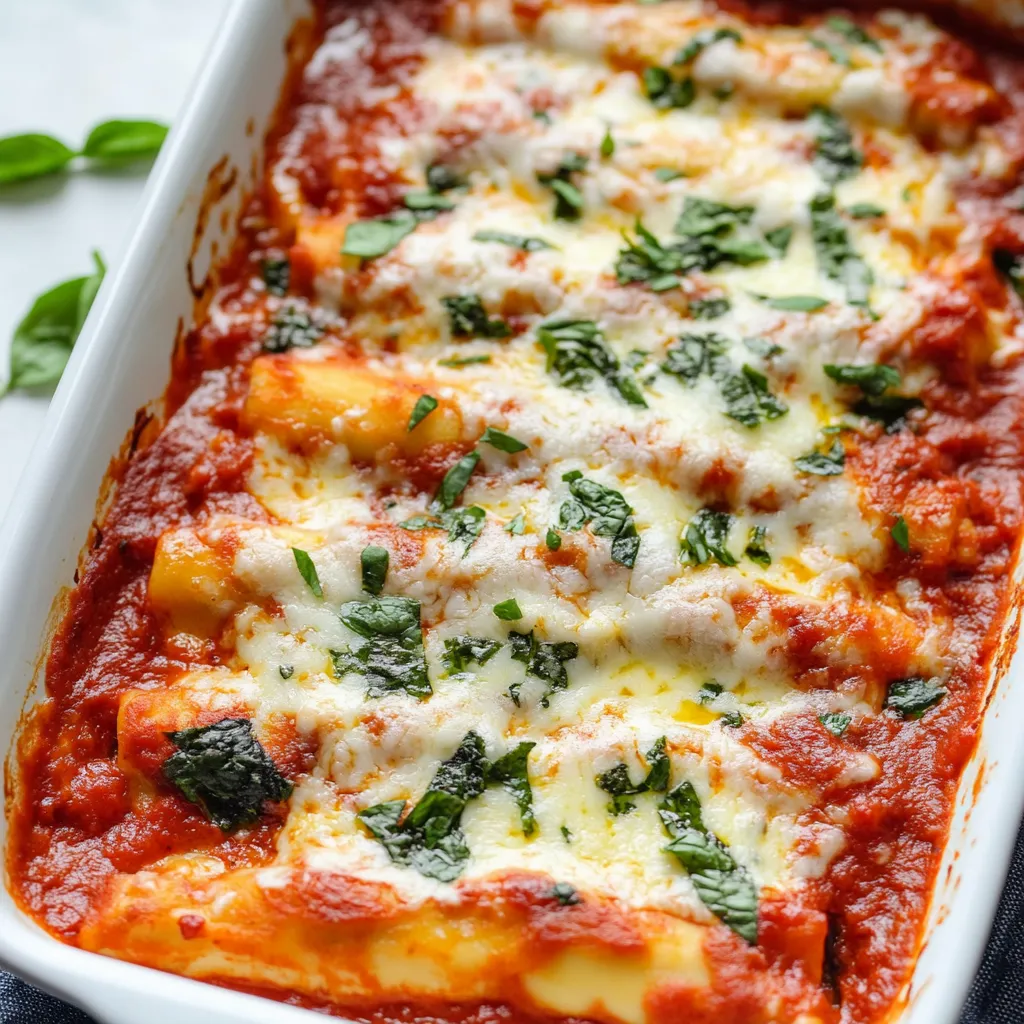
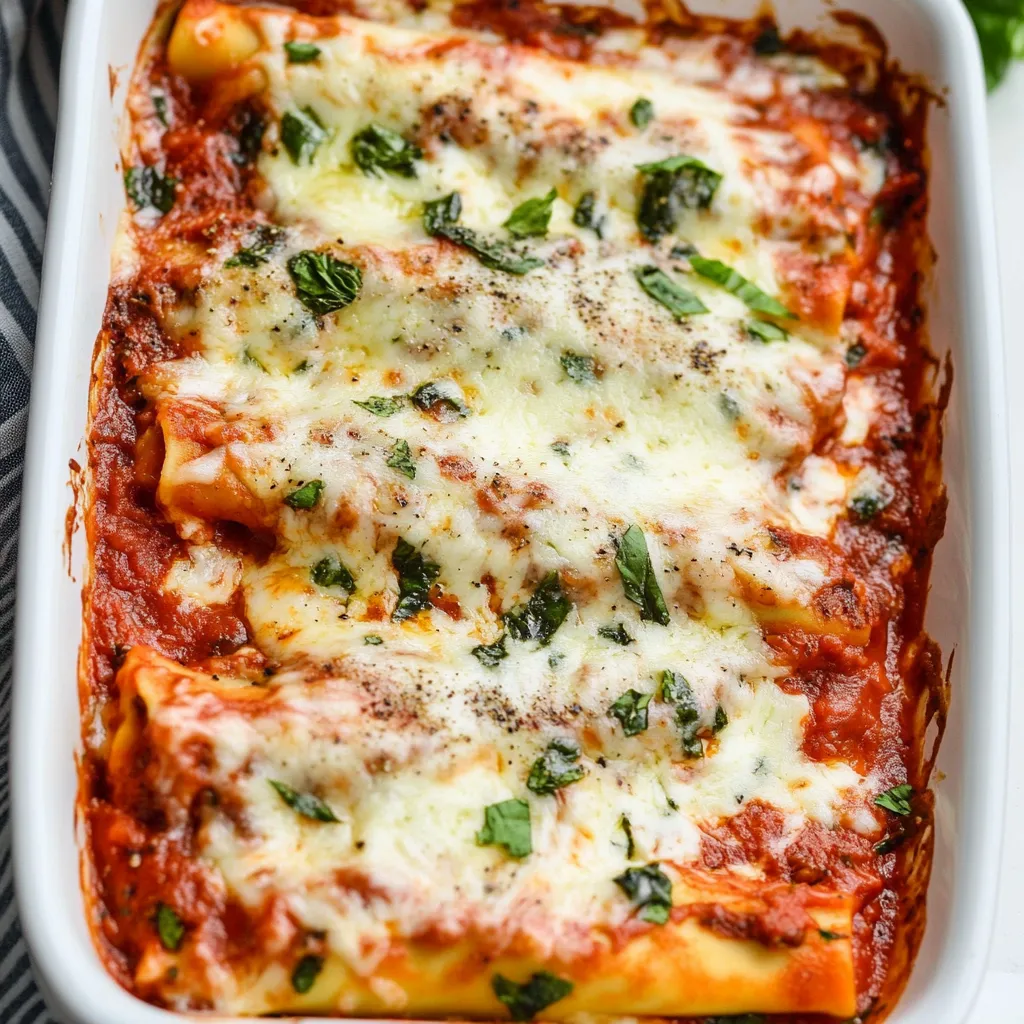
Three kinds of cheese stuffed into pasta shells and baked under marinara sauce creates one of those dishes that disappears from the table faster than you can serve it. Manicotti looks impressive enough for company but comes together quickly enough for weeknight dinners when you need something reliable. The large pasta tubes hold a rich mixture of ricotta, mozzarella, and parmesan that becomes creamy and melted during baking, while spinach sneaks in some nutrition without anyone really noticing. Each piece delivers that satisfying combination of tender pasta, gooey cheese filling, and tangy tomato sauce that defines classic Italian comfort food.
Italian food became my comfort zone in the kitchen after I married into an Italian family where Sunday dinners always featured some kind of stuffed pasta. My mother-in-law taught me her manicotti recipe, though I've tweaked it over the years to include spinach for extra nutrition. My kids request this specific dish for their birthday dinners more often than cake, which tells you everything about how good it tastes. The first time I made it for my husband's extended family, three aunts asked for the recipe and one uncle ate five pieces, so I knew I'd gotten it right.
Ingredients and Why They Matter
- Manicotti shells (1 box, about 14 shells): These large tubular pasta shapes are specifically designed for stuffing; if you can't find manicotti, jumbo pasta shells work as a substitute though they look different
- Ricotta cheese (15 ounces, about 2 cups): Whole milk ricotta provides the creamy base for the filling and keeps everything moist during baking; part-skim works but won't be quite as rich
- Shredded mozzarella cheese (2 cups, divided): Mozzarella melts beautifully and creates those satisfying cheese pulls; use half in the filling and save the rest for topping
- Grated parmesan cheese (½ cup plus extra for topping): Real parmesan adds sharp, nutty flavor that balances the mild ricotta and mozzarella; the pre-grated kind works fine here
- Fresh or frozen spinach (1½ cups chopped, about 5 ounces): Spinach adds color, nutrition, and slight earthiness; chop it very finely so kids don't pick it out
- Italian seasoning (1 tablespoon): This blend of basil, oregano, thyme, and other herbs infuses the filling with classic Italian flavor; make your own or use store-bought
- Egg (1 large): The egg binds all the cheeses together so the filling holds its shape inside the shells instead of becoming loose and grainy
- Marinara sauce (24-28 ounces, about 3 cups): Good quality jarred sauce works perfectly and saves time; homemade marinara tastes even better if you have the energy to make it
- Salt and pepper (to taste): Seasoning the filling properly makes the difference between bland and delicious
How To Make It
- Cook the pasta shells:
- Fill a large pot with water, add a generous tablespoon of salt, and bring it to a rolling boil over high heat. The salt seasons the pasta from the inside and makes a noticeable difference in final flavor. Add your manicotti shells to the boiling water and cook them according to package directions, but aim for al dente, which means slightly underdone with a tiny bit of firmness remaining when you bite into one. This usually takes about 7-8 minutes. The shells will continue softening during baking, so undercooking them slightly now prevents mushy pasta later. When time is up, drain the shells in a colander and immediately rinse them under cold running water to stop the cooking process and cool them enough to handle. Lay the drained shells out on a clean kitchen towel or baking sheet so they don't stick together while you prepare the filling. Handle them gently because cooked manicotti tears easily.
- Prepare the spinach:
- If using fresh spinach, wash it thoroughly and chop it very finely into tiny pieces barely bigger than confetti. Fine chopping is crucial because large spinach pieces make the filling lumpy and give kids something to pick out. If using frozen spinach, thaw it completely and then squeeze it in your hands or press it in a clean kitchen towel to remove as much water as possible. Excess moisture from spinach will make your filling watery and cause it to leak out of the shells during baking. You want the spinach as dry as you can get it. Set the prepared spinach aside while you work on the cheese mixture.
- Make the cheese filling:
- In a large mixing bowl, combine the ricotta cheese, 1 cup of the shredded mozzarella, parmesan cheese, your prepared spinach, Italian seasoning, and the egg. Add a generous pinch of salt and several grinds of black pepper. Use a large spoon or spatula to stir everything together thoroughly until completely combined and no streaks of plain ricotta remain. The mixture should look uniformly green-flecked from the spinach with cheese evenly distributed throughout. Taste a small bit of the filling and adjust salt and pepper if needed, keeping in mind that the marinara sauce will add more salt later. The consistency should be thick and spreadable, similar to thick frosting. If it seems too loose or wet, your spinach probably wasn't squeezed dry enough. The filling can sit at room temperature while you prep the baking dish, or cover it and refrigerate for up to a day ahead.
- Prepare the baking dish:
- Preheat your oven to 350°F and position the rack in the center. Take a 9x13 inch baking dish and pour about 1 cup of marinara sauce across the bottom, spreading it evenly to coat the entire surface. This sauce layer prevents the pasta from sticking to the dish and burning on the bottom during baking. It also adds moisture that helps the manicotti cook through properly. Don't skip this step thinking you'll save sauce for the top - that bottom layer serves an important purpose. Set aside the remaining marinara sauce for covering the filled shells.
- Fill the manicotti shells:
- This step requires patience but gets easier after you've done a few. The easiest method uses a piping bag or a large zip-top plastic bag with one corner cut off. Spoon all your cheese filling into the bag, then pipe it into each manicotti shell from both ends, squeezing gently and steadily. Fill each shell completely but not so full that filling squishes out the ends. If you don't have a piping bag, use a small spoon to carefully stuff the filling into the shells from both openings, pushing it toward the center. This method takes longer and gets messier, but it works. Another option is to use your fingers to push the filling into the shells, though this feels weird at first. However you fill them, work on a clean surface and expect some mess. As you fill each shell, place it seam-side up in the prepared baking dish, arranging them in a single layer side by side. You should fit all 14 shells snugly in the dish.
- Add sauce and final cheese:
- Once all shells are filled and arranged in the baking dish, pour the remaining marinara sauce over the top, making sure to cover all the shells completely. Some pasta edges poking through the sauce will dry out and get hard during baking, so use a spoon to spread the sauce and ensure good coverage. Sprinkle the remaining 1 cup of shredded mozzarella evenly over the sauce, covering the entire surface. Add a final dusting of extra parmesan if you want more cheesy goodness on top. The cheese will melt and bubble during baking, creating that appealing golden topping.
- Bake until bubbly:
- Cover the baking dish tightly with aluminum foil and place it in your preheated oven. Bake covered for 20 minutes, which allows the pasta to steam and cook through without the top drying out. After 20 minutes, remove the foil and continue baking uncovered for another 10-15 minutes, until the cheese on top melts completely, turns golden in spots, and the sauce bubbles around the edges. The total baking time is usually 30-35 minutes. Let the manicotti rest for 5-10 minutes after removing from the oven before serving. This resting time lets the cheese filling firm up slightly so the shells don't fall apart when you serve them.
 Pin it
Ricotta cheese became one of my favorite ingredients after I learned it's actually quite mild and takes on the flavors you mix with it. My kids think they don't like ricotta when I mention it by name, but they devour lasagna and manicotti without realizing both dishes feature ricotta prominently in the filling. The trick is blending it with other stronger-flavored ingredients so it adds creaminess without tasting like plain cheese. My neighbor's daughter claims she hates all cheese except mozzarella, yet she ate three pieces of this manicotti at our last dinner party without complaining once.
Pasta Cooking Perfection
Understanding al dente pasta changes how you cook it and dramatically improves final results. The Italian phrase "al dente" literally means "to the tooth" and describes pasta cooked until tender but still slightly firm when you bite it. This texture prevents pasta from turning to mush during baking or reheating. Testing for al dente means pulling out a piece of pasta a minute or two before the package directions say it's done, letting it cool briefly, then biting into it. You should feel slight resistance at the very center. For manicotti that will bake in sauce for 30 minutes, you want pasta even more underdone than typical al dente. Some people call this "al duro" or extra firm. The shells might seem almost too hard when you taste them, but trust the process because they'll soften perfectly during baking.
Filling Techniques Compared
Three main methods exist for stuffing manicotti shells, each with advantages and drawbacks. The piping bag method is fastest and neatest once you get the hang of it - squeeze steady pressure and the filling flows smoothly into shells from both ends. This professional technique minimizes mess and creates evenly filled shells. The spoon method works when you don't have piping equipment but takes longer and requires patience as you carefully push filling into the narrow opening. Expect more filling to end up on your work surface than inside shells initially. The finger method feels strange but gives you the most control - use your index finger to push filling into one end while holding the shell steady, packing it firmly. Some cooks actually prefer this tactile approach despite the mess. Try all three methods and use whichever feels most comfortable.
Sauce Coverage Importance
Properly covering manicotti with sauce before baking serves multiple purposes beyond just adding flavor. The sauce provides moisture that creates steam in the covered dish, helping pasta cook through evenly. Exposed pasta edges dry out and become hard and unpleasant to eat. The sauce also prevents cheese filling from drying out or forming a skin during baking. Even if you think you've added enough sauce, check carefully before baking and spoon extra sauce over any visible pasta. You can always drain excess sauce when serving if you've overdone it, but you can't fix dried-out pasta after baking. That bottom layer of sauce also prevents sticking and makes serving much easier because shells lift out cleanly instead of welding themselves to the dish.
Make-Ahead Strategies
This dish's flexibility for advance preparation makes it perfect for busy schedules or entertaining when you want food ready without last-minute cooking. For same-day advance prep, assemble completely up to 8 hours ahead, cover tightly with foil, and refrigerate. Bring to room temperature for 30 minutes before baking, or add 10-15 minutes to the covered baking time if starting cold. For longer storage, assemble in a freezer-safe dish, cover with plastic wrap and then foil, and freeze for up to 3 months. Bake directly from frozen, adding 30-45 minutes to the total time and keeping it covered for the first 40 minutes. The texture might be slightly softer than fresh, but the flavor remains excellent. Label the container with baking instructions so you don't have to remember details months later.
Serving Suggestions
Manicotti serves beautifully as the main course with simple sides that don't compete for attention. A crisp green salad with Italian vinaigrette provides fresh contrast to the rich, cheesy pasta. Garlic bread or warm crusty Italian bread gives you something to sop up extra sauce. Roasted or steamed vegetables like broccoli, green beans, or asparagus add color and nutrition without much effort. For larger gatherings, pair manicotti with other Italian favorites like Caesar salad, antipasto platters, or bruschetta. Red wine complements the tomato sauce and cheese perfectly for adults. Keep side dishes simple because the manicotti itself is quite rich and filling - most people find two stuffed shells plus sides to be a complete meal.
Leftover Magic
Manicotti often tastes even better the next day after flavors have melded together overnight. Individual portions reheat beautifully in the microwave - place one or two shells in a microwave-safe dish, cover loosely, and heat on medium power for 2-3 minutes until hot throughout. Oven reheating works for larger portions at 350°F covered with foil for about 20 minutes. Add a splash of water or extra sauce before reheating to prevent drying. Leftover manicotti keeps refrigerated in an airtight container for 4-5 days. The pasta softens slightly more each day, but many people prefer this ultra-tender texture. Frozen leftovers stay good for 2-3 months - freeze individual portions in freezer-safe containers for easy single-serving meals later.
 Pin it
This manicotti recipe represents the kind of cooking I value most - impressive results from straightforward techniques using ingredients most people already know. Nothing here requires special skills or exotic components, just careful assembly and proper baking. The satisfaction of pulling a bubbling pan from the oven and seeing everyone's faces light up makes the modest effort completely worthwhile. When my kids bring friends over for dinner and those friends ask their parents to make "that pasta thing with cheese inside," I know this recipe has done its job. Good food doesn't need to be complicated; it just needs to taste delicious and make people happy, which these cheese-stuffed pasta shells accomplish every single time.
Frequently Asked Questions
- → Can I make manicotti ahead of time?
- Yes! You can assemble the whole dish, cover it tightly, and refrigerate for up to 24 hours before baking. Just add a few extra minutes to the baking time if cooking straight from the fridge.
- → What's the easiest way to fill manicotti shells?
- Use a piping bag or a plastic zip-top bag with the corner cut off. This makes filling the shells much faster and less messy than using a spoon.
- → Can I freeze manicotti?
- Absolutely! Assemble the dish but don't bake it. Wrap it well in plastic wrap and foil, then freeze for up to 3 months. Thaw overnight in the fridge before baking.
- → What can I use instead of spinach?
- You can leave it out completely or substitute with other veggies like sautéed mushrooms, diced zucchini, or even cooked ground beef if you want a heartier filling.
- → How do I keep manicotti shells from tearing?
- Don't overcook the pasta - aim for al dente. Rinse them in cold water right after draining to stop the cooking, and handle them gently when filling.
- → Can I use a different type of pasta?
- If you can't find manicotti, jumbo pasta shells work great as a substitute. The filling and cooking method stay the same.