
 Pin it
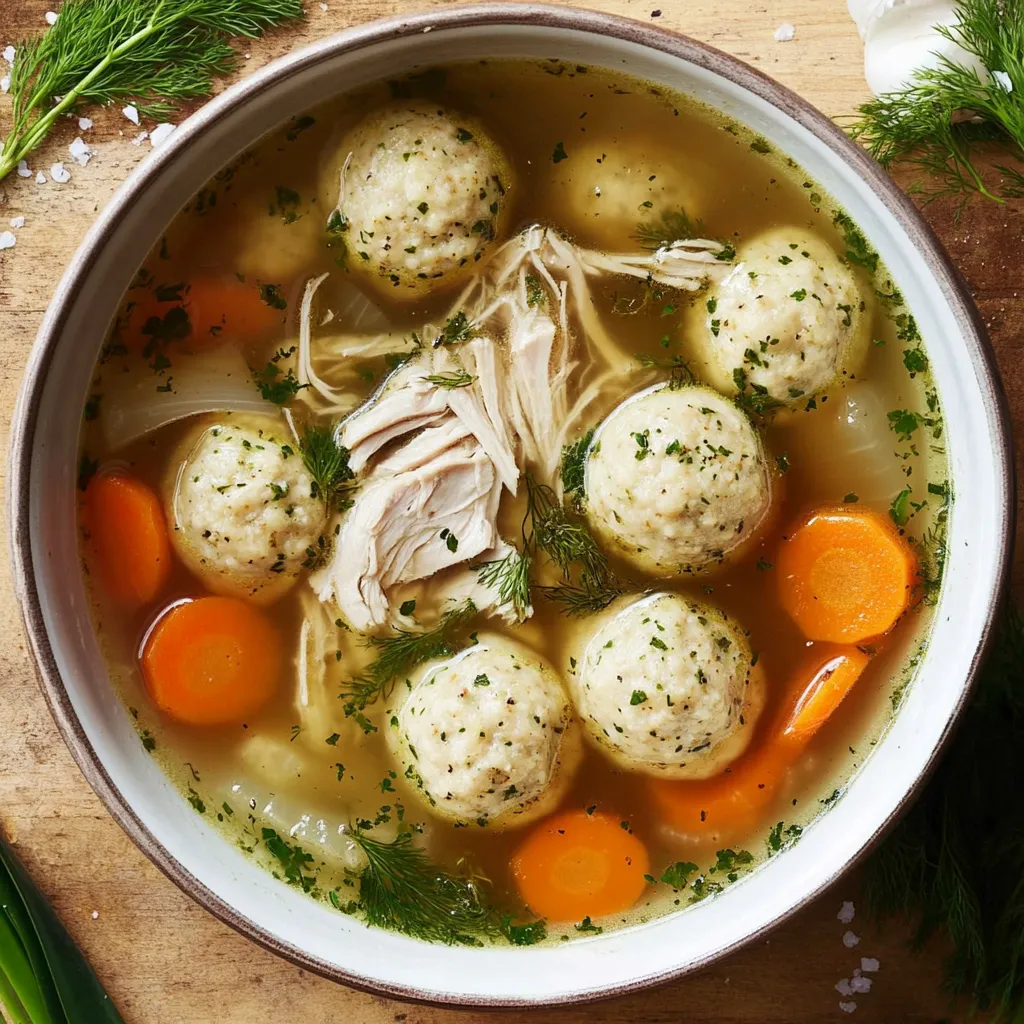
This homemade matzo ball soup brings together everything that makes Jewish comfort food so special. The rich, golden broth simmers for hours until it's packed with deep chicken flavor, while the matzo balls—whether you make them light and fluffy or hearty and dense—provide that perfect tender bite. Making this soup from scratch takes time, but the process itself becomes part of the tradition, and the result is miles beyond anything you'd get from a carton or takeout container. The house fills with that unmistakable aroma of slow-cooked chicken and fresh dill, and each spoonful delivers warmth that goes straight to your soul.
I've made this soup at least a dozen times now, tweaking the recipe each time until I found the perfect balance. The first time I tried it, I was nervous about getting the matzo balls right, but once I understood that the resting time in the fridge is what really makes them come together, everything clicked. Now it's become my signature dish for family gatherings, and I always make extra because everyone wants to take leftovers home.
Ingredients and What Makes Them Essential
- Whole chicken (4 to 5 pounds) or chicken legs: Using a whole bird gives you the perfect mix of white and dark meat, with the bones releasing collagen that makes the broth silky and full-bodied. If you prefer richer flavor, go with all chicken legs since dark meat has more fat and connective tissue. Look for chicken that's organic or free-range if possible, as the quality really shows in a simple soup like this.
- Yellow onions (2 large): These form the aromatic foundation of the stock and break down during cooking to add natural sweetness. Choose onions that feel heavy for their size with tight, papery skins and no soft spots. The skins can actually stay on for added color and depth.
- Carrots (4 to 5 medium): Carrots bring mild sweetness and earthiness to balance the savory chicken. Pick firm, bright orange carrots without cracks or limpness. The ones with tops still attached tend to be fresher, though you'll remove the greens before using them.
- Celery (3 to 4 stalks): Celery adds a subtle vegetal note and helps round out the flavor base without overpowering anything. Look for crisp stalks with fresh-looking leaves, and don't bother peeling them since everything simmers together.
- Parsnips (2 medium): These are the secret weapon that sets this stock apart from basic recipes. Parsnips contribute a gentle, almost nutty sweetness that's more complex than carrots alone. Choose parsnips that are firm and pale cream-colored, avoiding any that feel rubbery or have brown spots.
- Fresh dill (1 bunch, divided): Dill brings that classic Jewish deli flavor and makes the soup taste authentic. You'll use some in the matzo balls and save the rest for garnish. Pick dill with feathery, bright green fronds that smell fragrant, and avoid any bunches with yellowing or slimy stems.
- Matzo meal (1 cup): This is ground matzo crackers and creates the structure of the matzo balls. The texture should be like fine breadcrumbs. Manischewitz is the most common brand, but if you can't find it, you can make your own by pulsing matzo crackers in a food processor until they're finely ground.
- Eggs (4 large): Eggs bind the matzo meal together and give the balls structure so they don't fall apart during cooking. Use fresh eggs at room temperature since they mix more smoothly into the other ingredients.
- Chicken schmaltz (¼ cup): Rendered chicken fat is traditional and adds unmatched richness and authentic flavor to the matzo balls. You can skim this from your homemade stock after refrigerating it overnight, buy it at specialty stores, or substitute with melted unsalted butter or vegetable oil if needed.
- Seltzer or club soda (¼ cup): The carbonation aerates the matzo ball mixture and creates a lighter, fluffier texture. Use plain seltzer, not flavored, and make sure it's cold and still fizzy when you add it. If you want denser matzo balls, replace this with cold water or chicken stock instead.
- Baking powder (1 teaspoon): This leavening agent works with the seltzer to make the matzo balls rise and become tender rather than heavy. If you prefer traditional dense matzo balls, simply leave this out.
Step-by-Step Instructions
- Prepare the chicken and vegetables:
- Start by breaking down your whole chicken into eight pieces—two breasts, two thighs, two drumsticks, and two wings—or ask your butcher to do this for you when you purchase it. If you're not comfortable with butchering, buying pre-cut chicken legs works perfectly fine and actually gives you richer flavor since dark meat has more fat. Peel the onions and cut them into quarters, leaving the root end attached so the layers stay together during the long simmer. Scrub the carrots well and cut them into large chunks about three inches long. Do the same with the celery stalks, including any leaves since they add flavor. Peel the parsnips with a vegetable peeler and cut them into similar-sized chunks as the carrots. Having everything roughly the same size ensures even cooking and flavor extraction.
- Build the stock base:
- Place your large stockpot or Dutch oven on the stove and add all the chicken pieces, arranging them so they fit in a single layer as much as possible. Add the quartered onions, carrot chunks, celery pieces, and parsnip chunks, distributing them around the chicken. Toss in several sprigs of fresh parsley along with a couple of bay leaves if you have them. Pour in enough cold water to cover everything by about two inches—this usually takes 10 to 12 cups depending on your pot size. Starting with cold water allows the flavors to extract slowly as the temperature rises, which creates a clearer, more flavorful stock than if you started with hot water. Add a generous amount of salt, about two tablespoons, and several grinds of black pepper. Don't worry about oversalting at this stage since the liquid will reduce and concentrate as it cooks.
- Bring to a gentle simmer and maintain it:
- Turn the heat to medium-high and watch the pot carefully as it comes up to temperature. You'll start seeing small bubbles form around the edges after about 15 to 20 minutes. The moment you see the surface just beginning to break with gentle bubbles, reduce the heat to medium-low or low, depending on your stove. The goal is to maintain the barest simmer—you should see just a few lazy bubbles breaking the surface every few seconds, not a rolling boil. This is crucial because boiling makes the stock cloudy and causes too much liquid to evaporate. If you boil it aggressively, the proteins will break apart and make the broth murky instead of clear and golden. Keep the pot uncovered so you can monitor it easily and adjust the heat as needed. Every stove is different, so find that sweet spot where it barely moves.
- Remove the chicken pieces strategically:
- After the stock has been simmering gently for one full hour, use tongs to carefully fish out the chicken breasts, thighs, and drumsticks. These cuts cook through faster than the wings and backbone pieces, and if you leave them in longer, they'll become dry and stringy. Transfer them to a large plate or baking sheet and let them cool until you can handle them comfortably, about 20 minutes. Once cooled, pull the meat off the bones with your hands or a fork, discarding the skin and bones. Shred the chicken into bite-sized pieces and set aside in a covered container. You can refrigerate this meat and add it to the finished soup later, or you can use it for chicken salad or sandwiches. Return any remaining chicken pieces and bones to the pot and continue simmering. The wings and any backbone pieces can stay in for the full cooking time since they're mostly bone and connective tissue that adds body to the stock.
- Continue simmering until deeply flavored:
- Let the stock continue its gentle simmer for another two to three hours, for a total cooking time of three to four hours. During this time, check on it every 30 minutes or so to make sure it's maintaining that gentle bubble and to skim off any foam or scum that rises to the surface. This foam is just coagulated protein and impurities, and removing it keeps your stock clear and clean-tasting. Use a ladle or large spoon to skim across the surface. You'll notice the stock turning a deeper golden color as time goes on, and the vegetables will become completely soft and falling apart. This long, slow cooking extracts every bit of flavor from the chicken bones and vegetables. The collagen from the bones breaks down into gelatin, which gives the finished stock a rich, almost silky texture that coats your spoon.
- Strain and cool the stock properly:
- When the stock has finished cooking and tastes rich and chickeny, turn off the heat and let it cool for about 15 minutes so you can handle it safely. Set a large fine-mesh strainer or colander over another big pot or large bowl. Carefully pour the stock through the strainer, or use a ladle to transfer it if the pot is too heavy to lift. Press down gently on the solids with the back of a spoon to extract any remaining liquid, but don't press too hard or you'll make the stock cloudy. Discard all the solids—the vegetables and bones have given up all their flavor at this point. If you're planning to make the matzo balls the same day, you can keep the stock warm on the stove over very low heat. If you're working ahead, let the stock cool to room temperature, then cover and refrigerate it overnight. When it's cold, a layer of fat will solidify on top, and you can scrape this off with a spoon and save it for making your matzo balls—this is your schmaltz, and it's liquid gold for flavor.
- Make the matzo ball mixture:
- In a medium mixing bowl, crack the four eggs and beat them lightly with a fork until the yolks and whites are just combined. Add the chicken schmaltz, making sure it's at room temperature or just slightly warm so it mixes in smoothly without cooking the eggs. If you're using butter instead, melt it and let it cool for a few minutes before adding. Stir in the seltzer or club soda, which should be cold and fizzy. Add the matzo meal, finely chopped fresh dill (about two to three tablespoons), salt (start with one teaspoon), black pepper (half a teaspoon), and baking powder if you're making fluffy matzo balls. Use a fork or wooden spoon to mix everything together until you have a thick, shaggy mixture that looks like wet sand or thick oatmeal. It won't be smooth, and that's exactly right. Don't overmix or the matzo balls can become tough. Cover the bowl tightly with plastic wrap and refrigerate for at least two hours, or up to 24 hours. This resting time is essential because it allows the matzo meal to fully absorb the liquid, which makes the mixture easier to shape and gives you better texture in the finished matzo balls.
- Form and cook the matzo balls:
- When you're ready to cook, bring a large pot of salted water to a rolling boil—you want enough water that the matzo balls can move around freely, at least eight cups. While the water heats, wet your hands with cold water to prevent sticking, then scoop out about two tablespoons of the matzo mixture and roll it gently between your palms to form a ball roughly the size of a golf ball. Don't pack them too tightly or roll them too much, or they'll be dense. Place each formed ball on a plate and continue until you've used all the mixture—you should get about 12 to 16 matzo balls depending on size. Once the water is at a rapid boil, carefully drop in the matzo balls one at a time. They'll sink to the bottom initially, which is normal. Reduce the heat to medium so the water maintains a steady but not violent boil. Cover the pot with a lid—this is important because the steam helps the matzo balls cook through and become tender. Set a timer for 30 to 35 minutes and resist the urge to peek or stir them. Opening the lid releases the steam and can prevent them from cooking properly. When the time is up, the matzo balls should have expanded significantly and be floating on the surface. Use a slotted spoon to lift one out and test it—it should be cooked through with a tender, uniform texture throughout.
- Finish and serve the soup:
- While the matzo balls cook, pour your strained stock into a large pot and bring it to a gentle simmer. Add two or three fresh carrots that you've peeled and sliced into rounds about half an inch thick. These will cook quickly in the hot stock and give you tender vegetables to serve with the soup. If you saved the shredded chicken, add it now so it can warm through, which takes about five minutes. Taste the stock and adjust the seasoning with more salt and pepper if needed—the flavor should be robust and chickeny, not weak or watery. When the matzo balls are done, use a slotted spoon to carefully transfer them directly from the boiling water into the simmering stock. Let everything hang out together for a few minutes so the matzo balls can absorb some of the stock's flavor. To serve, ladle two or three matzo balls into each bowl along with plenty of hot stock, some carrot slices, and shredded chicken if using. Finish each bowl with a generous sprinkle of freshly chopped dill and a few grinds of black pepper. The contrast of the rich, clear broth with the tender matzo balls and bright dill is absolutely perfect.
 Pin it
The ingredient I always splurge on for this soup is the chicken itself. I've learned through years of making stock that the quality of your bird directly impacts the final flavor in a way that no amount of seasoning can fix. When I use organic, pasture-raised chicken, the stock has a richer, more golden color and a depth of flavor that regular supermarket chicken just doesn't provide. The fat is cleaner tasting too, which matters especially if you're using it to make schmaltz for your matzo balls. My family noticed the difference immediately the first time I upgraded my chicken, and now they actually request this specific soup when anyone isn't feeling well because they swear it has healing properties. There's something about that pure, rich flavor that does feel restorative, whether it's scientifically proven or not.
Understanding Stock Basics and Why They Matter
A good chicken stock is the foundation of countless soups and sauces, and learning to make it properly opens up a whole world of cooking. The difference between homemade and store-bought is dramatic—homemade stock has a pure, clean chicken flavor with body and richness that boxed broth simply can't match. The secret is in the long, slow simmer that extracts gelatin from the bones, giving you that luxurious texture that coats your mouth. When you refrigerate homemade stock, it should jiggle like jello because of all that dissolved collagen, and that's exactly what makes it feel so satisfying to eat. Store-bought broths are usually made quickly under pressure and often contain additives to mimic that body artificially.
The vegetables you choose for stock matter more than you might think. While carrots, celery, and onions are standard, adding parsnips brings a subtle complexity that makes people wonder what the secret ingredient is. Parsnips have a mild sweetness that's different from carrots—less bright and more earthy, with an almost spicy undertone that becomes mellow when cooked. This addition is what takes the stock from ordinary to exceptional. You could also experiment with a small piece of turnip or celeriac for even more depth, though these can become overpowering if you use too much.
Temperature control during stock making is probably the most important skill to develop. Many home cooks make the mistake of letting the stock boil vigorously, thinking it will extract more flavor, but the opposite is true. A rapid boil breaks down proteins too aggressively, creating tiny particles that cloud the stock and give it a murky appearance instead of that beautiful clear golden color you want. The violent movement also causes too much evaporation, concentrating the stock too quickly before all the flavors have had time to extract. Instead, you want gentle heat that creates just a few bubbles breaking the surface every few seconds. This patient approach gives you time to develop complex flavors while keeping everything crystal clear.
The Cultural Significance of Matzo Ball Soup
Matzo ball soup holds a special place in Jewish cuisine as one of the most beloved comfort foods, particularly during Passover. The soup appears at seders around the world, but every family has their own version and strong opinions about how it should be made. Some families have been making the same recipe for generations, with grandmothers teaching granddaughters the exact feel of the matzo ball mixture and the proper shape for rolling. These traditions create connections across generations and keep culinary heritage alive in a meaningful way.
The great matzo ball debate between floaters and sinkers is more than just personal preference—it reflects different regional traditions and family backgrounds. Fluffy matzo balls, or floaters, are lighter and more delicate, with a texture almost like dumplings. They're popular in American Jewish households, particularly those with Eastern European roots. Dense matzo balls, or sinkers, have more heft and a satisfying chew that stands up to the broth without dissolving. German Jewish families often prefer this style, and many people feel they're more authentic because they reflect the way matzo balls were made before modern leavening agents became common.
Making matzo ball soup from scratch is undeniably more work than buying it from a deli or using packet mixes, but the process itself becomes part of the tradition. There's something meditative about standing at the stove, tending a pot of simmering stock, checking on it periodically, and adjusting the heat. The time it takes allows you to slow down and be present in your kitchen, which feels increasingly rare in our busy lives. When you serve soup you've made entirely by hand, you're not just feeding people—you're creating memories and showing care in a tangible way that everyone at the table can taste.
Working with Schmaltz and Fat
Chicken schmaltz is one of those old-fashioned ingredients that deserves a comeback in modern cooking. Rendered chicken fat has an incredibly rich, savory flavor that's completely different from butter or oil. When you use it in matzo balls, it infuses them with deep chicken essence that makes them taste like they belong in the soup rather than being separate components. Schmaltz also has a lower melting point than butter, which contributes to the tender texture of the finished matzo balls because it stays softer even when cold.
Making your own schmaltz is surprisingly easy if you're already preparing homemade stock. After refrigerating the stock overnight, the fat rises to the top and solidifies into a thick layer that you can simply scrape off with a spoon. This fat is already seasoned from the stock and has absorbed flavors from the aromatics, making it even better than plain rendered fat. You can store schmaltz in an airtight container in the refrigerator for up to two weeks, or freeze it for several months. Beyond matzo balls, schmaltz is incredible for sautéing vegetables, frying potatoes, or spreading on bread—basically anywhere you'd use butter or oil but want that extra savory depth.
If you can't get schmaltz or prefer not to use it, butter makes a perfectly acceptable substitute that still produces excellent matzo balls. Use unsalted butter so you can control the salt level in your mixture, and make sure it's fully melted and slightly cooled before mixing it with the eggs. The matzo balls will be slightly richer and have a more neutral flavor without the distinctly chickeny taste that schmaltz provides. Vegetable oil is another option that works well, particularly if you're keeping the recipe neutral for dietary reasons, though it won't add any flavor of its own. Some cooks even use a combination of butter and olive oil for matzo balls with a subtle fruity note.
Storing and Reheating for Best Results
One of the best things about this soup is how well it keeps and reheats, making it perfect for meal prep or advance cooking before holidays. The stock can be refrigerated for up to five days in an airtight container, and it actually improves in flavor as it sits because the seasonings continue to meld together. When you're ready to use it, you can reheat it gently on the stove until steaming, adding your fresh carrots and shredded chicken right before serving. If the stock has jelled completely when cold, don't worry—this is a sign of good quality and high gelatin content, and it will return to liquid form as soon as it heats up.
Matzo balls freeze remarkably well, which means you can make a double batch and always have some ready to go. After cooking them in boiling water, let them cool completely, then arrange them in a single layer on a baking sheet and freeze until solid. Once frozen, transfer them to a freezer bag or container where they'll keep for up to three months. To reheat frozen matzo balls, you can drop them directly into simmering stock—no need to thaw first. They'll need about 10 to 15 minutes to heat through completely. The texture stays surprisingly good after freezing, though they might be slightly less fluffy than fresh ones. This makes it easy to have matzo ball soup any time the craving strikes without committing to the full multi-hour process.
Leftover soup with the matzo balls already in the stock should be stored carefully because the matzo balls will continue absorbing liquid as they sit, which can make them mushy over time. If you know you'll have leftovers, it's better to store the matzo balls separately from the stock. Keep them in a container with just a little bit of stock to prevent drying out, and store the remaining broth separately. When reheating, warm the stock first, then add the matzo balls for just a few minutes to heat them through. This method keeps everything at its best texture rather than ending up with waterlogged, falling-apart matzo balls.
 Pin it
This recipe has become my gold standard for matzo ball soup, and I genuinely believe it's worth every minute of the time investment. The stock is so rich and flavorful that it doesn't need any embellishment, and being able to control whether your matzo balls turn out fluffy or dense means everyone gets exactly what they want. I've served this soup to people who claimed they didn't even like matzo ball soup, and they've gone back for seconds every single time. There's something deeply satisfying about putting in the work to create something completely from scratch, especially when it's a dish with so much cultural meaning and tradition behind it. Once you taste the difference homemade makes, it's really hard to go back to anything else.
Frequently Asked Questions
- → Can I make the matzo balls ahead of time?
- Yes, you can prepare the matzo ball mixture and refrigerate it for up to 24 hours before cooking. The longer it chills, the better the texture will be.
- → What makes matzo balls fluffy or dense?
- Using seltzer water and baking powder creates light, fluffy matzo balls. For traditional dense ones, use chicken broth instead and skip the baking powder.
- → Can I use store-bought chicken broth instead?
- While homemade broth tastes best, you can use store-bought in a pinch. Just add the cooked chicken and carrots to warm broth and proceed with the matzo balls.
- → How do I store leftover matzo ball soup?
- Keep the soup in an airtight container in the fridge for up to 3 days. The matzo balls may absorb some broth, so you might need to add more when reheating.
- → What can I use instead of schmaltz?
- Melted butter works great as a substitute for chicken fat. You can also use vegetable oil, though the flavor won't be quite as rich.
- → Why do my matzo balls fall apart when cooking?
- Make sure the mixture chills for at least 2 hours so it firms up properly. Also, keep the water at a gentle simmer rather than a rolling boil.
- → Can I freeze matzo ball soup?
- The broth freezes beautifully for up to 3 months. However, matzo balls can get mushy when frozen, so it's best to make them fresh when serving.