
 Pin it
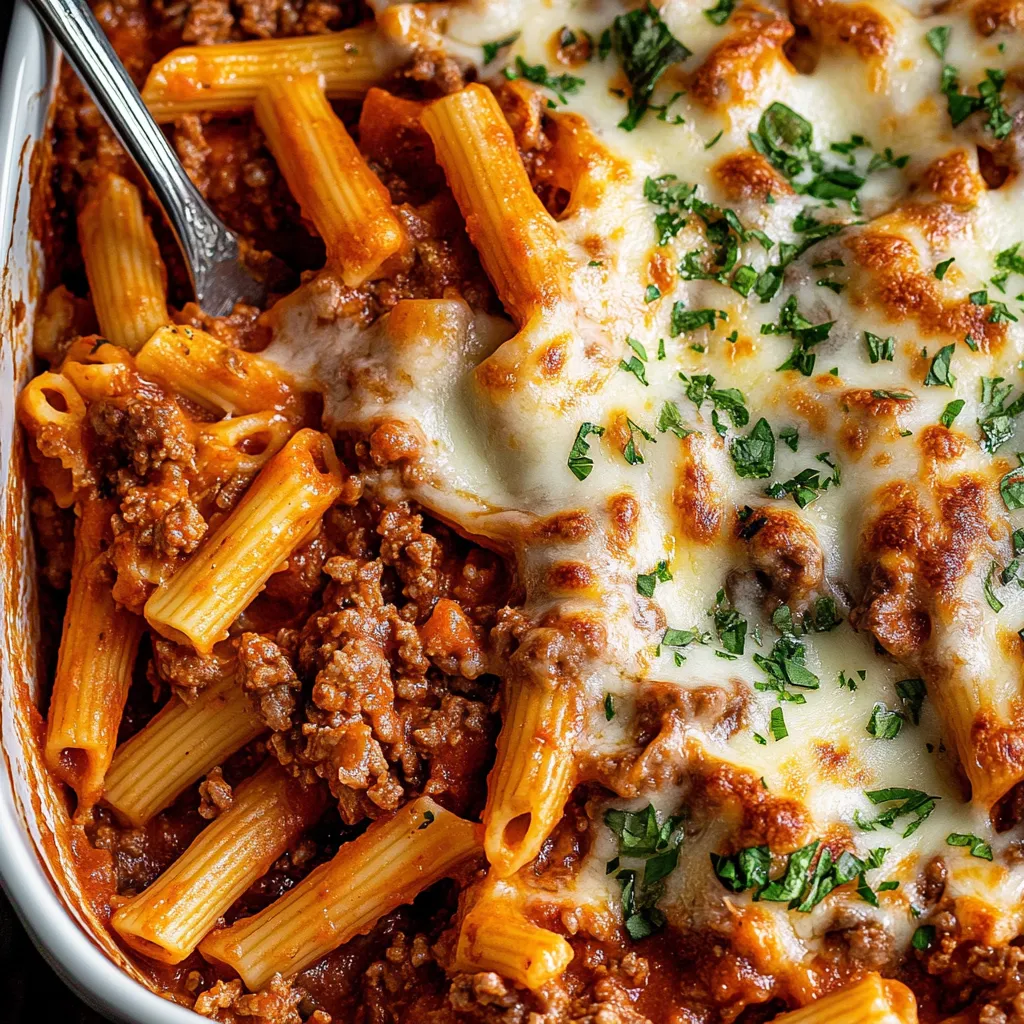
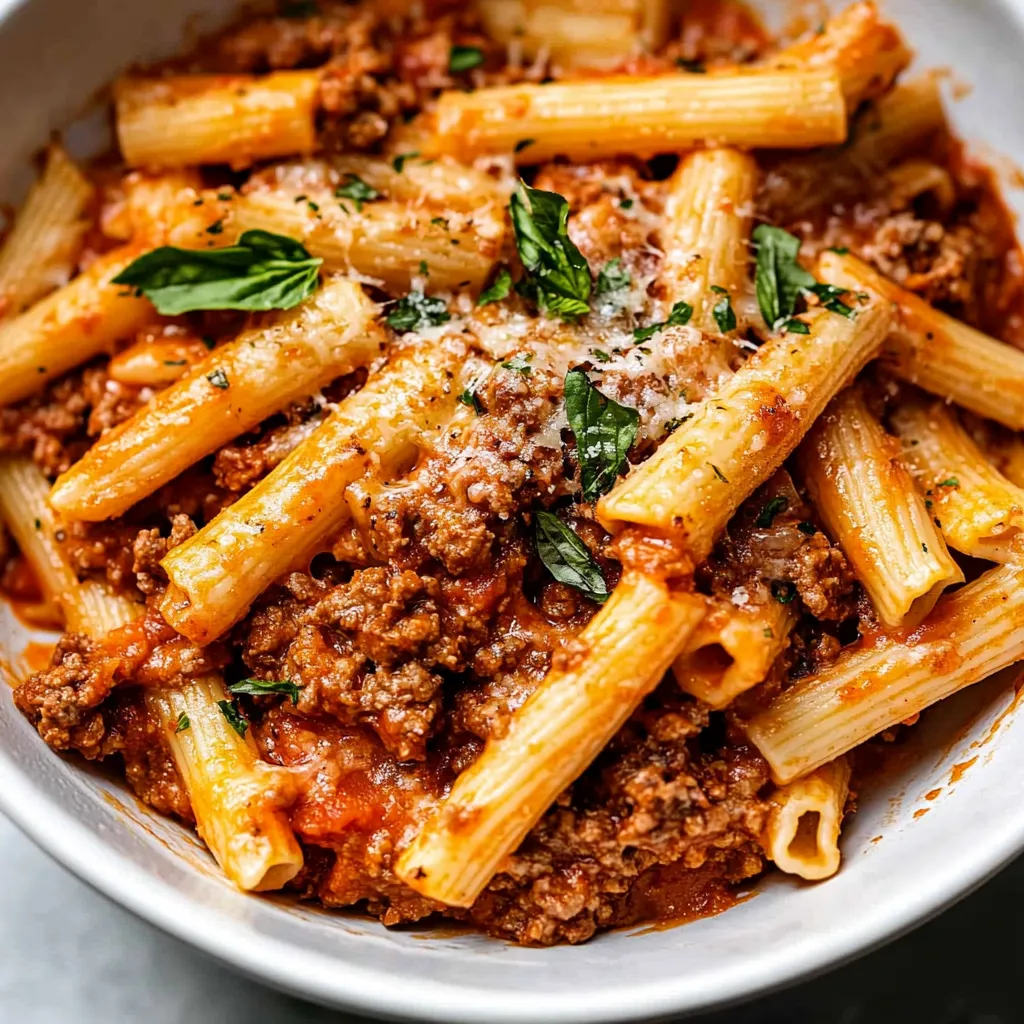
Layering pasta with meat sauce and three different cheeses creates one of those dishes that makes everyone at the table go quiet while they eat. Baked ziti delivers all the satisfying flavors of lasagna without the fussy layering process or need to cook noodles perfectly flat. The tube-shaped pasta catches meat and sauce inside each piece, giving you complete bites with every flavor in one forkful. Ricotta adds creaminess, mozzarella melts into stretchy perfection, and parmesan brings sharp, salty notes that tie everything together. This feeds a crowd easily and tastes even better the next day after flavors have had time to mingle overnight.
Baked ziti became my go-to dish for feeding groups after I realized I could make it look effortless while actually being effortless. My kids call this "the messy lasagna" because they can see all the cheese and sauce mixed throughout instead of hidden in neat layers. The first time I served this at a dinner party, guests went back for thirds and asked if I'd been cooking Italian food for years. I didn't have the heart to tell them it was literally my second attempt and took less effort than roasting a chicken. Now I make double batches and freeze one for those nights when cooking feels impossible.
Ingredients and Why They Matter
- Ziti or penne pasta: 1 pound - Tube-shaped pasta works best because the hollow centers trap sauce and cheese; rigatoni also works while spaghetti or other flat noodles don't hold ingredients as well
- Olive oil: 2 tablespoons - Any cooking oil works for browning meat and aromatics; olive oil adds subtle flavor that complements Italian seasonings
- Yellow onion: 1 small, diced - Onion provides aromatic base flavor that sweetens during cooking; white onion or shallots substitute easily
- Fresh garlic: 3-4 cloves, minced - Fresh garlic tastes sharper and more complex than powder; if using powder, substitute 1 teaspoon
- Ground beef: 1 pound, preferably 85/15 - Beef with some fat content stays moist and flavorful; leaner ground turkey or chicken work but may taste slightly drier
- Sweet paprika: 1 teaspoon - Adds subtle sweetness and red color without heat; smoked paprika creates different flavor profile
- Dried basil and oregano: 1 teaspoon - Classic Italian herbs that define the flavor; Italian seasoning blend can replace both
- Salt and black pepper: to taste - Essential for bringing out all other flavors; start with 1 teaspoon salt and adjust after tasting
- Tomato sauce: 28 ounces, about 3½ cups - Plain canned tomato sauce provides the base; marinara or pasta sauce from a jar works too
- Water: ½ cup - Thins the sauce slightly so it coats pasta without being too thick
- Ricotta cheese: 15 ounces, about 2 cups - Whole milk ricotta adds creaminess; part-skim works but won't be as rich
- Shredded mozzarella: 2 cups - Fresh mozzarella melts beautifully into stretchy cheese pulls; pre-shredded is convenient though fresh tastes better
- Grated parmesan: ½ cup plus extra for topping - Real parmesan adds sharp, nutty flavor; the pre-grated kind works fine here
- Fresh basil for garnish: optional - Adds color and fresh herbal notes right before serving
How To Make It
- Prepare oven and baking dish:
- Turn your oven to 350°F and let it preheat fully while you prepare everything else. Take out a 9x13 inch baking dish and spray it generously with non-stick cooking spray or brush it with olive oil. Greasing prevents pasta from sticking to the dish and makes serving and cleanup much easier. Set the prepared dish aside near your stove where you'll be working. Having everything ready before you start cooking keeps the process organized and prevents scrambling later.
- Cook the pasta:
- Fill a large pot with water, add a generous tablespoon of salt, and bring to a rolling boil over high heat. The salted water seasons pasta from the inside, making a significant flavor difference. Add your ziti or penne and cook according to package directions, usually 8-10 minutes for al dente. You want the pasta slightly underdone because it will continue cooking during baking. Test a piece a minute before the package says it's done - it should have slight firmness in the center when you bite it. Drain the cooked pasta in a colander and return it to the pot it cooked in. Don't rinse it because the starchy coating helps sauce cling. Set aside while you make the meat sauce.
- Brown the aromatics and meat:
- Heat olive oil in a large skillet over medium-high heat until it shimmers. Add your diced onion and cook, stirring occasionally, for about 2 minutes until it starts softening and turning translucent. The edges might brown slightly which adds flavor. Add the minced garlic and stir constantly for about 20 seconds until fragrant but not browned - garlic burns quickly and turns bitter. Immediately add the ground beef, breaking it up with a wooden spoon or spatula into small crumbles. Cook for about 5 minutes, stirring and breaking up the meat frequently, until no pink remains and the beef has developed some brown bits. If using very fatty beef, tip the pan carefully and use paper towels to absorb excess grease, or drain in a colander.
- Season and simmer the sauce:
- Once the meat is fully browned, sprinkle it with paprika, dried basil, dried oregano, salt, and black pepper. Stir everything together for about 30 seconds so the spices toast slightly and release their flavors. Pour in the tomato sauce and water, stirring to combine everything thoroughly. Bring the mixture to a simmer where you see gentle bubbles breaking the surface. Reduce heat to medium-low and let it simmer uncovered for 10 minutes, stirring occasionally. The sauce will thicken slightly and the flavors will meld together. Taste the sauce and add more salt and pepper if needed - it should taste well-seasoned and flavorful on its own because this is what flavors the entire dish.
- Combine pasta with some sauce:
- Once your meat sauce has simmered, scoop out about 2 cups of it and add it to the pot with your drained pasta. Stir everything together until the pasta is evenly coated with sauce. You want just enough sauce to coat the noodles lightly but not drown them - you're saving most of the sauce for layering. This step ensures every bite of pasta has flavor instead of having plain noodles with all the sauce on top. The pasta will absorb some of the sauce as it sits, which is perfect.
- Layer everything in the baking dish:
- Transfer your sauced pasta to the prepared 9x13 inch baking dish, spreading it into an even layer. Now take your ricotta cheese and drop it by the tablespoonful over the pasta, distributing dollops evenly across the entire surface. Use about 8-10 spoonfuls scattered around. Keep the ricotta mounds small - no bigger than a tablespoon - so they'll melt and incorporate during baking instead of staying in thick, dry clumps. Pour all the remaining meat sauce over the pasta, spreading it to cover everything completely. The sauce layer should be generous and thick to keep the pasta moist during baking. Sprinkle the shredded mozzarella evenly over the sauce, covering the entire surface. Finish with grated parmesan distributed over the mozzarella.
- Bake covered then uncovered:
- Cover the baking dish tightly with aluminum foil, making sure it doesn't touch the cheese - you can spray the underside of the foil with cooking spray if needed to prevent sticking. Place the covered dish in your preheated oven and bake for 20 minutes. The foil traps steam that helps everything heat through and keeps the top from drying out. After 20 minutes, carefully remove the foil and return the dish to the oven uncovered. Bake for another 10-12 minutes until the cheese on top is completely melted, bubbly around the edges, and starting to turn golden brown in spots. The sauce should be bubbling up around the sides of the dish.
- Rest before serving:
- Remove the baked ziti from the oven and let it sit for 5-10 minutes before serving. This resting time is crucial because it allows the cheese to firm up slightly and the sauce to thicken, making the ziti easier to serve in neat portions instead of soupy messes. If you cut into it immediately, everything will be molten and run all over the plate. After resting, use a large serving spoon or spatula to scoop portions onto plates. Garnish with fresh chopped basil if using, and serve while still hot. The melted cheese will be stretchy and the sauce will cling to every piece of pasta perfectly.
 Pin it
Ground beef with a bit of fat became my preference after making this with extra-lean meat that turned out dry and crumbly. The 85/15 ratio provides enough fat to keep meat moist and flavorful without creating a greasy puddle in the bottom of the pan. My mother-in-law uses ground turkey to reduce fat and calories, and while it tastes good, it doesn't have quite the same rich, meaty depth that beef provides. My kids don't notice the difference though, so I'll sometimes use turkey when trying to lighten things up without complaints.
Pasta Shape Importance
Tube-shaped pasta works significantly better than flat noodles for baked ziti because the hollow centers and ridged surfaces catch and hold onto sauce, meat, and melted cheese. Each bite delivers complete flavor instead of having sauce slide off plain noodles. Ziti, penne, and rigatoni all work beautifully with their tubular shapes. Smaller shapes like rotini or farfalle trap ingredients in their twists and folds. Avoid long thin pasta like spaghetti, linguine, or angel hair because they clump together and don't hold sauce well in casseroles. The pasta shape affects the entire eating experience more than you might expect, so choose wisely.
Ricotta Distribution Technique
How you add ricotta to baked ziti dramatically changes the final texture and consistency. Large spoonfuls create pockets of thick, dry cheese that don't melt properly and taste chalky. Small dollops no bigger than a tablespoon scattered across the entire dish melt into the surrounding sauce and create creamy pockets throughout. Some cooks prefer mixing all the ricotta directly into the pasta before layering, which distributes it even more thoroughly but changes the texture to be uniformly creamy rather than having distinct cheese pockets. For richer ricotta, beat one egg into it before adding to the ziti - this creates creamier texture and helps it melt better during baking.
Sauce Coverage Strategy
That thick layer of meat sauce on top serves multiple important purposes beyond just adding flavor. It creates a protective blanket that traps moisture and prevents exposed pasta from drying out and becoming hard. The sauce insulates everything underneath so it heats evenly rather than having edges burn while centers stay cold. Generous sauce also makes the dish look more appealing and abundant. Always reserve at least half your meat sauce for the top layer rather than mixing it all with the pasta. If you run short on sauce, add extra canned tomato sauce or marinara to ensure complete coverage.
Vegetable Additions
Sneaking vegetables into baked ziti works beautifully because the rich cheese sauce and flavorful meat disguise them completely. Finely minced carrots and celery sautéed with the onions add nutrition and subtle sweetness without changing flavor noticeably. Chopped fresh spinach or kale wilted into the hot meat sauce before assembling provides iron and vitamins. Diced mushrooms browned with the beef add umami depth and meaty texture. Frozen peas stirred into the pasta layer contribute color and sweetness. Roasted diced eggplant or zucchini mixed throughout bulk up the dish with fewer calories. My kids have never once noticed the minced vegetables I add to the sauce, proving this strategy works.
Make-Ahead and Freezing
Baked ziti's flexibility for advance preparation makes it perfect for busy schedules or helping others with meal delivery. Assemble completely up to a day ahead, cover tightly with foil, and refrigerate. Bring to room temperature for 30 minutes before baking, or add 10-15 minutes to covered baking time if starting cold. For freezing, assemble in a disposable aluminum pan, cover with plastic wrap and then foil, label with baking instructions, and freeze for up to 3 months. Bake directly from frozen at 350°F covered for 1 hour, then uncover and bake 15-20 minutes more until bubbly and heated through. The convenience of pulling dinner from the freezer makes meal planning significantly easier.
Leftover Strategies
Baked ziti often tastes better as leftovers after sitting overnight allows flavors to deepen and meld together. Store in airtight containers refrigerated for up to 5 days. Individual portions reheat perfectly in the microwave - add a splash of water or extra sauce, cover loosely, and heat for 2-3 minutes. Large portions reheat in a 350°F oven covered with foil for about 20 minutes. The pasta continues absorbing sauce during storage, so leftovers may seem less saucy than fresh ziti. Adding a spoonful of marinara or tomato sauce before reheating solves this and prevents drying. Some people prefer the firmer, more cohesive texture of day-old baked ziti.
 Pin it
This baked ziti recipe represents everything I appreciate about Italian-American comfort food that prioritizes flavor and satisfaction over fussy presentation. Nothing here requires advanced techniques or unusual skills, just straightforward cooking that results in something genuinely delicious. When you pull a bubbling pan from the oven with cheese browned and sauce bursting through the edges, it looks and smells like you've been working for hours even though the active time was maybe 30 minutes. The way everyone lights up when you announce it's ziti night confirms that simple, hearty food made with good ingredients beats complicated recipes every single time. Sometimes the most memorable meals are the ones that bring people together over shared plates and easy conversation, which describes baked ziti perfectly.
Frequently Asked Questions
- → Can I use a different type of pasta instead of ziti?
- Yes, penne, rigatoni, or mostaccioli work great. Just pick a tube-shaped pasta that holds the sauce well.
- → Can I make this ahead of time?
- Absolutely. Assemble everything in the baking dish, cover it tightly, and refrigerate for up to 24 hours. Add about 10 extra minutes to the baking time if going straight from the fridge to the oven.
- → Can I freeze baked ziti?
- Yes. Either freeze it before baking or after. Wrap it well in foil and plastic wrap. It keeps for up to 3 months. Thaw overnight in the fridge before baking.
- → What can I substitute for ground beef?
- Ground turkey, ground chicken, or Italian sausage all work well. You can also leave out the meat entirely for a vegetarian version.
- → Why is my baked ziti watery?
- Make sure you drain the pasta completely and let the meat sauce simmer long enough to thicken. If it still seems watery, let it rest for 5-10 minutes after baking so it sets up.
- → Do I have to use ricotta cheese?
- Ricotta adds creaminess, but you can skip it or use cottage cheese instead. Some people even use cream cheese for extra richness.
- → How do I know when it's done baking?
- The cheese should be completely melted and bubbling around the edges. The top will have some golden brown spots. Let it rest a few minutes before serving.