
 Pin it
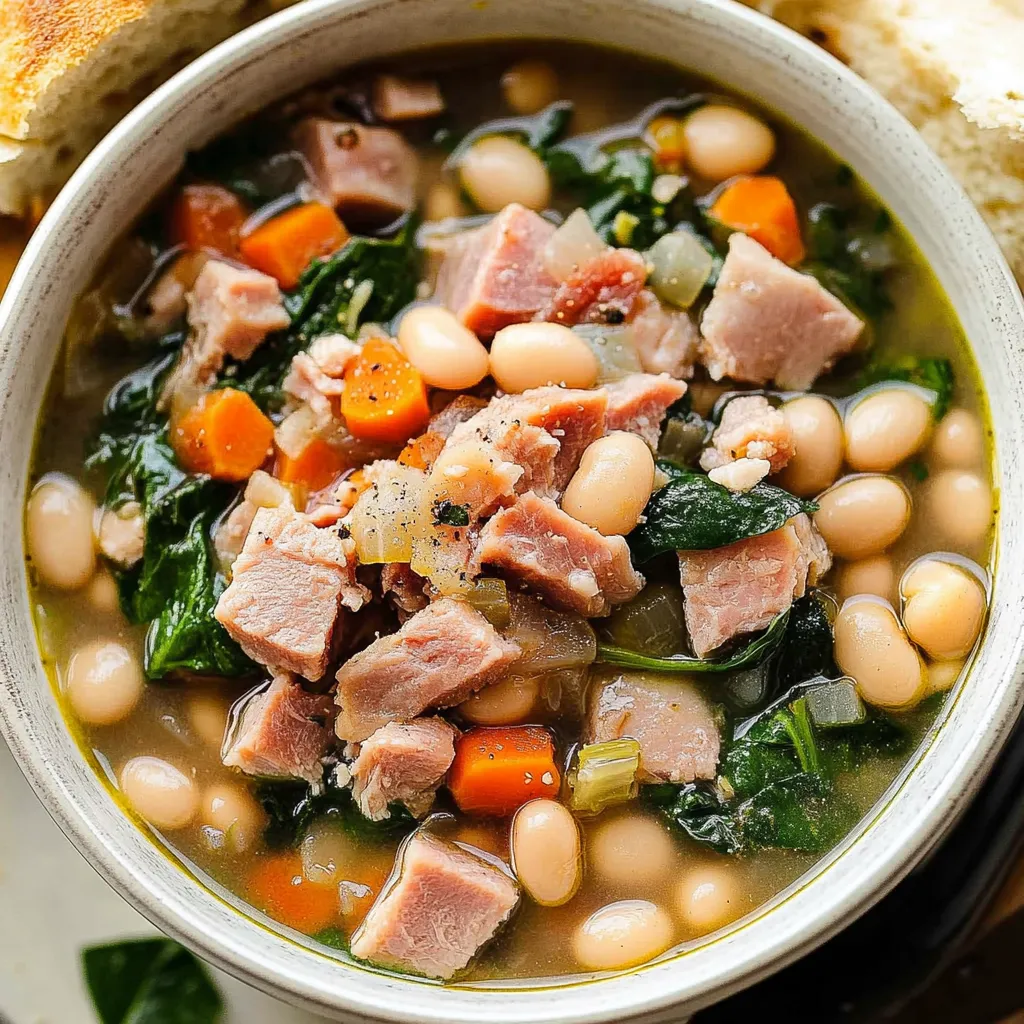
This ham and bean soup delivers pure comfort through creamy white beans, tender vegetables, and salty ham pieces swimming in rich, flavorful broth that tastes like it simmered for hours. Fresh spinach or kale wilts into the hot soup at the end, adding vibrant color and nutrition while a splash of apple cider vinegar brightens all the flavors and prevents the richness from feeling heavy. The recipe works beautifully with either convenient canned beans that have you eating in under 45 minutes, or dried beans that create even deeper flavor through long, slow simmering with a ham hock. This is the kind of soul-warming soup that makes you understand why people have been making it for generations, and it provides the perfect solution for using up leftover holiday ham.
I fell in love with ham and bean soup as a kid at church soup suppers and was genuinely surprised that something bean-and-vegetable-based could taste so satisfying and delicious. Now I make it constantly whenever I have leftover ham from Easter, Thanksgiving, or Christmas because it transforms that often-dry ham into something I actually crave rather than just eating out of obligation. The combination of creamy beans, salty ham, and tender vegetables in rich broth creates complete satisfaction in a bowl, and the fact that it requires minimal effort while delivering maximum comfort makes it one of my most-reliable recipes. I love that I can use the quick canned bean method on busy weeknights or the slow-simmered dried bean method on lazy weekends when I want the house to smell incredible all afternoon.
Ingredients and What Makes Them Essential
- Leftover ham (3 cups, diced or torn): Cooked ham from holiday meals provides salty, meaty richness and protein without requiring you to cook meat from scratch. Both the tender pieces and any drier bits work beautifully since they rehydrate in the broth. Tear or dice the ham into bite-sized pieces, discarding any large fatty sections. If you don't have leftovers, purchase a 1-pound ham steak and cut it into pieces, or ask at the meat counter for diced cooked ham. The natural saltiness seasons the entire soup, so you'll need less added salt than with other proteins.
- Ham hock or ham bone (1, optional but recommended): The center bone from a baked ham with meat still attached adds incredible depth and richness through collagen that melts into gelatin during simmering. This creates body and silky mouthfeel that regular ham pieces can't provide. The bone also contributes minerals and savory flavor that make the broth taste restaurant-quality. If you don't have a leftover ham hock, you can buy them at many grocery store meat counters. The hock gets removed before serving after contributing all its flavor. Skip it if unavailable—the soup will still be delicious, just slightly less rich.
- Canned white beans (3 15-ounce cans, drained and rinsed, OR 1 pound dried beans): White beans like Great Northern, navy, or cannellini provide creamy texture, mild flavor, and substantial protein and fiber that make the soup filling and satisfying. Canned beans are convenient and cook quickly, while dried beans create deeper flavor through long simmering but require significantly more time. Choose based on your schedule—both produce excellent results. If using canned, drain and rinse them to remove excess sodium and starchy liquid that would make the soup too thick.
- Yellow onion (1 large, diced): Onion provides aromatic foundation and sweet-savory depth that supports all the other flavors. Dice it into small, uniform pieces so it softens completely and practically melts into the soup. Yellow onions have ideal balance of sweetness and sharpness that mellows beautifully during cooking. The onion releases natural sugars that add subtle sweetness balancing the salty ham.
- Celery (3 stalks, diced): Celery adds aromatic complexity, subtle peppery flavor, and pleasant texture that softens during simmering. The mild flavor supports the other vegetables without dominating. Dice it into pieces similar in size to the onion for even cooking. Don't skip the celery even if you're not a fan raw—cooked celery becomes mellow and contributes essential aromatic depth to soup.
- Carrots (2 medium, diced): Carrots contribute natural sweetness, vibrant color, and additional vegetables that make the soup feel more complete. Dice them into small pieces that will soften during the relatively short cooking time without staying hard. The natural sugars in carrots balance the savory, salty elements and add depth. Choose firm, fresh carrots without soft spots.
- Garlic (4 cloves, minced): Fresh garlic brings pungent, aromatic complexity that enhances the soup's savory qualities. Mince it finely so it distributes evenly and cooks quickly without burning. Fresh garlic tastes dramatically better than jarred or powdered in soup where the flavor comes through clearly. The garlic mellows during simmering, losing its raw bite and contributing sweet, nutty undertones.
- Italian seasoning (1 tablespoon): This herb blend typically contains oregano, basil, thyme, and sometimes rosemary—flavors that complement beans and ham beautifully. Using a premixed blend is convenient and provides balanced flavor. If you don't have it, substitute with individual dried herbs—about 1 teaspoon each of oregano and thyme. The dried herbs infuse into the broth during simmering, creating aromatic complexity.
- Bay leaves (2): Bay leaves add subtle peppery, herbal complexity that develops during the long simmering time. They're not meant to be eaten—remove and discard them before serving. Don't skip them even though their contribution is subtle; they add background complexity that would be missed if omitted. Turkish bay leaves are most common and work perfectly.
- Chicken broth (6 cups for canned beans, 10 cups for dried): Broth provides the savory liquid base that becomes the soup. Chicken broth adds depth and body, though water works if that's all you have—the ham provides enough flavor on its own. Use low-sodium broth so you can control the final salt level, since ham is quite salty. Vegetable broth substitutes for a lighter flavor profile. Homemade stock is ideal but not necessary.
- Fresh spinach or kale (4 cups packed): Fresh greens added at the very end provide vibrant color, nutritional value, and fresh flavor that balances the rich, meaty soup. Baby spinach is easiest since it requires no preparation and wilts almost instantly. Kale needs to be stripped from tough stems and chopped before adding—it takes slightly longer to wilt but adds heartier texture. The greens contribute vitamins A and C, iron, potassium, and magnesium while making the soup feel more balanced and complete.
- Apple cider vinegar (1 tablespoon): A splash of vinegar at the very end brightens all the flavors and adds acidity that balances the richness and prevents the soup from tasting heavy or one-dimensional. The vinegar enhances the ham, beans, and vegetables, making individual flavors pop. Add it right before serving rather than during cooking so the acidity stays bright and pronounced. White wine vinegar or lemon juice can substitute.
Step-by-Step Instructions
- Sauté the aromatic vegetables:
- Heat about 2 tablespoons of olive oil in a large pot or Dutch oven over medium heat until it shimmers. Add the diced onion, celery, and carrots. Cook for about 8 to 10 minutes, stirring occasionally, until the vegetables soften and the onion becomes translucent without browning. You want them tender and aromatic but not caramelized. Add the minced garlic and cook for another minute, stirring constantly, until it becomes fragrant and releases its aroma without burning. This aromatic base-building step makes enormous difference in the final soup's flavor depth despite taking just 10 minutes.
- Add beans, ham hock, and seasonings:
- Drain and rinse your canned white beans thoroughly in a colander, shaking off excess water. For thicker soup, mash about 1 cup of the beans in a small bowl with a fork until they're mostly broken down, then add both the mashed and whole beans to the pot. Add the ham hock if using, the Italian seasoning, and bay leaves. Stir everything together to distribute the seasonings. Add just a small pinch of salt at this stage—the ham will contribute significant saltiness, so you'll adjust later after tasting.
- Add broth and simmer:
- Pour in the chicken broth and increase the heat to medium-high. Bring the soup to a boil, then immediately reduce the heat to maintain a gentle simmer where you see occasional bubbles breaking the surface but not a rolling boil. Let it simmer uncovered for about 20 to 30 minutes, stirring occasionally. During this time, the flavors meld together, the vegetables become completely tender, and the soup thickens slightly. If using a ham hock, it will release its collagen and flavor into the broth. The longer you simmer, the thicker the soup becomes—go for 30 to 45 minutes if you want very thick, stewlike consistency.
- Add diced ham and continue simmering:
- If you used a ham hock, carefully remove it from the pot with tongs and set it on a cutting board to cool slightly. Pull any remaining meat off the bone, chop it if needed, and add it back to the soup—discard the bone and any fat or gristle. Stir in all your diced or torn ham pieces. Continue simmering for another 10 to 15 minutes to heat the ham through and allow it to infuse its flavor throughout the soup. The ham should be hot and tender, and the soup should be thick enough to coat the back of a spoon.
- Finish with greens and vinegar:
- Remove the pot from heat and fish out and discard the bay leaves. Add the fresh spinach or chopped kale all at once—it will seem like a huge amount but will wilt dramatically. Stir gently for about 30 seconds to 1 minute until the greens are completely wilted and distributed throughout the soup. They'll reduce in volume by at least 75%. Add the apple cider vinegar and stir well. Taste the soup carefully and season with salt and black pepper as needed—you'll likely need less salt than you expect since the ham is quite salty. Adjust until it tastes properly seasoned and delicious.
- Serve hot:
- Ladle the hot soup into bowls and serve immediately. Garnish with fresh cracked black pepper, fresh thyme leaves, or chopped parsley if desired. The soup pairs beautifully with crusty bread for dipping or cornbread for a complete, satisfying meal. The contrast of the hot, creamy soup with fresh greens and tender ham is incredibly comforting.
 Pin it
The technique that improved my ham and bean soup most dramatically was learning to resist adding salt until the very end after everything had simmered together and I could actually taste how salty the ham made it. My early attempts were so salty they were barely edible because I'd season the vegetables normally, then the ham would add massive additional saltiness I hadn't accounted for. Once I learned to season extremely conservatively during cooking—just the tiniest pinch early on—and wait until the end to taste and adjust, my soup became properly seasoned instead of overwhelmingly salty. Now I'm disciplined about this even though instinct tells me to add more salt earlier, and I always use low-sodium broth when making ham soup. That restraint with salt is what makes the difference between soup that's perfectly balanced versus soup that makes you reach for water after every spoonful.
Understanding Bean Soup Thickness
Creating properly thick, creamy bean soup rather than thin, brothy soup requires understanding how different techniques contribute to body and texture. The most effective method is mashing some of the beans before adding them to the soup, which releases their starchy interiors that dissolve into the broth and create natural thickening without requiring flour or other additives. Mashing about one-third of your beans provides ideal balance—enough thickening to create body without turning the soup into paste.
Extended simmering also thickens soup significantly through two mechanisms. First, water evaporates over time as steam escapes, concentrating the remaining liquid and making it thicker. Second, the beans break down slightly during prolonged cooking, releasing more starch that thickens the broth naturally. This is why the recipe suggests simmering longer if you want thicker soup—an extra 30 minutes of gentle simmering makes noticeable difference in consistency. Just watch the pot and add more broth if it gets too thick.
The type of beans also affects final thickness. Some varieties like navy beans and Great Northern beans break down more readily and create creamier soup than firmer varieties like cannellini beans that tend to hold their shape. The cooking method matters too—canned beans are already fully cooked and quite soft, so they break down quickly and thicken soup efficiently. Dried beans simmered from scratch can be cooked to your preferred consistency, from firm and distinct to completely broken down and creamy. Adjust cooking time based on the texture you want.
Dried Bean Method Explained
Making ham and bean soup with dried beans requires more time but creates deeper flavor through long, slow simmering that allows the beans to absorb the ham and vegetable flavors from the beginning rather than adding pre-cooked beans at the end. Start by adding 1 pound of dried white beans to your pot with 10 cups of liquid (water, broth, or a combination). Bring to a rolling boil for 2 minutes, then cover, turn off the heat, and let sit for 1 hour. This quick-soak method hydrates the beans and begins softening them without overnight soaking.
After the 1-hour soak, add the ham hock, all the vegetables, garlic, seasonings, and bay leaves to the pot with the beans and their soaking liquid. Return to a boil for 1 minute, then reduce to a gentle simmer. Cook uncovered for about 2 hours, stirring occasionally, until the beans are tender but not yet falling apart. Remove the ham hock, pull off any meat, and return the meat to the pot. Add the diced ham and continue simmering for another 30 minutes to 2 hours depending on how thick you want the soup and how tender you want the beans. Add more liquid as needed if the soup gets too thick.
The total cooking time for dried beans is about 3 to 4 hours from start to finish, which is significantly longer than the canned bean method but produces soup with incredible depth and flavor. The beans absorb the ham and vegetable flavors throughout their entire structure rather than just on the surface, creating more cohesive taste. The long simmering also extracts maximum collagen from the ham hock, creating silky, rich broth. This method is ideal for lazy weekends when you want the house to smell amazing all afternoon.
Saltiness Management
One of the most common mistakes when making ham and bean soup is creating something inedibly salty because ham is naturally quite salty and inexperienced cooks add salt without accounting for this. The key is seasoning very conservatively during cooking, then tasting and adjusting at the end when you can actually evaluate how salty the ham made everything. Start with just a tiny pinch of salt when you add the vegetables, then don't add more until the very end after everything has simmered together.
Using low-sodium or no-salt-added broth gives you maximum control over the final salt level. Regular broth combined with salty ham often produces soup that's too salty to enjoy, and there's no easy fix once you've over-salted. If you accidentally make the soup too salty, you can try adding more beans, vegetables, and unsalted broth to dilute the saltiness, or adding a peeled potato to the pot and simmering for 20 minutes—the potato absorbs some salt, though this doesn't work miracles.
Different hams vary dramatically in saltiness depending on how they were cured and processed. Honey-baked hams tend to be less salty than regular spiral hams, while country hams are extremely salty. Taste a small piece of your ham before adding it to the soup so you know what you're working with. If it's very salty, use water instead of broth for some or all of the liquid. The beauty of making soup at home is you can adjust everything to your preferences rather than being stuck with restaurant versions that might be over-salted.
Leftover Storage and Improvement
Ham and bean soup is one of those magical recipes that actually tastes better the next day after flavors have had time to meld and develop in the refrigerator overnight. The beans absorb more of the broth's flavor, the vegetables become even more tender, and all the disparate elements harmonize into something more cohesive than when freshly made. This improvement over time makes the soup ideal for advance preparation—make it a day before you need it and refrigerate overnight for optimal results.
Store leftover soup in an airtight container in the refrigerator for up to 5 days. The soup will thicken considerably as it cools since the beans continue absorbing liquid even in the cold. When reheating, add extra broth or water to thin it back to your preferred consistency—start with half a cup and add more as needed while stirring over medium heat on the stovetop. Taste and adjust seasoning after reheating since refrigeration can dull flavors. A fresh splash of vinegar brightens everything up beautifully.
For longer storage, the soup freezes well for up to 3 months in freezer-safe bags or containers. Freeze it in portion-sized amounts for easy single-serving reheating. Thaw overnight in the refrigerator, then reheat on the stovetop with additional liquid as needed. The texture after freezing is slightly less perfect than fresh—the beans can become a bit mushy and the vegetables softer—but it's still delicious and incredibly convenient for busy weeknight dinners. Having homemade soup ready in the freezer is like having a comfort food insurance policy.
 Pin it
This ham and bean soup has become my absolute favorite way to use leftover holiday ham because it transforms something I'd otherwise struggle to finish into something genuinely crave-worthy that my family requests specifically. The combination of creamy beans, salty ham, tender vegetables, and fresh greens in rich broth creates complete satisfaction and comfort in a bowl. I love that I can make it quickly with canned beans on busy weeknights or slowly with dried beans on relaxed weekends, and both methods produce excellent results adapted to my schedule. The fact that it tastes better the next day makes it perfect for meal prep and advance preparation, and having portions in the freezer means I can enjoy this comfort whenever I want without requiring leftover ham. Once you taste how the beans become creamy and tender while absorbing all that ham and vegetable flavor, and how the splash of vinegar and fresh greens keep it from feeling heavy despite being so rich, you'll understand why generations of people have been making this soup and why it's earned permanent status in my cooking repertoire.
Frequently Asked Questions
- → Can I use dried beans instead of canned?
- Yes, you can use 1 pound of dried white beans. You'll need to soak them first and extend the cooking time to about 3 hours until they're tender.
- → What if I don't have leftover ham?
- Just pick up a ham steak from the grocery store and cut it into bite-sized pieces. It works just as well as leftover ham.
- → How do I make the soup thicker?
- Mash about a cup of the beans with a fork before adding them to the pot. You can also let it simmer longer uncovered to reduce and thicken naturally.
- → Can I freeze this soup?
- Absolutely. Let it cool completely, then store it in freezer-safe containers for up to 3 months. Thaw in the fridge overnight before reheating.
- → What can I use instead of spinach?
- Chopped kale works great, or you can skip the greens entirely if you prefer. The soup will still be delicious either way.
- → Do I need a ham bone for this recipe?
- No, it's optional. The ham bone adds extra flavor, but if you don't have one, just use chicken broth instead of some of the water for a richer taste.