
 Pin it
Eggnog is one of those holiday drinks that people either make from a carton without thinking twice, or they skip entirely because the idea of raw eggs sounds intimidating. But homemade eggnog tastes completely different from store-bought - it's richer, creamier, and has this fresh quality that bottled versions just can't match. This recipe eliminates the worry about raw eggs by using a clever blending technique that tempers them safely right in your blender, bringing them to the proper temperature through friction from the blades. The combination of eggs, cream, milk, warm spices, and your choice of spirits creates something luxurious and festive that makes you understand why eggnog has been a holiday tradition for centuries. What makes this version special is how quick it comes together - no standing over the stove whisking a custard, no complicated techniques, just blend everything and chill. The result is thick, velvety, perfectly spiced eggnog that tastes like the holidays in a glass.
I grew up drinking store-bought eggnog every Christmas, the kind that comes in those waxy cartons and tastes vaguely of artificial flavoring. When I first made homemade eggnog about five years ago, I was genuinely shocked at how different it tasted - so much fresher and creamier, with actual spice flavor instead of that weird chemical taste. My husband, who claimed he didn't like eggnog, tried this version and immediately changed his position. Now I make multiple batches throughout December because people actually request it, and I've stopped buying the store-bought kind entirely.
Ingredients and What Makes Them Essential
- Large Eggs (6, preferably pasteurized): Eggs provide the rich, custardy base that makes eggnog so luxurious and thick. Pasteurized eggs are recommended because they've been heat-treated to eliminate any potential bacteria, giving you extra peace of mind even after tempering. You'll find them in most grocery stores labeled as pasteurized - they look just like regular eggs but have been treated for safety. Room temperature eggs work slightly better than cold ones, so leave them on the counter for thirty minutes before blending.
- Pure Maple Syrup (⅓ cup): Maple syrup adds sweetness with a subtle warmth and complexity that white sugar just doesn't provide. The natural maple flavor complements the spices beautifully without being overwhelming or cloying. Use real maple syrup, not pancake syrup which is mostly corn syrup and artificial flavoring. Grade A maple syrup is fine - you don't need the more expensive Grade B for this recipe.
- Ground Nutmeg (1 teaspoon): Nutmeg is the signature spice in eggnog, providing that warm, slightly sweet, aromatic flavor that screams holidays. Freshly grated nutmeg tastes noticeably better than pre-ground if you have a whole nutmeg and a microplane, but pre-ground works perfectly fine. Just make sure yours isn't ancient and flavorless.
- Ground Cinnamon (½ teaspoon for mixing, plus extra for garnish): Cinnamon adds warmth and a familiar spice note that balances the nutmeg. Most of it goes into the eggnog itself, but you'll also dust a bit on top of each glass for presentation and an extra hit of spice when you take your first sip.
- Whole Milk (2 cups): Milk provides the liquid base and additional creaminess. Whole milk is ideal because the fat content contributes to that rich texture, but 2% works if that's what you have. You can also use dairy-free alternatives like oat milk, almond milk, or cashew milk if needed, though the flavor and texture will be slightly different.
- Heavy Cream (1 cup): This is what makes eggnog truly decadent and rich with that signature velvety texture. Heavy cream has a high fat content that creates that luxurious mouthfeel. For dairy-free eggnog, coconut cream from a can works beautifully as a substitute, though it will add a subtle coconut flavor.
- Bourbon, Brandy, or Rum (¾ cup total): The alcohol is traditional in eggnog and adds warmth and depth beyond just getting you buzzed. Bourbon provides a smooth, slightly sweet oak flavor. Brandy adds fruity, wine-like notes. Rum, especially dark rum, contributes molasses and vanilla undertones. You can use just one type of spirit or mix them - many people like using half rum and half bourbon for complexity. Don't feel like you need expensive, premium spirits here because the other ingredients mellow everything out.
Step-by-Step Instructions
- Temper the Eggs Through Blending:
- This is the crucial step that makes this recipe both safe and easy. Add your 6 room-temperature eggs to your high-powered blender - you need a powerful blender like a Vitamix or Blendtec for this technique to work properly because lower-powered blenders won't generate enough friction to heat the eggs adequately. Crack the eggs directly into the blender jar, being careful not to include any shell pieces. Pour in ⅓ cup of maple syrup on top of the eggs. Put the lid on the blender securely - this is important because you'll be blending for several minutes and you don't want anything splattering out. Set a timer for exactly 4 minutes. This timing is critical and not flexible - 4 minutes is the precise amount of time needed for the friction from the blender blades spinning at high speed to heat the eggs to 160°F, which is the temperature that kills any potential bacteria. Start the blender on the highest speed setting and let it run for the full 4 minutes without stopping or opening the lid. Don't be tempted to check it early or blend longer. The eggs will become pale, thick, and frothy during this time, transforming from liquid to a light, airy mixture. You might notice the blender jar getting slightly warm to the touch, which is exactly what you want. If you have an instant-read thermometer, you can check the temperature after 4 minutes - it should read around 160°F. If it's lower than 155°F, your blender might not be powerful enough for this method and you should use only pasteurized eggs for safety.
- Add the Remaining Ingredients:
- After your eggs have been properly tempered and are pale and frothy, it's time to add everything else. With the blender off, remove the lid carefully. Pour in your 2 cups of whole milk and 1 cup of heavy cream. Add ¾ cup of your chosen alcohol - this could be all bourbon, all rum, all brandy, or any combination you prefer. Some people like ½ cup rum and ¼ cup bourbon, others prefer ⅓ cup each of bourbon, brandy, and rum for maximum complexity. Add 1 teaspoon of ground nutmeg and ½ teaspoon of ground cinnamon directly to the blender. Put the lid back on securely. Blend everything on high speed for just 10 seconds - you're simply mixing everything together, not tempering anymore, so this is a quick pulse to incorporate all the ingredients uniformly. The mixture will look pale tan or beige, smooth and creamy, with all the spices distributed throughout. Don't over-blend at this stage because you're not trying to add air or heat anything, just combine.
- Chill and Let Flavors Develop:
- Pour the blended eggnog from the blender into a large pitcher or an airtight container - a glass pitcher with a lid works beautifully. Cover it tightly with a lid or plastic wrap. Place it in the refrigerator and let it chill for at least 2 hours, though 4 hours or overnight is even better. This chilling time serves multiple purposes. First, it brings the eggnog to a properly cold serving temperature, which is how eggnog should be enjoyed. Second, it allows all those flavors - the spices, the alcohol, the maple sweetness - to meld together and become more integrated rather than tasting like separate components. Third, the mixture thickens slightly as it chills, becoming more luxurious and coating your glass beautifully when you pour it. The eggnog might separate slightly during chilling with a layer of cream rising to the top, which is completely normal. Just give it a good stir before serving to bring everything back together.
- Serve and Garnish:
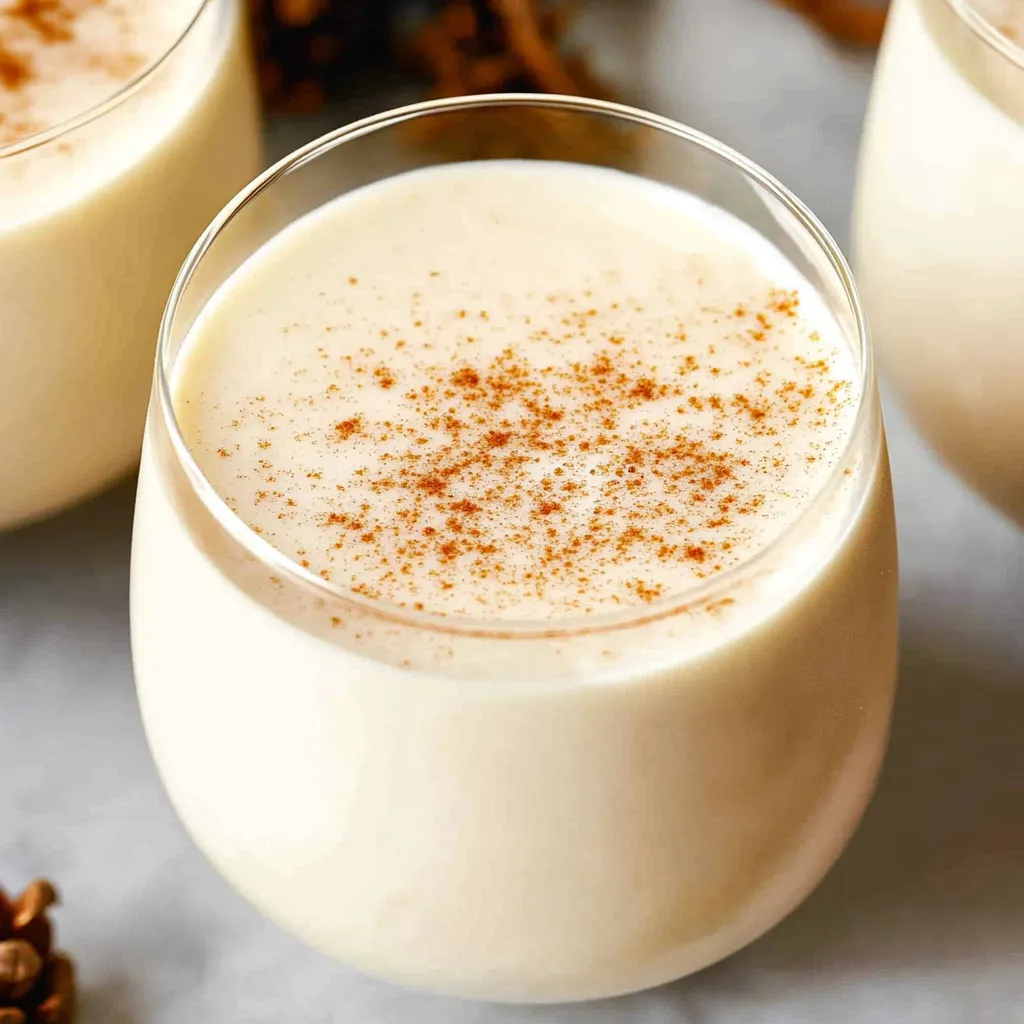
- When you're ready to serve, remove the pitcher from the refrigerator and give the eggnog a thorough stir with a spoon or whisk to make sure everything is evenly mixed. The texture should be thick and creamy, coating the back of a spoon nicely. Pour the eggnog into glasses - small glasses are traditional since this is a rich drink and most people don't want huge servings. Fill each glass about two-thirds full, leaving room at the top. Take a small fine-mesh sieve or a spice shaker and dust the top of each serving with a light sprinkle of ground cinnamon or additional nutmeg. This garnish isn't just for looks - that hit of fresh spice on top adds an extra aromatic quality when you bring the glass to your lips. Some people like to add a cinnamon stick to each glass as both garnish and stirrer. You can also top with a small dollop of whipped cream and a grating of fresh nutmeg if you're feeling fancy. Serve immediately while cold, or keep the pitcher in an ice bucket if you're serving a crowd so it stays chilled throughout your gathering.
 Pin it
My grandmother made eggnog every Christmas Eve using a recipe that involved standing at the stove for twenty minutes whisking a custard, and she'd get so stressed about it curdling that she'd make everyone leave the kitchen so she could concentrate. When I showed her this blender method a few years before she passed, she was skeptical at first but tried it and couldn't believe how much easier it was. She made me promise to keep making eggnog for the family after she was gone, and now every Christmas Eve when I'm blending up a batch, I think about her standing at that stove with her whisk, and I'm grateful that technology has made this tradition so much more accessible. My kids have started requesting "Grandma's eggnog" even though they never met her, and I love that this drink connects them to someone they never knew.
Understanding the Science of Tempering Eggs
Tempering is a cooking technique where you gradually raise the temperature of eggs to cook them without scrambling. When raw eggs hit high heat suddenly, the proteins coagulate too quickly and you get scrambled eggs. Tempering heats them slowly and gently, allowing the proteins to set smoothly into a custard-like consistency rather than chunky curds. Traditional tempering involves slowly whisking hot liquid into beaten eggs, then returning everything to the heat while stirring constantly. This blender method works through friction instead of direct heat. When your blender blades spin at high speed for several minutes, the friction between the moving blades and the liquid creates heat. It's the same reason your hands get warm when you rub them together quickly. Over four minutes, that friction heat gradually brings the egg mixture to 160°F, which is hot enough to kill any potential Salmonella bacteria. The constant movement from the blades also ensures even heating throughout, preventing hot spots that could curdle the eggs. This method only works with high-powered blenders that can maintain high speeds for extended periods - lower-powered blenders won't generate enough friction heat.
The History and Cultural Significance of Eggnog
Eggnog's origins trace back to medieval Britain where people drank a hot milk and ale beverage called "posset." The wealthy would add eggs and sherry, creating something closer to what we call eggnog today. When the drink came to colonial America, settlers adapted it based on what was available. Rum from the Caribbean was plentiful and cheap, while milk and eggs were abundant on American farms, making eggnog an accessible indulgence for many social classes. The drink became especially popular during winter holidays because eggs and milk were less available during cold months, making them feel more special and celebratory. By the 1800s, eggnog was firmly established as a Christmas tradition across America. Different regions developed their own variations - Southern eggnog tends to be stronger and spicier, while Northern versions are often milder. The "nog" part of the name likely comes from "noggin," which was a small wooden cup used for serving strong ale. Today, eggnog remains deeply associated with Christmas and Thanksgiving, though its popularity has waned somewhat as modern food safety concerns have made people wary of raw eggs.
Choosing and Combining Spirits for Eggnog
The type of alcohol you use significantly impacts the final flavor of your eggnog. Bourbon brings smooth, oaky notes with hints of vanilla and caramel, creating a warm, slightly sweet profile that many people find comforting. Brandy adds fruity, wine-like complexity with a refined quality that feels elegant. Rum, especially dark rum, contributes molasses, vanilla, and tropical notes that make the eggnog taste richer and more exotic. Many traditional recipes use a combination of spirits to create layers of flavor that are more interesting than any single type. A common ratio is half rum and half bourbon, which gives you the richness of rum with the smoothness of bourbon. Another popular combination is equal parts bourbon, brandy, and rum for maximum complexity. You don't need expensive, premium bottles because the cream, sugar, and spices mellow harsh edges and blend everything together. Mid-range spirits work perfectly fine. For non-alcoholic eggnog, you can add a teaspoon of rum extract or bourbon extract to maintain that characteristic flavor without the alcohol content, though truly alcohol-free eggnog is delicious on its own as well.
Dairy and Non-Dairy Options for Eggnog
Traditional eggnog relies heavily on dairy for its signature rich, creamy texture, but modern dietary preferences and restrictions mean many people need alternatives. For the milk component, whole dairy milk creates the richest result, but 2% milk works if you're watching fat intake. Oat milk is the best non-dairy milk substitute because its creamy texture and neutral flavor most closely resemble dairy milk. Almond milk works but is thinner and adds a slight almond flavor. Cashew milk is creamy and neutral, making it another excellent choice. Coconut milk from a carton can work but adds coconut flavor. For the heavy cream component, nothing replaces dairy heavy cream's luxurious fat content and texture perfectly, but full-fat coconut cream from a can is the closest alternative. Look for coconut cream specifically, not coconut milk - it's much thicker. Some people use cashew cream made by blending soaked cashews with water, which creates a neutral, creamy base. The texture of non-dairy eggnog will be slightly different than traditional, often a bit thinner, but the flavor can still be delicious. You can compensate for thinner texture by using less milk and more cream alternative in your ratio.
Storing Eggnog and Understanding Shelf Life
Homemade eggnog has a shorter shelf life than commercial versions because it doesn't contain the preservatives and stabilizers that extend shelf life on store shelves. Your freshly made eggnog will keep in the refrigerator for about 4 days in an airtight container. The alcohol content acts as a mild preservative, so spiked eggnog actually lasts slightly longer than alcohol-free versions. Always store eggnog in a sealed container because it readily absorbs refrigerator odors. Glass containers are ideal because they don't retain odors or stains like plastic. Give the eggnog a good stir before serving because it naturally separates during storage with cream rising to the top. If your eggnog starts to smell off, looks curdled, or tastes sour, discard it immediately. Some traditional recipes call for aging eggnog for weeks or even months in the refrigerator, but those recipes use much higher alcohol ratios that act as serious preservatives. This recipe has a moderate alcohol content and should be consumed within a few days for best quality and safety. You cannot freeze eggnog successfully because the dairy and eggs separate and curdle when thawed, creating an unpleasant grainy texture that can't be fixed.
Serving Eggnog at Holiday Gatherings
Eggnog deserves thoughtful presentation since it's such a special holiday treat. Serve it in small glasses rather than large ones because it's rich and most people don't want a full pint. Traditional punch cups or small tumblers work beautifully. Always serve eggnog well-chilled - warm eggnog is unpleasant. If you're serving a crowd, keep the pitcher in an ice bucket or punch bowl surrounded by ice to maintain the cold temperature throughout your gathering. Setting up a self-serve eggnog station is festive and practical. Put out the chilled pitcher, glasses, and garnishes like ground cinnamon, nutmeg, cinnamon sticks, and whipped cream so guests can customize their servings. Some people like to offer extras like chocolate shavings, caramel sauce, or even a shot of additional liquor for guests who want theirs stronger. For mixed gatherings with both drinkers and non-drinkers, consider making two batches - one spiked and one alcohol-free - and label them clearly so people can choose. Eggnog pairs beautifully with holiday cookies, gingerbread, fruitcake, and other traditional Christmas desserts. It can also serve as a dessert itself rather than just a beverage before the meal.
Common Eggnog Problems and How to Fix Them
When eggnog doesn't turn out right, the issue usually stems from a few common mistakes. If your eggnog is too thin and watery, you either didn't use enough cream, over-diluted it with too much milk, or didn't blend the eggs long enough to properly emulsify everything. Next time, stick to the recipe ratios and make sure you're using actual heavy cream, not half-and-half or light cream. If the eggnog tastes too sweet, reduce the maple syrup next time - everyone's sweetness preference differs. You can also add a pinch of salt which balances sweetness. If it's not sweet enough, stir in more maple syrup or honey after chilling. If the eggs curdled and you have bits of cooked egg throughout, your blender overheated them by blending too long past 4 minutes, or your blender is so powerful it generated heat too quickly. Stick exactly to the 4-minute timing. If the eggnog tastes too boozy, you added too much alcohol - next time reduce it to ½ cup total for a milder version. If you can barely taste the alcohol, increase it next time or add a splash more to the finished batch. If the spices aren't coming through, your spices are probably old and flavorless - replace them with fresh ones and consider adding a bit more nutmeg. If it separates dramatically and won't re-incorporate with stirring, the emulsion failed, which can happen if ingredients were at dramatically different temperatures.
 Pin it
After making eggnog this way for several years now, I've become that person who brings homemade eggnog to every holiday party and gets genuinely offended when people reach for the store-bought stuff instead. There's just no comparison once you've tasted how fresh and luxurious real eggnog can be. The blender method has completely removed any intimidation factor I used to feel about raw eggs and custards. Now it's one of those recipes I can make while chatting with people or half-watching a movie because it's so straightforward and foolproof. Whether you're continuing a family tradition or starting a new one, homemade eggnog adds something special to holiday celebrations that makes them feel more festive and memorable. That first sip of cold, creamy, spiced eggnog on Christmas Eve signals that the holidays have truly arrived, and I wouldn't want to celebrate without it.
Frequently Asked Questions
- → Can I make eggnog without alcohol?
- Yes, just skip the brandy and rum. Add a splash of vanilla extract instead for extra flavor.
- → How long does homemade eggnog last?
- It stays fresh in the fridge for up to 4 days when stored in a sealed container.
- → Do I have to use a high-powered blender?
- A regular blender works too, but high-powered ones give you the smoothest, creamiest texture.
- → Can I use a different sweetener?
- Sure! Honey, sugar, or agave nectar all work well. Just use the same amount.
- → Is it safe to drink raw eggs in eggnog?
- Using fresh eggs reduces risk, but if you're concerned, look for pasteurized eggs at your grocery store.
- → Can I make this dairy-free?
- Absolutely. Use almond milk or oat milk and swap the heavy cream for coconut cream.