
 Pin it
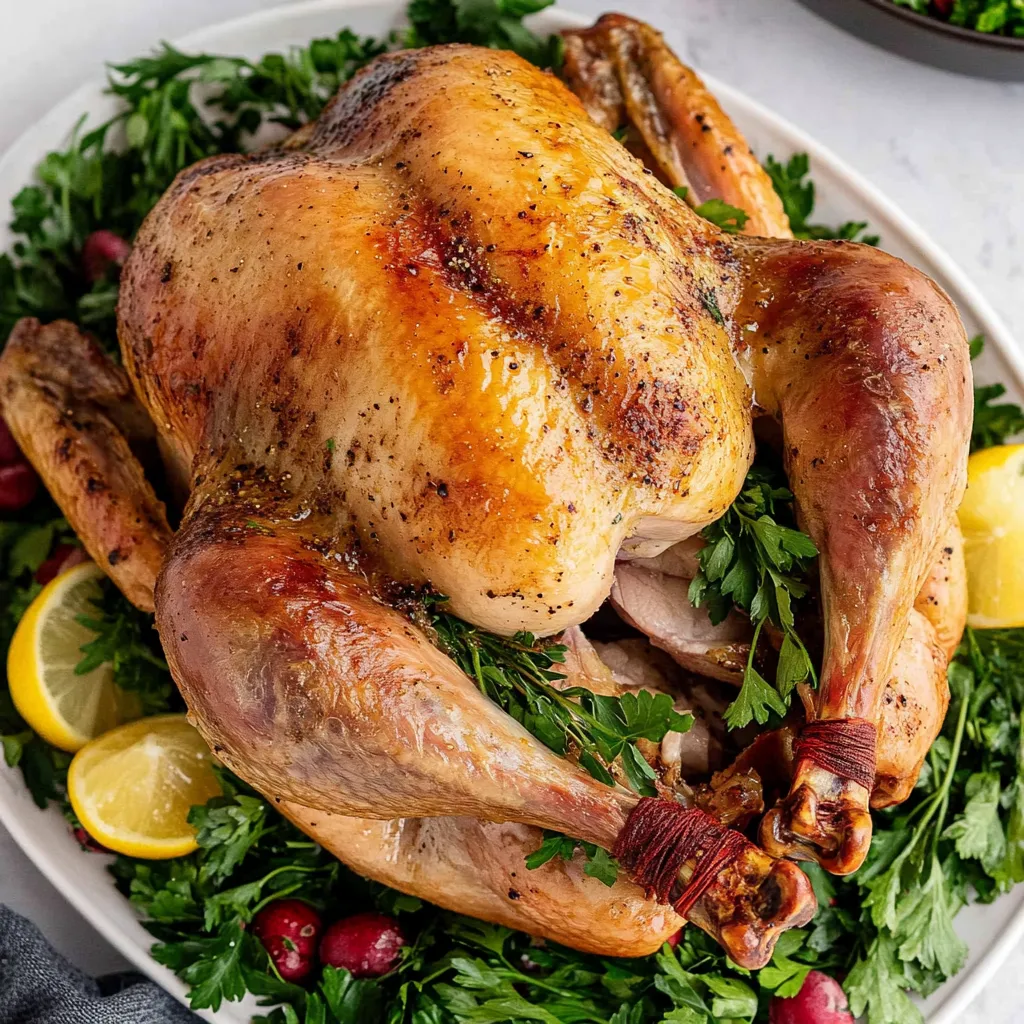
This foolproof roast turkey delivers everything you want from the centerpiece of your holiday table - incredibly juicy breast meat, crispy golden skin, and rich flavors that have your guests asking for seconds before they've finished their first serving. The secret lies in a fragrant butter mixture that gets tucked under the skin, keeping the meat moist while infusing every bite with fresh herbs, lemon, and garlic. What makes this recipe truly special is how it takes the intimidation out of cooking turkey, giving home cooks the confidence to create something that looks and tastes restaurant-quality.
I'll never forget my first turkey disaster - dry, flavorless, and honestly pretty embarrassing when served to my new in-laws for our first Thanksgiving as a married couple. That failure motivated me to spend years perfecting this recipe, testing different techniques and gathering advice from experienced cooks until I developed something truly reliable. Now this turkey has become the star of our holiday table for over a decade, and watching my family's faces light up when I bring it to the table never gets old. The best part is seeing other home cooks succeed with this recipe and gain confidence in their own kitchens.
Ingredients
For the Turkey:
- Whole turkey (12 lbs) - Choose a fresh or properly thawed frozen bird, though this recipe works beautifully with turkeys from 11-15 pounds
- Kosher salt and black pepper - For seasoning inside and outside the bird, essential for building flavor layers
For the Flavored Butter:
- Unsalted butter (1 cup, softened) - The base for our moisture-locking, flavor-packed mixture that transforms ordinary turkey into something extraordinary
- Light olive oil (2 tablespoons plus extra for drizzling) - Helps the butter spread smoothly and adds richness without overwhelming the delicate turkey flavor
- Fresh lemon juice (4 tablespoons) - Brightens all the flavors and helps tenderize the meat naturally
- Lemon zest (1/2 tablespoon) - Adds intense citrus flavor without extra moisture that could affect the butter consistency
- Large garlic cloves (3, pressed) - Creates aromatic depth that infuses throughout the turkey as it roasts
- Fresh parsley (1/4 cup, finely chopped) - Adds color, freshness, and herbaceous notes that complement the other flavors beautifully
- Sea salt (1/2 tablespoon) - Enhances all the other flavors in the butter mixture
- Freshly ground black pepper (1/2 teaspoon) - Adds just the right amount of warmth and spice
For the Aromatic Stuffing:
- Large onion (1, quartered with skin on) - Creates incredible flavor in the pan drippings while keeping the turkey cavity moist
- Garlic cloves (4, halved with skin on) - Adds aromatic depth that permeates the entire bird from the inside out
- Fresh parsley (1/2 bunch) - Provides fresh herbal notes and beautiful aroma as the turkey roasts
- Lemon (1, quartered) - Adds bright citrus fragrance and helps keep the cavity moist during the long roasting process
Instructions
- Prepare your turkey for roasting success.
- Remove the turkey from the refrigerator 30 minutes before starting to let it come closer to room temperature for more even cooking. Remove the neck and giblet bag from inside the cavity, then pat the entire bird completely dry with paper towels - this is crucial for achieving crispy skin.
- Create the magical flavored butter mixture.
- In a medium bowl, combine softened butter, olive oil, lemon juice, lemon zest, pressed garlic, chopped parsley, salt, and pepper. Mix thoroughly with a fork until everything is well combined and the mixture smells absolutely incredible - this usually takes a few minutes of persistent stirring.
- Season the turkey cavity generously.
- Sprinkle about 1 teaspoon of salt and 1/4 teaspoon of pepper inside the turkey cavity, rubbing it around to coat the interior surfaces. This internal seasoning helps flavor the meat from the inside out during the long roasting process.
- Carefully separate the skin from the breast meat.
- Starting from the neck end, gently work your fingers under the skin covering the breast meat, being very careful not to tear the delicate skin. Work from both the front and back to create pockets for the butter mixture.
- Apply the butter mixture under the skin.
- Take about two-thirds of your flavored butter and carefully spread it under the loosened skin, massaging gently over the top of the skin to distribute it evenly across the breast meat. This step is crucial for keeping the breast meat incredibly juicy and flavorful.
- Butter and season the outside of the turkey.
- Rub the remaining butter mixture all over the outside of the turkey - breast, legs, wings, and back. Drizzle with additional olive oil, then season generously with salt and pepper for that perfectly crispy, golden skin.
- Stuff the cavity with aromatic vegetables.
- Place the quartered onion, halved garlic cloves, parsley bunch, and quartered lemon inside the turkey cavity. These aromatics will flavor the bird from the inside and create incredibly fragrant pan drippings for gravy.
- Truss the turkey for even cooking.
- Using kitchen string, tie the legs together and tuck the wing tips behind the body. This helps the turkey cook evenly and creates a more attractive presentation when served.
- Start roasting at high heat for crispy skin.
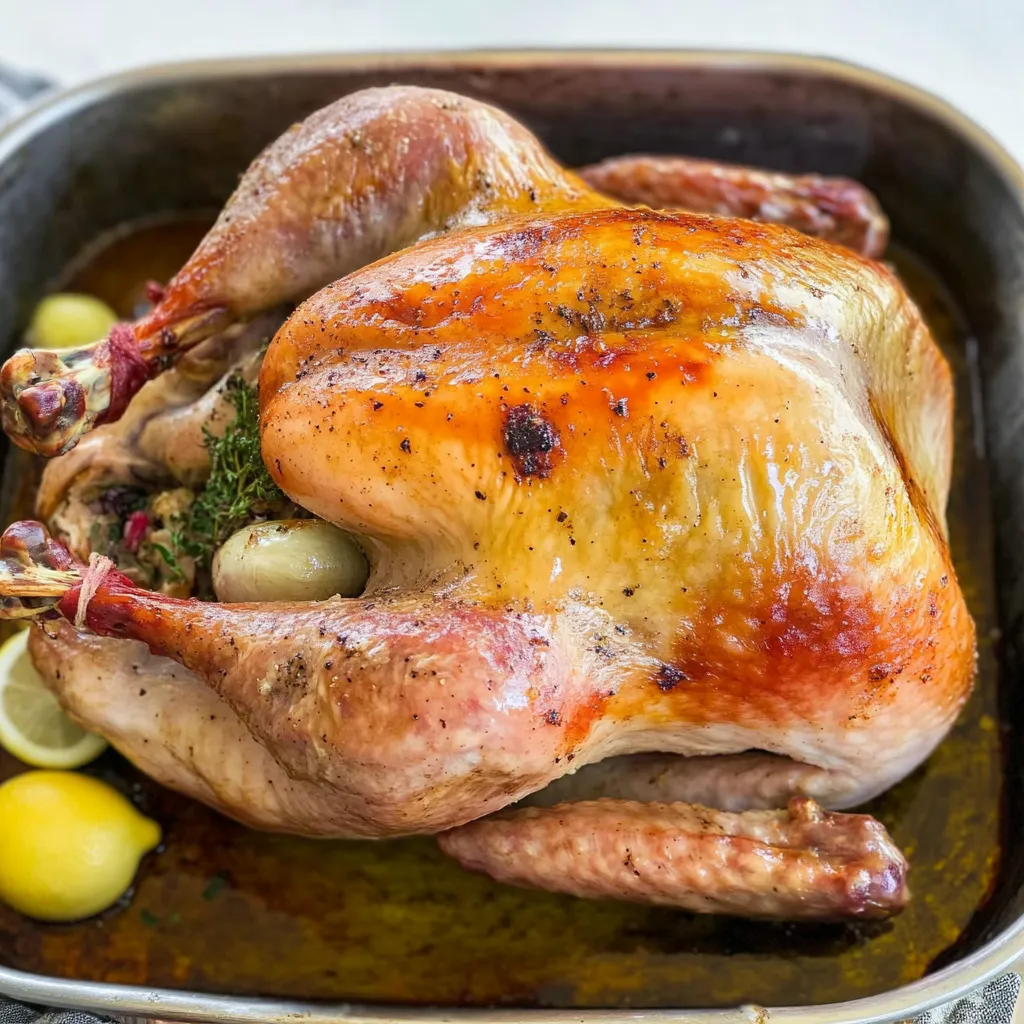
- Preheat your oven to 430°F with the rack positioned in the lower third. Place the turkey breast-side up in a heavy roasting pan and roast uncovered for exactly 20 minutes to get that initial browning and crispy skin development.
- Protect the breast and finish cooking.
- Remove the turkey from the oven, baste quickly with the pan drippings, then cover the breast area with an oiled foil triangle to prevent overcooking. Reduce oven temperature to 350°F and continue roasting for about 2 hours and 30 minutes, or until the thickest part of the thigh reaches 170°F and the breast reaches 160°F.
- Rest for perfect carving and maximum juiciness.
- Transfer the finished turkey to a serving platter and tent loosely with foil. Let it rest for at least 1 hour before carving - this allows the juices to redistribute throughout the meat, ensuring every slice is incredibly moist and flavorful.
 Pin it
The Key to Perfectly Juicy Turkey Breast
The biggest challenge with roasting turkey is preventing the breast meat from drying out while ensuring the dark meat cooks completely. This recipe solves that problem with the flavored butter technique that essentially bastes the breast meat from the inside throughout the entire cooking process. The butter melts slowly, keeping the meat moist while infusing incredible flavor into every fiber.
The foil shield technique is equally important for protecting the breast from the direct heat of the oven during the long cooking time. By covering the breast partway through cooking, you prevent it from overcooking while allowing the legs and thighs to reach their proper temperature. This simple step makes the difference between dry, disappointing turkey and the juicy, tender results everyone hopes for.
Understanding Turkey Cooking Times and Temperatures
Proper temperature monitoring is absolutely crucial for turkey success, and investing in a good meat thermometer takes all the guesswork out of the process. The thigh meat needs to reach 170°F because dark meat has more connective tissue that requires higher temperatures to break down properly. The breast meat is perfectly cooked at 160°F and will continue to rise slightly during the resting period.
For different sized turkeys, the general rule after the initial high-heat browning is about 13 minutes per pound at 350°F. However, always rely on temperature rather than time for doneness, as oven variations and turkey shape can affect cooking speed. A 15-pound turkey might take an extra 30-45 minutes, while a 10-pound bird could be done 30 minutes earlier than expected.
Make-Ahead Strategies for Stress-Free Holidays
One of the best features of this recipe is how well it works with advance preparation, which can be a lifesaver during busy holiday schedules. You can complete all the prep work - stuffing, buttering, seasoning, and trussing - up to 24 hours before roasting. Just cover the prepared turkey tightly and refrigerate, then remove it from the fridge an hour before cooking to let it come to room temperature.
This make-ahead approach actually improves the flavor because it gives the seasonings and aromatics more time to penetrate the meat. The only adjustment needed is adding about 15-20 minutes to the cooking time since the turkey will be starting from a colder temperature. The results are every bit as good as same-day preparation, with significantly less stress on the actual cooking day.
Creating Amazing Pan Gravy from the Drippings
The aromatic vegetables and flavored butter create the most incredible pan drippings that form the base for extraordinary homemade gravy. After removing the turkey, strain the drippings to remove the solids, then use the flavorful liquid as the base for your gravy. The combination of butter, herbs, citrus, and roasted vegetables creates depth and complexity that store-bought gravy simply cannot match.
Don't discard those roasted aromatics either - the softened onions and garlic can be mashed and stirred into your gravy for even more flavor and body. The lemon quarters will have given up their juice during roasting, but the roasted parsley adds a lovely herbal note when finely chopped and stirred into the finished gravy just before serving.
Storage and Leftover Magic
Proper storage of leftover turkey ensures you can enjoy this delicious meal for days after the initial feast. Remove all the meat from the bones within two hours of cooking, then store it in the refrigerator for up to four days or freeze for up to three months. For the best texture when reheating, add the turkey to hot gravy, which prevents it from drying out and actually improves the flavor.
The bones shouldn't go to waste either - they make incredible turkey stock for soups and risottos. Simply roast the picked-clean bones for 30 minutes at 400°F, then simmer them with vegetables and herbs for several hours to create liquid gold for your future cooking projects.
After making this turkey countless times for my own family and helping friends succeed with their holiday meals, I can honestly say this recipe has never let me down. There's something so deeply satisfying about watching people's faces when they taste truly exceptional turkey, especially when they're used to dry, flavorless holiday birds. The combination of technique and flavor in this recipe creates the kind of meal that becomes part of family tradition and gets requested year after year.
This recipe embodies everything I love about holiday cooking - it brings families together, creates lasting memories, and proves that with the right techniques, home cooks can create something truly spectacular. Every time I make this turkey, I'm reminded that the best holiday meals aren't just about the food, but about the love and care we put into creating something special for the people we cherish most.
Frequently Asked Questions
- → How long does it take to thaw a 12-pound turkey?
- A 12-pound turkey needs about 3 days to thaw completely in the refrigerator. Allow 1 day for every 4-5 pounds.
- → What temperature should the turkey reach when done?
- The thigh should reach 170°F and the breast should reach 160°F. The temperature will rise another 5°F while resting.
- → Do I need to brine the turkey before roasting?
- No, this recipe doesn't require brining. The herb butter mixture keeps the meat juicy and adds plenty of flavor.
- → Why do you put foil over the turkey breast?
- The foil shield prevents the breast meat from drying out while the darker meat finishes cooking. Apply it after the first 20 minutes.
- → How long should the turkey rest before carving?
- Let the turkey rest for at least 1 hour after cooking. This makes the meat more tender and easier to carve cleanly.
- → Can I use this recipe for a smaller or larger turkey?
- Yes, this works for 11-15 pound turkeys. Cook for about 13 minutes per pound at 350°F after the initial high-heat period.