
 Pin it
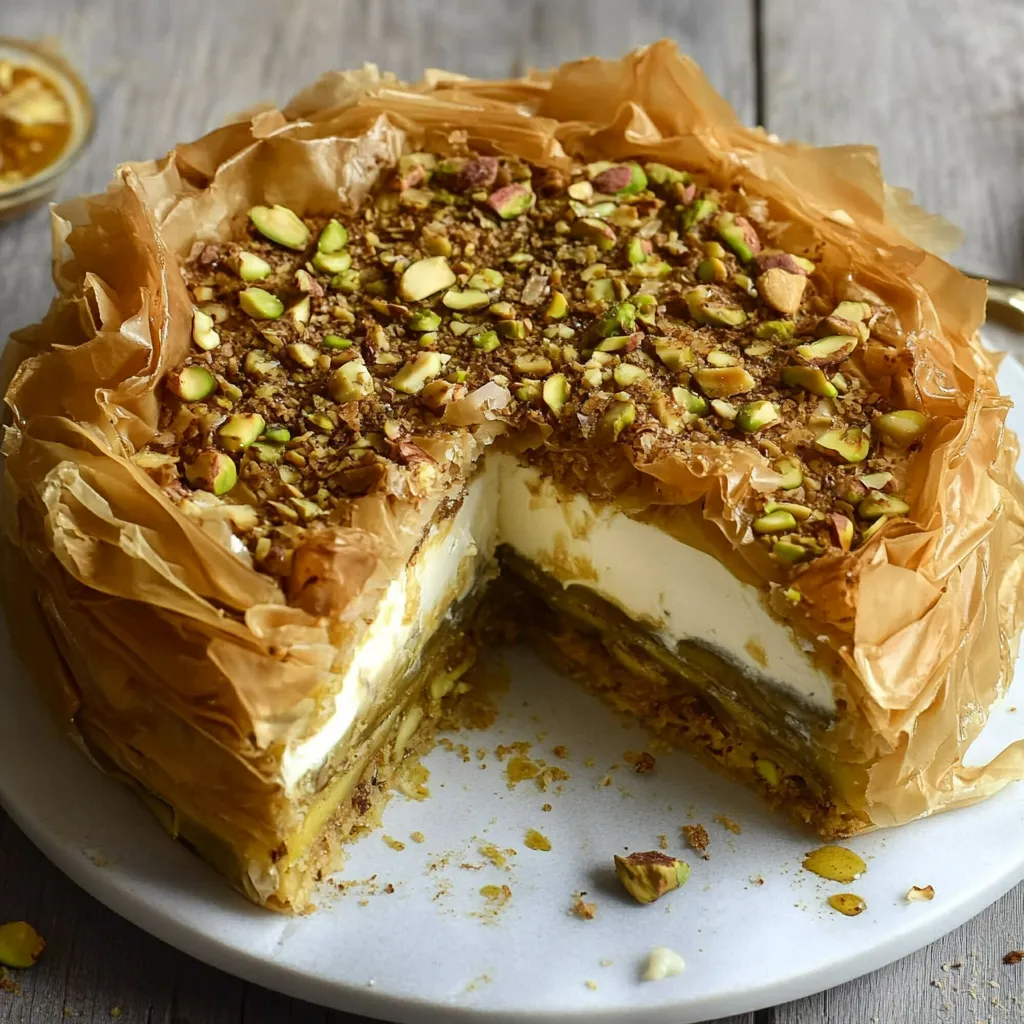
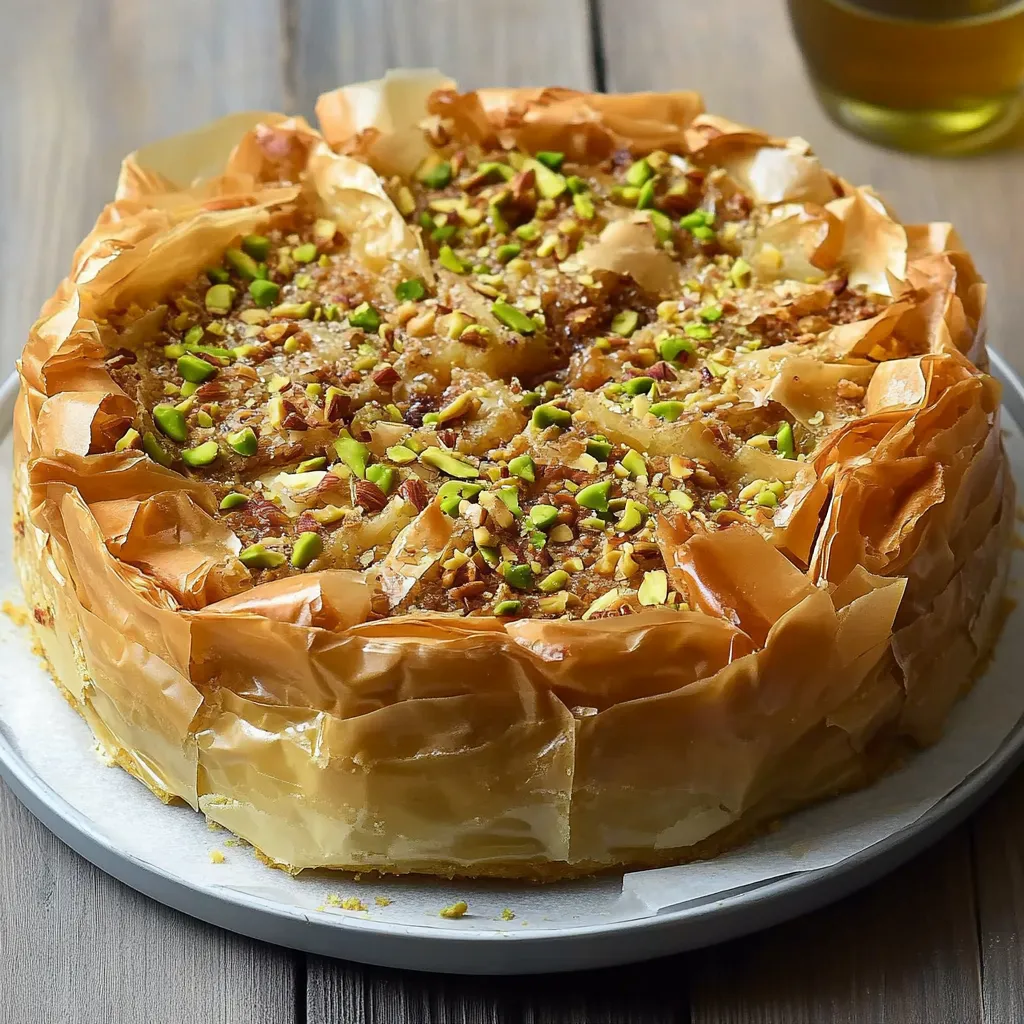
This stunning baklava cheesecake combines two beloved desserts into one show-stopping creation that delivers layers of crispy, buttery phyllo and crunchy nuts surrounding a silky, tangy cheesecake filling. The contrast between the delicate, flaky baklava crust and the rich, creamy cheesecake creates an incredible textural experience, while a drizzle of honey syrup ties everything together with that authentic baklava sweetness. This impressive dessert proves that sometimes the most extraordinary creations come from combining classic favorites in unexpected ways.
I created this recipe when my father-in-law mentioned that his two favorite desserts were cheesecake and baklava, and I wanted to make something special for his birthday but didn't have time to make both separately. The combination seemed almost too ambitious at first, but the results were absolutely incredible - the crispy, buttery phyllo provides the perfect textural contrast to the smooth cheesecake, while the nuts and honey syrup add layers of flavor that complement rather than compete. Now it's become my signature dessert for special occasions, and people literally request it months in advance for their celebrations.
Essential Ingredients and Selection Tips:
- Phyllo dough: Use frozen phyllo sheets, thawed overnight in the refrigerator; work quickly once opened as they dry out fast
- Ghee or clarified butter: Ghee has a higher smoke point and richer flavor than regular butter; essential for proper browning
- Mixed nuts: Toast walnuts and pistachios yourself for maximum flavor and crunch; pre-toasted nuts often lack intensity
- Full-fat cream cheese: Use brick-style cream cheese at room temperature; low-fat versions won't create the proper texture
- Fresh lemon juice: Adds brightness that balances the rich nuts and sweet honey; don't skip this essential element
- Quality honey: Choose floral honey rather than generic varieties for the most complex flavor in the syrup
Step-by-Step Instructions:
- Prepare the nut mixture properly:
- Toast walnuts and pistachios in a 350°F oven for 8-10 minutes until fragrant and golden. Let cool completely, then roughly chop or pulse in a food processor until you have a mixture of fine pieces and small chunks. Toss with granulated sugar, cinnamon, and a pinch of salt. The mixture should be sweet and aromatic with varied textures that will create interest in every bite.
- Create silky cheesecake filling:
- Ensure cream cheese is completely at room temperature and very soft. In a large bowl, use the back of a rubber spatula to press and smooth the cream cheese against the sides, eliminating any lumps before mixing. Add sugar, lemon juice, vanilla, and lemon zest if using, then beat with an electric mixer until completely smooth and creamy, about 3-4 minutes.
- Finish cheesecake base correctly:
- Add room temperature sour cream and beat until just combined, scraping down the sides as needed. Finally, add eggs one at a time, beating just until incorporated after each addition. Don't overbeat once eggs are added, as this can create cracks during baking. Strain the mixture through a fine-mesh sieve to eliminate any remaining lumps for the smoothest possible texture.
- Begin phyllo layering technique:
- Brush the bottom and sides of a 9-inch springform pan with melted ghee. Carefully place the first sheet of phyllo in the pan, letting it overhang the edges, and brush completely with ghee. Add the second sheet rotated slightly clockwise to create even overhang all around, brush with ghee, and continue this pattern. You want 10 sheets total for the bottom layer, each brushed with ghee.
- Create the baklava layers:
- Spread half of the nut mixture evenly over the 10th phyllo sheet. Add 5 more sheets of phyllo, each brushed with ghee and rotated slightly for even coverage. Spread the remaining nut mixture over this layer, then add the final 5 sheets of phyllo, again brushing each with ghee and rotating for complete coverage.
- Add cheesecake and seal edges:
- Pour the strained cheesecake filling over the top phyllo layer, spreading it evenly with an offset spatula. Gently gather the overhanging phyllo edges and scrunch them over the filling, leaving the center exposed so you can check for doneness. Brush the gathered phyllo with remaining ghee for golden browning.
- Bake with proper technique:
- Place the springform pan on a parchment-lined baking sheet to catch any leaking ghee. Bake at 325°F for 55-65 minutes, until the phyllo is golden brown all over and the cheesecake center has just a slight jiggle when gently shaken. The exposed cheesecake should be set but not completely firm, as it will continue cooking from residual heat.
- Prepare and apply syrup:
- While the cheesecake bakes, combine water, sugar, honey, and a splash of lemon juice in a small saucepan. Bring to a boil, then simmer for 5-7 minutes until slightly thickened. As soon as the cheesecake comes out of the oven, slowly pour the hot syrup over all the phyllo areas, allowing it to soak into the layers. Let cool completely before removing from the springform pan.
 Pin it
The technique I'm most passionate about in this recipe is the layering method for the phyllo crust. When I first attempted this, I tried to treat the phyllo like a regular pie crust, but that approach created a soggy, uneven base. The breakthrough came when I learned to rotate each sheet slightly as I layered, creating that beautiful overhang that can be gathered over the filling like a rustic galette. This technique not only looks stunning but also ensures every bite has crispy phyllo, crunchy nuts, and creamy cheesecake. The brushing with ghee between each layer is crucial - it's what creates those incredibly flaky, golden layers that make baklava so special.
Phyllo Dough Mastery and Handling
Working with phyllo requires understanding its delicate nature and tendency to dry out quickly. The key is confidence and speed rather than perfection - tears and breaks in individual sheets don't matter when you're layering multiple sheets. The rotating technique ensures even coverage and prevents weak spots, while the generous ghee brushing between layers creates the signature flaky texture that defines great baklava.
Cheesecake Technique and Texture Control
Creating perfectly smooth cheesecake filling requires attention to temperature and mixing technique. Room temperature ingredients blend more easily and create fewer lumps, while the pressing method for cream cheese eliminates lumps before mixing begins. The minimal beating after adding eggs prevents incorporating too much air, which would cause cracking during baking.
Temperature Management and Baking Strategy
The combination of phyllo and cheesecake requires careful temperature control since phyllo needs high heat to crisp while cheesecake prefers gentle baking. The moderate oven temperature and extended baking time allow both components to cook properly without burning the delicate phyllo or overcooking the cheesecake center.
Syrup Application and Absorption
The timing of syrup application is crucial for achieving proper absorption without making the phyllo soggy. Hot syrup on hot phyllo creates maximum penetration into the layers, while the sugar concentration helps preserve the crispy texture. The syrup should be applied generously but only to phyllo areas, not the exposed cheesecake.
Flavor Balance and Harmony
This dessert succeeds because each component maintains its identity while complementing the others. The tangy lemon in the cheesecake balances the sweet honey and nuts, while the rich cream cheese provides contrast to the crispy, nutty phyllo. Understanding these flavor relationships helps explain why the combination works so beautifully.
Presentation and Serving Excellence
The visual impact of this dessert comes from the rustic, gathered phyllo edges contrasting with the smooth cheesecake center. Proper cooling allows clean slicing that showcases the distinct layers, while the golden phyllo and creamy filling create an appealing color contrast that makes every slice Instagram-worthy.
This baklava cheesecake represents everything I love about creative baking - taking two beloved classics and finding a way to honor both while creating something entirely new and exciting. The first time I served this, watching people's reactions as they tried to process what they were tasting was absolutely priceless. Every bite delivers that perfect contrast between the crispy, honey-sweetened phyllo and the smooth, tangy cheesecake that makes you want to close your eyes and savor the experience. It's become one of those desserts that creates lasting memories and shows how sometimes the most ambitious ideas turn out to be the most rewarding ones.
Frequently Asked Questions
- → Can I use regular butter instead of ghee?
- Yes, melted butter works perfectly fine. Ghee gives a richer flavor, but regular butter will still create delicious flaky layers.
- → How long does this cheesecake need to chill?
- The cheesecake needs to chill overnight in the fridge. This helps it set properly and makes slicing much easier.
- → Can I make this ahead of time?
- Yes, this dessert actually tastes better the next day. You can make it up to 3 days ahead and store it covered in the fridge.
- → What if my phyllo tears while layering?
- Don't worry if the phyllo tears - it happens to everyone. Just keep layering and brush with ghee. The final result will still be delicious.
- → Can I use different nuts?
- Absolutely. Walnuts, almonds, or hazelnuts work great. You can also mix different nuts together for more complex flavor.
- → How do I know when the cheesecake is done baking?
- The center should have just a slight jiggle when you gently shake the pan. The edges should be set and the phyllo golden brown.