
 Pin it
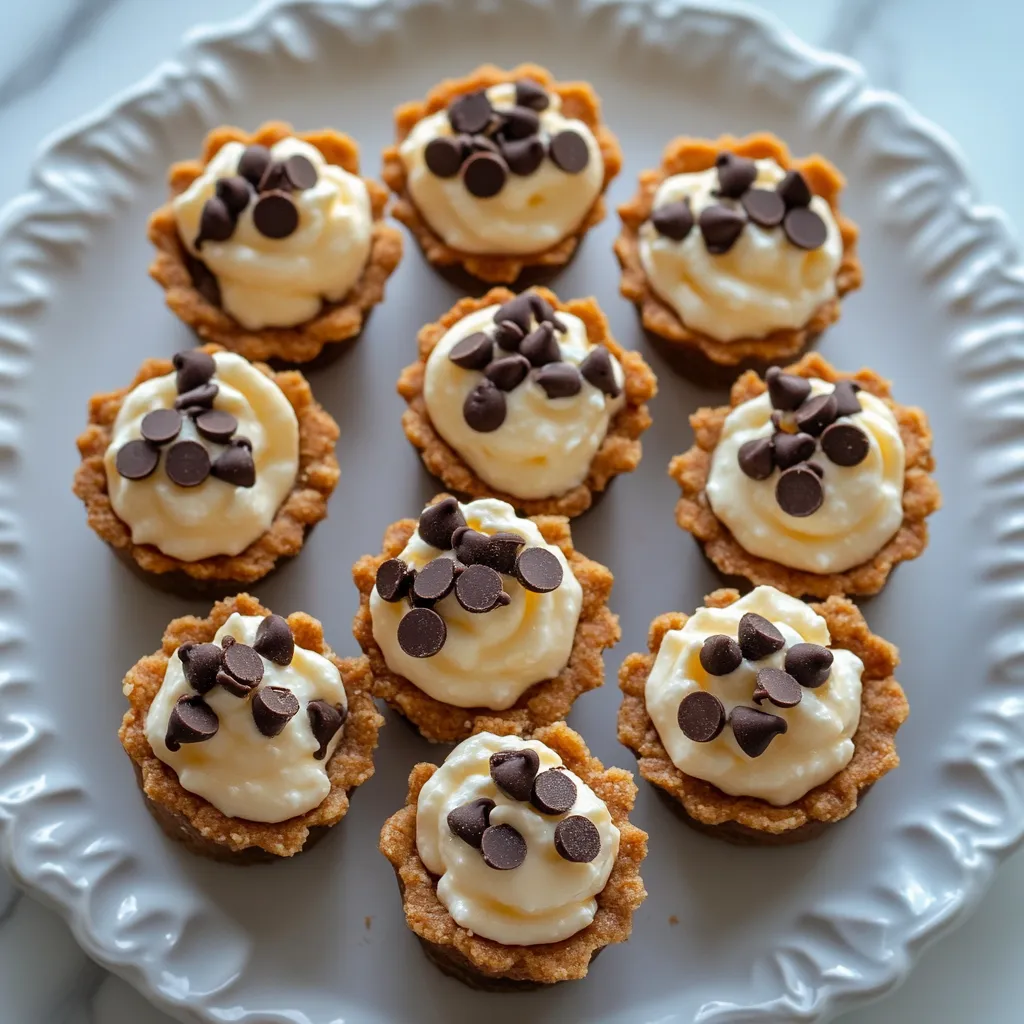
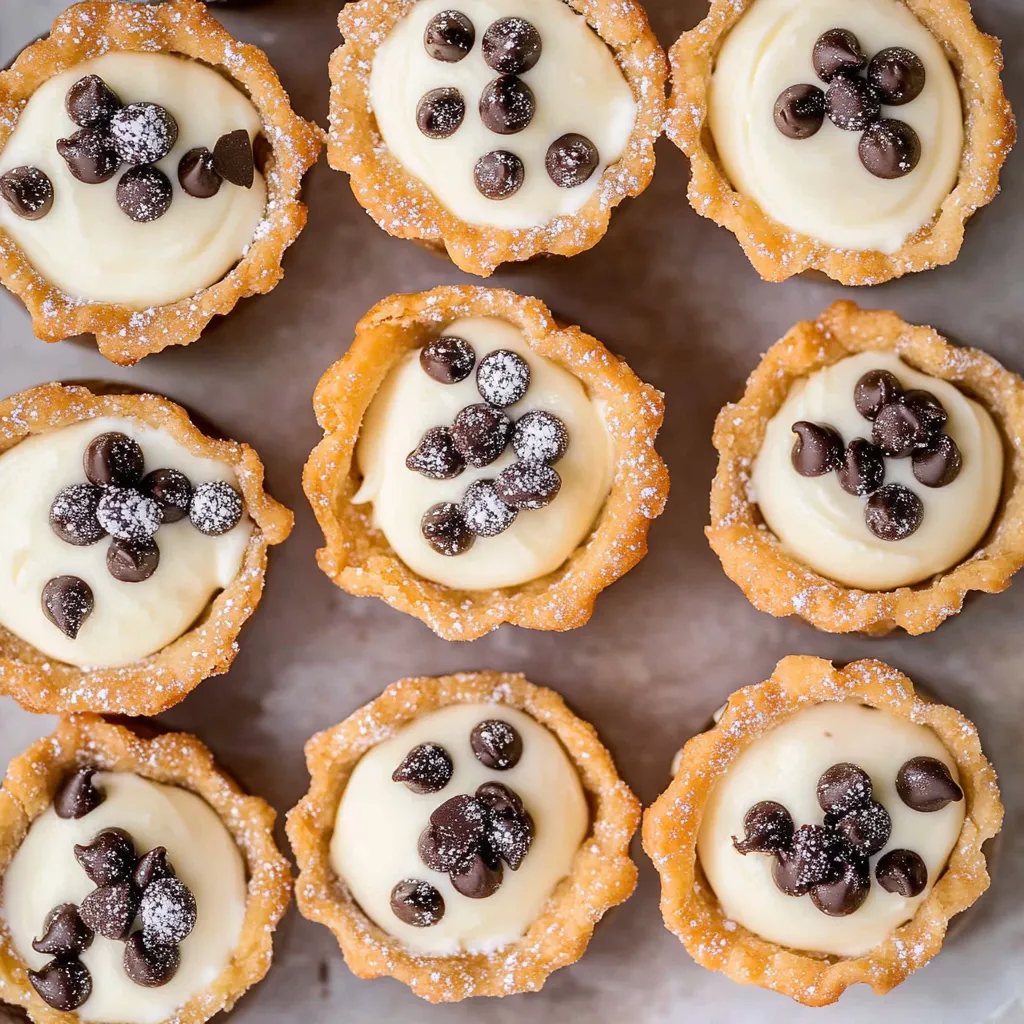
These mini cannoli bites capture all the creamy richness of traditional cannoli in an adorable, bite-sized package that's infinitely easier to prepare. With a buttery pie crust shell and silky sweet ricotta filling, they deliver authentic Italian flavor with a fraction of the effort.
I first made these mini cannoli bites for a family gathering when time was short but expectations were high. My Italian grandmother, who typically scoffs at shortcuts, popped one in her mouth and gave me that knowing nod of approval that's worth more than a thousand words. They've since become my signature dessert for everything from holiday gatherings to casual dinner parties.
Ingredients
- Pre-made pie crust – Creates a buttery, flaky shell that mimics traditional cannoli pastry without the hassle of deep frying. The richness of the crust complements the sweet filling beautifully.
- Whole milk ricotta cheese – The star of authentic cannoli filling, providing that distinctive texture that's both creamy and slightly grainy. Its subtle sweetness forms the perfect canvas for other flavors.
- Mascarpone cheese – This Italian cream cheese adds luxurious smoothness and richness to the filling. Its higher fat content creates an irresistibly silky texture that melts in your mouth.
- Powdered sugar – Dissolves seamlessly into the cheese mixture, adding sweetness without the grittiness that granulated sugar would create. The fine texture ensures a perfectly smooth filling.
- Vanilla extract – Adds warmth and depth to the filling, enhancing the dairy flavors while providing that subtle aromatic quality that makes these bites so addictive.
- Mini chocolate chips – These tiny morsels distribute perfectly throughout the filling, ensuring chocolate in every bite. Their small size means they don't overwhelm the delicate texture of the cream.
Step-by-Step Instructions
- Prepare your workspace –
- Preheat your oven to 400°F and allow the pie crust to come to room temperature, which makes it more pliable and easier to work with.
- Cut pie crust rounds –
- Unroll the pie crust onto a lightly floured surface. Using a 2½-inch round cutter, cut out 12 circles from the dough. Work quickly to prevent the dough from warming too much, which can make it sticky.
- Form the shells –
- Gently press each round into the cups of an ungreased mini muffin tin. Using your fingertips, carefully shape the dough to fit the contours of each cup, ensuring it reaches the top edge for a pretty presentation.
- Bake to golden perfection –
- Place the muffin tin in the preheated oven and bake for 10-12 minutes until the cups are light golden brown. The color indicates a properly baked crust that will hold its shape without being too brittle.
- Cool completely –
- Remove from the oven and allow the shells to cool in the pan for 5 minutes, then transfer to a wire rack to cool completely. This prevents condensation from making the shells soggy.
- Strain the ricotta –
- While the shells cool, place the ricotta in a fine-mesh sieve lined with cheesecloth or paper towels. Press gently to remove excess moisture, which would otherwise make your filling watery.
- Prepare the filling –
- In a medium bowl, combine the strained ricotta, mascarpone, powdered sugar, and vanilla extract. Mix until smooth and well incorporated, then gently fold in most of the mini chocolate chips, reserving some for garnish.
- Fill the shells –
- Transfer the filling to a piping bag fitted with a large star tip for a decorative finish, or simply use a zip-top bag with the corner snipped off. Pipe the filling into each cooled pie crust cup, creating a small swirl on top.
- Garnish beautifully –
- Sprinkle the remaining mini chocolate chips over the filled cups and dust lightly with powdered sugar for that classic cannoli finish. The contrast of dark chocolate against the white filling makes for a stunning presentation.
- Serve with pride –
- Arrange on a serving platter and watch them disappear! For the most authentic experience, serve shortly after filling to maintain the perfect contrast between crisp shell and creamy filling.
 Pin it
The magic of these bites lies in the contrast of textures – the crisp, buttery shell giving way to the luxuriously smooth filling, punctuated by tiny bursts of chocolate. The slight coolness of the filling against the room-temperature shell creates a sensory experience that's remarkably similar to traditional cannoli despite the simplified preparation.
My Italian great-aunt once told me that the secret to good cannoli is patience – with the filling, with the assembly, with the waiting to eat them. While these mini bites take significantly less patience than traditional cannoli, I've found that taking the extra few minutes to properly strain the ricotta makes all the difference between an ordinary dessert and one that people will talk about long after the last bite is gone.
Advance Preparation Strategies
These mini cannoli bites are perfect for entertaining because almost everything can be prepared ahead of time. The pie crust shells can be baked up to three days in advance and stored in an airtight container at room temperature. The filling can be made up to two days ahead and kept refrigerated in a sealed container. Simply pipe the filling into the shells shortly before serving to maintain that perfect texture contrast.
Creative Variations
- Citrus lover's delight: Add orange or lemon zest to the filling
- Nutty texture: Fold in finely chopped pistachios or almonds
- Chocolate indulgence: Dip the edges of the shells in melted chocolate before filling
- Holiday special: Add a pinch of cinnamon and nutmeg to the filling for warm holiday notes
Beyond Dessert
These versatile bites can be adapted for serving at brunch by reducing the sugar slightly and adding a touch of lemon zest to brighten the filling. Pair with fresh berries and a mimosa for an elegant mid-morning treat that bridges the gap between breakfast and dessert.
After years of making these for gatherings large and small, I've found they consistently receive more compliments than desserts that took triple the effort. There's something about the perfect two-bite size that makes them irresistible – small enough to enjoy without guilt, but substantial enough to satisfy a sweet craving. Whether served alongside coffee after dinner or arranged on a dessert table at a celebration, these little cups of creamy, chocolatey goodness never fail to delight everyone from the most discerning Italian grandmothers to picky children who typically push aside "fancy" desserts.
Frequently Asked Questions
- → Can I make these cannoli bites ahead of time?
- Yes, you can make the shells 1-2 days ahead. Store them in an airtight container and fill them just before serving to prevent them from getting soggy.
- → Why do I need to strain the ricotta cheese?
- Straining the ricotta removes excess moisture, which gives you a thicker, creamier filling that won't make the shells soggy.
- → Can I freeze these cannoli bites?
- The unfilled shells freeze well for up to 1 month. The filling doesn't freeze well, so it's best to make that fresh when ready to serve.
- → What can I use instead of mascarpone cheese?
- Cream cheese makes a good substitute, though the flavor will be slightly different. Use the same amount as called for in the recipe.
- → How long will these stay fresh?
- Once filled, the cannoli bites are best eaten within 24 hours. Store them in the refrigerator until ready to serve.