
 Pin it
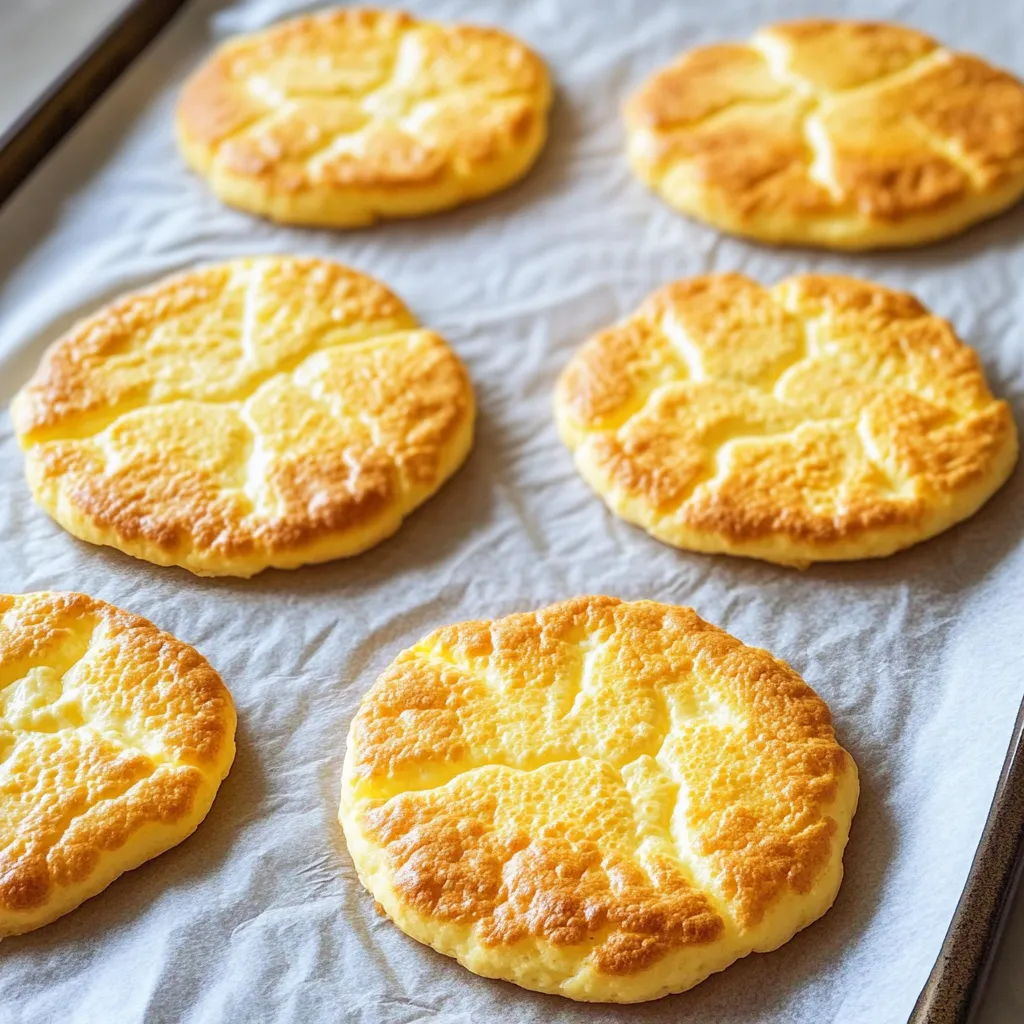
This revolutionary cloud bread transforms just a handful of simple ingredients into a surprisingly satisfying, bread-like experience that's perfect for anyone following low-carb, keto, or gluten-free lifestyles without sacrificing the comfort of having something to make sandwiches with. The secret lies in creating a stable meringue base that's carefully folded with seasoned cream cheese and egg yolks, resulting in individual "slices" that bake up light and airy like soufflé but firm up into something remarkably bread-like as they cool. Unlike many alternative bread recipes that taste artificial or overly eggy, the savory seasoning blend of garlic powder, Italian herbs, and salt creates something that actually tastes like bread rather than a sweet breakfast treat.
I was initially skeptical about cloud bread because so many alternative bread recipes disappoint, but this version completely changed my mind when I realized how much the savory seasonings matter. The first time I made a turkey sandwich with this bread, I was genuinely surprised by how satisfying it was and how little I missed traditional bread.
Essential Ingredients and Selection Tips
- Fresh eggs: Use the freshest eggs possible as they whip to better volume; room temperature eggs separate more easily and whip higher
- Cream of tartar: This is absolutely essential for stabilizing the egg whites; there's no good substitute that will work as effectively
- Low-fat cream cheese: Softened completely to room temperature for smooth mixing; full-fat works but adds unnecessary calories
- Italian seasoning: Choose a high-quality blend or make your own with dried basil, oregano, thyme, and rosemary
- Garlic powder: Start conservatively as the flavor concentrates during baking; fresh garlic would add too much moisture
- Fine sea salt: Balances all the flavors and enhances the bread-like taste rather than leaving it flat and eggy
The secret to success is achieving perfectly stiff egg whites that hold their structure when folded with the other ingredients - any under-whipping will result in flat, dense results.
Detailed Step-by-Step Instructions
- Step 1: Prepare your workspace:
- Preheat the oven to 300°F and line two large baking sheets with parchment paper. If using a convection oven, use the convection setting for more even baking and better rise.
- Step 2: Separate eggs carefully:
- Separate the eggs when they're cold for easier separation, ensuring absolutely no yolk gets into the whites as even a tiny amount of fat will prevent proper whipping. Let separated eggs come to room temperature for about 30 minutes for best volume.
- Step 3: Whip whites to perfection:
- Place egg whites in a completely clean stand mixer bowl with the whip attachment. Add cream of tartar and whip on high speed for 3-5 minutes until stiff, glossy peaks form that don't fall when the bowl is tilted. The meringue should look thick and voluminous.
- Step 4: Transfer meringue safely:
- Gently transfer the whipped whites to a separate large bowl using a rubber spatula, being careful not to deflate them. This prevents them from being accidentally mixed while you prepare the yolk mixture.
- Step 5: Prepare the yolk base:
- In the same mixer bowl (no need to wash), beat the softened cream cheese on high speed until completely smooth and fluffy, about 2 minutes. Scrape down the bowl as needed to ensure no lumps remain.
- Step 6: Incorporate yolks gradually:
- Add egg yolks one at a time to the cream cheese, beating well after each addition until completely smooth. The mixture should be creamy and homogeneous with no streaks or lumps visible.
- Step 7: Season the base:
- Beat in the Italian seasoning, salt, and garlic powder until evenly distributed throughout the mixture. Taste and adjust seasoning if desired, keeping in mind that flavors will concentrate slightly during baking.
- Step 8: Fold carefully:
- Add about one-third of the meringue to the yolk mixture and fold gently with a rubber spatula to lighten the base. Then fold in the remaining meringue in two additions, working quickly but gently to maintain as much air as possible.
- Step 9: Shape the bread:
- Using a ¼-cup measure, portion the mixture onto prepared baking sheets, spacing them about 2 inches apart. Gently spread each portion into 4-inch circles about ¾-inch thick using the back of a spoon or offset spatula.
- Step 10: Bake to golden perfection:
- Bake for 15-18 minutes in convection or up to 30 minutes in conventional oven until golden brown on top and firm to the touch. The centers should not jiggle when the pan is gently shaken.
- Step 11: Cool properly:
- Let cool on the baking sheets for several minutes before carefully transferring to a wire rack. The bread will continue to firm up as it cools and develops its bread-like texture.
 Pin it
The most critical technique is folding the meringue into the yolk mixture without deflating it - work quickly but gently, and stop folding as soon as the mixture is just combined.
This cloud bread has become my go-to proof that low-carb eating doesn't have to mean giving up the foods that make meals satisfying and complete. My husband, who was initially resistant to any bread substitutes, now specifically requests this for his lunch sandwiches because he says it's actually more satisfying than regular bread.
Understanding Meringue Science and Stabilization
The success of cloud bread depends entirely on creating a stable meringue that can support the weight of the other ingredients while baking. Cream of tartar works by lowering the pH of the egg whites, which helps proteins unfold and trap air more effectively while providing stability against deflation. The whipping process incorporates air bubbles that become surrounded by protein networks, creating the foam structure essential for the bread's texture. Understanding this science explains why proper technique and timing are so critical for success.
Protein Coagulation and Texture Development
During baking, the egg proteins coagulate at different temperatures, creating the structure that transforms the foamy mixture into something bread-like. The whites set first, forming the outer structure, while the yolks and cream cheese create the interior texture and flavor. The gentle oven temperature allows this process to happen gradually, preventing the proteins from seizing up too quickly and creating a tough texture. This is why cloud bread has that unique light yet substantial mouthfeel.
Seasoning Balance and Flavor Development
The savory seasoning blend is what transforms this from a sweet breakfast item into legitimate bread. Salt enhances all flavors while suppressing any eggy taste, garlic powder provides savory depth without adding moisture, and Italian seasoning creates complexity that makes the bread taste intentional rather than like a diet substitute. The proportions are critical - too little and it tastes bland, too much and it becomes overwhelming rather than bread-like.
Temperature Control and Baking Techniques
The relatively low baking temperature is essential for gentle cooking that sets the proteins without browning too quickly or creating a tough exterior. Convection baking works particularly well because the air circulation helps create even browning while preventing the bottoms from becoming soggy. The visual cues for doneness - golden color and no jiggling - indicate that the proteins have set sufficiently to maintain structure while cooling.
Storage and Texture Evolution
Cloud bread's texture continues to evolve after baking as moisture redistributes and proteins continue to set. The initial soufflé-like texture firms up into something more bread-like within a few hours, making it perfect for sandwiches. Proper storage in airtight containers maintains this texture for several days, though the bread is best consumed within 24-48 hours for optimal taste and texture. The bread can be refreshed briefly in a warm oven if it becomes too soft.
This cloud bread recipe has taught me that successful dietary substitutions aren't about trying to exactly replicate what you're giving up, but rather about creating something delicious in its own right that fulfills the same function. Every time I make it, I'm reminded that understanding the science behind cooking techniques allows you to adapt and create new solutions that work within whatever dietary constraints you're following.
Frequently Asked Questions
- → How long does cloud bread last?
- Cloud bread stays fresh in the fridge for several days but tastes best within 12 hours of baking.
- → Can I make cloud bread without cream cheese?
- Cream cheese helps bind the ingredients and adds flavor. You can try Greek yogurt as a substitute but the texture may change.
- → Why is my cloud bread flat?
- Make sure your egg whites are beaten to stiff peaks and fold gently to keep the air bubbles intact.
- → Is cloud bread really carb free?
- Cloud bread has virtually zero carbs, making it perfect for keto and low carb diets.
- → Can I freeze cloud bread?
- Yes, you can freeze cloud bread for up to a month. Thaw at room temperature before eating.
- → What can I use cloud bread for?
- Use cloud bread for sandwiches, toast, or as a side with soups and salads. It works great as regular bread.