
 Pin it
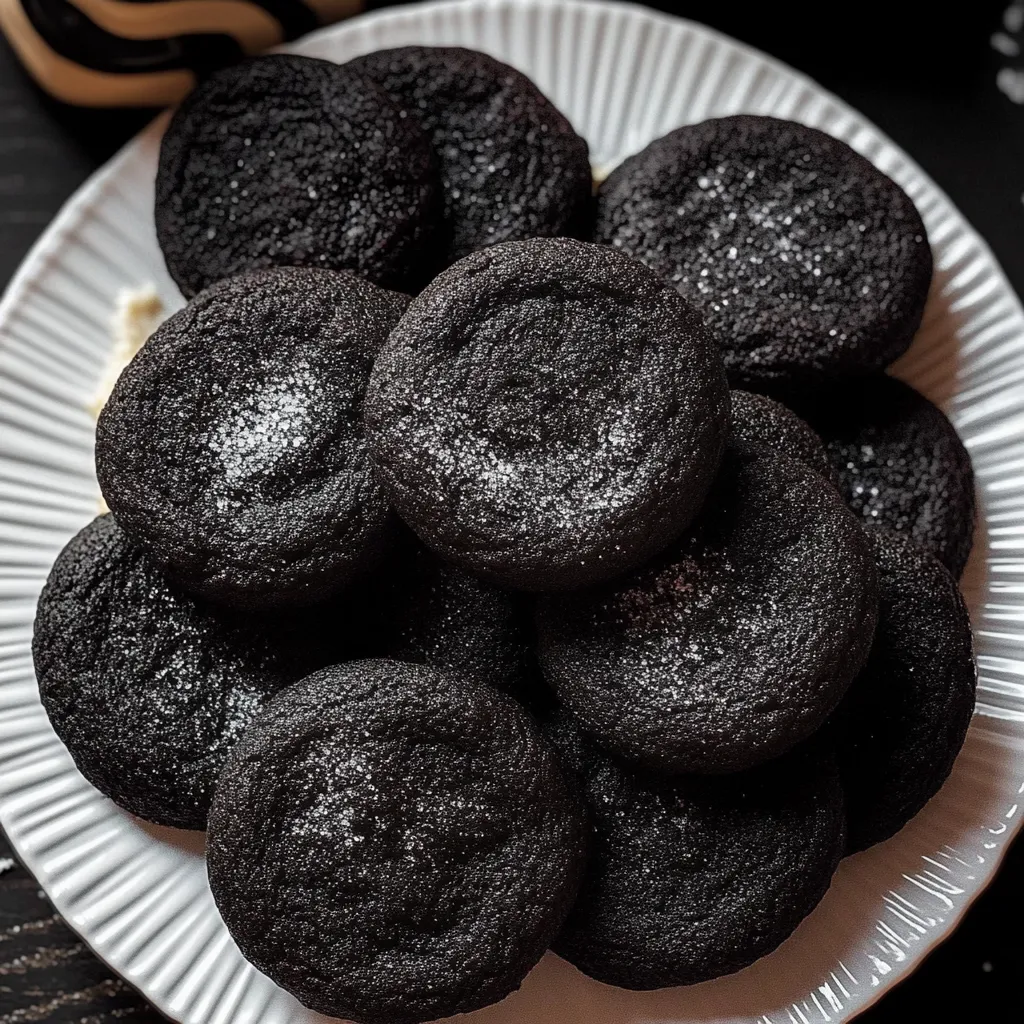
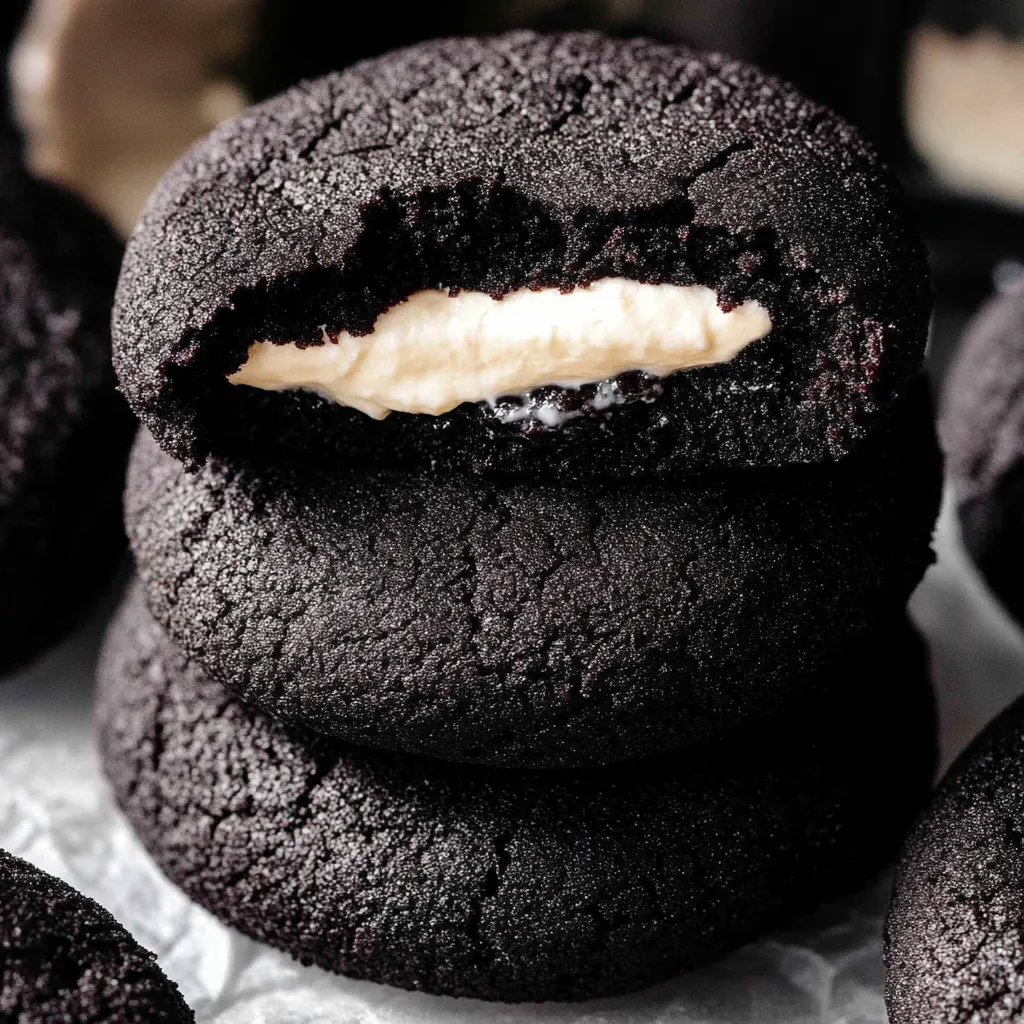
Stuffing chocolate cookies with frozen cheesecake filling creates something that tastes like eating an Oreo and a slice of cheesecake at the same time. The **black cocoa powder** in both the cookie dough and the coating sugar produces that deep, dark color without any food coloring, while giving you that distinctive **Oreo flavor** most people recognize immediately. Each cookie hides a creamy surprise in the center that stays intact during baking because you **freeze it solid first**. The edges bake up crisp while the centers remain chewy, and that cold cheesecake ball in the middle softens just enough in the oven to become smooth and tangy without melting out.
I developed this recipe after my daughter asked why we couldn't just bake the Oreo filling into cookies instead of eating them separately. Her question made me realize that combining those elements into one cookie would actually work if I figured out how to keep the filling from melting everywhere. The **frozen cheesecake ball** solution came after several messy test batches where cream cheese leaked out and created puddles on my baking sheets. Now these cookies show up at every Halloween party we attend, and people always ask for the recipe because they can't believe something this dramatic-looking comes together with regular baking ingredients.
Ingredients and Why They Matter
- Unsalted butter: (½ cup, softened to room temperature) - Room temperature butter creams properly with sugar to incorporate air that makes cookies tender; cold butter won't blend smoothly and melted butter creates flat, greasy cookies
- Brown sugar: (¾ cup packed) - Brown sugar contains molasses that adds moisture and **chewiness** to cookies; pack it firmly into the measuring cup for accurate amounts
- Granulated white sugar: (¼ cup for cookies, 3 tablespoons for filling, 2 tablespoons for coating) - White sugar in the dough balances the brown sugar's moisture while sugar in the filling sweetens the cream cheese, and coating sugar adds crunch
- Egg yolks: (2 large, room temperature) - Using only yolks instead of whole eggs creates **richer, more tender** cookies because yolks contain fat and emulsifiers without the drying effect of egg whites
- Vanilla extract or paste: (1 teaspoon for cookies, ½ teaspoon for filling) - Vanilla bean paste provides the best flavor with visible specks, but extract works perfectly fine and costs less
- All-purpose flour: (1¾ cups, measured correctly) - The right amount of flour gives cookies structure without making them dry or cakey; too much flour creates crumbly cookies that fall apart
- Black cocoa powder: (½ cup for dough, 1 tablespoon for coating) - This ultra-processed cocoa creates both the black color and **Oreo-like flavor**; brands like The Cocoa Trader or similar give you the darkest results
- Baking powder: (½ teaspoon) - Just enough leavening to give cookies a slight rise and tender texture without making them puffy or cake-like
- Salt: (¼ teaspoon) - Salt enhances chocolate flavor and balances sweetness so cookies don't taste one-dimensionally sweet
- Cream cheese: (4 ounces, softened to room temperature) - Full-fat cream cheese creates the smoothest, most stable filling; low-fat versions don't freeze or hold their shape as well
How To Make It
- Prepare the cheesecake filling:
- Take your softened cream cheese and place it in a small mixing bowl along with 3 tablespoons of granulated sugar and ½ teaspoon vanilla. Beat everything together using an electric mixer on medium-high speed for about 2 minutes, scraping down the sides of the bowl halfway through. You want the mixture completely smooth with no lumps of cream cheese remaining, and the sugar should dissolve into the cream cheese rather than staying grainy. The filling will look fluffy and slightly lighter in color when it's ready. Line a small baking sheet or plate with parchment paper. Use a teaspoon measuring spoon or small cookie scoop to portion out the filling into 16 equal mounds, each about 2 teaspoons in size. Try to make them as uniform as possible so they fit evenly inside the cookies later. Use your fingers to quickly roll each portion into a smooth ball - work fast because the warmth from your hands will soften the cream cheese. Place all 16 cheesecake balls on the parchment-lined sheet and immediately transfer to your **freezer**. Let them freeze for at least 2 hours, or until completely solid and rock-hard. These need to be frozen solid or they'll melt into the cookie dough during assembly and baking.
- Mix the dry ingredients:
- While your cheesecake balls freeze, you can start preparing the cookie dough components. Get out a medium bowl and add the flour, black cocoa powder, baking powder, and salt. Use a whisk to stir everything together thoroughly for about 30 seconds, making sure the black cocoa powder distributes evenly throughout the flour with no dark streaks remaining. Whisking also breaks up any clumps in the cocoa powder. Set this bowl aside - you'll add these dry ingredients to the wet mixture later. Preparing dry ingredients separately ensures even distribution and prevents overmixing once you combine everything.
- Cream butter and sugars:
- In a large mixing bowl, combine your softened butter with the brown sugar and ¼ cup granulated white sugar. Make sure your butter is truly at room temperature - it should indent easily when you press it with your finger but not be greasy or melted. Use an electric hand mixer or stand mixer fitted with the paddle attachment, and beat on high speed for about 2 minutes. The mixture will go from looking like separate butter and sugar to becoming light, fluffy, and slightly paler in color. Scrape down the bowl sides at least once during this process. This creaming process incorporates air bubbles that help cookies spread properly and develop good texture. Don't rush this step - proper creaming makes a noticeable difference in the final cookies.
- Add eggs and vanilla:
- Separate your eggs carefully, saving just the yolks and discarding the whites or saving them for another use. Make sure the yolks are at room temperature by letting them sit out for 30 minutes, or place them in a bowl of warm water for 5 minutes. Add both yolks and 1 teaspoon vanilla to your butter-sugar mixture. Beat on medium speed for a full minute, which seems longer than necessary but creates the right texture. The mixture should become noticeably paler in color and increase slightly in volume, looking almost mousse-like. This beating incorporates air and emulsifies the fat from the butter and yolks, creating a smooth base that will produce tender cookies. If you skip this step or don't beat long enough, your cookies will be denser and less tender.
- Combine wet and dry ingredients:
- Pour your prepared dry ingredient mixture into the bowl with the wet ingredients. Mix on low speed, pulsing the mixer rather than running it continuously to prevent flour from flying everywhere. Mix just until you see no more dry flour streaks and everything looks uniformly dark and combined. The dough will be quite thick and stiff, pulling away from the bowl sides. Don't overmix once the flour disappears or you'll develop too much gluten, making cookies tough instead of tender. A few seconds of mixing past the point where flour disappears is fine, but don't beat it for a full minute.
- Assemble the filled cookies:
- Take your cheesecake balls out of the freezer - they should be completely frozen and very hard. Prepare your work surface and get the cookie dough ready. Use a 2-tablespoon cookie scoop or measuring spoon to portion out the dough into 16 equal pieces. Roll each portion into a smooth ball between your palms. Working with one ball at a time, press it flat in your palm to create a disc about 3 inches across. Place one frozen cheesecake ball in the center of the disc. Carefully bring the edges of the cookie dough up and around the cheesecake, pinching and sealing the dough to completely encase the filling. Make absolutely sure no cheesecake shows through anywhere - any exposed areas will leak during baking. Roll the filled ball between your palms again to smooth out any seams and create a uniform sphere. The dough will warm slightly from your hands, making it easier to seal. Repeat with all remaining dough portions and cheesecake balls, keeping unused cheesecake balls in the freezer until you're ready to wrap them.
- Coat in cocoa sugar:
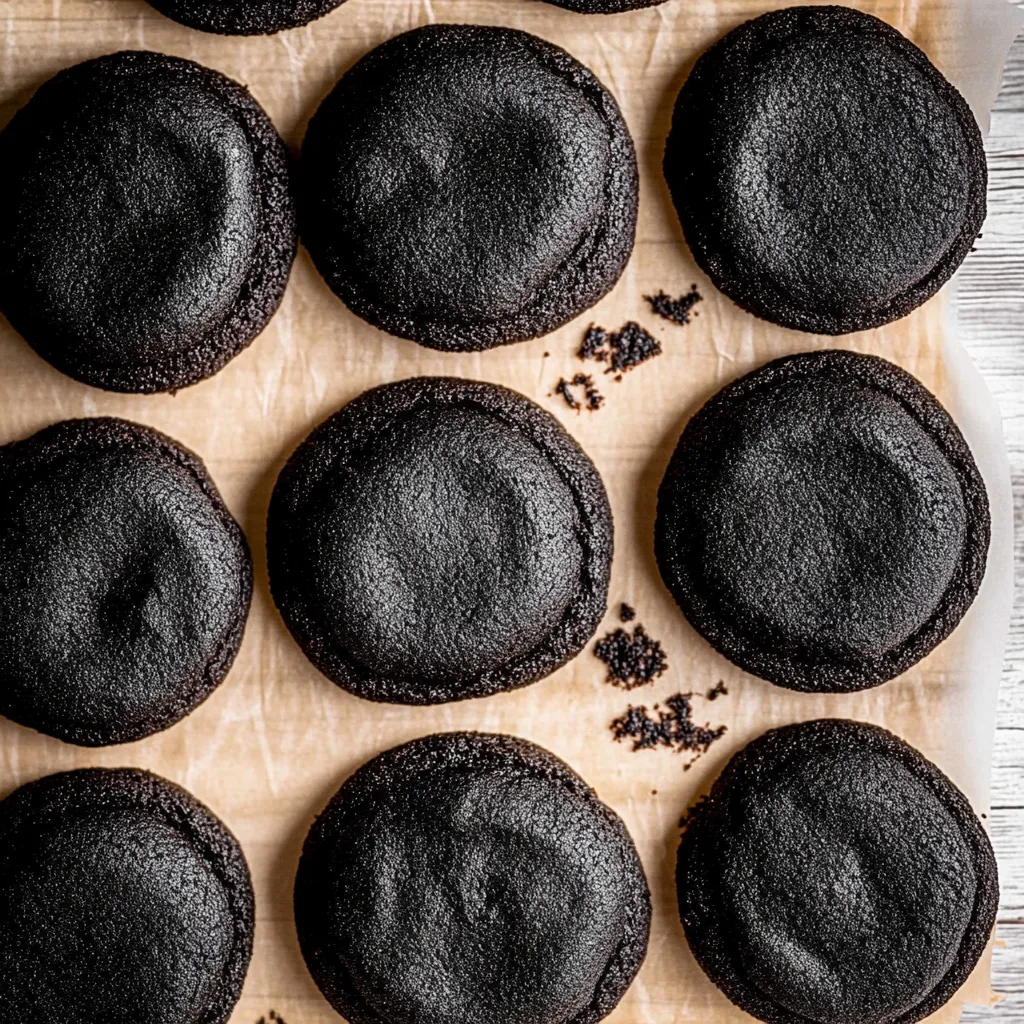
- In a small shallow bowl, whisk together 2 tablespoons granulated sugar with 1 tablespoon black cocoa powder until completely combined with no white sugar visible. This creates your coating mixture. Take each filled cookie ball and roll it around in this cocoa sugar mixture, coating the entire surface. Press gently so the sugar adheres properly. The coating adds visual interest, extra chocolate flavor, and a slightly crunchy exterior texture. Place each coated ball on a parchment-lined baking sheet, spacing them at least 3 inches apart because they'll spread during baking. Only place 6 cookies per sheet - crowding them leads to uneven baking and cookies that merge together.
- Bake in batches:
- Preheat your oven to 350°F and make sure the rack sits in the center position. Bake only 6 cookies at a time for the most even results. Slide the baking sheet into the preheated oven and set your timer for 11-13 minutes. The cookies are done when they look set around the edges but still slightly soft in the centers. They'll continue firming up as they cool, so don't overbake trying to make them completely hard. Overbaked cookies become dry and crumbly instead of chewy. When you remove the pan from the oven, the cookies will be puffy. Let them sit on the baking sheet for a full 10 minutes without moving them - this cooling time allows the structure to set and the cheesecake filling to firm back up. After 10 minutes, use a spatula to carefully transfer cookies to a wire cooling rack. They need to cool completely before eating, usually another 20-30 minutes, so the cheesecake filling reaches the right consistency instead of being runny.
 Pin it
Cream cheese has been my secret weapon for adding richness to desserts ever since I learned that a little bit goes a long way in creating luxurious texture. These cookies taught me that freezing soft fillings solves so many baking problems - you can stuff almost anything into cookie dough if you freeze it first. My husband initially thought these would be too complicated for regular baking, but after watching me make them twice, he realized the process just involves a few simple steps done in order. Now he requests these specifically for his office parties because they look impressive and his coworkers always assume we bought them from an expensive bakery.
Why Freezing Matters
The **frozen cheesecake center** represents the key technique that makes these cookies work without turning into a melted mess. Room temperature or even chilled cream cheese filling would immediately start melting when you wrap warm cookie dough around it, making sealing impossible. Worse, that soft filling would melt completely during baking, leaking out through any tiny crack in the dough and creating puddles on your baking sheet. Frozen filling stays solid long enough for you to wrap and seal the dough around it. During the first few minutes of baking, the frozen center acts like an ice pack, keeping its immediate surroundings cooler while the outer cookie dough bakes and sets. By the time the filling thaws and warms, the cookie structure has already firmed up enough to contain it. This same freezing technique works for stuffing cookies with chocolate ganache, peanut butter, caramel, or any other soft filling.
Measuring Flour Correctly
More cookies fail because of **incorrect flour measurement** than any other reason, and these cookies are particularly sensitive to having the right flour amount. When you scoop a measuring cup directly into a flour bag or canister, you compress the flour and end up with significantly more than the recipe intends - sometimes 25-30% more. That excess flour creates dry, crumbly cookies that fall apart and taste chalky. The correct method involves **spooning flour into your measuring cup** with a spoon, letting it pile up over the rim, then sweeping across the top with a knife or straight edge to level it off. This gives you the actual intended amount. Even better, use a kitchen scale to weigh flour - 1 cup should weigh 125 grams. Taking an extra 30 seconds to measure properly prevents disappointing results and wasted ingredients.
Room Temperature Ingredients
Recipes specify **room temperature butter, eggs, and cream cheese** for actual reasons, not just to be difficult. Cold butter won't cream properly with sugar because it's too firm to trap air bubbles, resulting in dense cookies. Cold eggs don't emulsify smoothly into the butter mixture and can cause it to look curdled or separated. Cold cream cheese won't beat smooth for the filling and will have lumps. Room temperature means these ingredients are soft and pliable, sitting around 65-70°F. To bring ingredients to room temperature quickly, leave butter on the counter for 30-45 minutes, place eggs in a bowl of warm tap water for 5 minutes, and microwave cream cheese for 10-15 seconds at reduced power. These small temperature considerations make noticeable differences in how recipes turn out.
The Coating Technique
Rolling cookies in **black cocoa sugar** before baking serves multiple purposes beyond just looking pretty. The sugar coating creates **texture contrast** - a slightly crunchy exterior that gives way to chewy cookie and creamy filling. It adds an extra hit of chocolate flavor right at the surface where your tongue first contacts the cookie. The black cocoa in the coating also intensifies the dark color, making cookies look even more dramatic. Regular granulated sugar alone would add sweetness and crunch but wouldn't contribute to the Oreo flavor profile or Halloween aesthetic. This coating technique works with other flavor combinations too - cinnamon sugar, cocoa powder and espresso powder, or any spice blend you want to feature prominently on the outside of cookies.
Batch Baking Strategy
Baking only **six cookies per sheet** instead of cramming more onto each pan produces consistently better results even though it takes longer overall. Crowded cookies don't get enough air circulation and bake unevenly - centers remain underdone while edges burn. Cookies placed too close together can spread and merge into each other, creating awkward connected shapes instead of distinct rounds. That **3-inch spacing** might seem excessive but accounts for how much these cookies spread during baking. Baking in batches also lets you keep remaining cookie dough balls refrigerated so they don't warm up and get too soft before baking. The extra time is worth it when every cookie comes out perfectly shaped and evenly baked rather than having some good ones and some disappointing ones.
Storage and Make-Ahead Options
These cookies keep well if stored properly, making them suitable for preparing ahead of parties or events. Once completely cooled, layer them in an airtight container with parchment paper between layers to prevent sticking. They'll stay good at **room temperature for 3 days**, maintaining that ideal texture. For longer storage, **freeze baked cookies** in a freezer-safe container for up to 2 weeks - let them thaw at room temperature before serving. You can also freeze the assembled but **unbaked cookie balls**, then bake them directly from frozen, adding 2-3 extra minutes to the baking time. The cheesecake filling can be made and frozen up to a month in advance, saving you prep time when you're ready to bake. Having these components ready to assemble makes it easy to bake fresh cookies whenever you want them.
 Pin it
These black velvet cheesecake cookies prove that impressive-looking treats don't always require complicated techniques or unusual equipment. The concept sounds fancy - chocolate cookies stuffed with frozen cheesecake and coated in black sugar - but every step uses basic baking skills you probably already have. The dramatic appearance comes from the naturally dark cocoa powder rather than food coloring, and that hidden cheesecake center creates genuine surprise and delight when people bite into them. Making these reminds me why I love baking for Halloween specifically - you can be creative and playful with colors and presentations in ways that might seem too bold for everyday desserts. When someone bites into a pitch-black cookie and discovers creamy cheesecake inside, their reaction makes every minute of freezing filling and wrapping dough completely worthwhile.
Frequently Asked Questions
- → Can I use regular cocoa powder instead of black cocoa?
- Yes, but your cookies won't be as dark. Black cocoa gives that deep black color and stronger chocolate flavor, but regular cocoa works fine if that's what you have.
- → How long do these cookies stay fresh?
- Keep them in an airtight container in the fridge for up to 5 days. The cheesecake filling needs to stay cold, so don't leave them out at room temperature.
- → Can I freeze these cookies?
- Absolutely! Freeze them in a single layer, then transfer to a freezer bag. They'll keep for up to 3 months. Thaw in the fridge before eating.
- → Why do I need to freeze the cheesecake filling first?
- Freezing makes it way easier to wrap the cookie dough around the filling without it squishing out. Plus, it helps the filling stay intact while baking.
- → What if my cookies spread too much while baking?
- Make sure your butter isn't too soft and that the cheesecake balls are completely frozen. You can also chill the shaped cookies for 15 minutes before baking.
- → Do these really taste like Oreos?
- They have that same dark chocolate cookie flavor with a creamy filling, so yes! The black cocoa powder is what Oreos use, which gives them that signature taste.
- → Can I make the dough ahead of time?
- Sure! Wrap the dough tightly and refrigerate for up to 2 days. Let it sit at room temperature for 10 minutes before shaping if it gets too firm.