
 Pin it
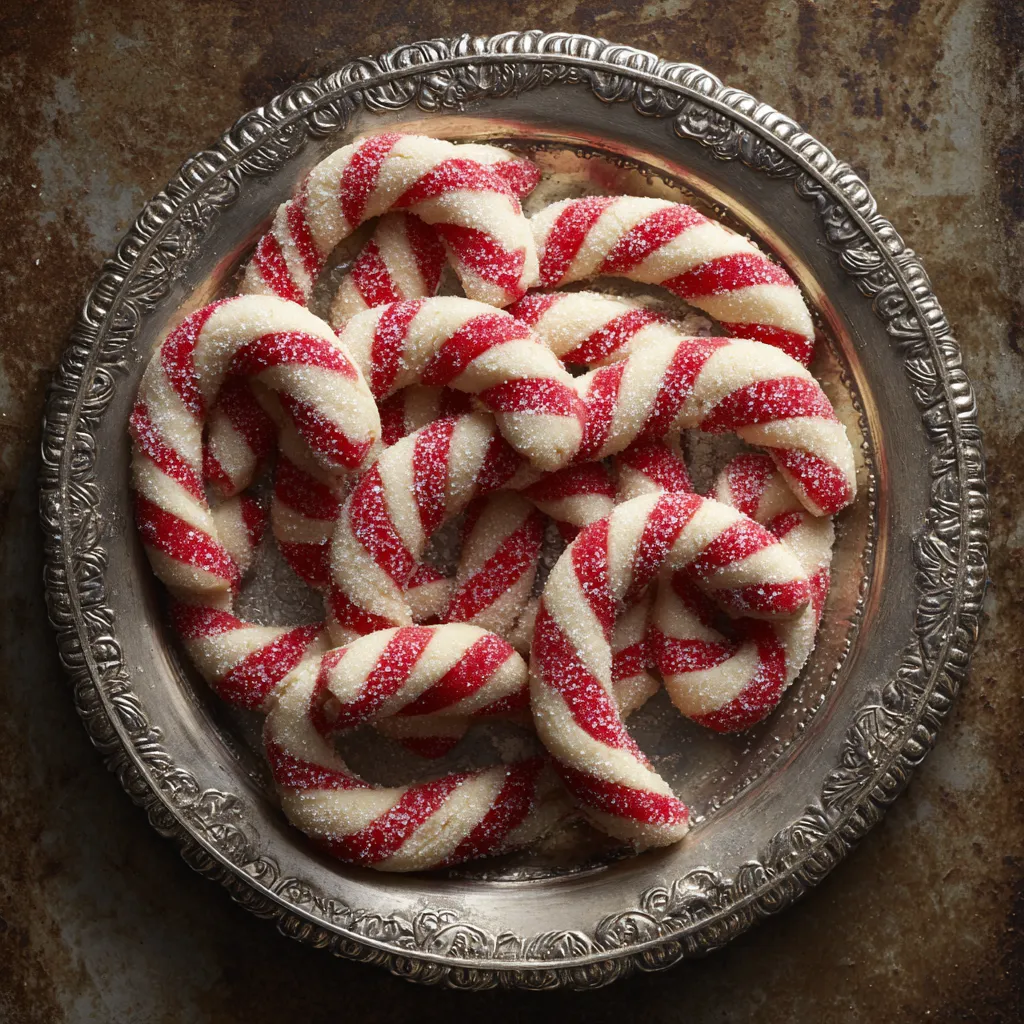
These candy cane cookies bring the magic of Christmas right into your kitchen with their festive red and white swirls that look almost too pretty to eat. Unlike actual candy canes that can be tooth-achingly sweet, these have just the right amount of peppermint flavor balanced with buttery cookie goodness. The first time I made them, my daughter insisted on helping twist the dough, and even though some looked a bit wonky, they all disappeared within hours because they tasted so good.
I've been making these every December for the past seven years, and they've become such a tradition that my family would riot if I tried to skip them. Last year my neighbor asked for the recipe after trying one at our holiday party, and she told me later that her kids wouldn't stop asking her to make "those striped cookies" all winter long.
Ingredients You'll Need
- Unsalted butter: softened to room temperature - This creates the rich, tender base for your cookies and needs to be soft enough that your finger leaves an indent when you press it, not cold and hard or melted and greasy
- Granulated sugar: Provides sweetness and helps create that slightly crisp exterior while keeping the inside soft, plus it creams with the butter to add air and lightness to the dough
- Large egg: (at room temperature) - Binds everything together and adds moisture and structure to the cookies; room temperature eggs mix in more smoothly without leaving streaks in your dough
- Pure peppermint extract: This is what gives these cookies their signature candy cane flavor, and pure extract tastes so much better than artificial versions that have that chemical aftertaste
- Pure vanilla extract: Enhances all the other flavors and adds depth and warmth that balances the coolness of the peppermint beautifully
- All-purpose flour: Forms the structure of the cookies and determines the final texture, so measuring it correctly is crucial for cookies that aren't too dense or too fragile
- Baking powder: (fresh and not expired) - Gives the cookies a bit of lift and that tender crumb, but old baking powder that's lost its potency won't work properly
- Salt: A small amount enhances all the sweet flavors and prevents the cookies from tasting flat or one-dimensional
- Red gel food coloring: Creates that vibrant candy cane color, and gel works better than liquid because it's more concentrated and doesn't add extra moisture that could mess up your dough consistency
- Crushed peppermint candies or candy canes: These go on top right after baking while the cookies are still warm, adding a crunchy texture and extra burst of mint flavor
Step-by-Step Instructions
- Combine your dry ingredients and prepare the base:
- Start by whisking together your flour, baking powder, and salt in a medium bowl until everything is evenly distributed throughout, making sure there are no clumps of baking powder hiding in there. Set this bowl aside while you work on the wet ingredients. In your stand mixer fitted with the paddle attachment, or in a large bowl if using hand beaters, add your softened butter and sugar, then beat them together on medium speed for about three full minutes. You'll see the mixture transform from grainy and yellow to pale, fluffy, and almost white as air gets incorporated, which is exactly what you want for tender cookies.
- Add the wet ingredients and mix until smooth:
- Turn your mixer speed down to low and crack in your egg, followed by the vanilla extract and peppermint extract, beating everything together until fully combined and stopping halfway through to scrape down the sides and bottom of the bowl with a rubber spatula. This ensures everything mixes evenly without leaving pockets of unmixed butter stuck to the sides. The mixture should look smooth, creamy, and uniform in color with no visible streaks of egg yolk or butter chunks remaining.
- Incorporate the flour mixture carefully:
- With your mixer still on low speed to prevent flour from flying everywhere, gradually add your flour mixture to the wet ingredients, beating just until you can no longer see any dry flour streaks in the dough. Stop mixing as soon as the flour is incorporated because overmixing at this stage develops too much gluten and makes cookies tough instead of tender. The dough should come together into a cohesive mass that pulls away from the sides of the bowl slightly.
- Divide and color half the dough red:
- Remove half of the dough from your mixing bowl and set it aside on a clean work surface or in a separate bowl, covering it so it doesn't dry out. To the remaining dough in the mixer, add several drops of red gel food coloring, starting with just a small amount because you can always add more but can't take it away. Mix on low speed until the color is completely and evenly distributed throughout with no white streaks remaining, adding more coloring drop by drop if you want a deeper, more vibrant red.
- Chill the dough until firm enough to handle:
- Wrap each portion of dough separately in plastic wrap, pressing it down into a disk about one inch thick, which helps it chill faster and more evenly than leaving it in a ball. Place both wrapped disks in the refrigerator for at least four hours or until they're firm to the touch and hold their shape when you press them. This chilling step is absolutely crucial because warm dough will be too soft and sticky to roll into ropes, and it'll stick to everything and lose its shape while you're trying to twist it.
- Cut the chilled dough and form into cubes:
- Once your dough is thoroughly chilled and firm, unwrap one disk at a time and use a sharp knife to cut it into one-inch cubes, which gives you uniform pieces that will all bake at the same rate. Work relatively quickly so the dough doesn't warm up too much from your hands, and if it starts getting soft and sticky, pop it back in the fridge for ten or fifteen minutes before continuing.
- Roll the cubes into long ropes:
- Take one cube of white dough and one cube of red dough, rolling each between your palms first to form them into smooth balls without any cracks or rough spots. Lightly dust your work surface with flour, then place one ball on the counter and gently roll it back and forth under your palm, moving your hand from the center outward to elongate the dough into a rope about five inches long and even in thickness from end to end. Repeat with the other color, trying to make both ropes approximately the same length and thickness so they twist together evenly.
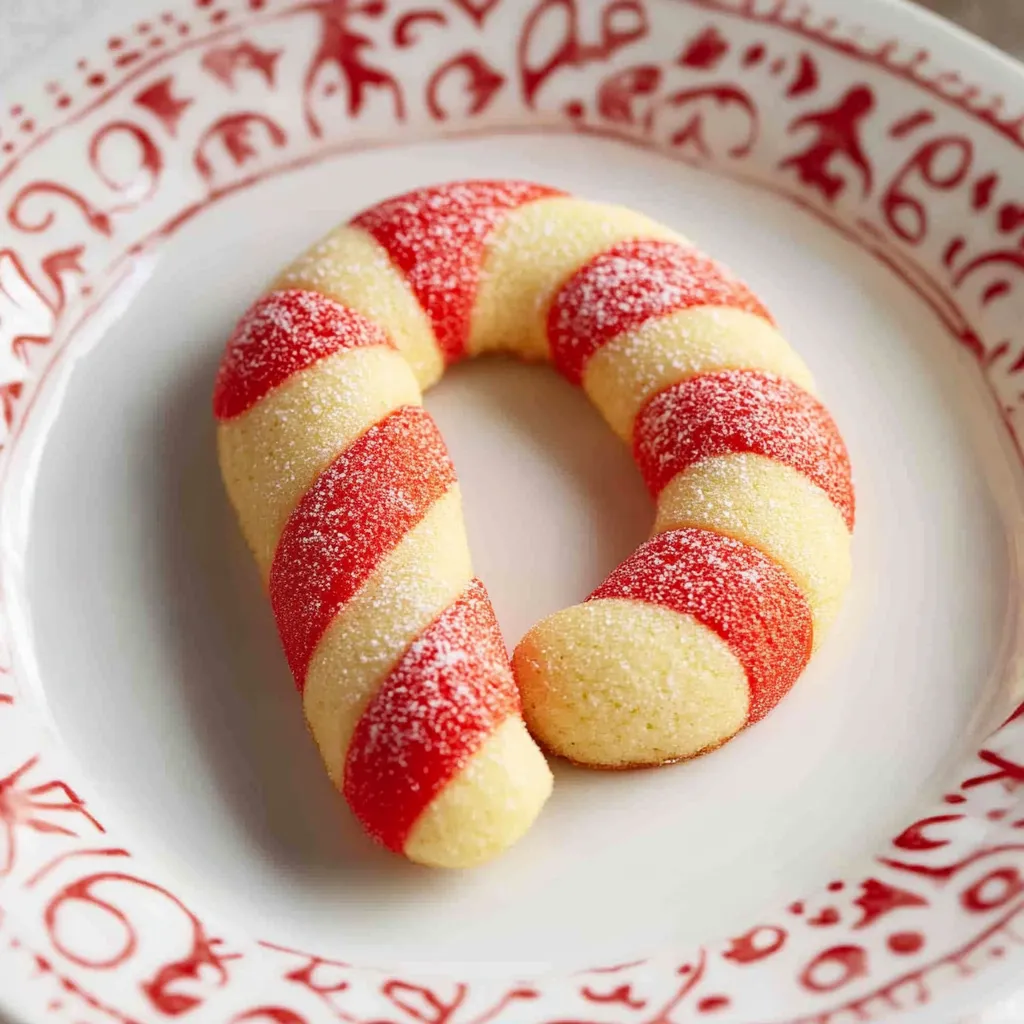
- Twist the ropes together and shape into candy canes:
- Lay the white rope and red rope side by side on your work surface, then carefully pick them up at one end and twist them around each other all the way down the length, working gently so they don't break or flatten. The twist should be tight enough that they hold together but not so tight that you smoosh them into one blob. Once twisted, gently curve the top inch or so of one end downward to create that classic candy cane hook shape, bending it carefully so it doesn't crack.
- Bake until set and top with crushed candy:
- Place your shaped candy canes on a parchment-lined baking sheet, spacing them about two inches apart because they'll spread slightly as they bake. Slide the sheet into your preheated oven and bake for about ten minutes, watching carefully during the last few minutes to make sure the edges don't brown too much. The cookies are done when they look dry and set but are still pale, not golden brown. As soon as you pull them from the oven, immediately sprinkle the crushed peppermint candies over the top while they're still hot so the pieces stick to the surface. Let them cool on the baking sheet for about five minutes so they firm up enough to move without breaking, then carefully transfer them to a wire cooling rack to cool completely before storing or serving.
 Pin it
My kids have become little experts at twisting these cookies after making them together for so many years, and I love how this recipe has created memories beyond just eating the finished cookies. There's something special about sitting around the kitchen table with flour everywhere and misshapen candy canes that still taste absolutely delicious, and those moments matter more than perfect-looking cookies ever could.
Working with Cookie Dough Temperature
Temperature control is honestly the secret to success with these cookies, and I learned this the hard way after my first attempt resulted in sticky dough that wouldn't hold its shape and candy canes that looked more like blobs. When your dough is properly chilled, it rolls smoothly into ropes that maintain their round shape and twist together cleanly without smooshing flat. If you notice the dough starting to get soft and sticky while you're working with it, don't try to power through and finish shaping all of them. Put the unworked dough back in the fridge immediately and let it firm up for fifteen minutes, which saves you so much frustration and results in much prettier cookies. On particularly warm days or in hot kitchens, I sometimes work with just a quarter of the dough at a time, keeping the rest chilled until I'm ready for it.
Getting Consistent Colors Throughout
Achieving that vibrant, even red color takes a bit more food coloring than you might expect, especially if you're using liquid instead of gel. Start conservatively with just a few drops and mix thoroughly, then assess the color and add more gradually until you reach that classic candy cane red. The color will look slightly lighter after baking, so aim for something a bit deeper than you think you want. I made the mistake once of not mixing the coloring in completely, and ended up with streaky dough that looked marbled instead of solid red, which actually turned out kind of cool but wasn't what I was going for. Make sure you mix until every speck of white disappears and the color is completely uniform.
Mastering the Twisting Technique
The twisting part intimidated me at first because I thought there must be some secret technique to getting them to look right, but it's actually much simpler than it seems. The key is making sure both ropes are the same length and thickness before you start twisting, which ensures they spiral evenly around each other instead of one dominating the other. Hold both ropes at one end and twist them around each other gently but firmly, kind of like braiding but with only two strands. If a rope breaks while you're twisting, just pinch it back together and keep going because minor imperfections disappear once they're baked. The candy cane curve at the top is the finishing touch, and you want to bend it while the dough is still pliable enough to curve without cracking.
Topping Options and Timing
Those crushed peppermint candies on top add such a nice crunch and extra hit of mint flavor that I never skip them, but timing matters more than you'd think. You absolutely must sprinkle them on while the cookies are still hot from the oven because the residual heat slightly melts the bottom of the candy pieces, making them stick to the cookie surface. If you wait until they cool, the candies just roll off and don't adhere properly. I crush my candy canes by putting them in a sealed plastic bag and whacking them with a rolling pin, which is also great stress relief during the hectic holiday season. If you don't have candy canes, coarse sanding sugar gives a pretty sparkle, or you could skip the topping entirely because the cookies are still delicious plain.
Storage and Make-Ahead Strategies
These cookies store beautifully, which makes them perfect for baking ahead during the busy holiday season when you're juggling a million other things. Once they're completely cooled, I layer them in an airtight container with parchment paper between each layer so they don't stick together or break. They stay fresh at room temperature for about a week, though they rarely last that long in my house. The dough itself is incredibly freezer-friendly, so I often make a double batch and freeze half of the shaped, unbaked candy canes on a baking sheet until solid, then transfer them to a freezer bag. When I need fresh cookies, I just bake them straight from frozen, adding maybe an extra minute or two to the baking time.
Troubleshooting Common Issues
Cracking dough is probably the most common problem people encounter with this recipe, and it happens when the dough is either too cold and stiff or has been sitting out too long and dried out. If your ropes crack as you roll them, the dough needs to chill longer or you need to work faster before it warms up. Dough that won't hold its shape usually means it's too warm, while dough that's impossible to roll is too cold. There's a sweet spot where it's firm but pliable, and once you make these a few times, you'll recognize that perfect consistency immediately. If your cookies spread too much during baking, your dough was probably too warm when it went into the oven, or your oven temperature is running low.
 Pin it
These candy cane cookies have earned their place as a non-negotiable part of our holiday traditions, right up there with decorating the tree and watching our favorite Christmas movies. There's something deeply satisfying about transforming simple cookie dough into something so festive and beautiful, and the fact that they taste as good as they look makes them the complete package for holiday baking.
Frequently Asked Questions
- → Can I make the dough ahead of time?
- Yes, you can keep the dough wrapped in the fridge for up to 3 days before baking. Just let it sit out for a few minutes if it gets too hard to work with.
- → Why is my dough cracking when I roll it?
- The dough is probably too warm or too dry. Put it back in the fridge for 15 minutes to firm up, and make sure to keep any dough you're not working with covered in plastic wrap.
- → Can I use liquid food coloring instead of gel?
- Yes, liquid works fine. Start with about a teaspoon and add more until you get the red color you want. Gel is just more concentrated so you need less of it.
- → Do these cookies taste very minty?
- They have a nice peppermint flavor that's similar to candy canes but not overwhelming. If you want them less minty, you can reduce the peppermint extract to 1 teaspoon.
- → How do I store these cookies?
- Keep them in an airtight container at room temperature for up to a week. You can also freeze them for up to 3 months if you want to make them ahead.
- → Can I skip the twisting and just make regular round cookies?
- Sure! You can absolutely roll them into balls and flatten them slightly if you want an easier version. They'll still taste great.