
 Pin it
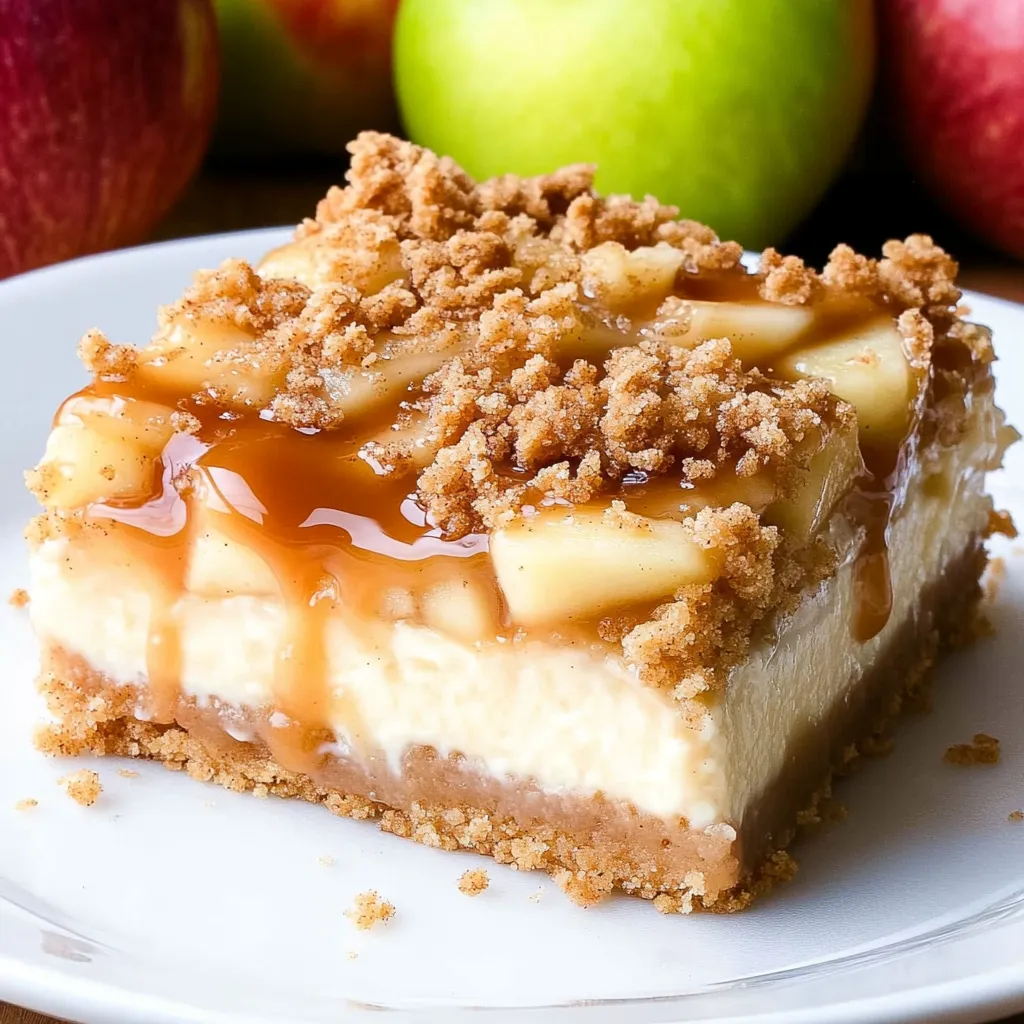
Layering buttery crust, creamy cheesecake, spiced apples, and crumbly streusel into one pan creates bars that taste like apple pie met cheesecake and they decided to become best friends. The bottom layer stays crisp while the cheesecake middle provides tang and richness, and those cinnamon-spiced apples add texture and fall flavor throughout. Finishing with caramel drizzle right before serving ties everything together into something that looks bakery-fancy but comes from simple ingredients mixed in bowls. These work equally well for dessert after dinner, afternoon coffee treats, or bringing to gatherings where you want people asking for the recipe.
Apple cheesecake became my go-to impressive dessert after making regular cheesecake so many times it felt boring. Adding the spiced apple layer and streusel topping transformed familiar flavors into something that felt new and seasonal. The first batch I made for Thanksgiving got completely devoured before pumpkin pie even got touched, which told me I'd found something special. Now I make these every October through December, and my family has stopped requesting plain cheesecake because these apple bars satisfy that creamy tang while adding so much more.
Ingredients and Why They Matter
- Digestive biscuits or graham crackers: (200g, about $1 rac{1}{2}$ cups crumbs) - Mild, slightly sweet cookies create neutral base; graham crackers substitute perfectly in the US
- Unsalted butter: (90g, about 6 tablespoons melted) - Binds crumbs together and adds rich flavor; salted butter works but tastes saltier
For the Cheesecake Layer:
- Full-fat cream cheese: (450g, about 16 ounces, room temperature) - Must be full-fat for proper texture; low-fat versions don't set correctly and taste inferior
- Granulated sugar: (100g, about $ rac{1}{2}$ cup) - Sweetens the tangy cream cheese; caster or powdered sugar work as substitutes
- Large eggs: (2, room temperature) - Provide structure and help cheesecake set properly; cold eggs don't incorporate smoothly
- Vanilla extract: (1 teaspoon) - Enhances overall flavor without being identifiable as a distinct taste
For the Apple Layer:
- Granny Smith apples: (3 medium, peeled and diced) - Tart apples balance sweet cheesecake better than soft, sweet varieties; any firm, tart apple works
- Ground cinnamon: (1 teaspoon) - Classic warming spice that defines fall flavor
- Ground nutmeg: ($ rac{1}{4}$ teaspoon) - Adds depth and complexity to the spice blend
- Granulated white sugar: (2 tablespoons) - Draws out apple juice and adds slight sweetness; light brown sugar substitutes
- Lemon zest: (from $ rac{1}{2}$ lemon, optional) - Brightens flavors and adds freshness that cuts through richness
For the Streusel Topping:
- All-purpose flour: (100g, about $ rac{3}{4}$ cup) - Creates structure for the crumble; self-raising flour works too
- Demerara or turbinado sugar: (50g, about $ rac{1}{4}$ cup) - Large crystals create crunchy texture and subtle caramel notes
- Granulated white sugar: (50g, about $ rac{1}{4}$ cup) - Adds sweetness alongside the coarser sugar
- Cold unsalted butter: (90g, about 6 tablespoons, diced) - Must be cold to create proper crumbly texture; warm butter makes it spread instead
- Ground cinnamon: ($ rac{1}{2}$ teaspoon) - Extra spice in the topping reinforces the apple flavors below
For Finishing:
- Caramel sauce: (about $ rac{1}{2}$ cup for drizzling) - Homemade or store-bought both work; adds sweet, sticky finishing touch
How To Make It
- Prepare the crust:
- Line an 8x8 inch square baking pan with parchment paper, leaving plenty hanging over two opposite sides to create handles for lifting later. This overhang is crucial for removing the finished bars cleanly. Place your digestive biscuits or graham crackers in a food processor and pulse until they become fine crumbs, or crush them in a sealed plastic bag using a rolling pin. You need about $1 rac{1}{2}$ cups of fine crumbs total. Transfer the crumbs to a medium bowl and pour in the melted butter. Stir with a fork until the mixture looks like wet sand with every crumb coated in butter. Dump this mixture into your prepared pan and press it firmly into an even layer across the entire bottom. Use the bottom of a measuring cup or flat glass to really compact it, pressing hard to create a sturdy base that won't crumble later. Place the pan in the refrigerator to chill while you prepare the other components. This chilling firms up the butter and helps the crust hold together during baking.
- Make the cheesecake filling:
- In a large mixing bowl, add your room-temperature cream cheese. Beat with an electric mixer on medium speed for about a minute until smooth and creamy with no lumps remaining. Add the sugar and beat for another minute until well combined and slightly fluffy. Crack in the eggs one at a time, beating after each addition until just incorporated. Don't overmix once the eggs are added or you'll incorporate too much air that creates cracks during baking. Add the vanilla extract and beat briefly to combine. Scrape down the bowl sides with a spatula to ensure everything mixes evenly. The finished filling should look smooth, pale, and creamy. Set this aside while you prepare the apples.
- Prepare the spiced apples:
- Peel your apples using a vegetable peeler, then cut them into quarters, remove the cores, and dice them into roughly $ rac{1}{2}$-inch cubes. You want pieces small enough to eat easily but large enough to maintain some texture after baking. Place the diced apples in a medium bowl and add the cinnamon, nutmeg, sugar, and lemon zest if using. Toss everything together with a spoon until the apples are evenly coated with the spices and sugar. Let this mixture sit for about 5 minutes while you preheat the oven. During this time, the sugar will start drawing out juice from the apples, creating a light syrup that adds moisture and flavor.
- Make the streusel topping:
- In another bowl, combine the flour, both sugars, and cinnamon. Stir these dry ingredients together briefly. Add the cold, diced butter pieces. Use your fingertips to rub the butter into the flour mixture, working quickly so your warm hands don't melt the butter. Pinch and squeeze the mixture until it resembles coarse breadcrumbs with some pea-sized butter pieces remaining. You want a mixture that clumps when squeezed but isn't one cohesive dough. If the butter starts melting from your hands, pop the bowl in the fridge for a few minutes. Once the streusel reaches the right texture, refrigerate it until needed. Cold streusel creates better texture during baking than room-temperature crumble.
- Assemble the layers:
- Preheat your oven to $350^{\circ} ext{F}$ ($175^{\circ} ext{C}$). Remove your chilled crust from the refrigerator. Pour the cheesecake filling over the crust, spreading it gently with a spatula to cover the entire surface in an even layer. Tap the pan firmly on the counter a few times to release any air bubbles trapped in the filling. Drain any excess liquid that accumulated in the apple bowl, then scatter the spiced apple pieces evenly over the cheesecake layer, distributing them across the entire surface. You want apples in every eventual square. Take your chilled streusel topping and crumble it over the apples, breaking up any large clumps with your fingers and scattering it to cover everything. The streusel layer doesn't need to be perfectly even - some gaps and texture variation actually look better.
- Bake until set:
- Place the assembled pan in your preheated oven on the center rack. Bake for 45-50 minutes, checking around 45 minutes. The bars are done when the edges look set and slightly golden, the streusel topping has browned nicely, and the center still jiggles very slightly when you gently shake the pan. A small jiggle is good - it means the cheesecake will set perfectly as it cools without being overbaked and dense. If the streusel browns too quickly before the cheesecake sets, loosely tent aluminum foil over the top for the remaining baking time. When done, turn off the oven and crack the door open slightly. Let the bars cool in the oven for 10 minutes with the door ajar. This gradual temperature change prevents cracking.
- Cool completely:
- Remove the pan from the oven and place it on a wire cooling rack. Let it cool at room temperature for about an hour until no longer warm. Once cooled to room temperature, transfer the entire pan to the refrigerator. Chill for at least 2-3 hours, or preferably overnight. This extended chilling time allows the cheesecake layer to firm up completely and makes cutting clean slices much easier. Don't try to cut these while warm or the cheesecake will be too soft and messy.
- Cut and serve:
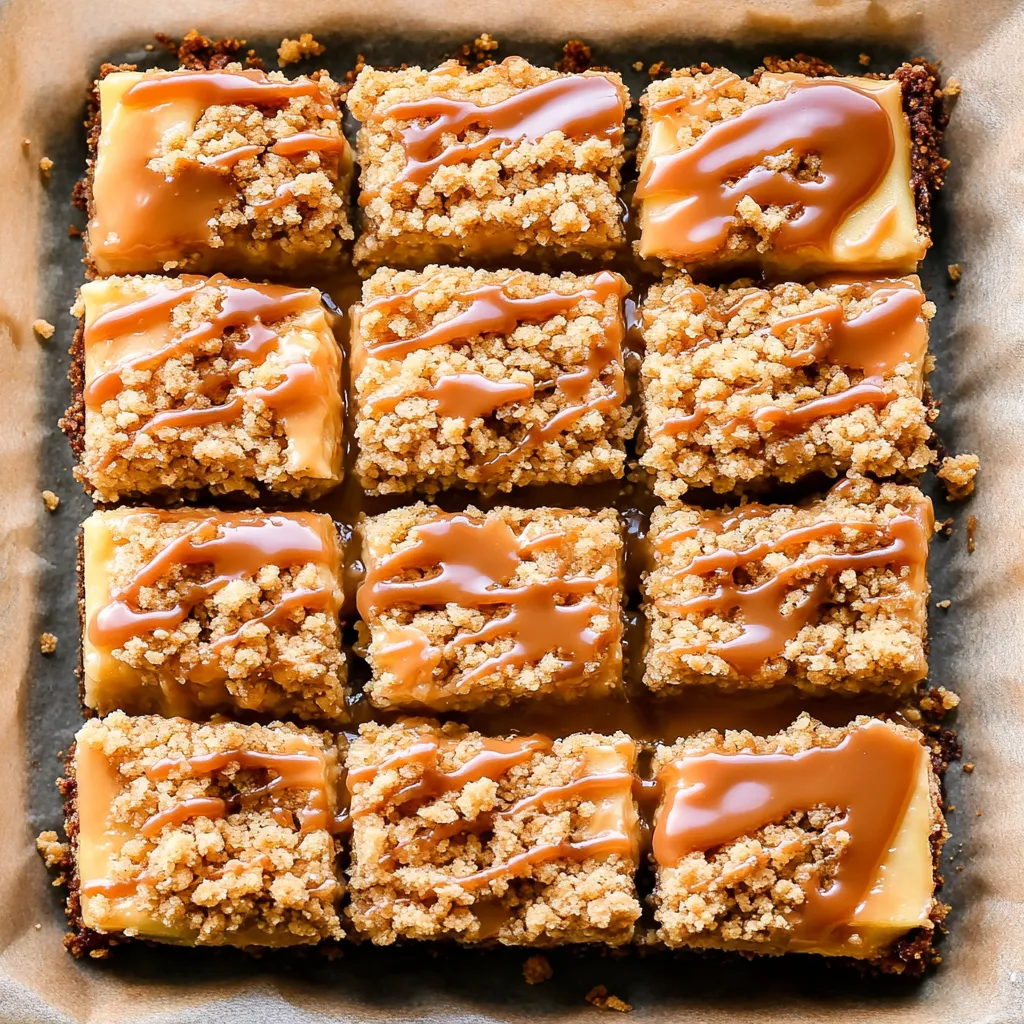
- When ready to serve, remove the pan from the refrigerator and let it sit at room temperature for 30-60 minutes. Room temperature brings out the best flavors and softens the texture slightly. Use the parchment paper handles to lift the entire square out of the pan onto a cutting board. Get a large, sharp knife and wipe it clean with a damp towel. Cut the square into 9 or 16 pieces depending on preferred size, wiping the knife clean after each cut for neat edges. Transfer the cut bars to serving plates. Drizzle each bar with caramel sauce right before serving - warm the caramel slightly in the microwave if it's too thick to drizzle. The caramel hardens in the fridge, so adding it at the last minute keeps it perfectly sticky and liquid.
 Pin it
Digestive biscuits became my preferred crust base after using them in British cheesecake recipes that my London cousin shared. They taste similar to graham crackers but slightly less sweet and more buttery, creating neutral flavor that doesn't compete with the filling. American readers can use graham crackers with identical results - the texture and function remain the same. My kids actually prefer making the crust because they get to smash cookies in the food processor, which feels more like playing than cooking to them.
Layering Strategy
The order of layers matters more than you might think for both practical and flavor reasons. The sturdy biscuit crust on the bottom provides structural support that prevents the soft cheesecake from making everything soggy. Cheesecake goes in the middle where it's protected and can set properly surrounded by other ingredients. Apples layer on top of the cheesecake rather than underneath because they release juice during baking - putting them under the cheesecake would create a soggy mess. Streusel tops everything because it needs direct oven heat to crisp up and brown. This specific order creates the ideal texture in each component.
Apple Selection and Preparation
Choosing the right apples affects both flavor and texture significantly. Granny Smiths work perfectly because their firm flesh holds shape during baking without turning to mush, and their tart flavor balances the sweet caramel and rich cheesecake. Other good options include Honeycrisp, Braeburn, or any apple labeled as good for baking. Avoid Red Delicious, Gala, or other soft, sweet apples that become mushy and add cloying sweetness. Cutting apples into uniform $ rac{1}{2}$-inch pieces ensures even cooking - larger chunks stay crunchy while tiny pieces disappear. Some cooks prefer leaving a bit of peel on for color and texture, though most people peel them completely.
Streusel Success
Creating perfect crumbly streusel requires understanding how fat and flour interact. Cold butter stays in distinct pieces that create pockets of flakiness during baking. Working quickly with cool hands prevents the butter from melting. The mixture should look like coarse breadcrumbs or small pebbles - if it clumps into one cohesive ball, the butter got too warm. Using a combination of regular and coarse sugar creates interesting texture with some large crunchy bits and some finer sweetness. Demerara or turbinado sugar's large crystals stay crunchy even after baking, providing pleasant texture contrast against soft cheesecake and tender apples.
Make-Ahead Options
These bars work beautifully for advance preparation, reducing day-of stress for gatherings. Make the crust and press it into the pan, then cover and refrigerate for up to 2 days. Prepare the streusel topping and store it in the fridge in a covered container for 2 days. The cheesecake filling and apples should be made fresh, but since they take only minutes, that's not burdensome. For complete make-ahead, bake the entire dessert 1-2 days before serving and store covered in the refrigerator. Just remember to add the caramel drizzle right before serving rather than in advance.
Serving Temperature Matters
These bars taste dramatically different at various temperatures, and room temperature is optimal. Straight from the fridge, the cheesecake is very firm, almost dense, and the flavors taste muted. After sitting at room temperature for 30-60 minutes, the cheesecake softens to creamy, luscious texture and all the flavors bloom and become more pronounced. The streusel topping also softens very slightly, creating better mouthfeel. You can serve them cold if needed, but the quality improves significantly with that warming period. Never serve these warm from the oven - the cheesecake needs chilling to set properly.
Storage and Freezing
Proper storage keeps these bars fresh and delicious for days. Store in an airtight container in the refrigerator for up to 4 days. The crust may soften slightly over time from moisture in the other layers, but they still taste great. For freezing, cool and chill completely, then cut into squares. Wrap each bar individually in plastic wrap, then place wrapped bars in a freezer-safe container or bag. Freeze for up to 2 months. Thaw overnight in the refrigerator, then bring to room temperature and add fresh caramel drizzle before serving. Don't drizzle caramel before freezing because it doesn't thaw well.
 Pin it
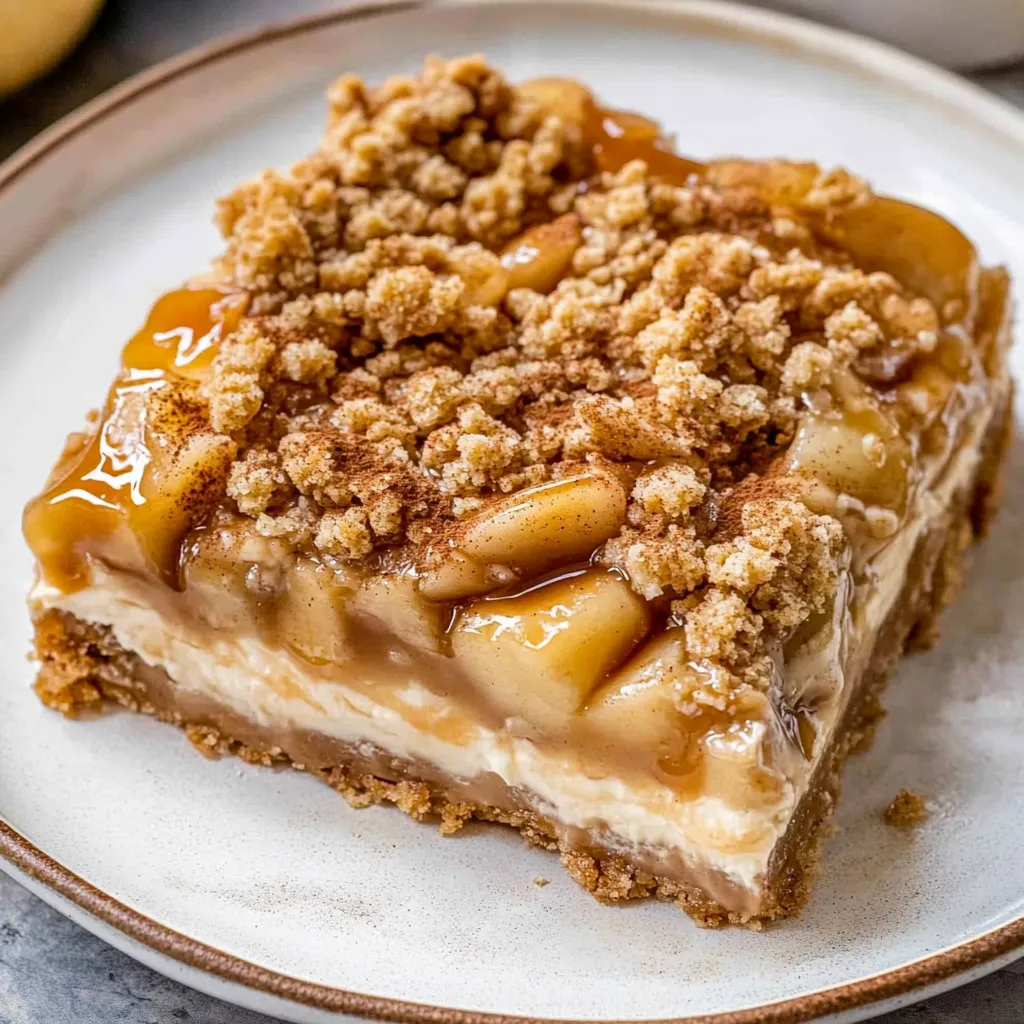
These caramel apple cheesecake bars represent the kind of dessert that looks like you hired a pastry chef but actually comes from simple techniques anyone can master. The multiple layers create visual drama when you cut through them, revealing the beautiful striation of crust, cream, fruit, and crumble. When someone takes that first bite and gets all the textures and flavors at once - crispy, creamy, tender, crunchy, sweet, tangy - their face always shows genuine delight. Sometimes the best recipes are the ones that taste like restaurant-quality dessert while being entirely doable in a home kitchen with basic equipment, and these bars absolutely deliver that experience every single time.
Frequently Asked Questions
- → Can I use a different type of apple?
- Yes, you can swap Granny Smith for any firm baking apple like Honeycrisp or Braeburn. Tart apples work best to balance the sweetness.
- → Do I need to use digestive biscuits?
- No, graham crackers work perfectly as a substitute. Use the same amount and follow the recipe as written.
- → Why does my cheesecake need to chill so long?
- Chilling helps the cheesecake set properly so the bars hold their shape when cut. It also makes them taste better and easier to slice cleanly.
- → Can I make these in a different size pan?
- Yes, but cooking time will change. A 9x9 pan makes thinner bars that bake faster. A 7x7 pan needs a bit more time in the oven.
- → How do I prevent the crumble from burning?
- If the crumble browns too quickly, tent the pan loosely with foil for the last 15 minutes of baking. The cheesecake will still set underneath.
- → Should the cream cheese be soft?
- Yes, room temperature cream cheese blends smoothly without lumps. Take it out of the fridge about an hour before you start baking.
- → Can I skip the caramel sauce?
- Absolutely. The bars taste wonderful without it, though the caramel adds a nice finishing touch. You could also use honey or maple syrup instead.