
 Pin it
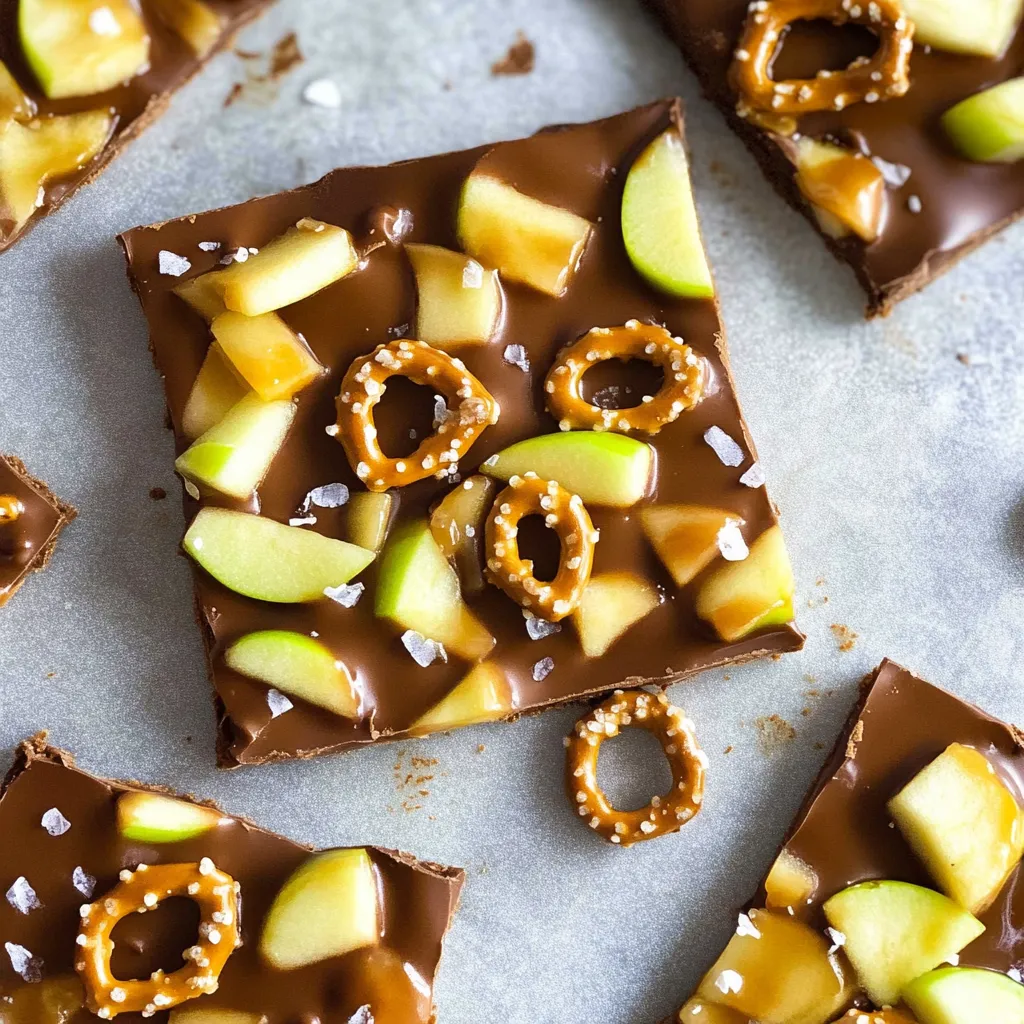
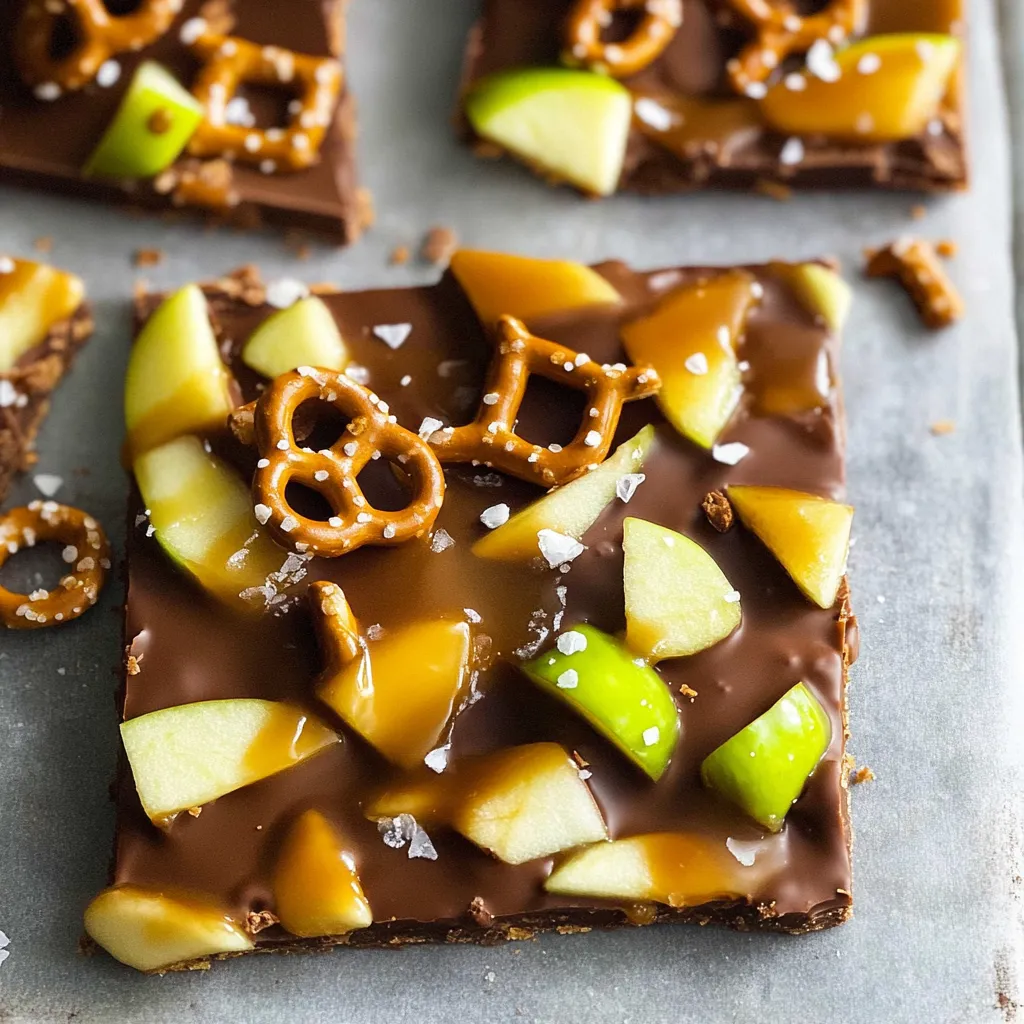
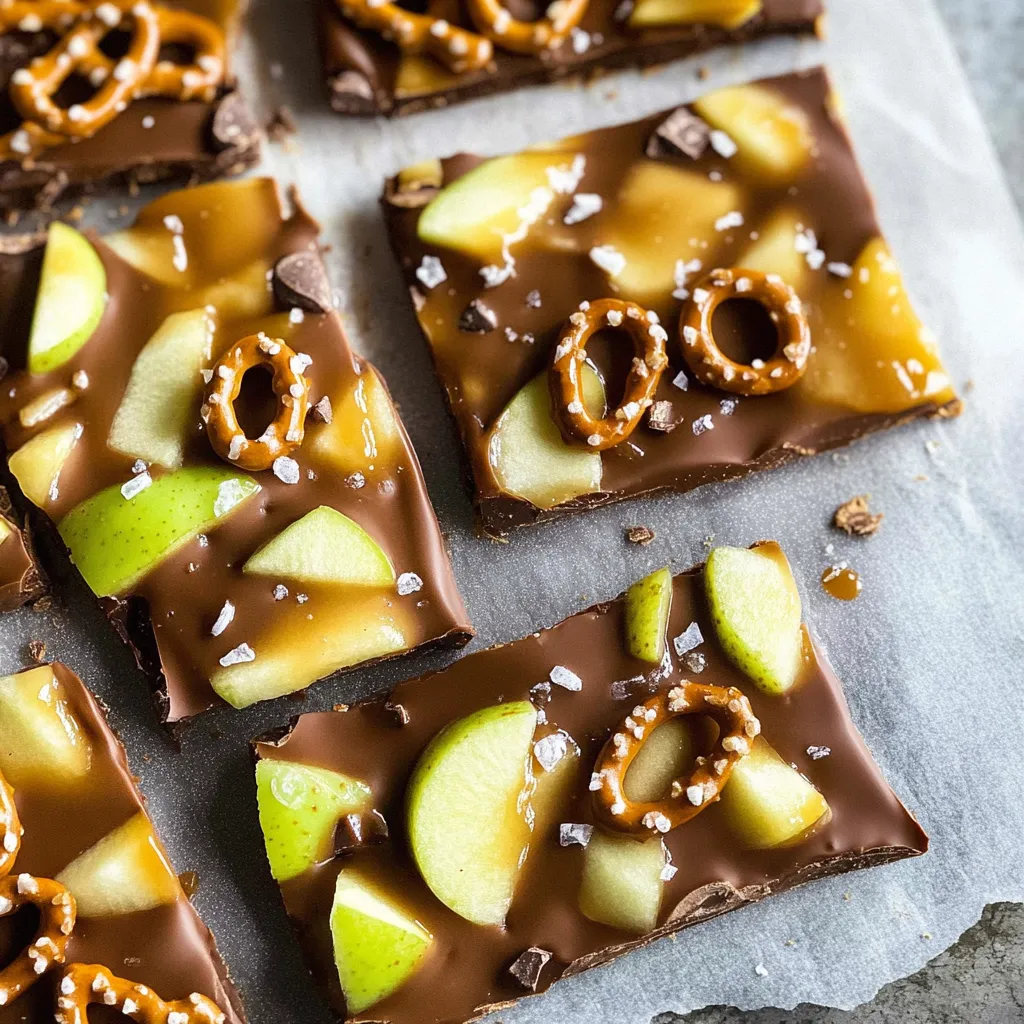
Looking at fall treats through a different lens changes everything when you discover you can have all the goodness of a caramel apple without wrestling with a stick. This bark combines chocolate, caramel, fresh apples, and pretzels into something you can actually enjoy without ending up with caramel in your hair. The chocolate base provides structure while the caramel binds everything together, and those apple pieces stay crisp enough to give you that satisfying crunch. Pretzels add their salty punch, and when you finish it with flaky sea salt, each bite delivers contrasting flavors that keep you reaching for more.
I tested this recipe three times before getting it right because my first batch used milk chocolate and turned out way too sweet. The second time, I didn't chill the chocolate layer long enough and the caramel just melted right into it. Third time was the winner. My kids actually prefer this to regular caramel apples now because they can grab a piece without getting caramel strings all over their shirts.
Ingredients and Why They Matter
- Dark chocolate chips: (about 1½ cups) - Dark chocolate creates a base that's rich but not cloying, and it firms up properly when chilled so your bark doesn't turn into a melted mess; look for chips that are smooth and uniform in size without any white bloom on them
- Chocolate bark: (about ½ cup) - This melting chocolate blends with the chips to create a smoother texture that sets firmly; you'll find it near the chocolate chips, usually in flat squares or wafer form
- Unwrapped caramels: (about 11 ounces or one bag) - Baking caramels melt into a smooth, spreadable consistency that firms up when cold; grab Kraft baking caramels in the wrapped squares or the unwrapped bits to save yourself some time
- Heavy cream: (2-3 tablespoons) - Full-fat cream helps caramels melt without seizing up and keeps them smooth; anything less than heavy cream will make your caramel too thin and it won't set properly
- Granny Smith apples: (2 medium, about 2½ cups chopped) - Tart green apples stay crisp and their sourness balances all that sweetness; pick apples that feel rock-hard when you press them, with no soft spots or bruises
- Mini pretzels: (about 1 cup, broken into pieces) - These add crunch and saltiness that makes the sweet elements taste even better; mini pretzels break more easily into bite-sized pieces than the big twists
- Flaky sea salt: (for sprinkling) - Maldon or another flaky salt adds texture and amplifies flavors; table salt won't give you the same burst of saltiness or the pleasant crunch
How To Make It
- Set up your workspace:
- Line a large rimmed baking sheet with parchment paper, making sure the paper extends all the way to the edges and lays flat without wrinkles. You want a smooth surface because any bumps or folds will show through your chocolate layer. A silicone baking mat works great too if you have one. Get this ready first because once your chocolate melts, you need to work quickly before it starts setting up.
- Melt your chocolate base:
- Combine the dark chocolate chips and chocolate bark pieces in a microwave-safe bowl that's large enough to stir comfortably. Microwave on 50% power for 30 seconds, then remove and stir thoroughly, scraping down the sides. Repeat this process, microwaving for 30 seconds at a time and stirring between each interval. The chocolate will look chunky at first, then gradually become smooth. Don't rush this by using full power because chocolate burns easily and turns grainy. After 2-3 intervals, the chocolate should be completely melted and silky smooth. If you see any lumps, give it one more 15-second burst.
- Create the chocolate layer:
- Pour the melted chocolate onto your prepared baking sheet and use an offset spatula or the back of a spoon to spread it into an even layer about ¼ inch thick. Don't spread it too thin or it'll crack when you cut it later, and don't make it too thick or the ratio of chocolate to toppings will be off. Aim for a rectangle roughly 10x12 inches, though the exact shape doesn't matter. Smooth out any ridges or thick spots. Immediately transfer the baking sheet to your refrigerator and let it chill for at least 15 minutes while you work on the caramel. The chocolate needs to be completely firm before you add the caramel layer.
- Prepare your caramel mixture:
- Unwrap your caramels if you're using the individually wrapped kind, or measure out the caramel bits. Place them in a small saucepan with the heavy cream. Set your burner to medium-low heat and let the caramels start softening. Stir frequently with a wooden spoon or heat-resistant spatula, scraping the bottom and sides of the pan to prevent scorching. The caramels will seem like they're taking forever to melt, then suddenly everything will come together. This usually takes about 5 minutes. Keep stirring until you have a smooth, thick caramel with no lumps remaining. If it seems too thick to spread, add another tablespoon of cream.
- Incorporate the apples:
- While your caramel is still hot and fluid, remove the pan from the heat and immediately stir in 2 cups of your chopped apple pieces. Work quickly and stir well to coat all the apple pieces with caramel. The apples will cool down the caramel slightly, which is actually helpful because you don't want the caramel so hot that it melts your chocolate layer. Let this mixture sit for about a minute to thicken slightly before spreading.
- Build your layers:
- Take your baking sheet out of the fridge. The chocolate should be firm to the touch. Working quickly, pour the caramel-apple mixture over the chocolate and use your spatula to spread it evenly across the entire surface, going right to the edges. Don't worry about making it perfectly smooth. Immediately sprinkle the remaining ½ cup of chopped apples over the caramel layer, distributing them evenly. Break your mini pretzels into smaller pieces with your hands and scatter them across the top, pressing them gently into the caramel so they stick. Finish with a generous sprinkle of flaky sea salt, focusing on areas that look like they need more visual interest.
- Chill until set:
- Return the baking sheet to the refrigerator and chill for at least 1 to 2 hours, or until the caramel feels firm when you press it lightly with your finger. Don't skip this chilling time or try to speed it up by using the freezer for just a few minutes, because the caramel needs slow, steady chilling to set up with the right texture. When properly chilled, the whole bark should feel solid and the caramel shouldn't indent when you touch it.
- Cut and serve:
- Remove the bark from the fridge and let it sit at room temperature for just 2-3 minutes to make cutting easier. Lift the parchment paper to transfer the bark to a cutting board. Use a large, sharp knife to cut the bark into irregular pieces, or break it apart with your hands for a more rustic look. Wipe your knife clean between cuts for the neatest edges. Serve immediately while still cold, or return the pieces to the fridge until ready to serve.
 Pin it
Granny Smith apples have been my go-to for anything involving caramel since I was a teenager working at a farm stand where we made caramel apple slices every weekend. The woman who ran the stand taught me that tart apples make caramel taste more interesting instead of just piling sweetness on top of sweetness. My daughter inherited this preference and now refuses to eat caramel with any other apple variety. When I made this bark for her birthday party last fall, kids who normally pick apples out of everything actually ate them because the caramel disguised them just enough.
Customizing Your Bark
You can transform this basic recipe into something completely different by swapping toppings based on what you have available or what sounds good. Chopped toasted pecans or walnuts add richness and a different kind of crunch than pretzels provide. Crushed graham crackers scattered over the top give you more of that traditional caramel apple vibe. Some people like adding a handful of mini chocolate chips or M&Ms for extra chocolate hits throughout. Dried cranberries or chopped dried apricots work if you want more fruit flavor. The base recipe is forgiving enough that you can get creative without ruining the fundamental structure.
Texture Considerations
The interplay of textures makes this bark memorable, but you need to understand how each component behaves. Chocolate provides the firm foundation that holds everything together, staying solid when cold but melting quickly at room temperature. Caramel adds chewiness that contrasts with the brittle chocolate, though it becomes sticky if the bark warms up too much. Fresh apples contribute their signature crunch that fades gradually as they release moisture into the surrounding caramel. Pretzels start out crispy but absorb moisture from both the caramel and apples, becoming softer after the first day. This evolution of textures explains why the bark tastes best when freshly made.
The Chocolate Layer Technique
Getting your chocolate base right determines whether your bark breaks cleanly or shatters into messy shards. Temperature control matters more than you might think. Chocolate that's too hot will stay fluid and mix with the caramel layer instead of providing separation. Chocolate that hasn't been chilled long enough will dent when you spread the caramel, creating thin spots that crack. The ideal chocolate layer feels cool and solid when touched but hasn't been refrigerated so long that condensation forms on the surface. That ¼-inch thickness gives you enough structure to pick up pieces without them breaking, while staying thin enough that chocolate doesn't overpower the other flavors.
Caramel Behavior
Working with melted caramel requires understanding how it changes from liquid to solid. Fresh off the stove, caramel flows like warm honey and coats everything it touches. As it cools, it thickens into a spreadable paste, then continues firming until it reaches that classic chewy texture. Adding cream keeps the caramel softer and more pliable than it would be otherwise. The apples interrupt this process by introducing moisture and dropping the temperature, which is why you need to work quickly once you've stirred them in. If your caramel gets too thick to spread before you've finished assembling everything, you can briefly warm it over low heat again, stirring constantly until it loosens up.
Storage Realities
Unlike shelf-stable candy bark that lasts for weeks, this version has a short window of peak quality because of those fresh apple pieces. Within the first few hours, everything tastes exactly how you want it to - chocolate is firm, caramel is chewy, apples are crisp, pretzels are crunchy. By the next day, the apples have released some juice that makes the caramel slightly softer and begins softening the pretzels. After two days, the textural contrast starts disappearing as everything moves toward the same soft-chewy consistency. The bark remains safe to eat for three days when refrigerated in an airtight container, but the experience changes significantly. If you need to make something in advance, consider chocolate bark with dried fruit and nuts instead, saving this apple version for same-day serving.
 Pin it
This bark reminds me why simple combinations often work better than complicated recipes with fifteen ingredients. The four main components here - chocolate, caramel, apples, pretzels - each play a clear role without competing for attention. When you bite through all the layers at once, you get that perfect moment where sweet meets salty, smooth meets crunchy, and rich meets fresh. Making it brings back memories of fall festivals and apple picking, but eating it is actually more enjoyable than struggling with a traditional caramel apple on a stick. Sometimes the best recipes are the ones that take familiar flavors and repackage them into something easier to share and enjoy.
Frequently Asked Questions
- → Can I use red apples instead of green?
- Yes, any crisp apple works well. Green apples add a nice tartness that balances the sweet caramel, but red apples taste great too.
- → How long does this bark stay fresh?
- It keeps in the fridge for up to 3 days in an airtight container. The apples and pretzels will soften over time though.
- → Can I make this ahead of time?
- Yes, you can make it a day or two before serving. Just keep it refrigerated and the textures will hold up pretty well.
- → What can I use instead of pretzels?
- Try crushed graham crackers, chopped nuts, or even potato chips for a different salty crunch.
- → Do I need to use chocolate bark or just chips?
- The chocolate bark helps it set nicely, but you can use all chocolate chips if that's what you have on hand.
- → Why are my apples turning brown?
- Toss the diced apples with a little lemon juice before adding them to prevent browning if you're making this ahead.