
 Pin it
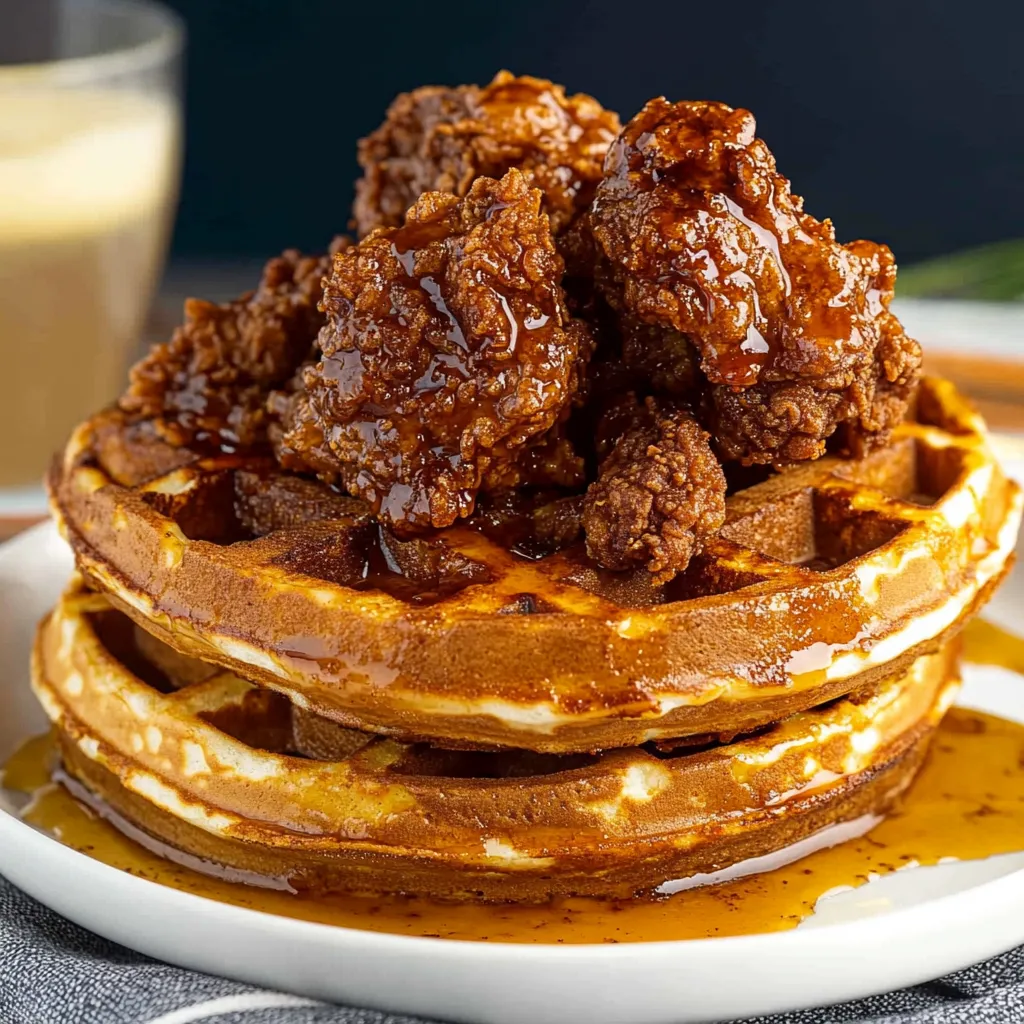
Chicken and waffles is one of those combinations that seems random and possibly wrong until you taste it, at which point you understand why it's been a Southern soul food staple for generations - the contrast between crispy, savory, spiced fried chicken and fluffy, slightly sweet waffles with sticky hot honey drizzled over everything creates this perfect balance of flavors and textures that shouldn't work but absolutely does. The dish has roots in both Southern soul food traditions and Harlem Renaissance-era supper clubs, and making it at home requires understanding a few key techniques that prevent soggy chicken and dense waffles. The chicken gets brined in buttermilk with spices for several hours which both tenderizes and flavors it, then gets dredged in seasoned flour and fried until golden and crunchy. The waffles incorporate cornmeal for texture and tang from buttermilk, creating the perfect fluffy base that holds up to chicken and syrup without getting soggy. Hot honey - regular honey spiked with hot sauce - provides that essential sweet-spicy finishing touch that ties everything together.
I avoided making chicken and waffles for years because frying intimidated me and I thought you needed special skills to get crispy coating that doesn't fall off. After finally attempting it and realizing that proper brining, the right oil temperature, and not overcrowding the pan are the only real secrets, it became one of my favorite weekend breakfast projects. The first batch had soggy coating because I crowded the pan and the oil temperature dropped, but once I understood to fry in small batches and monitor temperature with a thermometer, it became foolproof. Now this is what I make for special occasion breakfasts or when I want to impress brunch guests.
Ingredients and What Makes Them Essential
For the Chicken:
- Chicken Thighs (2 pounds, boneless skinless): Thighs have more fat than breasts, which keeps them juicy during high-heat frying. They also have richer flavor and more forgiving timing - slight overcooking won't ruin them. You can use bone-in thighs or drumsticks if preferred, adjusting cooking time.
- Buttermilk (2 cups, for brining): Buttermilk's acidity tenderizes chicken while its thickness helps spices adhere. The tangy flavor also permeates the meat. Don't substitute regular milk which lacks acidity. If you don't have buttermilk, make it by adding 2 tablespoons of lemon juice to regular milk.
- Hot Sauce (2 tablespoons, Tabasco or Frank's): Hot sauce in the brine adds heat and tang. Tabasco is sharper and more vinegary, Frank's is smoother and milder. Use whatever you prefer or have.
- Garlic Powder (2 teaspoons): Garlic powder distributes evenly through the brine and coating. Don't substitute fresh garlic which burns during frying.
- Onion Powder (2 teaspoons): Onion powder adds savory depth without the moisture fresh onions would contribute.
- Smoked Paprika (1 tablespoon): Smoked paprika provides color and subtle smoky flavor. Regular paprika works but lacks the smokiness.
- Kosher Salt and Black Pepper (1 teaspoon each for brine, plus more for dredge): Salt helps chicken absorb the brine and seasons throughout. Freshly ground pepper tastes better than pre-ground.
- All-Purpose Flour (2 cups): Flour creates the base of the coating. Use regular all-purpose, not self-rising.
- Rice Flour (½ cup): This is the secret to extra-crispy coating. Rice flour is finer than wheat flour and creates lighter, crunchier texture. Find it in the Asian section or baking aisle.
- Poultry Seasoning (1 tablespoon): This herb blend typically contains sage, thyme, and rosemary that complement chicken. You can substitute Italian seasoning in a pinch.
- Vegetable Oil (for frying, about 3-4 cups): Use neutral oil with high smoke point like vegetable, canola, or peanut oil. Don't use olive oil which smokes and burns.
- Butter (3 tablespoons, for frying): Adding butter to the frying oil creates golden color and nutty flavor. Use unsalted butter.
For the Waffles:
- All-Purpose Flour (2 cups): Forms the structure of the waffles. Measure by spooning into the cup and leveling off.
- Cornmeal (½ cup): Cornmeal adds subtle sweetness and pleasant grittiness that makes these distinctly Southern waffles. Use fine or medium-grind cornmeal.
- Sugar (2 tablespoons): Just enough sweetness without making them dessert-like. The sugar also helps with browning.
- Baking Powder (1 tablespoon): Provides leavening for fluffy waffles.
- Baking Soda (½ teaspoon): Additional leavening that also helps with browning.
- Salt (½ teaspoon): Enhances all the other flavors.
- Buttermilk (2 cups): Creates tangy flavor and tender texture. The acidity reacts with baking soda for extra lift.
- Eggs (2 large): Bind the batter and add richness.
- Melted Butter (¼ cup): Adds flavor and keeps waffles from sticking to the iron.
For the Hot Honey:
- Honey (½ cup): Provides sweet base. Use good quality honey.
- Hot Sauce (2-3 tablespoons, to taste): Adds heat that balances the sweetness. Start with 2 tablespoons and add more if you want it spicier.
- Butter (2 tablespoons): Helps honey and hot sauce emulsify into smooth drizzle.
Step-by-Step Instructions
- Brine the Chicken (1-4 hours ahead):
- In a large bowl, whisk together 2 cups of buttermilk, 2 tablespoons of hot sauce, 2 teaspoons of garlic powder, 2 teaspoons of onion powder, 1 tablespoon of smoked paprika, 1 teaspoon of kosher salt, and 1 teaspoon of black pepper until smooth. Add your chicken thighs to the bowl, turning to coat completely. Make sure all pieces are submerged in the brine. Cover the bowl with plastic wrap or transfer everything to a zip-top bag. Refrigerate for at least 1 hour, though 4 hours is ideal. The longer it brines, the more flavorful and tender it becomes. Don't go beyond 24 hours or the texture becomes mushy.
- Prepare the Dredge:
- When ready to cook, set up your dredging station. In a shallow bowl or pie plate, whisk together 2 cups of all-purpose flour, ½ cup of rice flour, 1 tablespoon of poultry seasoning, 1 teaspoon of salt, and 1 teaspoon of black pepper. Mix thoroughly so the seasonings distribute evenly. Have a large plate or baking sheet ready nearby for holding the dredged chicken.
- Dredge the Chicken:
- Remove the chicken pieces from the brine one at a time, letting excess brine drip back into the bowl. You want the chicken wet but not dripping. Place each piece in the seasoned flour mixture and turn to coat completely, pressing the flour firmly into the chicken on all sides. Make sure every bit is covered with a solid coating. Shake off any excess flour and place the coated chicken on your prepared plate. Repeat with all pieces. Let the dredged chicken sit for about 10 minutes while the oil heats - this helps the coating adhere better during frying.
- Heat the Oil:
- Pour 2 inches of vegetable oil into a large, heavy skillet or Dutch oven. Add 3 tablespoons of butter to the oil. Place over medium-high heat and heat until the oil reaches 350°F on a cooking thermometer. This temperature is crucial - too low and the coating absorbs oil and gets greasy, too high and it burns before the chicken cooks through. If you don't have a thermometer, test by dropping a small pinch of flour into the oil - it should sizzle vigorously immediately. Preheat your oven to 200°F for keeping finished chicken warm.
- Fry the Chicken:
- Working in batches of 3 to 4 pieces (don't overcrowd - this is crucial), carefully add chicken to the hot oil. The oil should bubble vigorously around each piece. Fry for 4 to 5 minutes on the first side without moving them. Use tongs to flip each piece carefully and fry the second side for another 4 to 5 minutes. The chicken is done when it's deep golden brown all over and reaches 165°F internal temperature on a meat thermometer. Total frying time is usually 8 to 10 minutes per batch. Use a slotted spoon or tongs to transfer cooked chicken to a paper towel-lined plate to drain. Keep finished chicken warm in the preheated oven while you fry remaining batches. Let the oil come back to 350°F between batches - this is important for consistent results.
- Make the Waffles:
- While the chicken fries or just before serving, make the waffle batter. In a large bowl, whisk together 2 cups of flour, ½ cup of cornmeal, 2 tablespoons of sugar, 1 tablespoon of baking powder, ½ teaspoon of baking soda, and ½ teaspoon of salt. In a separate bowl, whisk together 2 cups of buttermilk, 2 eggs, and ¼ cup of melted butter until smooth. Pour the wet ingredients into the dry ingredients and whisk just until combined - some small lumps are fine. Don't overmix or waffles will be tough.
- Cook the Waffles:
- Preheat your waffle maker according to manufacturer's instructions and spray generously with nonstick cooking spray. Pour about ⅔ cup of batter (this varies by waffle maker size) into the center of the hot iron. Close the lid and cook according to your maker's instructions, usually 3 to 5 minutes, until the waffle is golden brown and crispy. The waffle is ready when steam stops coming out and it releases easily. Transfer to a plate and repeat with remaining batter. You can keep finished waffles warm in a 200°F oven on a baking sheet while you finish cooking.
- Make Hot Honey:
- In a small saucepan over low heat, melt 2 tablespoons of butter. Add ½ cup of honey and 2 to 3 tablespoons of hot sauce. Whisk together until smooth and combined. Taste and add more hot sauce if you want it spicier. Keep warm until serving.
- Serve:
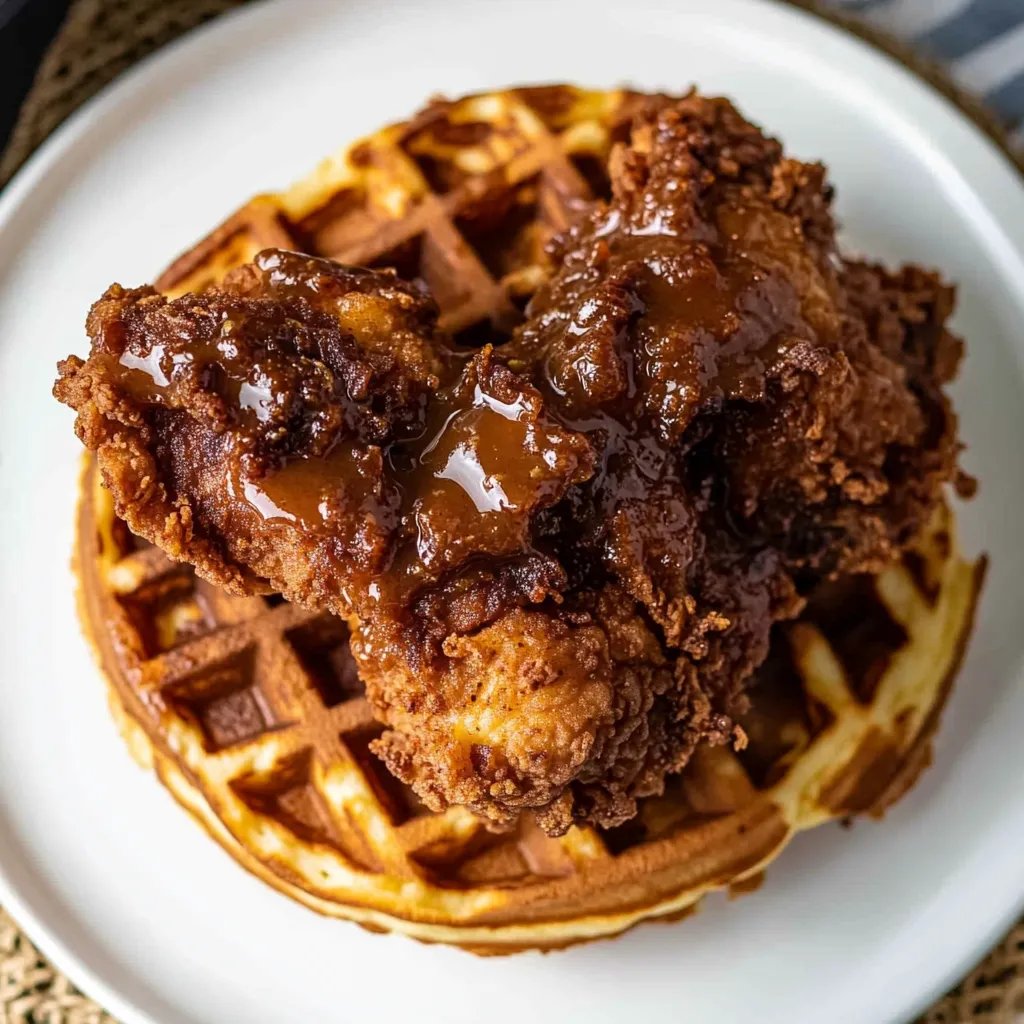
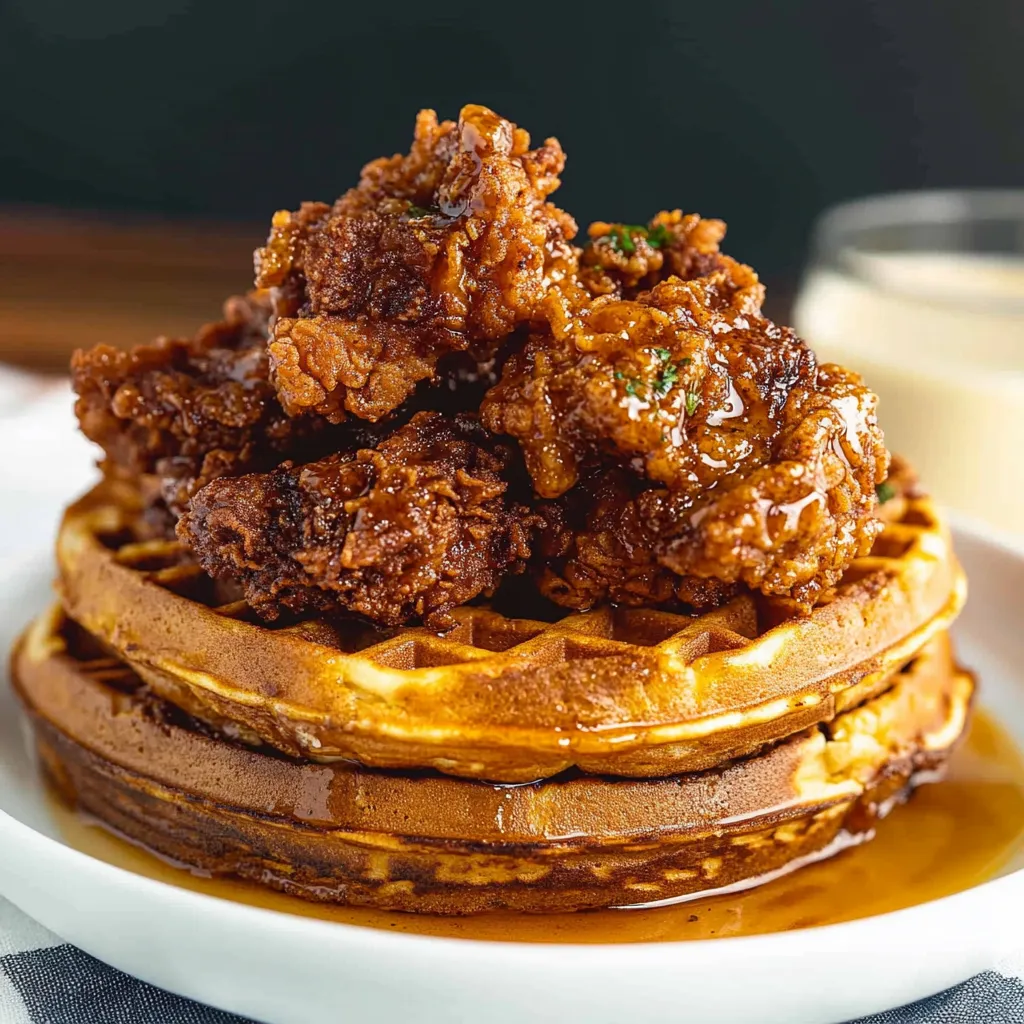
- Place a waffle on each plate, top with 2 to 3 pieces of fried chicken, and generously drizzle hot honey over everything. Serve immediately while the chicken is hot and crispy and the waffles are fresh.
 Pin it
My brother claimed for years that he could only eat fried chicken from a specific fast food chain and that homemade versions were never as good because they lacked "the recipe." When I made this chicken and waffles for a family brunch, he ate three pieces before grudgingly admitting that properly brined and fried homemade chicken was actually better than his beloved chain. He still won't fully concede that I've mastered it, but he requests it regularly now, which is basically an admission. Converting the fast-food-only person to homemade fried chicken feels like winning an argument without saying a word.
Understanding the Science of Brining
Brining isn't just about adding flavor - it fundamentally changes the texture of chicken through osmosis and protein modification. When you submerge chicken in a salty liquid, salt molecules penetrate the meat and alter protein structures, allowing them to retain more moisture during cooking. The buttermilk's acidity also helps break down proteins, tenderizing the meat. This is why brined chicken stays juicy even if slightly overcooked, while un-brined chicken dries out easily. The buttermilk acts as a flavor carrier, helping spices penetrate deeper into the meat than they would through surface seasoning alone. The minimum effective brining time is about an hour, though 4 hours is optimal. Beyond 12-24 hours, texture can become mushy as proteins break down too much. For fried chicken specifically, the buttermilk brine also helps the flour coating adhere better because the wet, slightly tacky surface gives flour something to grip.
Why Rice Flour Creates Crispier Coating
The inclusion of rice flour in the dredge isn't just trendy - it's based on food science that creates legitimately crispier coating. Rice flour consists of much finer particles than wheat flour and contains different starches. When fried, these finer particles create a more delicate, shattering-crisp texture rather than the thick, bread-like coating that all-purpose flour alone produces. Rice flour also absorbs less oil during frying, making the coating lighter and less greasy. The lack of gluten in rice flour means the coating doesn't develop chewiness. This technique is borrowed from Asian frying methods, particularly Japanese tempura and Korean fried chicken, where ultra-crispy texture is paramount. The ideal ratio is about 75% all-purpose flour for structure and 25% rice flour for crispiness. Using 100% rice flour creates coating that's too delicate and falls apart.
The Importance of Oil Temperature Control
Maintaining proper oil temperature is the single most important factor in achieving crispy, non-greasy fried chicken. At 350°F, several things happen simultaneously - the exterior coating crisps quickly, forming a barrier that prevents interior moisture from escaping and exterior oil from penetrating. The chicken cooks through at a rate that allows the inside to reach 165°F right as the outside reaches perfect golden brown. Below 325°F, the coating absorbs oil before crisping, creating greasy, soggy chicken. Above 375°F, the exterior burns before the inside cooks through. When you add cold chicken to hot oil, the temperature drops - this is why you can't overcrowd the pan. Adding too many pieces at once can drop the temperature 50-75 degrees, preventing proper frying. Using a thermometer removes all guesswork. Clip-on candy thermometers work well, or use an instant-read to check periodically.
Why Cornmeal Transforms Waffles
Adding cornmeal to waffle batter creates distinctly Southern-style waffles with texture and flavor impossible to achieve with flour alone. Cornmeal provides subtle sweetness and pleasant, slightly gritty texture that contrasts with fluffy interior. The grittiness also helps waffles maintain structure when topped with chicken and syrup, preventing them from turning into mush. Cornmeal's coarser texture creates more surface irregularities that crisp up beautifully in the waffle iron. The corn flavor complements both sweet syrup and savory chicken. Fine or medium-grind cornmeal works best - coarse cornmeal is too gritty and doesn't incorporate well. The ideal ratio is about 20% cornmeal to 80% flour - more cornmeal makes waffles dry and crumbly, less and you lose the characteristic texture. This technique appears throughout Southern cooking in cornbread, hush puppies, and corn cakes.
The Cultural History of Chicken and Waffles
While chicken and waffles seems like an odd combination, it has deep roots in American culinary history, particularly in African American and Southern cuisine. One origin story traces it to Pennsylvania Dutch country in the 1600s, where it was served as a Sunday meal. The more widely accepted origin is from late-1800s Southern United States, where fried chicken was a special occasion food and waffles represented a refined dish. The combination gained particular prominence during the Harlem Renaissance in the 1930s, when Wells Supper Club in Harlem began serving it as late-night food for jazz musicians - it bridged dinner and breakfast, providing substantial sustenance. The dish spread through soul food restaurants and became emblematic of Southern comfort food. Today it represents a blend of African American culinary traditions, Southern cooking, and American innovation. The sweet-savory combination reflects broader American tastes for contrasts like bacon with maple syrup or ham with brown sugar.
Storage, Reheating, and Make-Ahead Strategies
Fried chicken stores reasonably well and reheats better than many assume if you know the techniques. Let cooked chicken cool to room temperature, then wrap each piece loosely in foil or parchment - loose wrapping allows some air circulation which helps maintain crispiness better than tight wrapping. Refrigerate for 3 to 4 days. To reheat and restore crispiness, place chicken on a wire rack set over a baking sheet and bake at 375°F for 15 to 20 minutes until heated through and the coating crisps up. The wire rack is crucial - it allows hot air to circulate underneath, preventing the bottom from getting soggy. Microwaving makes the coating soft and chewy, so avoid it if possible. For waffles, they're best made fresh, but you can refrigerate the batter for up to 5 days and cook waffles as needed. Alternatively, cook all the waffles, cool completely, and freeze in zip-top bags with parchment between layers for up to 2 months. Reheat frozen waffles in a toaster or toaster oven until crisp.
Variations and Customization Ideas
While the classic version is perfect, you can create variations on the theme. For Nashville hot chicken and waffles, brush fried chicken with cayenne-oil paste after frying for intense heat. For buttermilk fried chicken and waffles, increase buttermilk in brine and add more to dredge for extra-crunchy coating. For different waffle flavors, try cheddar-chive waffles for savory version, or cinnamon-sugar waffles for sweeter contrast. For different proteins, this technique works with chicken tenders, bone-in pieces, or even boneless thighs cut smaller. For gluten-free, use gluten-free flour blend in both dredge and waffles - rice flour is naturally gluten-free. For dairy-free, use plant-based milk with vinegar instead of buttermilk. For lower-mess frying, try shallow-frying in a deep skillet rather than deep-frying. Each variation maintains the core appeal while accommodating preferences.
Troubleshooting Common Problems
When chicken and waffles don't turn out right, there's usually a fixable cause. If coating is soggy, you overcrowded the pan or oil wasn't hot enough - fry in smaller batches and monitor temperature. If coating falls off, the chicken was too wet when dredged or you didn't let it rest before frying - shake off excess brine and let dredged chicken sit 10 minutes. If chicken is dry, you didn't brine long enough or overcooked it - brine at least an hour and use a thermometer. If waffles are dense, you overmixed the batter - stir just until combined with lumps remaining. If waffles are soggy, your iron wasn't hot enough or you opened it too early - let waffles cook until steam stops. If hot honey is too thin, add more honey; if too thick, add water. Most issues relate to temperature management, timing, or technique rather than the recipe itself.
 Pin it
After making chicken and waffles probably twenty times over the past few years, perfecting the technique through trial and error, it's become my signature special occasion breakfast that people specifically request. I appreciate how the recipe breaks down into manageable components - brine the chicken ahead, fry in batches while waffles cook, drizzle everything with hot honey. The combination of crispy, savory, spiced chicken with fluffy, slightly sweet waffles and that perfect hot honey creates flavors and textures that feel celebratory and indulgent. Knowing the secrets to crispy coating (rice flour, proper temperature, small batches) and fluffy waffles (don't overmix, use buttermilk) makes something that seemed intimidating feel completely achievable. This represents exactly what weekend cooking should be - special enough to feel like an event, genuinely delicious in ways that justify the effort, and impressive enough that people think you're more skilled than you actually are once you understand proper technique.
Frequently Asked Questions
- → Can I use chicken breasts instead of thighs?
- Yes, but thighs stay juicier. If using breasts, pound them to even thickness and watch the cook time since they can dry out faster.
- → How long should I soak the chicken in buttermilk?
- At least 1 hour, but you can go up to 4 hours. Any longer and the chicken gets too soft and mushy.
- → What if I don't have rice flour?
- Just use 2 cups of all-purpose flour instead. The rice flour makes it extra crispy, but regular flour works fine too.
- → Can I make the waffles ahead of time?
- Sure! Make them earlier and reheat in a 350°F oven for 5 minutes to crisp them back up before serving.
- → What temperature should the oil be for frying?
- Start at 350-375°F. It'll drop when you add the chicken, so keep it around 320-325°F while frying for the best crispy coating.
- → Do I have to make the spicy honey?
- Nope, it's totally optional. Regular maple syrup works great, or just use plain honey if you prefer it less spicy.