
 Pin it
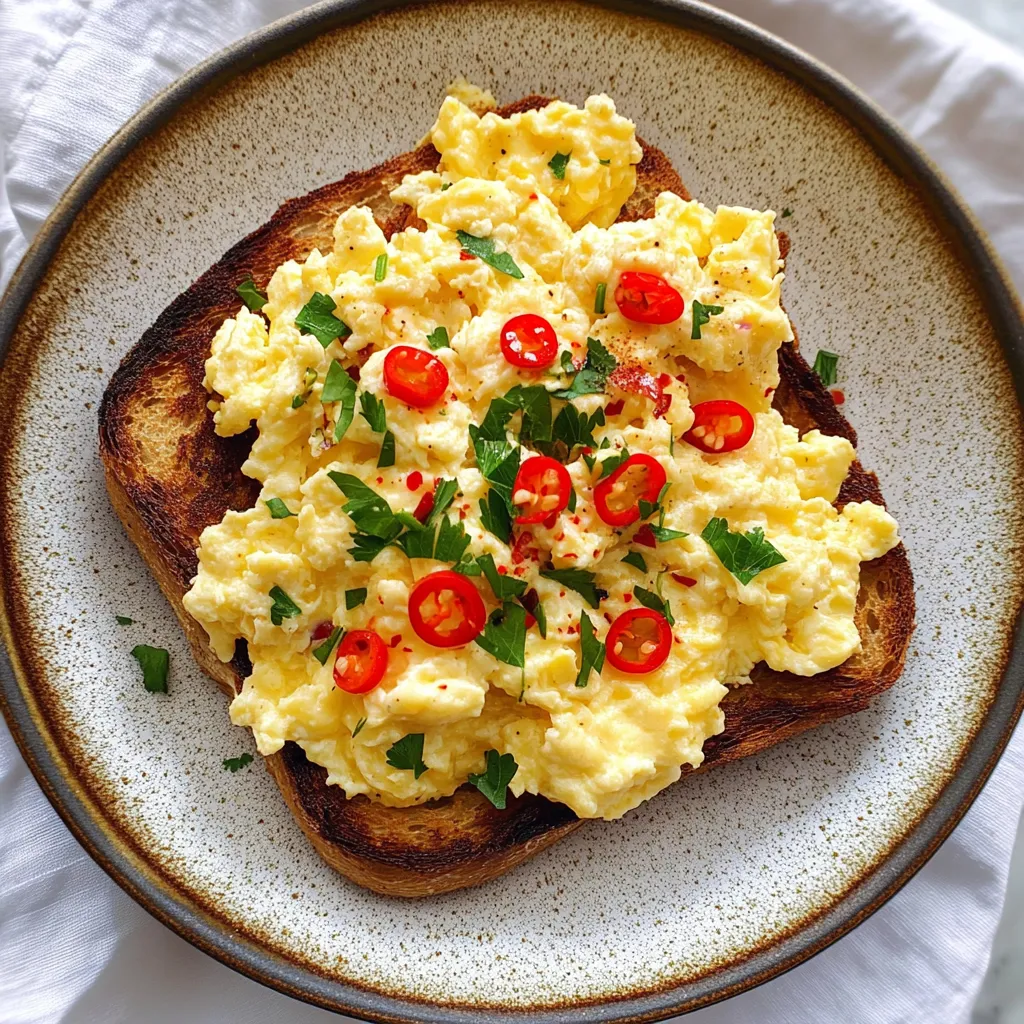
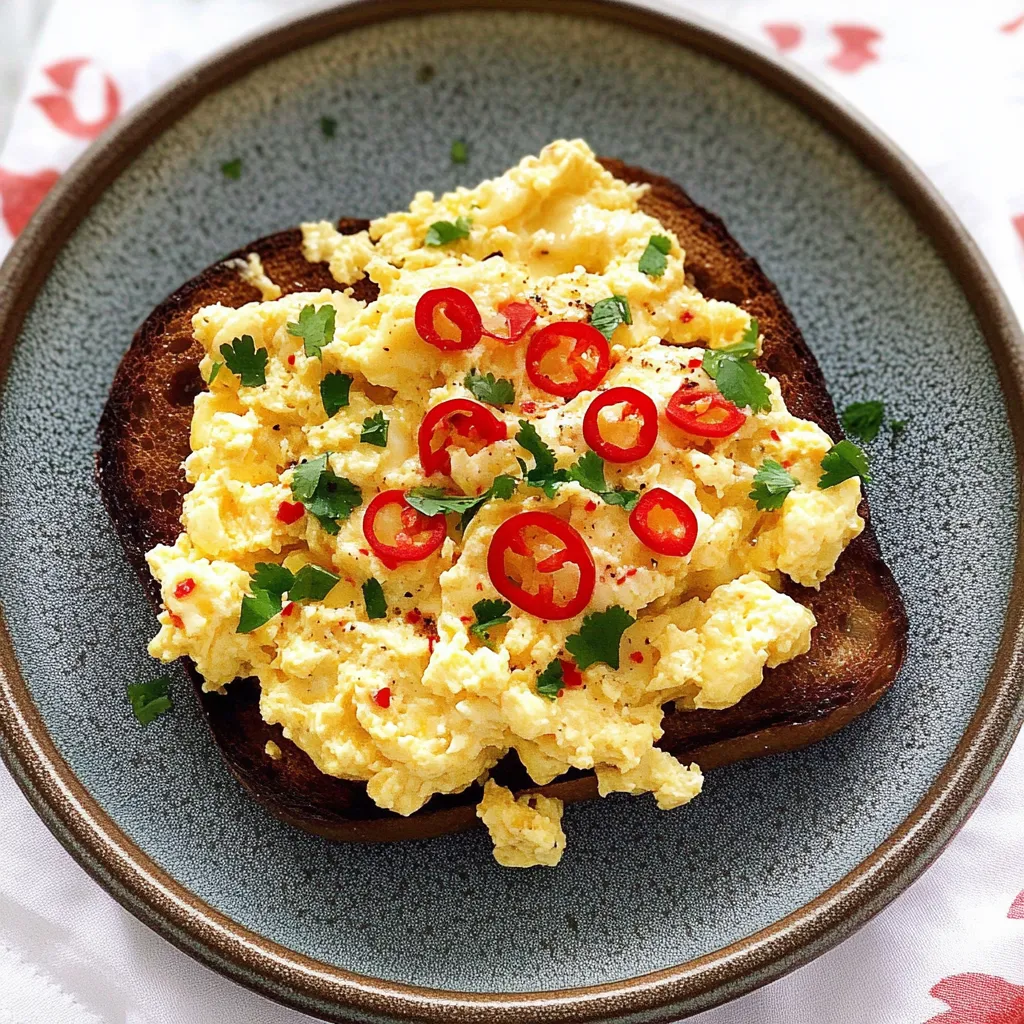
These spicy scrambled eggs bring restaurant-quality flavor to your kitchen with perfectly soft, fluffy curds infused with fresh chilies and aromatic onions. The gentle heat from diced red peppers creates a warming kick without overwhelming the delicate egg texture, while the slow cooking method ensures every bite is creamy and luxurious. Unlike rushed scrambled eggs that turn rubbery, this technique creates silky smooth results that work beautifully for any meal of the day.
I started making these eggs when I wanted something more exciting than plain scrambled eggs but didn't want to complicate my morning routine. The first time I tasted how the chilies and onions melded together with the creamy eggs, I knew this would become a weekly staple in our house. My husband loves the gentle heat, and even our kids enjoy the version without seeds.
Essential Ingredients and Selection Tips
- Fresh eggs: Use the freshest organic, free-range eggs you can find; fresh eggs have firmer whites and brighter yolks that create better texture and richer flavor
- Red chilies: Choose firm, glossy peppers with vibrant color; remove seeds for mild heat or leave them in for more intensity
- Yellow onion: Look for firm onions without soft spots; the sweetness balances the chili heat perfectly when cooked until soft and translucent
- Real butter: Use unsalted butter for the best flavor control; it creates much richer taste than oil and helps achieve that silky egg texture
- Sea salt: Coarse sea salt seasons more evenly than table salt and doesn't make the eggs taste harsh or overly salty
- Fresh herbs: Choose bright green parsley or cilantro without yellowing; fresh herbs add color and brightness that cuts through the richness
The secret to perfect chili scrambled eggs is cooking the aromatics first to develop their flavors, then adding well-beaten eggs and cooking everything slowly with constant stirring. This builds layers of taste while maintaining that luxurious, creamy texture.
Detailed Step-by-Step Instructions
- Step 1: Prepare the aromatics:
- Dice the yellow onion into very small, uniform pieces about ⅛-inch in size so they cook evenly and distribute throughout the eggs. Remove the stem and seeds from the red chili, then dice it just as finely as the onion - keeping pieces small ensures even heat distribution and prevents any single bite from being too spicy.
- Step 2: Beat the eggs properly:
- Crack the eggs into a medium bowl and whisk vigorously for 60-90 seconds until the mixture becomes pale, slightly foamy, and you can see small bubbles forming on the surface. This incorporates air that creates the fluffy texture, so don't rush this step. Season generously with sea salt and whisk once more to distribute evenly.
- Step 3: Cook the aromatics:
- Heat a non-stick pan over medium-low heat and add the butter, letting it melt completely and stop foaming before adding the onions. Cook the diced onion for 4-5 minutes, stirring occasionally, until they become translucent and soft but not browned - you want them sweet and tender, not caramelized.
- Step 4: Add the chilies:
- Stir the diced chilies into the softened onions and cook for exactly 1 minute, stirring constantly. This brief cooking time releases the chili oils and flavors without making them bitter or overly intense, while allowing them to infuse the butter that will coat the eggs.
- Step 5: Begin the egg cooking:
- Reduce the heat to low and pour the beaten eggs directly into the center of the pan with the onions and chilies. Do not stir immediately - let the eggs sit for 10-15 seconds to begin setting on the bottom, which helps create better texture.
- Step 6: Stir continuously:
- Using a wooden spoon or heat-proof silicone spatula, begin stirring the eggs gently but constantly, scraping the bottom of the pan and folding the mixture over itself. Continue this motion for 3-4 minutes, never stopping the stirring motion, as this prevents large curds from forming and keeps the texture silky.
- Step 7: Watch for doneness:
- The eggs are ready when they form small, soft curds and still look slightly wet and glossy - they should appear almost but not quite set. This usually takes 4-6 minutes total of gentle cooking and constant stirring, depending on your pan and heat level.
- Step 8: Remove from heat immediately:
- Take the pan completely off the heat source while the eggs still look slightly underdone - the residual heat will continue cooking them to perfect doneness while you plate them. Waiting until they look completely set in the pan will result in overcooked, dry eggs.
- Step 9: Season and serve:
- Taste and add additional salt and freshly ground black pepper as needed, then transfer immediately to warmed plates. Garnish with chopped fresh herbs, extra sliced chilies, or a drizzle of hot sauce according to your preference.
 Pin it
The most critical technique is maintaining low heat and never stopping the stirring motion once you add the eggs. High heat will cause the eggs to set too quickly and become rubbery, while stopping the stirring allows large curds to form instead of the desired creamy texture.
Growing up, my grandmother always said that properly cooked eggs should never be rushed, and this recipe perfectly embodies that philosophy. There's something deeply satisfying about taking those few extra minutes to cook the eggs gently, watching them transform into something that tastes so much more sophisticated than regular scrambled eggs.
Understanding Egg Science and Cooking Temperature
The key to perfect scrambled eggs lies in understanding how egg proteins behave at different temperatures. Egg whites begin to set at around 140°F, while yolks don't fully set until 150°F, which is why low and slow cooking allows you to control the texture precisely. High heat causes the proteins to tighten quickly, squeezing out moisture and creating tough, rubbery eggs. Constant stirring breaks up the protein networks as they form, creating smaller curds and preventing the eggs from becoming one solid mass. The goal is to cook the eggs just until the proteins are set but still tender, maintaining maximum moisture for that creamy, luxurious mouthfeel.
Chili Selection and Heat Management
Different chili varieties bring unique flavor profiles beyond just heat levels, making selection important for the overall dish character. Red chilies tend to be slightly sweeter and more aromatic than green varieties, while jalapeños offer bright, grassy notes with moderate heat. The seeds and white ribs contain the highest concentration of capsaicin, so removing them provides flavor without overwhelming spiciness. For families with varying heat tolerances, cook the base recipe with seeded chilies, then offer hot sauce or fresh sliced chilies as optional garnishes, allowing everyone to customize their preferred spice level.
Timing and Serving Temperature Strategies
Scrambled eggs continue cooking from residual heat even after removing from the stove, making timing crucial for perfect results. The eggs should look slightly underdone when you remove them from heat, as they'll reach perfect doneness by the time you get them to the plate. Warm your serving plates in a low oven or with warm water to prevent the eggs from cooling too quickly, which can make them appear less creamy. If serving multiple people, cook the eggs in smaller batches rather than trying to scramble large quantities at once, as this ensures better heat control and texture consistency.
Building Flavor Layers and Seasoning Balance
The beauty of this recipe lies in how different elements build upon each other to create complex flavors. The onions provide sweetness that balances the chili heat, while the butter adds richness that carries all the flavors throughout the eggs. Salt should be added to the raw eggs to help break down proteins slightly, creating more tender results, but always taste and adjust seasoning at the end since the cooking process concentrates flavors. Fresh herbs added at the end provide brightness and color contrast that makes the dish feel more complete and restaurant-quality.
Equipment and Pan Selection for Best Results
A good non-stick pan is essential for perfect scrambled eggs, as it prevents sticking and allows for easy stirring without tearing the delicate curds. Heavy-bottomed pans distribute heat more evenly, preventing hot spots that can cause uneven cooking. The pan size matters too - use a pan that gives the eggs room to spread without being too thin, typically an 8-10 inch pan for 4-6 eggs. Wooden spoons or silicone spatulas work best for stirring as they won't scratch the non-stick surface and are gentle enough not to break up the eggs too aggressively.
These chili scrambled eggs have taught me that sometimes the simplest techniques produce the most impressive results. The patience required to cook them slowly and gently is always rewarded with eggs that taste like they came from the best breakfast spot in town, proving that great cooking often comes down to understanding a few key principles and executing them with care.
Frequently Asked Questions
- → How do I keep scrambled eggs from getting rubbery?
- Cook them on low heat and stir constantly. Remove from heat when they still look slightly wet - they'll finish cooking from the heat of the pan.
- → Can I make this less spicy?
- Yes! Use less chili or remove all the seeds. You can also skip the chili entirely and add it as a garnish instead.
- → What type of chili works best?
- Any small red chili works well. Fresno, red jalapeño, or bird's eye chilies are good choices. Adjust the amount based on how hot you want it.
- → Can I prep this recipe ahead of time?
- You can chop the onion and chili ahead, but scrambled eggs are best made fresh. They only take 10 minutes to cook anyway.
- → What should I serve with chili scrambled eggs?
- Toast, hash browns, or tortillas work great. You can also add cheese, avocado, or serve it over rice for a heartier meal.
- → How do I know when the eggs are done?
- They should look set but still slightly glossy. Don't wait until they look completely dry or they'll be overcooked.