
 Pin it
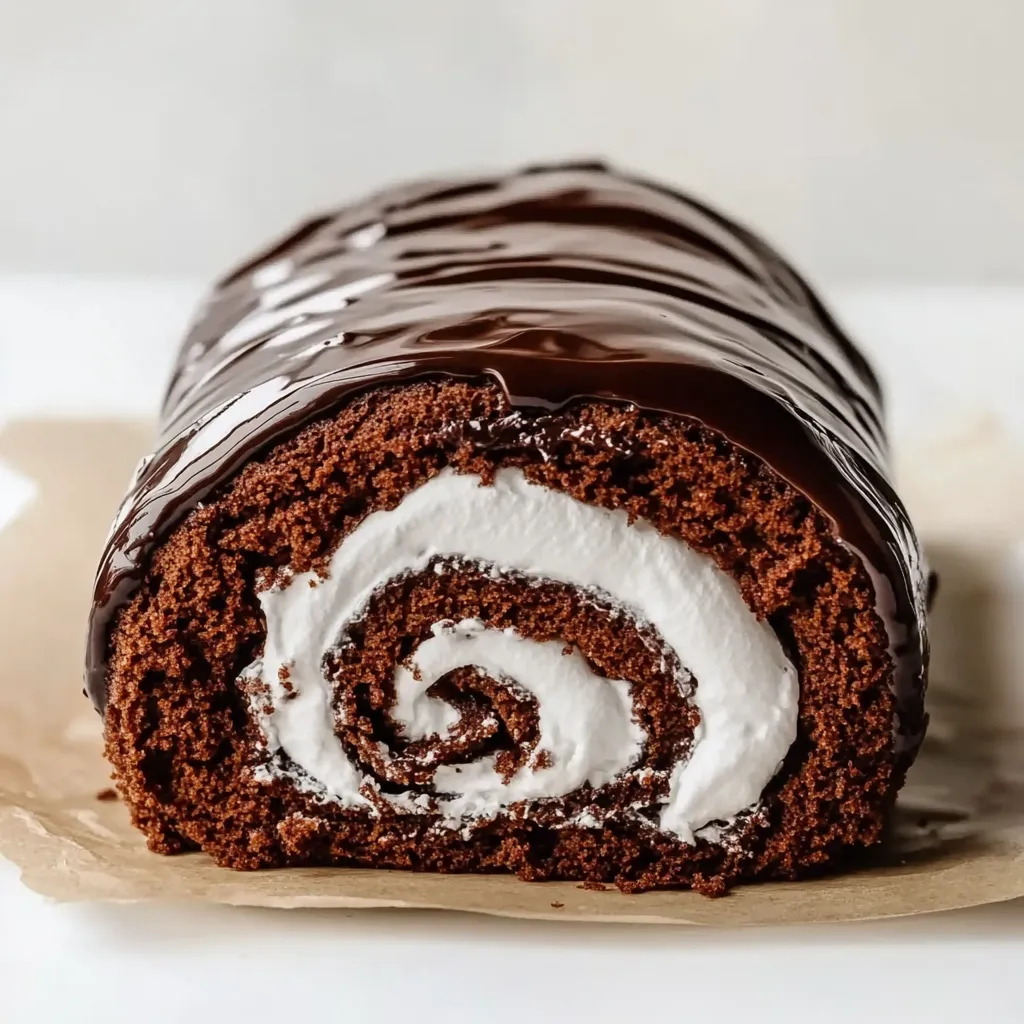
Chocolate cake roll is one of those nostalgic desserts - light chocolate sponge cake filled with sweet vanilla whipped cream and topped with dark chocolate ganache, all rolled into a spiral log - that seems intimidating but becomes manageable once you understand that the key to preventing cracks is rolling the warm cake immediately after baking while it's still pliable, letting it cool in that rolled shape so it "remembers" the curve, then unrolling gently to fill. The technique requires attention to detail through whipping egg whites to medium peaks for structure, folding them carefully to avoid deflation, and baking just until set so the cake stays moist and flexible rather than dry and brittle. What makes this particularly rewarding is how homemade versions taste dramatically better than packaged store-bought versions with their artificial flavors and preservatives, and how the combination of fluffy whipped cream filling and rich ganache topping creates textural and flavor contrast that makes each slice genuinely special.
I started making chocolate cake rolls about ten years ago after buying expensive Swiss rolls from bakeries and realizing I could make better versions at home. The first several attempts cracked terribly when I tried to roll them because I let the cake cool completely before rolling, and the cold, set structure couldn't bend without breaking. After learning that rolling the warm cake immediately while it's still flexible, then letting it cool in that rolled shape, prevents most cracking issues, it became reliably successful. Now I make them regularly because they're one of those desserts that consistently impresses people while being genuinely delicious rather than just visually striking.
Ingredients and What Makes Them Essential
For the Chocolate Sponge Cake:
- Cake Flour or All-Purpose Flour (¾ cup, about 90 grams): Either works equally well after extensive testing. Cake flour creates slightly more tender crumb, but all-purpose is perfectly fine. Measure by spooning and leveling.
- Unsweetened Cocoa Powder (¼ cup): Provides chocolate flavor. You can use either Dutch-process or natural cocoa powder. Dutch-process has deeper, smoother flavor. Sift this with the flour.
- Baking Powder (½ teaspoon): Provides slight lift.
- Salt (¼ teaspoon): Enhances chocolate flavor.
- Large Eggs (4, separated): Eggs provide all the structure and leavening. You'll whip the whites to medium peaks for volume, and beat the yolks for richness.
- Granulated Sugar (¾ cup, divided): Sugar sweetens and helps stabilize whipped egg whites. Use ¼ cup for whites, ½ cup for yolks.
- Vanilla Extract (1 teaspoon): Enhances chocolate flavor.
- Vegetable Oil (3 tablespoons): Oil creates moister cake than butter because it stays liquid at room temperature. This moisture prevents cracking.
- Buttermilk (3 tablespoons): Buttermilk adds moisture and tender texture. You can substitute whole milk if needed.
- Espresso Powder (½ teaspoon): Just a pinch heightens chocolate flavor without tasting like coffee. Optional but recommended.
For the Whipped Cream Filling:
- Heavy Whipping Cream (1½ cups): Must be cold. Whips into fluffy, stable filling.
- Powdered Sugar (⅓ cup): Sweetens without graininess. You can use granulated sugar but it may not dissolve completely.
- Vanilla Extract (1 teaspoon): Adds sweet vanilla flavor.
- Marshmallow Creme (2-3 tablespoons, optional): Adds remarkable flavor and stability. Store-bought Marshmallow Fluff works perfectly.
For the Chocolate Ganache:
- Heavy Cream (½ cup): Combines with chocolate to create smooth ganache.
- Bittersweet Chocolate (4 ounces, finely chopped): Use real chocolate bars (60% cacao), not chips which contain stabilizers. Baker's or Ghirardelli baking bars work perfectly.
- Light Corn Syrup (1 teaspoon, optional): Creates extra glossy finish.
Step-by-Step Instructions
- Prep the Pan:
- Preheat your oven to 350°F. Line a 12x17-inch half sheet pan (also called a jelly roll pan) with parchment paper, leaving overhang on the short sides for easy removal. Spray the parchment lightly with cooking spray. Set aside.
- Prepare for Rolling:
- Lay out a large piece of parchment paper or a clean, thin kitchen towel on your counter. Dust it generously with cocoa powder using a fine-mesh sieve. This is what you'll roll the cake onto after baking. Set aside.
- Whip Egg Whites:
- Separate 4 eggs, placing whites in the bowl of a stand mixer fitted with the whisk attachment (or in a large bowl if using a hand mixer), and yolks in a separate medium bowl. To the egg whites, add ¼ cup of sugar. Beat on medium-high speed for 4 to 5 minutes until medium peaks form - when you lift the whisk, the peaks should stand up but the tips curl over slightly. Don't underbeat or overbeat. Set aside.
- Beat Egg Yolks:
- In the medium bowl with the egg yolks, add the remaining ½ cup of sugar. Beat with a hand mixer on high speed for about 2 minutes until thick and pale yellow. Add 1 teaspoon of vanilla, 3 tablespoons of oil, 3 tablespoons of buttermilk, and ½ teaspoon of espresso powder. Beat until completely smooth and well combined.
- Fold in Egg Whites:
- Add about one-third of the whipped egg whites to the yolk mixture. Fold gently with a rubber spatula to lighten the yolk mixture. Add the remaining egg whites in two more additions, folding gently after each addition until just combined. The batter should be light, foamy, and fluffy. Don't overmix or you'll deflate the air you've incorporated.
- Add Dry Ingredients:
- In a separate bowl, sift together ¾ cup of flour, ¼ cup of cocoa powder, ½ teaspoon of baking powder, and ¼ teaspoon of salt. This sifting is essential for a smooth batter. Sift the dry ingredients directly over the egg mixture in two additions, folding gently with a rubber spatula after each addition until just combined. No streaks of flour should remain, but don't overmix.
- Bake:
- Pour the batter into the prepared pan and spread into an even layer with an offset spatula, making sure to get into the corners. The layer will be thin. Bake in the preheated 350°F oven for 13 to 14 minutes until the top springs back when lightly touched and the edges just barely start to pull away from the sides. Don't overbake or the cake will be dry and crack.
- Roll Immediately:
- As soon as you remove the cake from the oven, use the parchment overhang to lift the cake out of the pan and onto your work surface. Immediately and carefully invert the hot cake onto the prepared cocoa-dusted parchment or towel. Peel off the baking parchment from the bottom of the cake. Starting at one short end, gently roll up the cake with the cocoa-dusted parchment or towel inside. Roll slowly and gently. Don't worry if it cracks slightly - this is normal and can be fixed. Let the rolled cake cool completely at room temperature in this rolled-up shape, about 1 hour. This teaches the cake the shape and prevents cracking when you re-roll it with filling.
- Make Whipped Cream Filling:
- In a large bowl or stand mixer fitted with the whisk attachment, combine 1½ cups of cold heavy cream, ⅓ cup of powdered sugar, and 1 teaspoon of vanilla. Beat on medium-high speed until stiff peaks form, about 3 to 4 minutes. If using, fold in 2 to 3 tablespoons of marshmallow creme until smooth. Refrigerate while you unroll the cake.
- Fill and Re-Roll:
- Once the cake is completely cool, carefully unroll it. It should unroll fairly easily since it cooled in that shape. Remove the parchment or towel. Spread the whipped cream filling evenly over the entire surface of the cake, leaving about ½ inch border on all sides. Starting at the same short end, carefully roll the cake back up (without the parchment this time). The whipped cream will spread to the edges as you roll. Place seam-side down on a serving platter. Refrigerate while making ganache.
- Make Ganache:
- Place ½ cup of heavy cream in a microwave-safe bowl or small saucepan. Heat until just beginning to simmer (don't boil). Place 4 ounces of finely chopped chocolate in a medium bowl. Pour the hot cream over the chocolate and let sit for 2 minutes without stirring. Then stir slowly until completely smooth and glossy. Stir in 1 teaspoon of corn syrup if using.
- Finish:
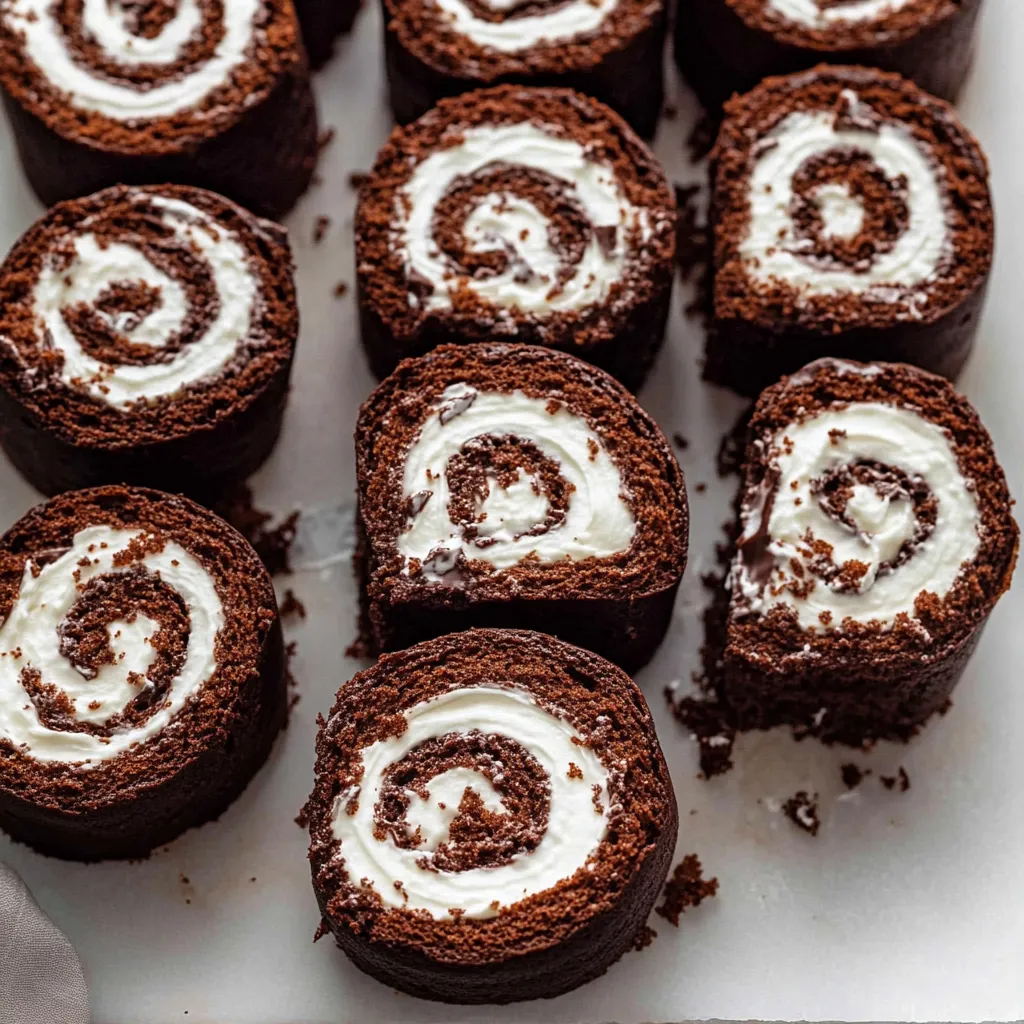
- Pour the ganache over the chilled cake roll, spreading with an offset spatula to cover the top and sides. Refrigerate for at least 1 hour until the ganache is set. Slice with a sharp knife, wiping it clean between cuts, and serve cold.
 Pin it
My sister who's an experienced baker was convinced cake rolls were impossibly difficult and refused to attempt them, insisting they required "professional skills." After I walked her through the process and explained that rolling while warm is the secret to preventing cracks, she successfully made a perfect roll on her first try. Getting the experienced baker to realize technique matters more than mystique feels like demystifying unnecessary complexity.
Understanding Egg White Whipping
Whipping egg whites is crucial to this cake's structure. When you beat egg whites, you're incorporating air bubbles into the protein network. The proteins unfold and bond with each other, trapping air. Sugar stabilizes these bubbles. For this recipe, you want medium peaks - when you lift the whisk, the peaks stand up but the tips curl over. Soft peaks (tips curl completely) aren't stable enough. Stiff peaks (tips stand straight up) are overbeaten - the protein network is too tight and won't fold into the batter smoothly. Medium peaks provide structure while remaining pliable enough to incorporate gently. This takes 4-5 minutes of beating at medium-high speed. Don't rush it, but also don't overbeat.
Why Oil Instead of Butter
The updated recipe uses vegetable oil instead of melted butter, and this matters significantly for preventing cracks. Butter is an emulsion of fat and water that solidifies when cool. Cakes made with butter become firmer and less flexible as they cool. Oil remains liquid at all temperatures, keeping the cake crumb moist and pliable even when cool. This flexibility is crucial for rolling without cracking. Oil also distributes more evenly through batter than butter, creating more uniform moisture throughout. For cake rolls specifically, where flexibility is paramount, oil is superior to butter. This is the same reason most super-moist chocolate cakes use oil.
The Importance of Rolling While Warm
The instruction to roll the cake immediately after baking while it's still warm is the single most important technique for preventing cracks. Warm cake is soft, pliable, and flexible - it bends easily without breaking. As cake cools, the structure sets and becomes more rigid. Cold cake is brittle and resistant to bending - trying to roll cold cake causes it to crack and break. By rolling the warm cake with parchment inside and letting it cool in that rolled shape, you're essentially training the cake to hold that curve. The structure sets in a curved position rather than flat. When you unroll it later to add filling, it already knows this shape and doesn't resist, making the final roll with filling much easier and less prone to cracking.
Choosing the Right Chocolate for Ganache
The recipe specifies using real chocolate bars rather than chocolate chips, and this matters. Chocolate chips contain stabilizers (usually soy lecithin) that prevent them from melting completely and losing their shape during baking. This same property makes them poor for ganache - they won't melt smoothly into the cream, creating grainy rather than silky texture. Real chocolate bars contain just chocolate and cocoa butter, which melt completely and emulsify perfectly with cream. Use bittersweet chocolate (60% cacao) for balanced sweetness. Chop the chocolate very finely - the smaller the pieces, the faster and more completely they melt, and the smoother the ganache. Baker's or Ghirardelli baking bars from the baking aisle work perfectly.
Storage, Make-Ahead, and Freezing
Chocolate cake rolls store well with proper handling. Refrigerate the filled and frosted roll, covered loosely with plastic wrap, for up to 3 days. The whipped cream filling requires refrigeration. For longer storage, freeze the filled roll (before adding ganache) wrapped tightly in plastic wrap then foil for up to 3 months. Thaw overnight in the refrigerator, then make fresh ganache and frost before serving. You can also bake the cake, roll it with parchment, and freeze it unfilled for up to 3 months. Thaw, then fill and frost as directed. The ganache softens at room temperature, so serve the roll cold for neatest slicing.
Variations and Different Flavors
While chocolate with vanilla cream is classic, you can create variations. For coffee filling, add 2 teaspoons of instant espresso powder to the whipped cream. For peppermint filling, substitute peppermint extract for vanilla and add crushed candy canes. For chocolate filling, make chocolate whipped cream by adding cocoa powder and extra sugar. For berry filling, spread thinned jam before adding whipped cream. For peanut butter filling, add peanut butter to the whipped cream. For different cake flavors, make vanilla sponge cake instead of chocolate. For mini rolls, cut the cake into quarters and roll each piece separately, then slice in half for 8 mini rolls. Each variation maintains the rolling technique while creating different flavor profiles.
Troubleshooting Common Problems
When cake rolls don't turn out right, there's usually a fixable cause. If the cake cracks badly, you rolled it cold instead of warm or overbaked it - roll while warm and bake only 13-14 minutes. If it won't roll at all, you overbaked it significantly - it must remain moist. If it's dry, you overbaked it or overmixed the batter - bake just until set. If it's dense, you deflated the egg whites or underbeat them - fold gently and beat to medium peaks. If it didn't rise, you overfolded or used expired baking powder - fold just until combined. If ganache is grainy, you used chocolate chips instead of bars - use real chocolate. If the filling squishes out, you added too much - use the amount specified. Most issues relate to baking time, egg white handling, or rolling temperature.
 Pin it
After making chocolate cake rolls probably fifty times over the past ten years, they've become one of those desserts that consistently impresses people while being genuinely achievable once you understand the key techniques. I appreciate how the combination of light sponge, fluffy cream, and rich ganache creates complexity in each bite, and how homemade versions taste dramatically better than packaged store-bought ones. The nostalgic element makes these especially fun to serve. Knowing the simple secrets - roll while warm, don't overbake, fold gently - transforms something that seems intimidating into something reliably successful. This represents exactly what impressive baking should be - looks professional through understanding proper technique, genuinely delicious rather than just visually striking, and achievable enough that you'll actually make it instead of just admiring pictures and feeling inadequate.
Frequently Asked Questions
- → Why does my cake roll crack when I roll it?
- Make sure to roll the cake while it's still warm right out of the oven. Rolling it cold will cause cracks. Also, don't overbake it - the cake should be moist and springy.
- → Can I make this cake ahead of time?
- Yes, you can prepare and roll the unfilled cake up to a day ahead. The filled cake also freezes well for up to 3 months. Just add the ganache after thawing.
- → Do I need to use cake flour?
- No, all-purpose flour works just as well. Both types give the same results in this recipe.
- → What can I use instead of buttermilk?
- Regular whole milk works perfectly fine. You won't notice much difference in the final cake.
- → How do I store leftover cake roll?
- Cover it well and keep it in the refrigerator for up to 3 days. The cake stays moist and delicious when properly stored.
- → Can I skip the espresso powder?
- Absolutely. The espresso powder just enhances the chocolate flavor without adding coffee taste, but it's completely optional.
- → Why do I need to use a towel to roll the cake?
- A kitchen towel helps the cake hold its shape while cooling and prevents it from cracking. It's easier to work with than parchment paper.