
 Pin it
These Christmas mints bring back memories of every holiday gathering I've attended, where those little pastel candies disappear faster than cookies from the dessert table. This recipe transforms basic pantry ingredients into buttery, melt-in-your-mouth treats that rival anything you'd find at a fancy candy shop. What makes these special is how the cream cheese creates an incredibly smooth texture while the peppermint gives just the right amount of refreshing flavor without being overpowering.
I started making these about five years ago when I needed something simple for a cookie exchange, and they've become my most requested recipe. The best part is watching people's faces when they bite into one expecting a regular mint and get that buttery, creamy surprise instead.
Ingredients You'll Need
- Granulated sugar (for coating): This creates that signature sparkly finish and adds a slight crunch that contrasts beautifully with the soft center; use regular white sugar, not superfine, so it actually sticks to the mints properly
- Cream cheese (softened to room temperature): This is what makes these mints incredibly creamy and gives them that luxurious texture that regular mints don't have; make sure it's completely soft or you'll end up with lumps in your dough
- Unsalted butter (softened): Adds richness and that buttery flavor that makes these taste homemade; salted butter will make them taste off, so stick with unsalted and at room temperature so it blends smoothly
- Light corn syrup (clear, like Karo brand): This keeps the mints from becoming grainy and helps them stay soft instead of hardening into rocks; the clear version won't change the colors of your mints
- Peppermint extract (pure, not imitation): Real extract gives a clean, fresh mint flavor without any chemical aftertaste; start with the amount in the recipe because peppermint can quickly become too strong
- Powdered sugar (confectioners' sugar): Forms the base of your dough and determines the final texture; you'll need extra for kneading, so buy more than you think you'll use
- Green liquid or gel food coloring: Gel colors work better because they're concentrated and won't make your dough too wet; liquid works fine but you might need extra powdered sugar to compensate for the moisture
- Red liquid or gel food coloring: Same as the green, gel gives you brighter, more vibrant colors without adding excess liquid that makes the dough sticky and hard to work with
Step-by-Step Instructions
Prepare your workspace and beat the wet ingredients together
Start by laying out a large piece of parchment paper on your counter and dusting it generously with powdered sugar so the dough doesn't stick when you're working with it later. In your stand mixer or a large bowl with hand beaters, combine the softened cream cheese and butter, beating them together for about two minutes until they're completely smooth and fluffy with no lumps remaining. Add the corn syrup and peppermint extract to this mixture and continue beating for another minute until everything is fully blended and the mixture looks silky and uniform in texture.
Gradually incorporate the powdered sugar
Now comes the important part - add your powdered sugar slowly, about half a cup at a time, mixing on low speed after each addition until it's completely absorbed into the dough. You'll notice the mixture getting thicker and stiffer as you add more sugar, which is exactly what you want. Keep adding sugar and mixing until all of it is incorporated and you have a smooth, workable dough that pulls away from the sides of the bowl. If the mixer starts struggling because the dough is too thick, don't force it - switch to a sturdy spatula or wooden spoon and fold in the remaining sugar by hand using firm, steady strokes.
Divide and color your dough
Turn your dough out onto that powdered sugar-dusted parchment paper and use a knife or bench scraper to divide it into three equal portions, eyeballing it as evenly as you can. Take two of the portions and use your finger to press a small well or indent right in the center of each one, making a little pocket for the food coloring. Add your red food coloring to one well and green to the other, starting with just a few drops because you can always add more but can't take it away. Leave the third portion completely white for a classic tri-color presentation.
Knead the colors through the dough
Working with one colored portion at a time, fold the dough over the food coloring and start kneading it like bread dough, pushing it away from you with the heels of your hands and folding it back over itself. The color will start streaky but keep kneading for several minutes until it's evenly distributed throughout with no white streaks remaining. You'll definitely notice the dough getting stickier from the liquid in the food coloring, so sprinkle powdered sugar onto your work surface as you knead, adding up to a quarter cup total until the dough is smooth and only slightly tacky to the touch. Even the white dough might need a tablespoon or two of extra powdered sugar kneaded in to get the perfect consistency - you want it pliable but not sticky.
Shape the dough into ropes and cut into pieces
Take each ball of dough and roll it between your palms and the counter to form a long rope, aiming for about 18 inches in length and roughly an inch thick all the way through. Use a sharp knife to slice each rope into half-inch pieces, which will give you the perfect size for bite-sized mints. Don't worry if they're not all exactly the same - slight variations actually make them look more homemade and charming. After cutting, take each little piece and roll it gently between your palms to form it into a smooth ball, taking just a few seconds per piece to round them out nicely.
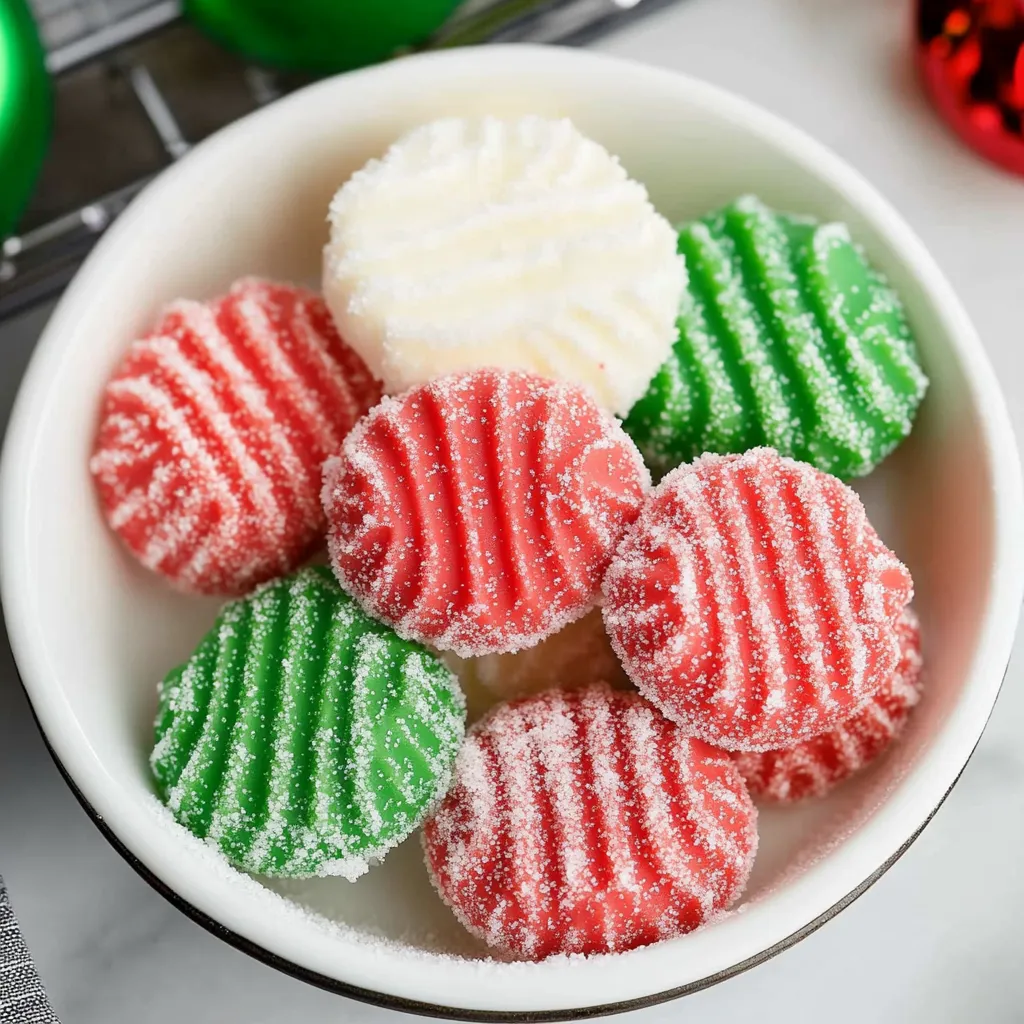
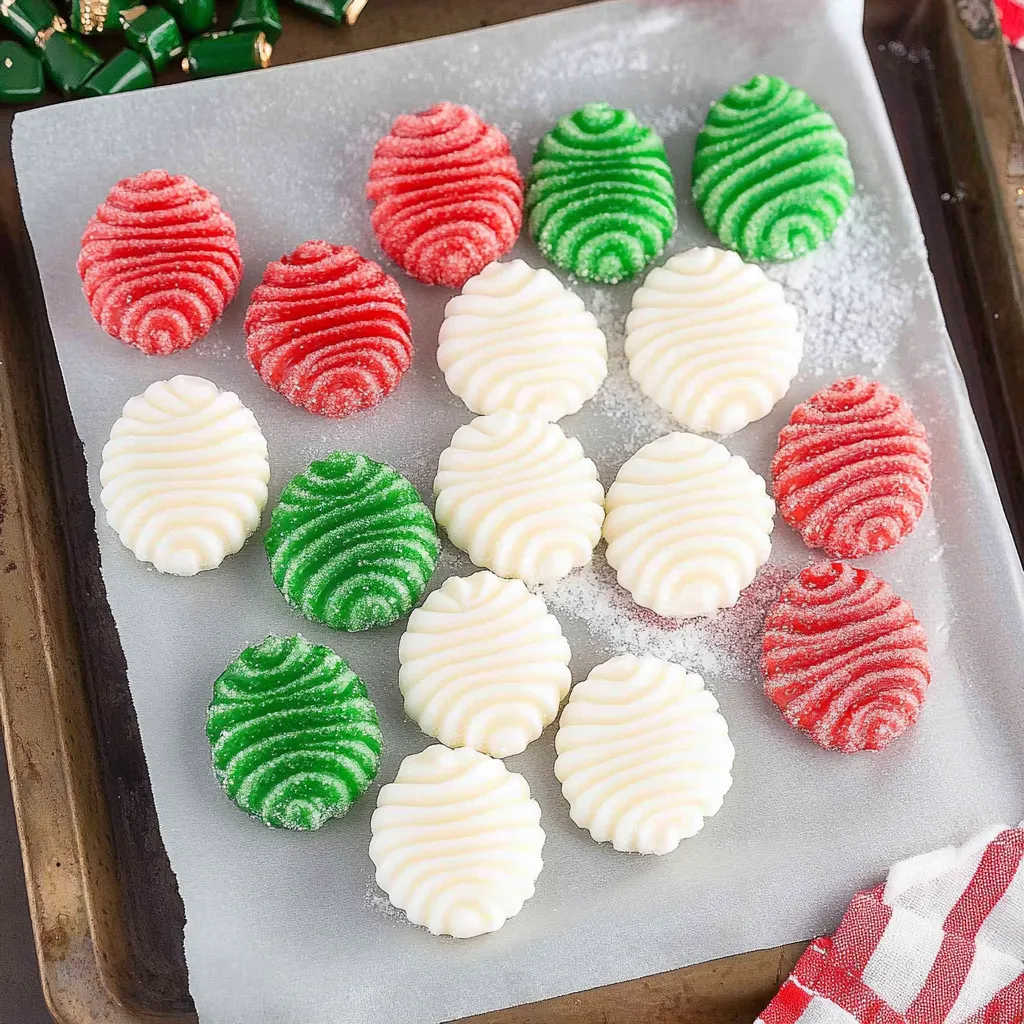
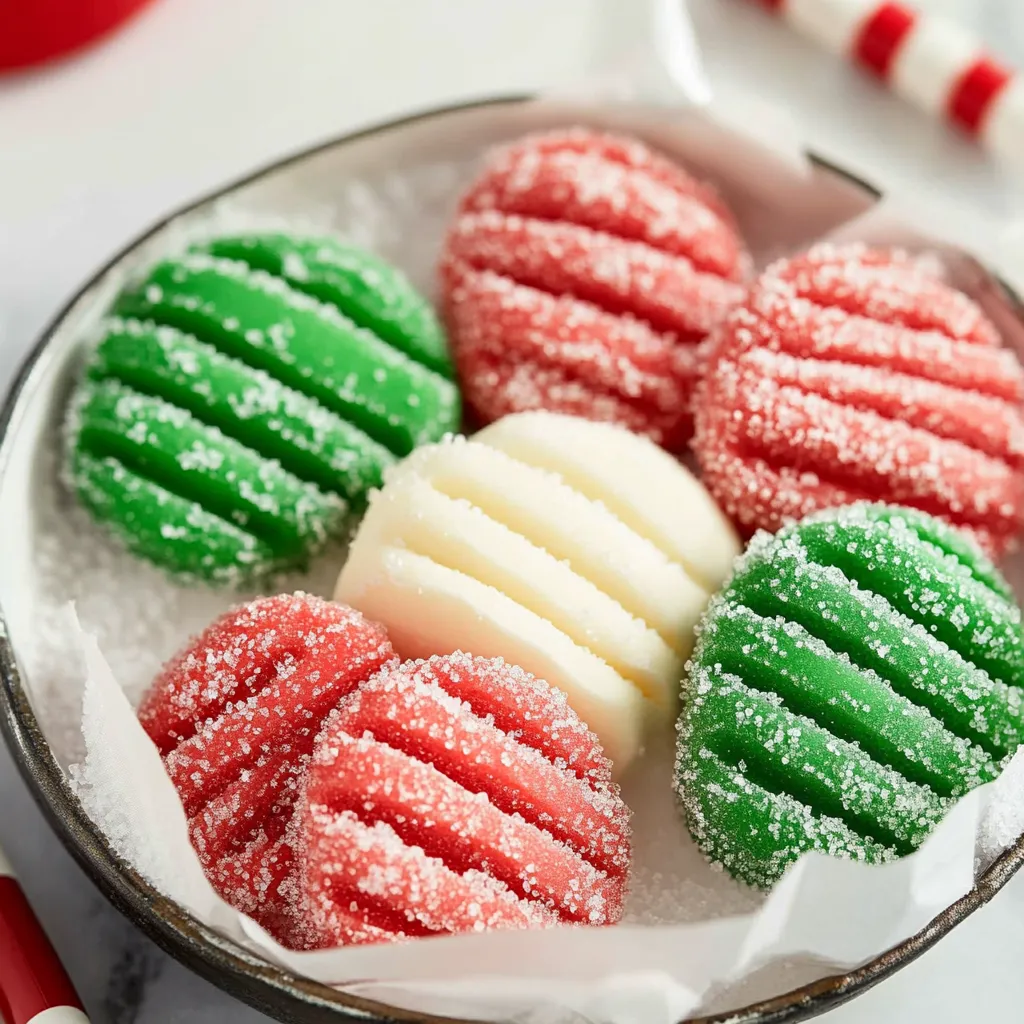
Coat each ball in sugar and flatten
Fill a medium bowl with granulated sugar and drop a few balls in at a time, swirling the bowl or using a spoon to roll them around until they're completely coated in a layer of sparkly sugar. Place each sugar-coated ball onto a parchment-lined baking sheet, spacing them about an inch apart so they're not touching. Once all your balls are arranged on the sheet, take a fork and gently press down on each one to flatten it into a disc shape, pressing just enough that the tines of the fork leave those pretty parallel lines across the top that make them look professional and decorative.
Allow proper drying time before serving
This is the hardest part because you have to be patient - let those mints sit out at room temperature on the baking sheet for a full 24 hours without disturbing them. During this time, the outer layer will dry and form that lovely crisp shell while the inside stays creamy and soft. After the drying period is complete, carefully transfer them to your serving platter or storage container, and they're ready to enjoy or gift to lucky friends and family.
 Pin it
My family has a tradition where we make these together every December, and my daughter always insists on making purple ones with grape flavoring even though they're supposed to be Christmas colors. Honestly, the purple ones disappear just as fast as the traditional colors, and I love how this recipe has become flexible enough that we can make it our own while still getting that perfect creamy texture every single time.
Why These Work So Perfectly for Holidays
The beauty of these mints lies in their simplicity and how forgiving the recipe actually is once you understand the basic technique. Unlike temperamental candies that require precise temperatures and candy thermometers, these come together at room temperature with ingredients you probably grabbed during your regular grocery run. The cream cheese acts as a stabilizer that keeps everything smooth and prevents that grainy texture you sometimes get with powdered sugar candies. What's really clever about this recipe is how the corn syrup works behind the scenes to maintain moisture, ensuring your mints stay soft for weeks instead of turning into hard little pucks after a few days.
Getting the Colors Just Right
Food coloring can be tricky, and I learned this the hard way when I made my first batch looking like pale, washed-out versions of what I wanted. **Gel food coloring** truly makes a difference here because it's so much more concentrated than the liquid stuff in those tiny bottles at the grocery store. When you're kneading in the color, don't be afraid to add another drop or two if it looks too pastel for your liking - just remember that each drop of liquid means a bit more powdered sugar to compensate for the extra moisture. The dough will also lighten slightly as it dries, so what looks vibrant when you're shaping them will be a touch lighter the next day.
Texture Troubleshooting
The consistency of your dough determines everything about how these mints turn out, and it's something you develop a feel for after making them once or twice. If your dough is too soft and sticky, it won't hold its shape when you flatten it with the fork and will just spread into shapeless blobs. Too stiff, and the mints will be hard and unpleasant to bite into instead of that dreamy melt-in-your-mouth texture you're after. Room temperature plays a bigger role than you'd expect - on hot summer days when I've made these for events, I've needed almost double the extra powdered sugar, while winter batches in my cold kitchen barely need any at all.
Storage and Make-Ahead Magic
These mints are absolutely perfect for **making ahead**, which is a lifesaver during the chaotic holiday season when you're juggling twelve other things. Once they've completed their **24-hour drying period**, they'll keep beautifully in an airtight container in the refrigerator for two full weeks without losing any of their texture or flavor. I actually think they taste better after a few days when the flavors have had time to meld together. For longer storage, the freezer is your friend - pack them in a freezer-safe container with parchment paper between layers, and they'll stay perfect for up to three months. Just move them to the fridge the night before you need them, and they'll thaw gradually without getting soggy or losing that crisp shell.
Gifting and Presentation Ideas
There's something special about giving homemade candy as a gift, especially when it looks as professional as these do. I like to layer them in clear cellophane bags tied with ribbon, alternating the colors so you can see the pretty pattern through the bag. Small decorative tins work wonderfully too, and you can line them with tissue paper before arranging the mints in a single layer. For teacher gifts, I've put them in mason jars with a festive fabric circle tied over the lid with twine and a handwritten tag with the flavor. The fact that they don't need refrigeration for a day or two makes them practical for gifting, and people are always impressed when you tell them you made them from scratch.
 Pin it
After making hundreds of these over the years, I've learned that the real secret isn't in any fancy technique but in the patience to let them dry properly and the willingness to adjust the powdered sugar as you go based on how the dough feels in your hands. These mints have become my signature contribution to every holiday gathering, and there's something deeply satisfying about creating something so elegant and delicious from such humble ingredients that probably cost less than a bag of store-bought mints.
Frequently Asked Questions
- → Can I make these mints ahead of time?
- Yes, these mints actually get better after sitting for 24 hours. You can make them up to a week before your party and store them in an airtight container.
- → Do I have to use liquid food coloring?
- Liquid food coloring works best for this recipe. Gel coloring is too thick and won't mix as easily into the dough.
- → How should I store Christmas mints?
- Keep them in an airtight container at room temperature for up to 2 weeks. You can also freeze them for up to 3 months.
- → Can I use salted butter instead of unsalted?
- Unsalted butter is best so you can control the flavor, but salted butter will work in a pinch. The mints might just taste slightly less sweet.
- → Why is my dough too sticky to work with?
- The dough gets sticky from the food coloring or warm temperatures. Just knead in a little more powdered sugar, one tablespoon at a time, until it's workable.
- → Can I make these without peppermint extract?
- Sure! Try vanilla, almond, or even lemon extract for different flavored mints. Use the same amount as the peppermint.