
 Pin it
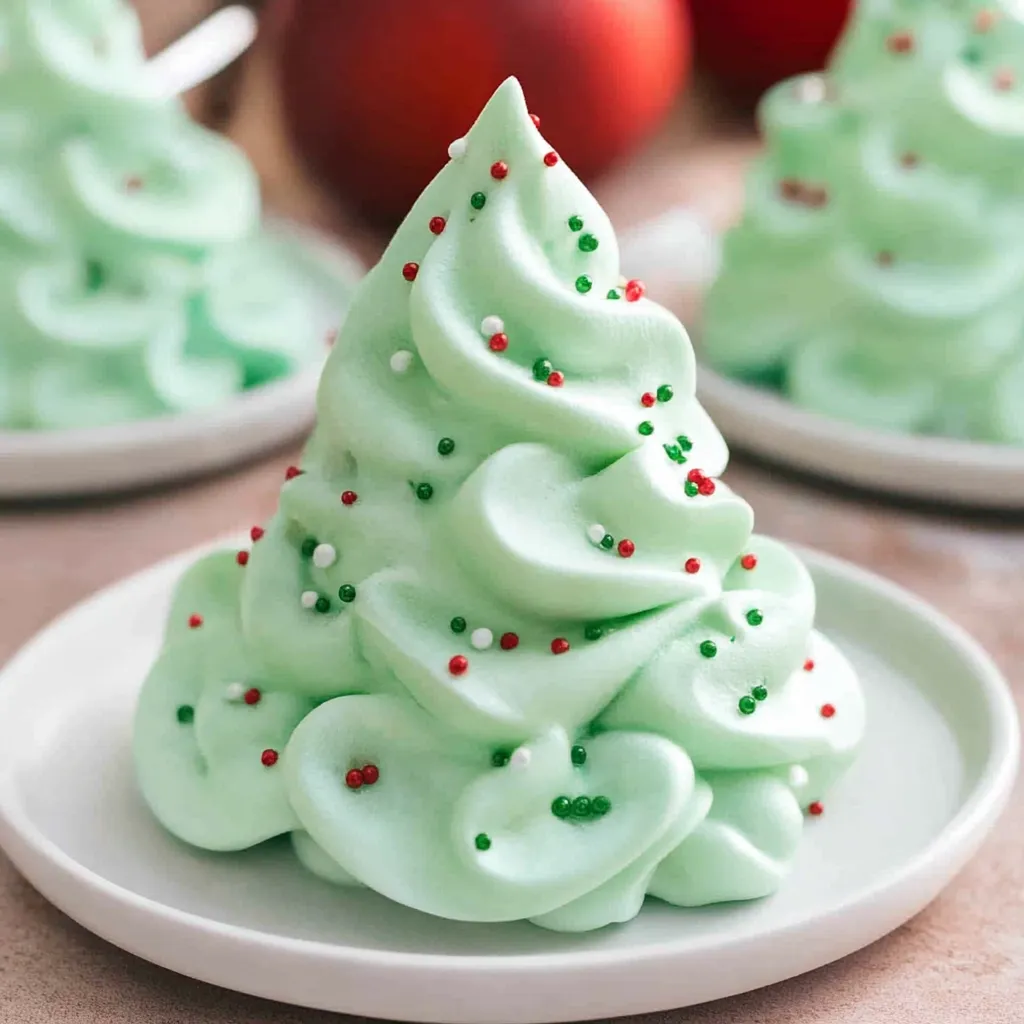
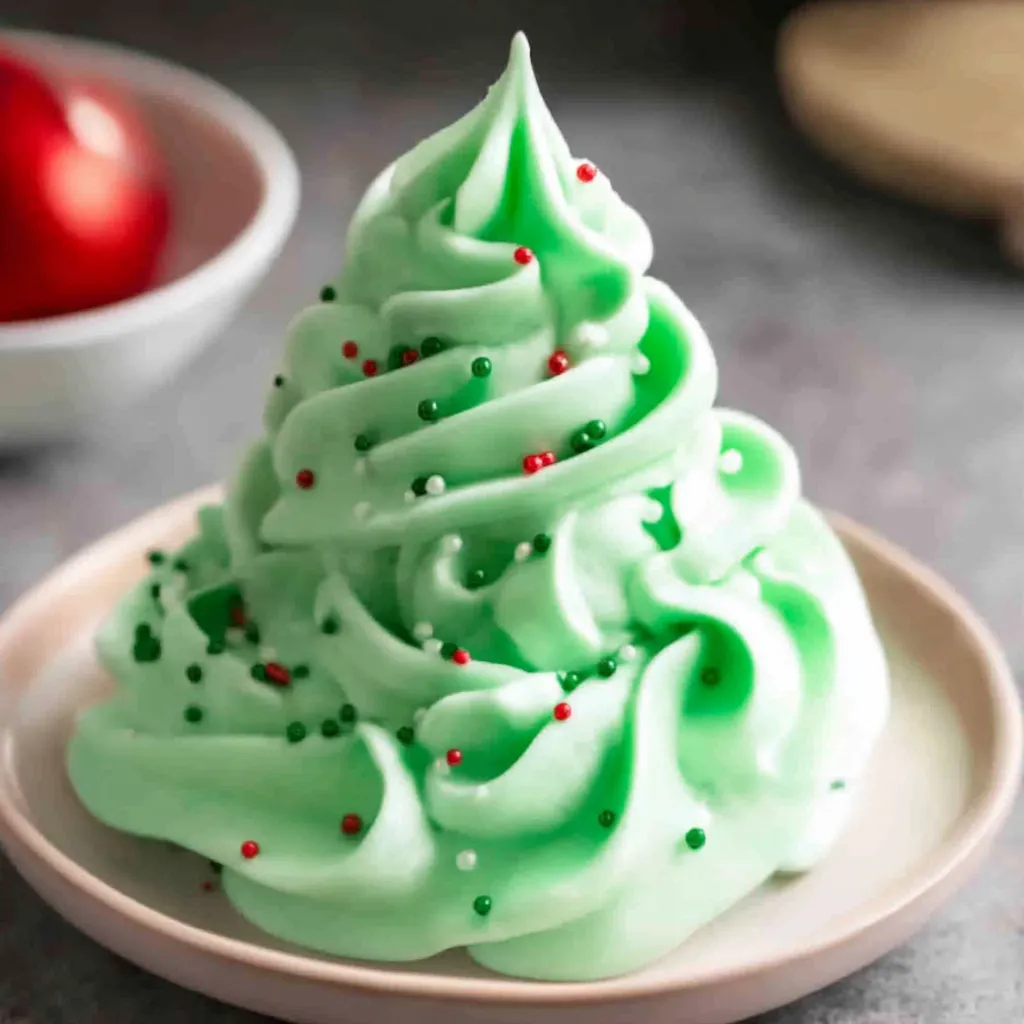
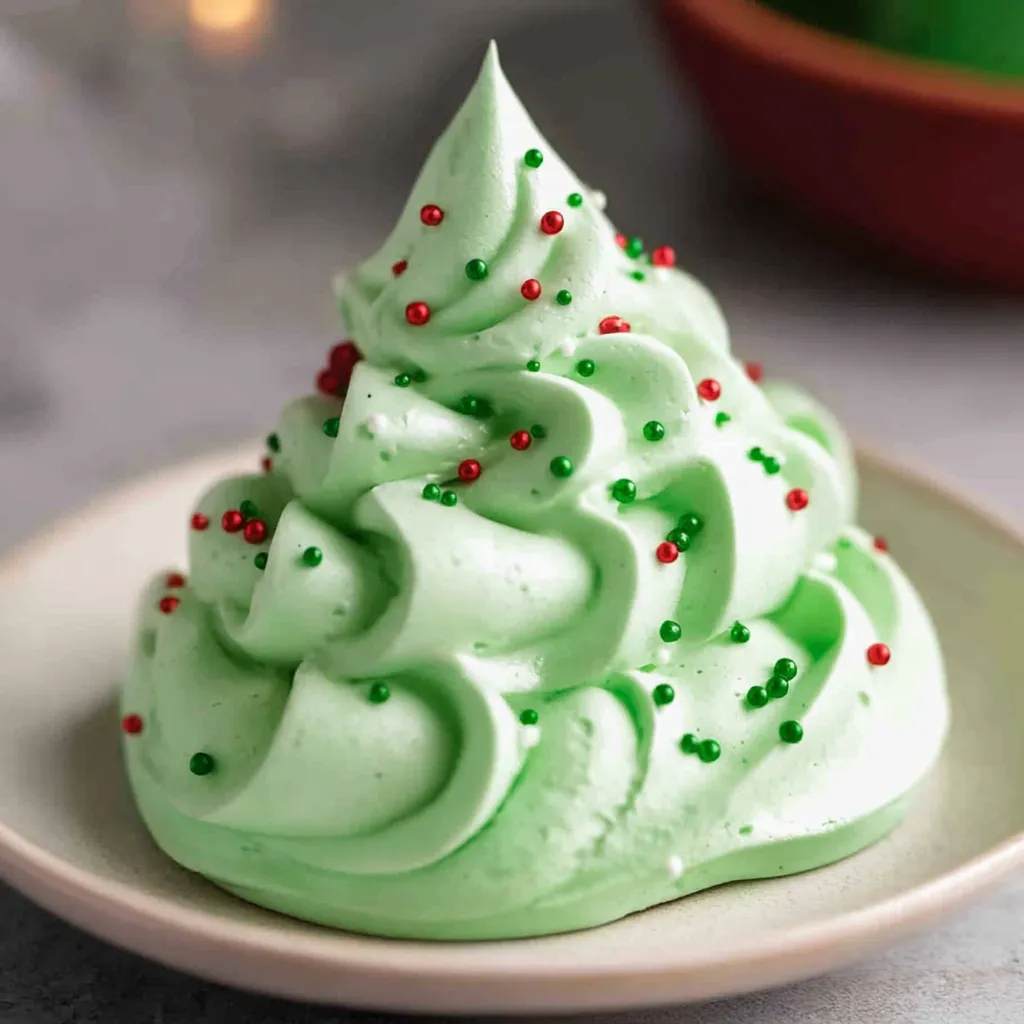
Christmas tree meringues are one of those festive treats that look like they require professional pastry skills - perfectly piped green swirls with star-topped peaks dusted with powdered sugar to resemble snow-covered evergreens - but actually require nothing more than whipped egg whites and sugar piped through a star tip and baked low and slow until crispy on the outside and marshmallowy inside. The technique for making stable meringue is straightforward once you understand that clean equipment is essential because any trace of fat prevents egg whites from whipping properly, and that adding sugar gradually while beating creates the thick, glossy consistency that holds its shape during piping and baking. What makes these particularly appealing beyond their adorable appearance is how they're naturally gluten-free and dairy-free, require only four basic ingredients you probably have already, and can be made days ahead since they store perfectly at room temperature in an airtight container.
I started making meringues about ten years ago and initially failed repeatedly because I didn't understand that even a tiny bit of yolk in the whites prevents them from whipping, and that high oven temperature makes them crack and brown instead of staying white and crispy. After learning that spotlessly clean equipment is essential and that 210°F is the ideal baking temperature - low enough to dry them without browning - they became foolproof. Now I make them every Christmas because they're one of those treats that consistently wow people while requiring minimal actual skill once you know the secrets.
Ingredients and What Makes Them Essential
- Large Egg Whites (4, at room temperature): Egg whites are the foundation. They must be completely free of any yolk, which contains fat that prevents whipping. Room temperature whites whip faster and to greater volume than cold whites. If your eggs are refrigerated, let them sit at room temperature for 15 minutes, or place whole eggs in warm water for 5 minutes.
- Caster Sugar or Superfine Sugar (1 cup): Fine sugar dissolves more completely into egg whites than granulated, creating smooth texture. Caster sugar is ideal, but you can pulse granulated sugar in a food processor to make it finer. You can also use half caster sugar and half powdered sugar.
- Cream of Tartar (½ teaspoon): Cream of tartar is an acid that stabilizes egg white foam, making it less likely to deflate. It also helps create that crispy shell with soft, marshmallowy center. You can substitute ½ teaspoon of white vinegar or lemon juice if you don't have cream of tartar.
- Pure Vanilla Extract (½ teaspoon): Vanilla adds flavor depth beyond just sweetness. You can substitute peppermint extract for festive flavor variation.
For Decorating:
- Green Gel Food Coloring: Gel food coloring provides vibrant color without adding liquid that would thin the meringue. Don't use liquid food coloring which affects consistency.
- Gold Star Sprinkles (optional): For decorating the tops before baking.
- Powdered Sugar (for dusting, optional): For creating a snowy effect after baking.
Step-by-Step Instructions
- Prepare Your Equipment:
- This is crucial. Any trace of fat (from egg yolks, butter, oil, or even fingerprints) will prevent egg whites from whipping properly. Wipe your mixing bowl and whisk attachment with lemon juice or white vinegar, then wipe dry with a clean towel. This removes any invisible fat residue. Make sure all equipment is completely dry - water also interferes with whipping.
- Whip the Egg Whites:
- Place 4 egg whites in the spotlessly clean bowl of a stand mixer fitted with the whisk attachment, or in a large bowl if using a hand mixer. Beat on medium speed for about 3 to 4 minutes until the whites become foamy and start to thicken. They should look like white foam but won't hold peaks yet.
- Add First Batch of Sugar and Stabilizers:
- With the mixer running on medium speed, add ½ cup of sugar (half the total), ½ teaspoon of cream of tartar, and ½ teaspoon of vanilla extract. Continue beating on medium speed for about 2 minutes. The mixture will become whiter and more voluminous.
- Add Remaining Sugar:
- Add the remaining ½ cup of sugar gradually, about 1 tablespoon at a time, beating for about 10 seconds between each addition. This gradual addition allows the sugar to dissolve completely. After all the sugar is added, increase speed to medium-high and beat for 6 to 8 minutes until the meringue is thick, glossy, and forms stiff peaks. When you lift the whisk, the meringue should stand straight up without drooping.
- Test for Readiness:
- Rub a small amount of meringue between your thumb and finger. If it feels grainy, the sugar hasn't fully dissolved - continue beating for another minute. If it feels completely smooth, it's ready. The meringue should be thick, glossy, and white. When you turn the bowl upside down, it shouldn't move at all.
- Add Color (Optional):
- If making green Christmas trees, add a small amount of green gel food coloring - start with just a tiny drop or two. Fold it through with a spatula until evenly colored. Add more color gradually if you want deeper green. Don't overmix or you'll deflate the meringue.
- Prepare for Piping:
- Preheat your oven to 210°F (100°C). Line two large baking sheets with parchment paper or silicone baking mats. Fit a large piping bag with a star tip (Wilton 1M or any large star tip with about ½-inch opening). If you don't have a piping bag, use a large zip-top freezer bag and cut off one corner.
- Pipe the Trees:
- Spoon or scoop all the meringue into the prepared piping bag. Hold the bag vertically with the tip about ½ inch above the prepared baking sheet. Pipe in a spiral motion, starting with a wide base and spiraling upward while gradually making the circle smaller, pulling up to a point at the top to create the star. Release pressure and pull away quickly. The swirl should look like a Christmas tree with the pointed top. Repeat, spacing meringues about 1 inch apart - they don't spread. If using gold star sprinkles, place one on the top of each tree before baking.
- Bake Low and Slow:
- Place the baking sheets in the preheated 210°F oven. Bake for exactly 1 hour. After 1 hour, turn off the oven but don't open the door. Leave the meringues inside the turned-off oven to cool completely - ideally overnight, or at least 4 hours. This gradual cooling dries them out completely, creating that crispy shell with soft marshmallowy center. If you remove them while warm, they'll be chewy throughout instead of crispy.
- Finish and Serve:
- Once completely cool, carefully remove the meringues from the oven. If desired, dust lightly with powdered sugar through a fine-mesh sieve to create a snowy effect. Store in an airtight container at room temperature.
 Pin it
My brother-in-law who's an experienced cook was convinced meringues were impossibly difficult and refused to attempt them, insisting they required "special baker skills." After I demonstrated the process - clean equipment, whip whites, add sugar gradually, pipe and bake low - and he successfully made perfect meringues, he looked annoyed that something so intimidating was actually straightforward. Now he makes them regularly and acts like he discovered the technique himself. Getting the confident cook to admit meringue isn't difficult feels like breaking down unnecessary barriers.
Understanding Egg White Science
Egg whites are about 90% water and 10% protein. When you whip them, you're creating foam - air bubbles trapped in a network of proteins. The whipping action unfolds the normally coiled proteins, allowing them to bond with each other and trap air. Sugar stabilizes this structure by bonding with the proteins and water, making the foam more stable. However, fat interferes with this entire process. Even tiny amounts of fat (from egg yolks, butter, oil, or dirty equipment) coat the proteins and prevent them from unfolding and bonding. This is why spotlessly clean equipment and yolk-free whites are absolutely essential. It's also why plastic bowls are problematic - they can retain invisible fat films even after washing. Glass or metal bowls are best.
The Role of Cream of Tartar
Cream of tartar (potassium bitartrate) is an acidic salt that serves multiple purposes in meringue. First, it lowers the pH of the egg whites, which helps proteins unfold more easily and bond more strongly, creating more stable foam. Second, it prevents the proteins from bonding too tightly, which would make the meringue dry and crumbly. Third, it helps maintain the white color by preventing discoloration. Fourth, it contributes to that characteristic crispy exterior with soft interior by affecting how the proteins set during baking. While technically optional, cream of tartar dramatically improves meringue stability and texture. White vinegar or lemon juice provide similar acidic properties if you don't have cream of tartar.
Why Low Temperature Baking Is Essential
The 210°F (100°C) baking temperature isn't arbitrary - it's the ideal temperature for drying meringues without browning or cracking them. Meringues aren't really "baking" in the traditional sense - they're drying out. At temperatures above 250°F, the sugars in the meringue start to caramelize, creating brown color and potentially burnt flavor. The exterior also sets too quickly, trapping moisture inside and potentially causing cracks as steam builds pressure. At very low temperatures (below 200°F), they take too long to dry and can become sticky. At 210°F, moisture evaporates gradually and evenly, the exterior forms a crisp shell, while the interior remains slightly soft and marshmallowy. The extended cooling time in the turned-off oven continues this drying process without additional heat.
Room Temperature Eggs Whip Better
The instruction to use room temperature egg whites isn't just preference - it affects how well and how quickly they whip. Cold egg whites are more viscous (thicker) than room temperature ones because the proteins are more tightly coiled. This viscosity makes it harder for the whisk to incorporate air and for the proteins to unfold and bond. Room temperature whites (around 70°F) are less viscous, allowing faster and more voluminous whipping. The difference can be dramatic - cold whites might take 10 minutes to reach stiff peaks while room temperature whites take 6-8 minutes and achieve greater volume. If you forgot to bring eggs to room temperature, place whole eggs in warm (not hot) tap water for 5 minutes before separating.
Storage, Humidity, and Shelf Life
Meringues are extremely sensitive to moisture and must be stored properly. Store completely cooled meringues in an airtight container at room temperature for up to 5 days. Don't refrigerate - the cold moisture will make them sticky and soft. In humid environments, meringues absorb moisture from the air and become chewy and sticky within hours. There's no fix for this except eating them quickly or making them only on dry days. For gifting, pack in airtight containers with tight-fitting lids. For longer storage, you can freeze meringues in airtight containers with parchment between layers for up to 1 month, but they often absorb moisture during thawing and become sticky. They're really best eaten fresh within a few days. Don't make meringues on rainy or very humid days if you want them to stay crispy.
Variations and Different Flavors
While Christmas trees are festive, you can create other shapes and flavors using the same meringue base. For peppermint meringues, substitute ½ teaspoon of peppermint extract for the vanilla and add crushed candy canes to the piping bag. For chocolate meringues, fold in 2 tablespoons of cocoa powder after the meringue is whipped. For different shapes, pipe rounds for nests (create an indent in the center for filling with cream and fruit), or pipe kisses by pulling straight up for points. For different colors, use any gel food coloring - pink for Valentine's Day, pastels for Easter, orange for Halloween. For flavored variations, try almond extract, coconut extract, or citrus zest. Each variation maintains the same technique while creating different presentations.
Troubleshooting Common Problems
When meringues don't turn out right, there's usually a fixable cause. If egg whites won't whip to stiff peaks, there's fat in the bowl or yolk in the whites - start over with clean equipment and carefully separated eggs. If meringue is grainy, the sugar didn't dissolve - continue beating longer or use finer sugar. If they deflate after piping, you undermixed - beat until truly stiff peaks form. If they brown during baking, your oven is too hot - reduce to 200°F and use an oven thermometer. If they crack, the oven is too hot or you opened the door during baking - use lower temperature and don't open the door. If they're chewy throughout instead of crispy, you removed them too soon - leave in the turned-off oven overnight. If they're sticky, it's humid or they absorbed moisture - store in airtight container. Most issues relate to cleanliness, sugar dissolution, or oven temperature.
 Pin it
After making meringues probably two hundred times over the past ten years, they've become one of my most reliable impressive desserts because they consistently deliver professional-looking results while requiring minimal ingredients and straightforward technique once you understand the principles. I appreciate how egg whites and sugar transform into something so light and delicate, and how the low-temperature baking creates that perfect textural contrast between crispy exterior and soft interior. The ability to make them days ahead and store at room temperature removes stress from holiday baking schedules. Knowing the simple secrets - spotlessly clean equipment, room temperature whites, gradual sugar addition, low baking temperature - transforms something that seems difficult into something genuinely achievable. This represents exactly what holiday baking should be - impressive enough for gifts and parties, naturally accommodating dietary restrictions, practical enough to make in advance, and genuinely delicious rather than just pretty to look at.
Frequently Asked Questions
- → Can I make these meringues ahead of time?
- Yes, these meringues store really well. Keep them in an airtight container at room temperature for up to 2 weeks. Just make sure they're completely cool before storing.
- → Why did my meringues turn out chewy instead of crispy?
- This usually happens if there's moisture in the air or if they weren't baked long enough. Make sure to let them cool completely in the oven and store them in an airtight container away from humidity.
- → Can I use regular sugar instead of caster sugar?
- It's better to stick with caster or superfine sugar because it dissolves more easily. Regular sugar can leave a grainy texture in your meringues.
- → What if I don't have cream of tartar?
- You can substitute it with an equal amount of lemon juice or white vinegar. Both work to stabilize the egg whites and help create that nice crispy shell.
- → How do I know when the meringues are done baking?
- They should feel dry to the touch and lift easily off the parchment paper. If they're still sticky on the bottom, give them another 15-20 minutes in the oven.
- → Can I add different flavors to the meringue?
- Absolutely! Peppermint extract works great for a festive twist, or you can try almond extract. Just use the same amount as the vanilla.
- → Do I really need to leave them in the oven overnight?
- It's not absolutely necessary, but it helps prevent cracking. If you're short on time, at least let them cool in the turned-off oven for an hour or two.