
 Pin it
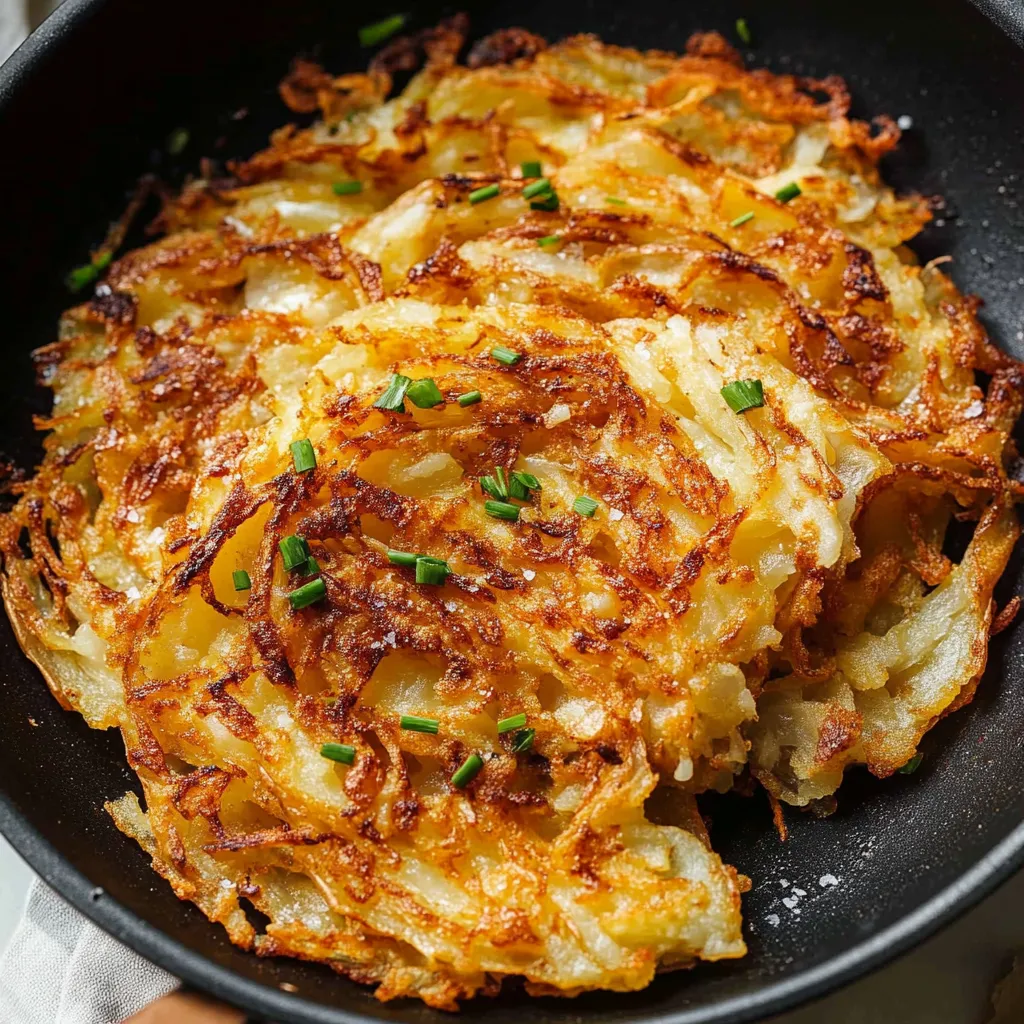
These incredibly crispy hash browns deliver the perfect combination of a golden, crunchy exterior and fluffy, tender interior that makes every bite absolutely irresistible. With just a few simple techniques and the right ratio of fat to potato, you'll create restaurant-quality hash browns that are so much better than anything you can buy frozen or get at a diner.
My love affair with homemade hash browns started when my sister taught me her secret technique using plenty of butter and proper potato preparation. I was amazed at how much better they were than anything I'd ever had at restaurants, and I became completely obsessed with perfecting the method. Now my kids beg me to make these every weekend, and I've discovered that adding a little bacon grease takes them from amazing to absolutely extraordinary.
Ingredients and Why They Matter
- Russet potatoes: these starchy potatoes crisp up beautifully and have the perfect texture for hash browns, unlike waxy varieties that can turn gummy
- Onion powder: provides that classic onion flavor without the risk of burning that fresh onions would bring during the long cooking process
- Vegetable oil or bacon grease: bacon fat adds incredible smoky flavor, while oil provides a neutral base for crisping
- Unsalted butter: creates rich flavor and promotes that gorgeous golden-brown color while helping achieve maximum crispiness
- Salt and black pepper: simple seasonings that enhance the natural potato flavor without overwhelming the dish
Step-by-Step Instructions
- Prepare and grate the potatoes:
- Peel 1.25 pounds of russet potatoes and grate them using the large holes of a box grater. Work carefully and consider using cut-resistant gloves to protect your hands. The key is getting uniform, medium-sized shreds that will cook evenly and crisp up properly.
- Remove excess moisture completely:
- This step is absolutely crucial for crispy hash browns. Place the grated potatoes in the center of a large piece of cheesecloth or clean kitchen towel. Gather the corners and twist to create a tight bundle, then squeeze and wring out as much liquid as possible over the sink. You'll be amazed at how much water comes out - keep squeezing until very little liquid emerges.
- Season the potatoes:
- Transfer the drained potatoes to a large bowl and sprinkle with 1/2 teaspoon onion powder. Toss everything together with your hands to distribute the seasoning evenly throughout all the potato shreds.
- Heat your skillet properly:
- Place a 10-inch non-stick or well-seasoned cast iron skillet over medium heat and let it warm for about 2-3 minutes. Add 2 tablespoons of vegetable oil or bacon grease and 1 tablespoon of butter, swirling to coat the bottom of the pan completely. The fat should sizzle gently when it hits the hot pan.
- Add potatoes and shape carefully:
- Add all the seasoned potatoes to the hot skillet and use a spatula to spread them into an even layer about 1/3 inch thick. Don't press down hard - just level them gently so they cook evenly. You want a cohesive layer that will hold together when you flip it.
- Cook the first side without disturbing:
- Let the hash browns cook completely undisturbed for 6-7 minutes over medium heat. You'll hear them sizzling steadily, and you should start to smell that amazing aroma of browning potatoes. Resist the urge to peek or move them around - this undisturbed time is what creates that perfect golden crust.
- Season and prepare to flip:
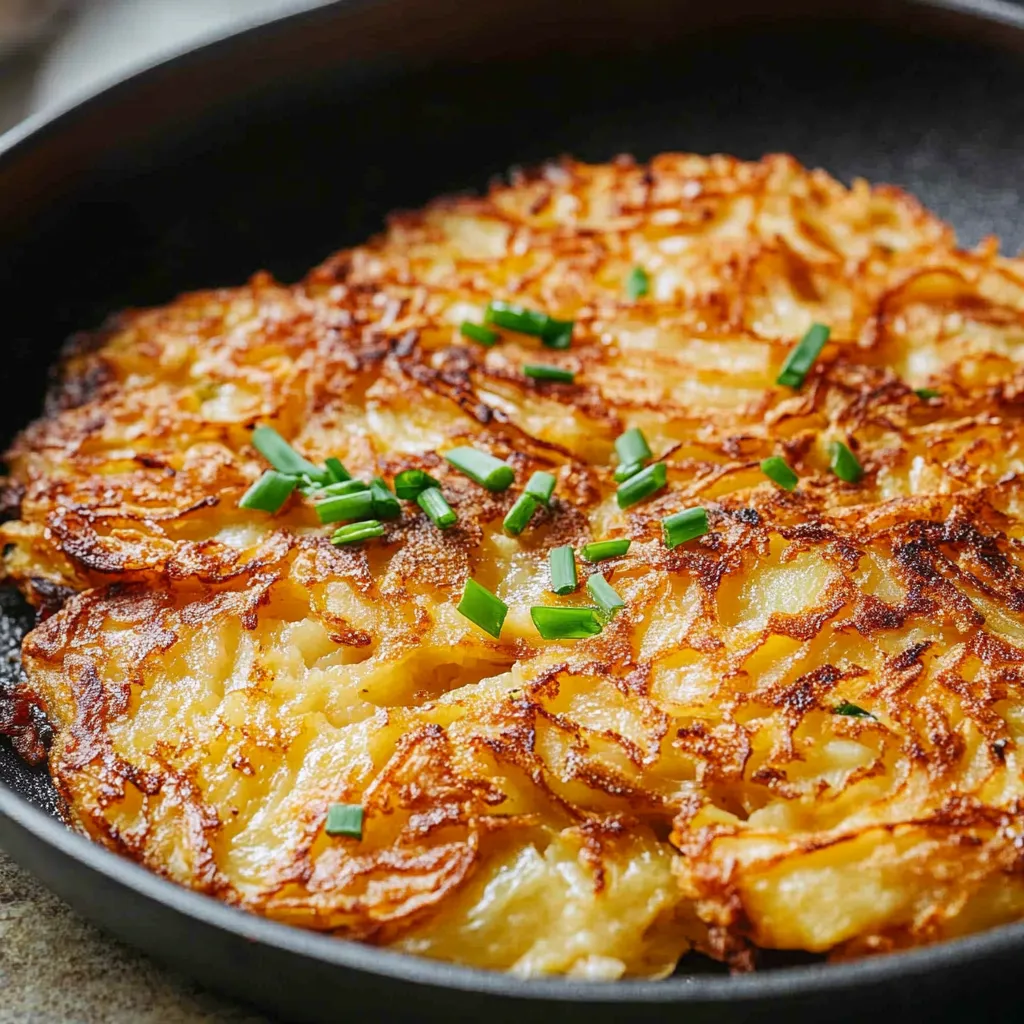
- Sprinkle the top surface generously with salt and black pepper. Using a pizza cutter or large knife, cut the hash brown patty into halves or quarters - this makes flipping much easier and reduces the risk of breaking apart.
- Flip and finish cooking:
- Using a large spatula, carefully flip each section of hash browns. Add another tablespoon of butter around the edges of the pan, letting it melt and flow under the hash browns. Cook for another 5-6 minutes until the second side is equally golden brown and crispy. Serve immediately while hot and at peak crispiness.
 Pin it
I learned the hard way that trying to rush the moisture removal step always results in disappointing, soggy hash browns. The first time I made these, I was impatient and didn't squeeze out enough water, and they just steamed in the pan instead of crisping up. Now I always take the time to really wring out every bit of moisture I can, and the difference in the final texture is absolutely dramatic.
Understanding Potato Varieties and Preparation
The type of potato you choose makes an enormous difference in the final texture of your hash browns. Russet potatoes are ideal because their high starch content and low moisture create the perfect conditions for crisping. Their starch forms a beautiful golden crust when it hits the hot fat, while the interior becomes fluffy and tender. Waxy potatoes like red or fingerling varieties contain more moisture and less starch, which can result in hash browns that never achieve that coveted crispy exterior. Proper grating technique also impacts the final result significantly. You want pieces that are large enough to maintain some texture but small enough to cook through evenly. The large holes on a box grater create the ideal size - not so small that they turn to mush, but not so large that they don't hold together or cook unevenly. I always grate in long, steady strokes to get uniform pieces that will crisp consistently.
The Role of Fat in Creating Perfect Texture
The combination of oil and butter serves specific purposes in creating the ideal hash brown texture. Oil has a higher smoke point than butter, which allows you to get the pan hot enough for proper crisping without burning. Butter adds incredible flavor and helps promote that gorgeous golden-brown color through the milk solids it contains. Using both together gives you the best of both worlds - high-heat cooking capability with rich, complex flavor. Bacon grease takes this concept even further by adding a smoky, savory depth that complements the potato flavor beautifully. If you're cooking bacon for breakfast anyway, definitely save that rendered fat for your hash browns. The smoky notes and extra richness elevate the dish from good to absolutely spectacular, and it's a trick that many restaurants use to make their hash browns irresistibly delicious.
Heat Control and Timing Techniques
Getting the heat level just right is crucial for hash browns that are crispy outside and cooked through inside. Medium heat allows the potatoes to cook all the way through while still developing that beautiful golden crust. Too high, and the outside burns before the interior is tender. Too low, and they'll just steam and never develop any crispiness at all. The timing of when to flip is equally important. You'll know they're ready when you can smell that distinctive aroma of browning potatoes and hear steady, vigorous sizzling. If you try to flip too early, the crust won't have formed properly and the hash browns will fall apart. Waiting that full 6-7 minutes on the first side ensures a cohesive, golden layer that will hold together beautifully when you turn it over.
Serving Suggestions and Meal Integration
These hash browns are the perfect foundation for building an amazing breakfast or brunch spread. They pair beautifully with eggs cooked any style - the crispy potato texture contrasts wonderfully with runny yolks or fluffy scrambled eggs. For a complete breakfast plate, serve them alongside bacon or sausage and some fresh fruit for a meal that feels both indulgent and balanced. They're also fantastic as a base for more elaborate dishes. Top them with poached eggs and hollandaise for a breakfast twist on hash brown eggs Benedict, or use them as the foundation for a breakfast bowl with avocado, salsa, and cheese. The sturdy texture holds up well to toppings and sauces, making them incredibly versatile for creative breakfast presentations.
Storage and Reheating Methods
While hash browns are definitely best served immediately while the exterior is at peak crispiness, you can successfully reheat leftovers if you use the right technique. Store any cooled leftovers in an airtight container in the refrigerator for up to three days. To reheat, use a hot skillet with a little oil rather than the microwave, which will make them soggy and ruin that carefully achieved crispy texture. For meal prep, you can actually grate and drain the potatoes up to a day ahead, storing them in the refrigerator until you're ready to cook. This makes weekend breakfast preparation much quicker and easier. Just make sure to pat them dry again before cooking, as they may release a bit more moisture while sitting in the fridge.
These crispy hash browns have become one of my most treasured weekend breakfast traditions because they transform such simple ingredients into something that feels truly special and indulgent. There's something deeply satisfying about achieving that perfect contrast between the shatteringly crispy exterior and the fluffy, tender interior that makes every bite a little celebration. They've taught me that sometimes the most impressive dishes come from mastering basic techniques rather than complicated recipes, and the joy on my family's faces every time I make them reminds me why cooking simple foods really well is one of life's greatest pleasures.
Frequently Asked Questions
- → Why do I need to squeeze water out of the potatoes?
- Removing moisture is the key to getting crispy hash browns. Wet potatoes will steam instead of getting golden and crispy.
- → What type of potatoes work best for hash browns?
- Russet potatoes are perfect because they have high starch content and low moisture, which helps them get crispy.
- → Can I make hash browns without butter?
- Yes, you can use all oil or bacon grease instead of butter. The butter adds flavor but isn't required for crispiness.
- → How do I know when to flip the hash browns?
- Wait until the edges start to brown and the bottom feels crispy when you lift a corner with a spatula, about 6 minutes.
- → What if my hash browns fall apart when flipping?
- Use a pizza cutter to slice them into smaller sections before flipping. This makes it much easier to turn them over intact.
- → Can I prep the potatoes ahead of time?
- It's best to cook them right after shredding and drying. Prepped potatoes can turn brown and lose their crispiness.