
 Pin it
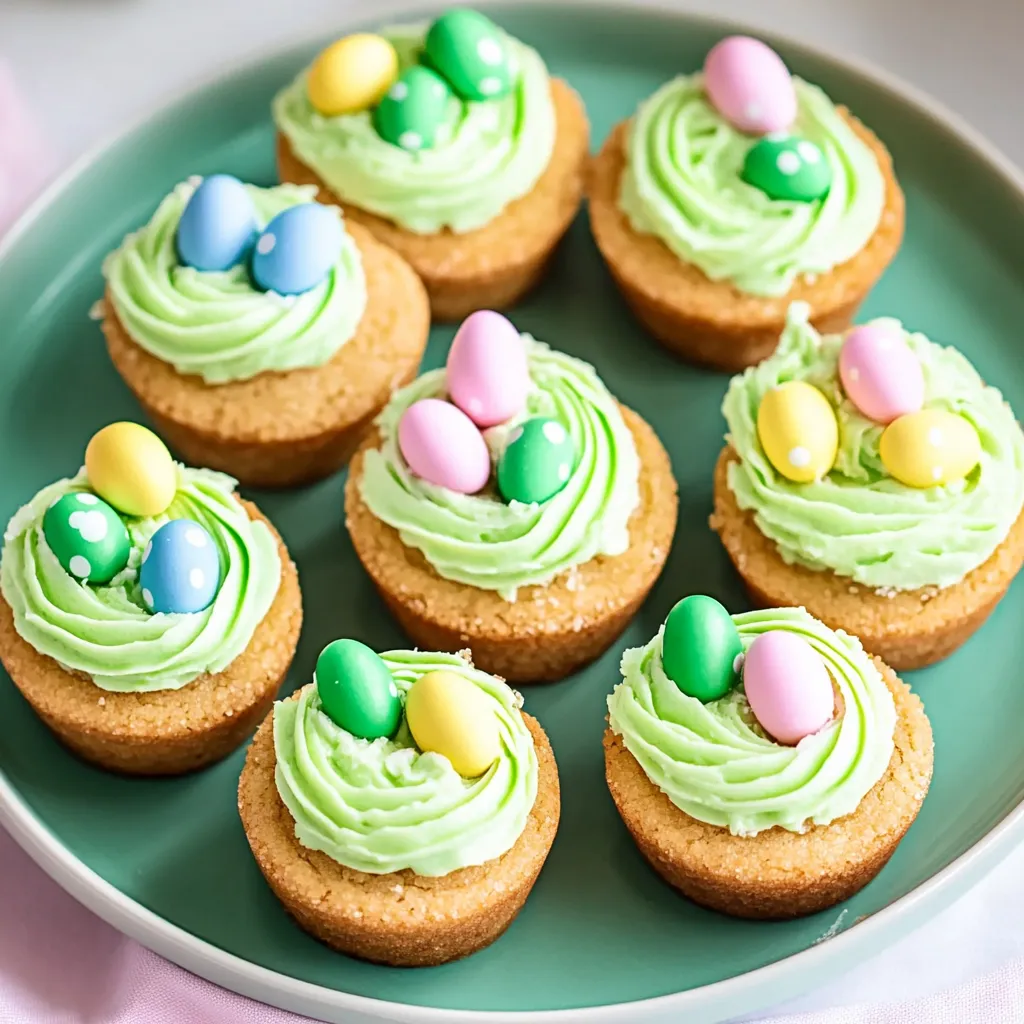
These Easter basket cookie cups transform simple sugar cookie dough into adorable edible baskets that will delight both kids and adults. The cookie cups cradle creamy green "grass" frosting topped with chocolate mini eggs, all finished with candy straw handles for that perfect basket look. These charming treats are surprisingly simple to create yet make a memorable addition to any Easter celebration.
I first made these with my nieces during a pre-Easter baking session, and we were all delighted by how professional they looked despite being so simple to make. What surprised me most was how sturdy the cookie cups turned out—they held their shape beautifully while being substantial enough to support the frosting and toppings.
Essential Ingredients
- Refrigerated sugar cookie dough – Forms the basket shape with minimal effort; its buttery sweetness provides the perfect base
- Cream cheese frosting – Creates the "grass" for the baskets; homemade versions offer better flavor, but store-bought works well for convenience
- Green food coloring – Transforms the frosting into realistic-looking grass; gel food coloring provides the most vibrant shade
- Cadbury mini eggs – Their speckled pastel shells look authentically Easter-like nestled in the frosting grass
- Sour Punch straws – These pliable candy ropes bend easily into perfect arched handles that complete the basket effect
Step-By-Step Cooking Instructions
- Prepare and bake the cookie cups –
- Preheat your oven to 350°F and lightly grease a mini muffin tin. If using refrigerated sugar cookie dough, it typically comes pre-portioned into 24 squares. Pinch off a small amount of dough from each square (the full square is slightly too much for each cup) and roll the remaining dough into a ball. Place one ball in each mini muffin well. For added insurance against sticking, you can roll each ball in granulated sugar before placing it in the tin. This extra step creates a slight crunch and helps the cookies release more easily after baking.
- Monitor baking carefully –
- Bake the cookie cups at 350°F for approximately 18 minutes, until they're light golden brown and set. Watch them carefully, as baking times can vary between ovens. As the cookies bake, they'll naturally rise up the sides of each muffin cup and then sink slightly in the middle, forming perfect little cup shapes. This natural formation is what creates the basket effect without any special tools or techniques. Allow the cookie cups to cool completely in the muffin tin for about an hour, which helps them maintain their shape.
- Remove cookies and prepare frosting –
- Once cooled, gently twist each cookie cup to loosen it before lifting it out of the tin. If any cookies have slightly overflowed the wells, you can use a sharp knife to trim the edges for a neater appearance, though most should be fine as is. In a bowl, combine your frosting (either homemade cream cheese frosting or store-bought) with several drops of green food coloring. Start with a small amount and add more until you achieve your desired shade of grass-green. Mix thoroughly to ensure even coloring.
- Frost the cookie cups –
- Transfer the green frosting to a piping bag fitted with a star tip or grass tip if you have one. If you don't have piping bags, you can use a zip-top plastic bag with a small corner snipped off. Pipe the frosting into each cookie cup, creating swirls or spikes to resemble grass. The texture of the frosting adds to the realistic appearance of your baskets, so try to create some dimension rather than a smooth surface. Fill each cup generously but leave room for the candy eggs.
- Add the finishing touches –
- Place three Cadbury mini eggs on top of the frosting in each cookie cup, nestling them slightly into the "grass" so they appear to be resting in a nest. For the handles, separate the Sour Punch candy straws and cut them into approximately 4.5-inch lengths. Gently bend each straw into an arched shape, then insert both ends into the cookie cup on opposite sides, pushing them down into the frosting and cookie to secure them. The pliable nature of these candy straws makes them perfect for creating stable handles that hold their shape.
- Display and serve –
- Arrange your completed Easter basket cookies on a serving platter. For an extra festive touch, surround them with a few scattered jelly beans or additional mini eggs. These cookies are best served the same day they're assembled, though they can be stored in a single layer in an airtight container at room temperature for 1-2 days if necessary.
 Pin it
Make-Ahead Options
These Easter basket cookies can be made partially ahead of time to make assembly easier on the day you plan to serve them. The cookie cups can be baked a day in advance and stored in an airtight container at room temperature once completely cooled. You can also prepare the frosting ahead of time and store it in the refrigerator. Just bring it to room temperature and re-stir before piping.
For best results, I recommend assembling the baskets (adding frosting, eggs, and handles) the day you plan to serve them. The moisture from the frosting can soften the cookie cups over time, and the candy handles may become less stable if stored too long.
Creative Variations
While this classic version is charming, there are several ways to customize these Easter basket cookies:
- For chocolate lovers, use chocolate chip cookie dough instead of sugar cookie dough. The chocolate base provides a nice contrast with the green frosting.
- Instead of mini eggs, try jelly beans, pastel M&Ms, or even small chocolate bunnies as your basket fillings. Small marzipan carrots would also be adorable nestled in the frosting "grass."
- If you're making these for a color-themed Easter celebration, adjust your frosting color accordingly, or divide the frosting and create multiple colors for a rainbow effect.
My grandmother always made little basket treats for Easter, though hers used cupcakes instead of cookie cups. She would say that eating with our eyes first makes dessert taste even sweeter. I think of her wisdom every time I make these cookies, recognizing that the extra few minutes spent on presentation creates joy that goes beyond just the taste.
I've been making these Easter basket cookies for several years now, and what I love most is how they delight people of all ages. There's something about miniature food that brings out childlike joy even in adults. These little baskets may be simple to create, but the smiles they bring to your Easter gathering will be remembered long after the last crumb has been enjoyed.
Frequently Asked Questions
- → Can I make these Easter basket cookies ahead of time?
- Yes, you can make them 2-3 days ahead and store in an airtight container at room temperature.
- → What can I use instead of Sour Punch Straws for handles?
- Licorice twists or even pipe cleaners (removed before eating) work well as alternative basket handles.
- → Can I use homemade cookie dough instead?
- Absolutely! Any sugar cookie dough that holds its shape works great for these cookie cups.
- → How do I prevent the cookie cups from sticking to the pan?
- Make sure to grease the mini muffin tin well, and let the cookies cool completely before removing them.
- → What other candies work for the 'eggs' in these baskets?
- Jelly beans, M&Ms, or any small egg-shaped candies make great alternatives to Cadbury Mini Eggs.