
 Pin it
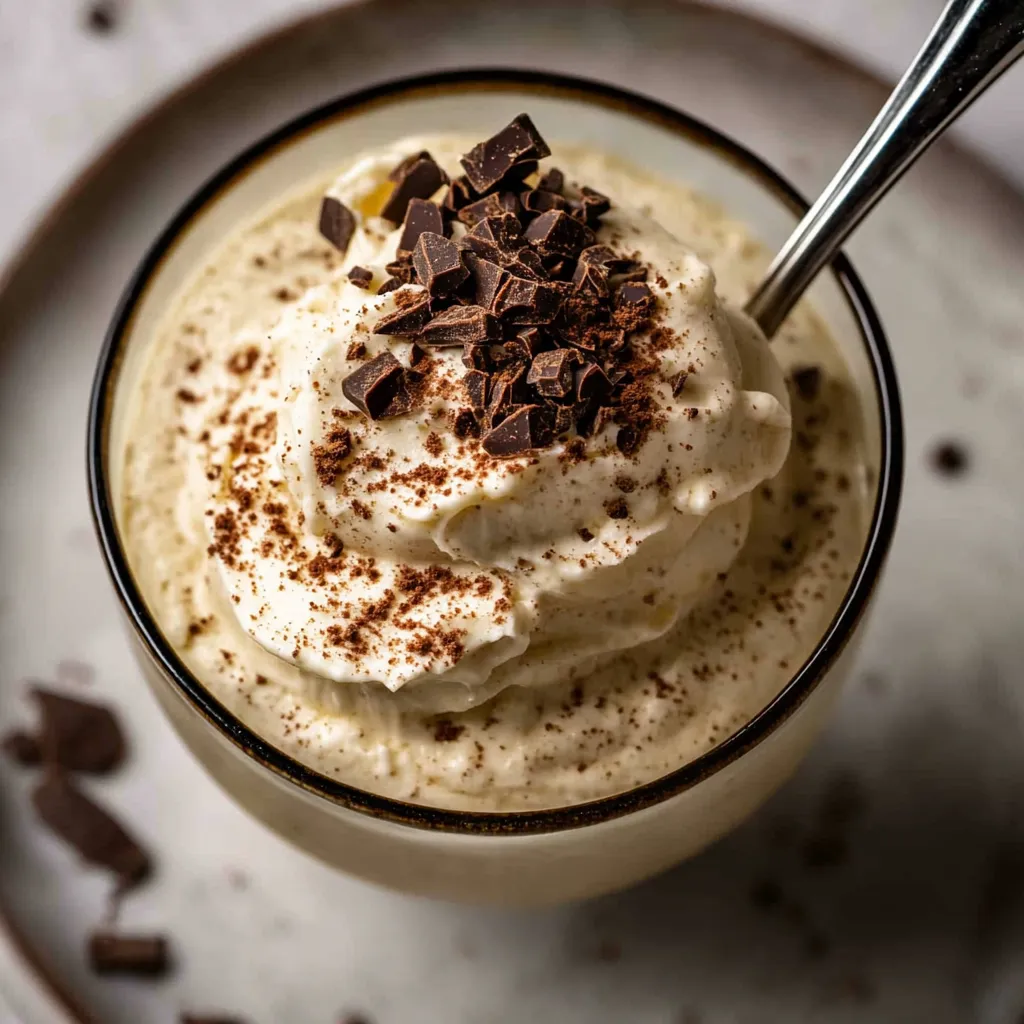
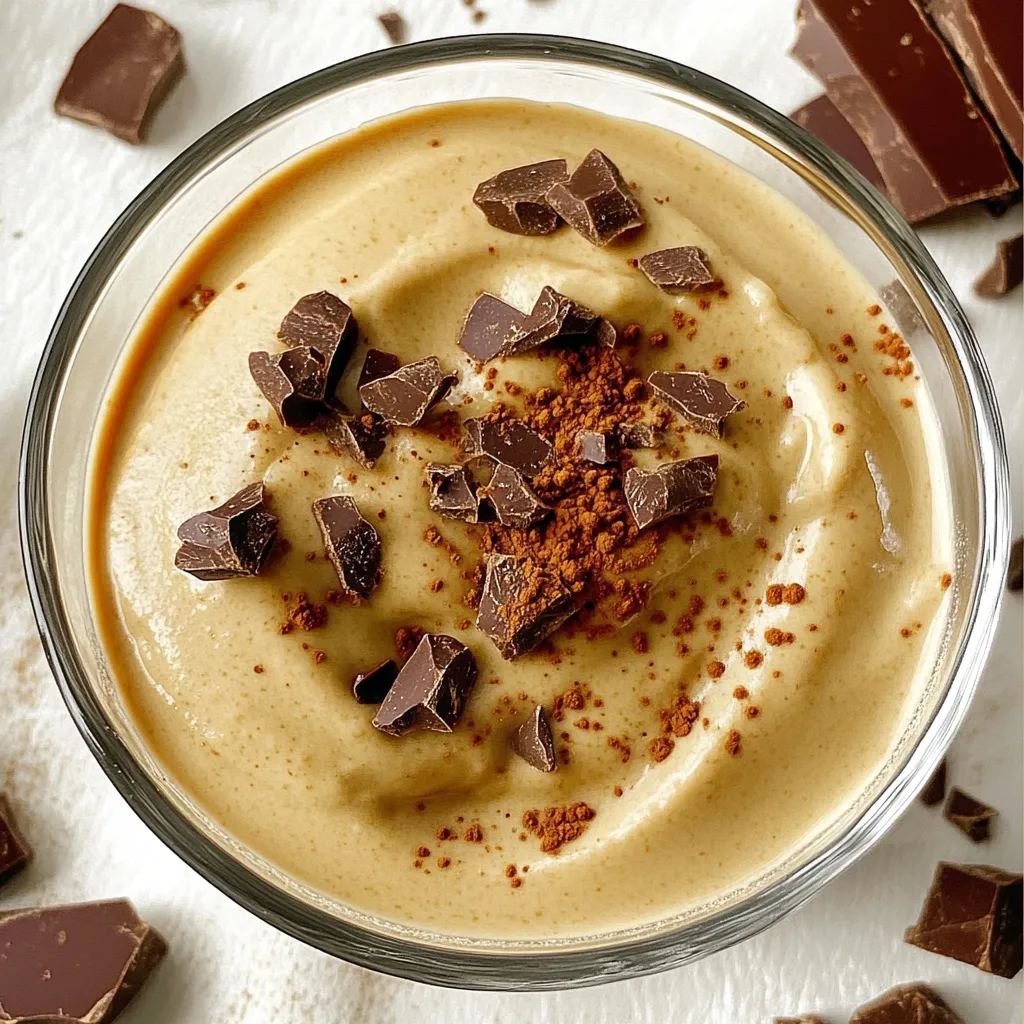
This decadent coffee mousse transforms your favorite coffee flavors into a light-as-air dessert that's both rich and refreshing. With just five simple ingredients and minimal effort, you'll create a sophisticated treat that tastes like it came from a high-end patisserie. The perfect balance of intense coffee flavor and creamy sweetness makes this an ideal finale to any meal.
I served this mousse at a dinner party last month, and my friend who usually orders a double espresso after every meal declared it the perfect coffee-lover's dessert. Her exact words were "It's like drinking the world's best latte, but with a spoon!" Even my husband, who typically skips dessert, scraped his glass clean.
Ingredients:
- Heavy cream - The foundation of your mousse that creates its luxurious texture. Always choose full-fat cream without added stabilizers for the purest flavor and best whipping performance.
- Instant coffee granules - Provides that robust coffee flavor without adding excess liquid. The concentrated flavor of instant coffee works better than brewed coffee in this recipe, giving you that perfect coffee kick.
- Caster sugar - Its fine texture dissolves quickly and completely, ensuring a smooth mousse without any grittiness. Regular granulated sugar works too, but may require more stirring.
- Gelatin powder - The secret to the mousse's stability, allowing it to hold its fluffy texture while providing that melt-in-your-mouth consistency. It's what gives this eggless recipe its perfect set.
- Vanilla extract - Though subtle, this ingredient is crucial as it enhances and deepens the coffee flavor. Don't skip it—vanilla has a magical way of making coffee taste more complex and rich.
Instructions:
- Begin with the coffee syrup base by sprinkling 1 tablespoon of gelatin powder over 1/4 cup of cold water in a small saucepan. Allow it to stand for 2-3 minutes until it blooms and becomes spongy in texture. This blooming process ensures the gelatin will dissolve properly without lumps. Place the saucepan over very low heat and stir constantly until the gelatin completely dissolves, watching carefully to ensure the mixture never reaches a boil—which would compromise the gelatin's setting ability. Once dissolved, add 1 tablespoon of instant coffee granules and 1/3 cup of caster sugar to the warm gelatin mixture, continuing to stir until both are fully dissolved and you have a smooth, dark syrup. Immediately remove from heat.
- Cool your coffee syrup properly by transferring it to a large mixing bowl and placing it in the refrigerator. This cooling step is crucial—if you add hot or even warm syrup to whipped cream, it will deflate the air bubbles and collapse your cream. Check the syrup every 5-10 minutes, stirring occasionally to promote even cooling. You're looking for it to reach a temperature below room temperature but not so cold that it begins to set. Ideally, it should feel cool to the touch but still be completely liquid. This usually takes about 15-20 minutes, depending on your refrigerator.
- Whip your cream to perfection while the syrup is cooling. Pour 2 cups of very cold heavy cream into a large, chilled mixing bowl. Using an electric mixer on medium speed (or a whisk if you're feeling ambitious), beat the cream until it forms stiff peaks. You'll know you've reached the right consistency when you lift the beaters and the cream stands up in firm peaks that just barely curl at their tips. Be vigilant during this process—there's a fine line between perfectly whipped cream and overbeaten cream that starts to become grainy and butter-like. If you're uncertain, it's better to stop slightly earlier rather than risk overwhipping.
- Combine the components with finesse by first adding 1 teaspoon of vanilla extract to your cooled coffee syrup and stirring to incorporate. Then, take about a quarter of your whipped cream and add it to the coffee mixture. Use a spatula to fold it in with broad, gentle strokes, cutting through the center of the mixture and pulling the spatula along the bottom of the bowl before folding the contents over itself. This initial addition of cream "lightens" the coffee base, making it easier to incorporate the remaining cream without deflating it. Once combined, add the remaining whipped cream in three more additions, folding each portion in with the same gentle technique until the mousse shows no streaks and has a uniform light brown color.
- Portion your mousse thoughtfully by spooning it into serving glasses. For an elegant presentation, use clear glasses that showcase the mousse's light coffee color. Fill each glass leaving about half an inch at the top for garnishes. If you're feeling fancy, use a piping bag fitted with a large star tip to pipe the mousse into the glasses, creating beautiful swirls on top. Once filled, cover each glass with plastic wrap, making sure it doesn't touch the surface of the mousse, and refrigerate for at least 4 hours or preferably overnight to allow the mousse to set completely.
- Finish with a professional touch just before serving by adding your choice of topping. For the simplest yet most effective garnish, use a vegetable peeler to create delicate chocolate shavings from a room-temperature bar of high-quality dark chocolate. The slight bitterness of dark chocolate perfectly complements the sweet coffee flavor. Alternatively, dust the tops lightly with unsweetened cocoa powder using a small sieve for an elegant, sophisticated finish. For special occasions, add a small chocolate-covered espresso bean on top of each serving.
 Pin it
I discovered through trial and error that adding just a tiny pinch of salt to the coffee syrup enhances the flavor dramatically. It's not enough to taste salty, but it works like magic to amplify the coffee notes. My grandmother always said that salt is to sweets what vanilla is to chocolate—an invisible enhancer that makes everything taste more like itself.
Perfect Coffee Selection
The type of coffee you use significantly impacts the final flavor of your mousse. Standard instant coffee works well, but for a truly exceptional dessert, consider using instant espresso powder, which provides a more authentic, intense coffee flavor without bitterness. If using espresso powder, reduce the amount to 3 teaspoons instead of a tablespoon since it's more concentrated. Coffee enthusiasts might enjoy experimenting with different varieties—a darker roast will give you a more robust flavor, while a medium roast offers smoother notes. I've found that a combination of both creates a beautifully complex profile.
Make-Ahead Magic
One of the greatest advantages of this dessert is its make-ahead potential. The mousse actually improves after sitting in the refrigerator overnight, as the flavors have time to meld and develop. This makes it perfect for entertaining—prepare these elegant desserts up to two days before your event, cover them tightly with plastic wrap, and they'll be ready to impress your guests when dessert time arrives. Just add the chocolate garnish right before serving to maintain its fresh appearance. I rely on this recipe whenever I'm hosting dinner parties because it allows me to focus on the main course while knowing dessert is already perfectly prepared.
Creative Variations
While the classic coffee mousse is divine on its own, it also serves as a wonderful base for creative variations. For a mocha version, add 2 tablespoons of unsweetened cocoa powder to the coffee syrup. For a holiday twist, incorporate 1/2 teaspoon of ground cinnamon and a pinch of nutmeg. If you enjoy liqueurs, adding a tablespoon of Kahlúa or Bailey's Irish Cream to the coffee syrup creates a sophisticated adult dessert. My personal favorite variation is layering the mousse with a thin sheet of espresso-soaked ladyfingers at the bottom of each glass, creating a deconstructed tiramisu effect that never fails to impress guests.
I began making this coffee mousse when my Italian grandmother shared her love of coffee with me as a teenager. She believed dessert should be light enough to enjoy after any meal but special enough to feel like a true indulgence. Over the years, I've perfected this recipe, making it simpler while maintaining that perfect balance of lightness and richness she always achieved. Each time I make it, I'm transported back to her sunny kitchen, the scent of coffee filling the air as she taught me that the most memorable desserts don't need to be complicated—they just need to be made with attention and care.
Frequently Asked Questions
- → Can I make this coffee mousse ahead of time?
- Yes! This mousse is perfect for making ahead. You can prepare it up to 2 days in advance and keep it refrigerated until ready to serve.
- → Can I use decaf coffee in this recipe?
- Absolutely! Decaf coffee granules work perfectly in this recipe if you want the coffee flavor without the caffeine.
- → Why isn't my mousse setting properly?
- Make sure your gelatin is completely dissolved and that you've chilled the mousse for at least 2 hours. Also check that your cream was whipped to firm peaks before folding.
- → Can I make this mousse without gelatin?
- For a vegetarian version, you can substitute the gelatin with agar-agar powder, using the same amount. The texture may be slightly different but still delicious.
- → How long does coffee mousse last in the fridge?
- This coffee mousse will keep well in the refrigerator for up to 3 days. Cover each glass with plastic wrap to prevent it from absorbing other flavors.