
 Pin it
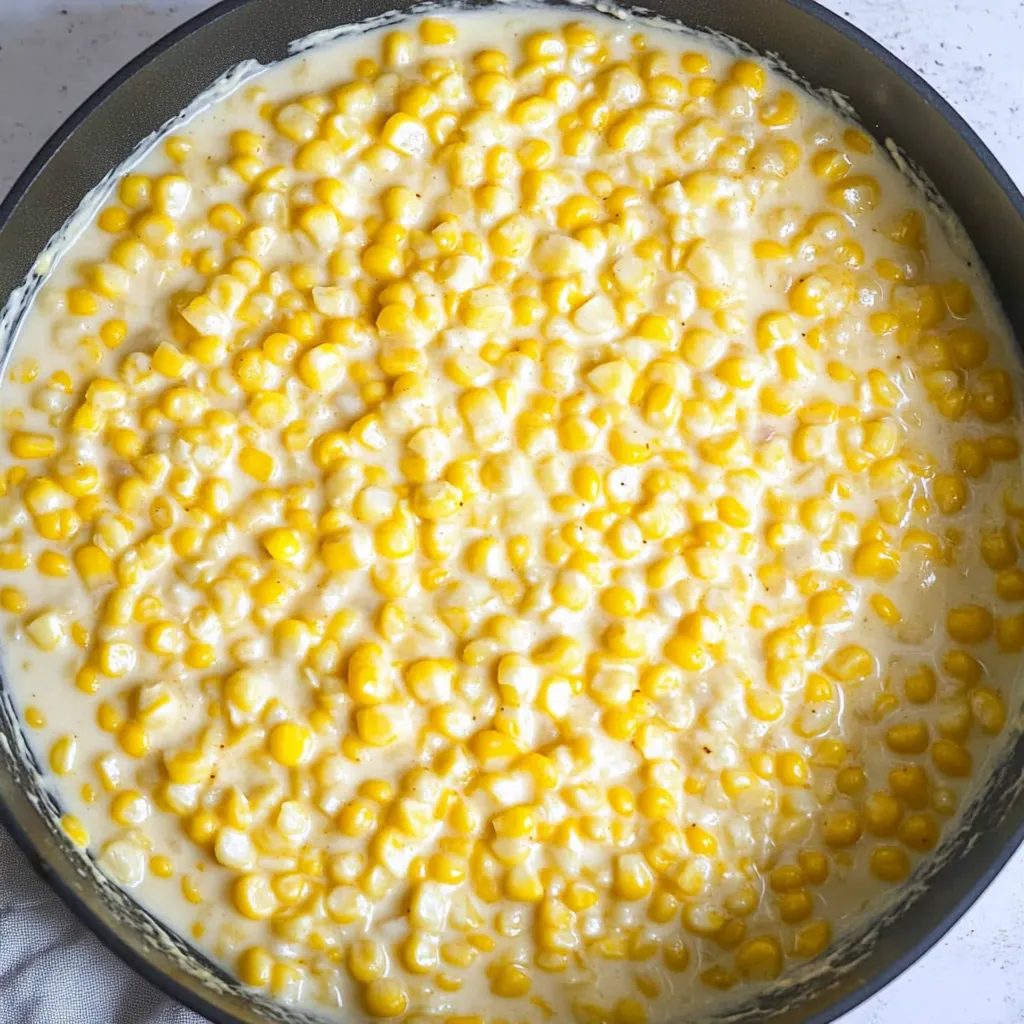
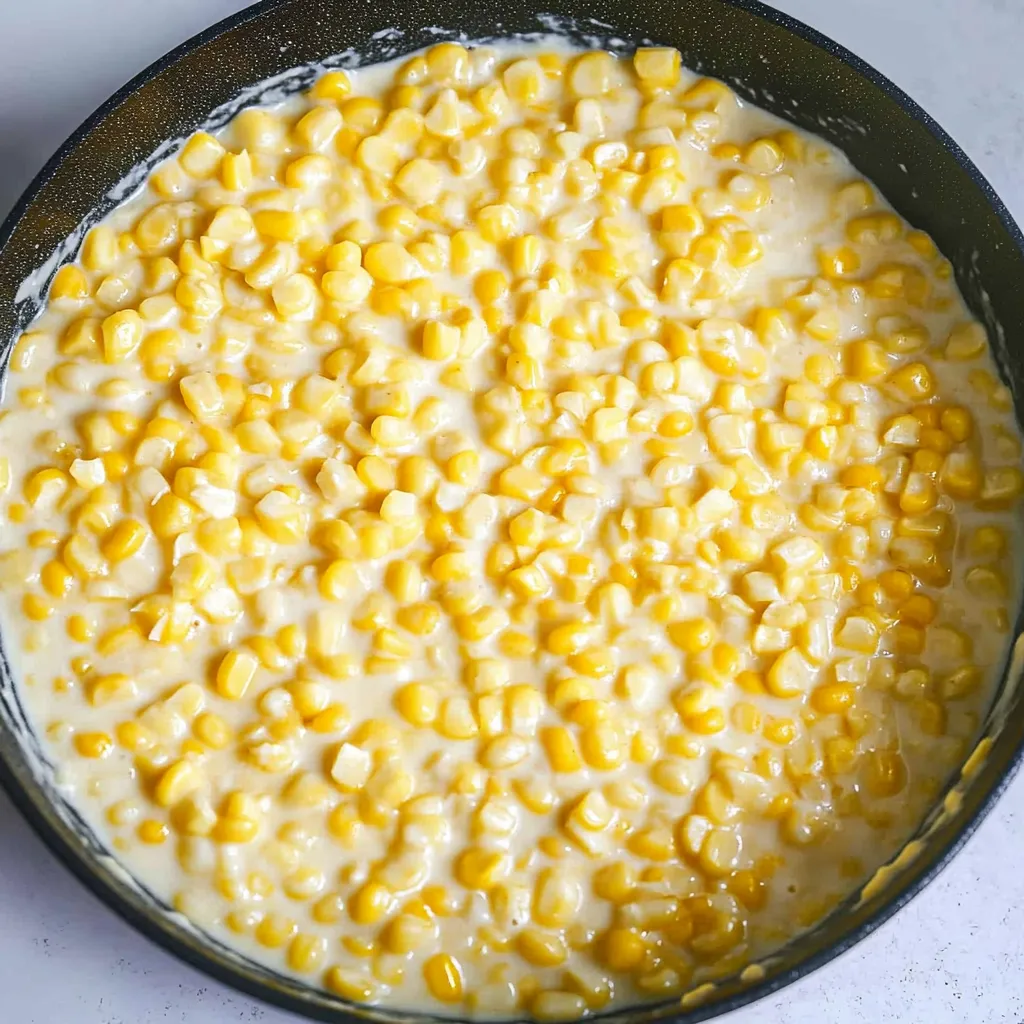
This creamed corn delivers pure, sweet corn flavor enriched with butter and cream in a silky sauce that lets the natural sweetness shine without being cloying or overly complicated. Frozen corn kernels simmer gently in a quick butter-and-flour roux enriched with half-and-half until they plump up beautifully and the sauce reduces to luscious, coating consistency. Just a hint of garlic powder and cayenne adds subtle depth without competing with the corn's natural flavor. This is the kind of simple, comforting side dish that pairs with absolutely everything from weeknight dinners to holiday feasts, and it comes together in about 20 minutes with ingredients you probably already have on hand.
I've tried numerous creamed corn recipes over the years—some with cream cheese, some with ridiculous amounts of sugar, some that required hours of simmering—and this streamlined version is hands-down the best. It lets the corn's natural sweetness come through without being masked by heavy cream or overwhelmed by sugar, and the simple roux-thickened sauce has just the right consistency without being gloppy or soupy. The first time I made this, I found myself sneaking bites straight from the pot while it simmered because it smelled so good and tasted even better. Now this is my default creamed corn recipe for every occasion from summer barbecues to Thanksgiving dinner, and people always ask for seconds. The fact that it's this easy to make something this delicious still surprises me every time.
Ingredients and What Makes Them Essential
- Butter (4 tablespoons, unsalted): Butter provides rich, creamy flavor and forms the fat base for the roux that thickens the sauce. Unsalted butter lets you control the salt level precisely since corn and dairy both contribute subtle saltiness. The butter should be melted completely before adding flour. Using real butter rather than margarine or oil makes a noticeable difference in the final flavor—this dish is simple enough that every ingredient matters.
- All-purpose flour (3 tablespoons): Flour combines with the melted butter to create a quick roux that thickens the half-and-half into silky sauce rather than staying thin and watery. The flour needs to cook briefly with the butter to remove the raw flour taste before adding liquid. All-purpose flour works perfectly here—don't substitute with cornstarch or other thickeners, which create different texture. Measure the flour accurately by spooning it into the measuring spoon and leveling off.
- Half-and-half (2 cups): This provides the creamy, luxurious quality that defines creamed corn while being less heavy than pure heavy cream. Half-and-half has the ideal fat content to create rich sauce without being overwhelming or making the dish feel overly indulgent. The dairy enhances the corn's natural sweetness without adding actual sugar. Whole milk can substitute in a pinch though the sauce will be noticeably thinner, while heavy cream can replace it but may thicken too quickly and feel too rich.
- Garlic powder (½ teaspoon): A touch of garlic powder adds subtle savory depth that balances the sweetness and prevents the dish from tasting one-dimensional. Garlic powder distributes more evenly than fresh garlic and provides background flavor without being identifiable. The amount is conservative—you want gentle enhancement rather than obvious garlic flavor that would compete with the corn.
- Cayenne pepper (pinch): Just a tiny pinch of cayenne adds complexity and subtle warmth without making the dish spicy at all. Most people won't identify cayenne specifically but will notice the dish tastes more interesting and well-rounded. The cayenne enhances the other flavors and adds that mysterious "something" that makes people wonder what your secret is. You can omit it if you're sensitive to any heat whatsoever, though it truly doesn't create spiciness at this level.
- Frozen corn (24 ounces, about 4 cups): Frozen corn provides incredible convenience while delivering corn that was frozen at peak ripeness when sugars are highest. The freezing process actually preserves sweetness better than store-bought "fresh" corn that's been sitting for days losing sugar content. Frozen corn also eliminates the tedious work of shucking and cutting kernels from cobs. If using fresh corn, you'll need about 8 ears to yield 4 cups of kernels—cut the kernels off with a sharp knife and scrape the cobs with the back of the knife to extract the sweet corn "milk." Canned corn can substitute but should be thoroughly drained and is my least favorite option since it tastes tinny and has mushier texture.
- Salt and black pepper (to taste): Generous seasoning with salt and pepper is essential for bringing out all the flavors and preventing the dish from tasting flat. Start with about half a teaspoon of salt and a quarter teaspoon of pepper, then taste and adjust. The salt especially is crucial—underseasoned creamed corn tastes bland and disappointing no matter how good your other ingredients are.
Step-by-Step Instructions
- Make the roux base:
- Place a fairly large pot or deep skillet over medium heat and add the butter, letting it melt completely until it's liquid and foaming slightly but not browning. Once the butter is fully melted, sprinkle in the flour all at once. Immediately begin whisking vigorously to combine the butter and flour into a smooth paste with no dry pockets of flour remaining. Continue cooking this roux for about 1 to 2 minutes while whisking constantly, which cooks out the raw flour taste and allows the roux to develop slightly. The mixture should smell toasty and look like wet sand or paste. Don't let it brown—you want a blonde roux that's just cooked enough to remove rawness but hasn't developed color.
- Add the cream and seasonings:
- Pour in the half-and-half gradually while whisking constantly to prevent lumps from forming. Start with about half a cup, whisk it smooth, then add the rest while continuing to whisk. The mixture will thicken noticeably as the roux combines with the liquid. Add the garlic powder and cayenne pepper, whisking them in thoroughly so they distribute evenly throughout the sauce. Continue whisking for another minute or two until you have a completely smooth, creamy base with no lumps or separation. The sauce should coat the back of a spoon at this point—not too thin but not super thick yet either.
- Add corn and bring to gentle boil:
- Pour in all the frozen corn kernels and stir well to coat them with the creamy sauce. Increase the heat to medium-high and bring the mixture to a gentle boil, stirring occasionally to prevent sticking and ensure even heating. You'll see small bubbles breaking the surface when it reaches a boil. The frozen corn will initially cool down the sauce, so it takes a few minutes to come back up to temperature. Once it's boiling gently and the corn is heated through, you're ready for the next step.
- Simmer low and slow:
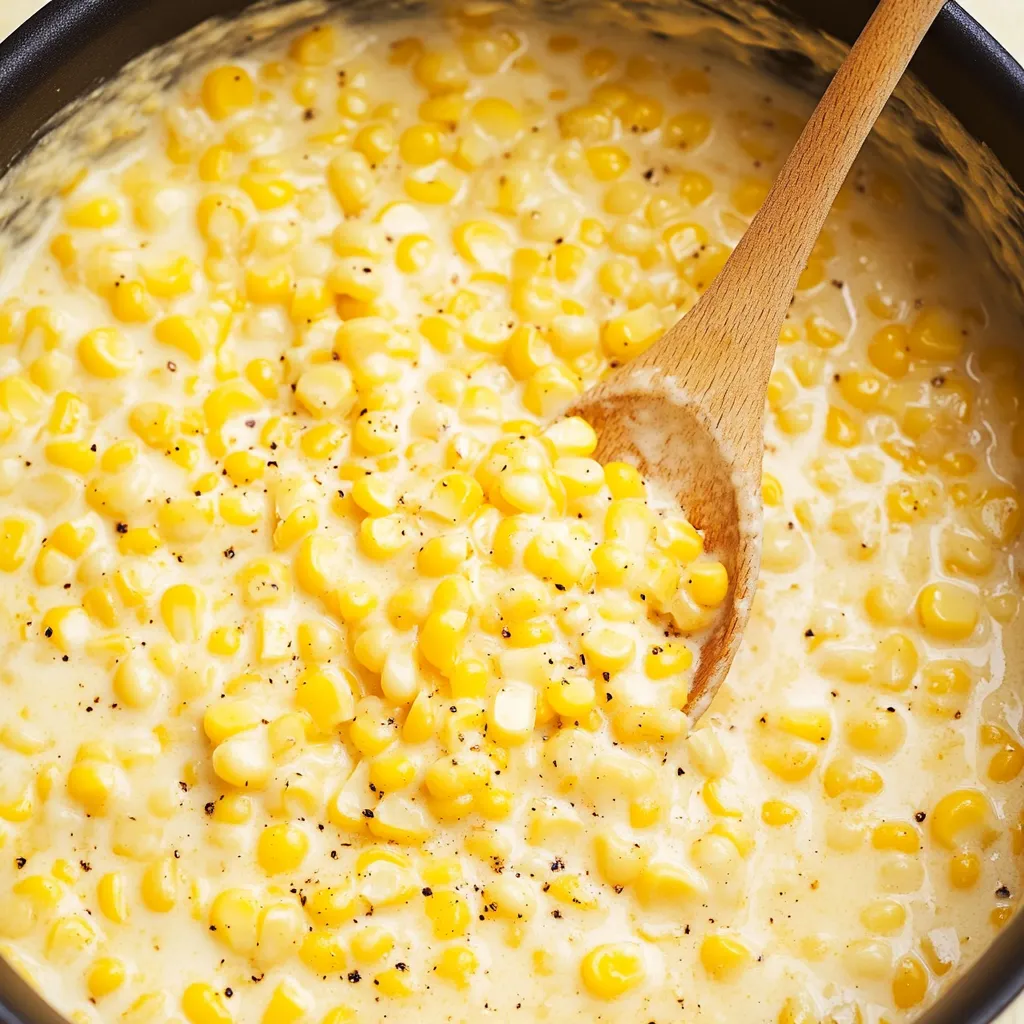
- This is the most important step for developing proper consistency and allowing the corn to plump up beautifully. Reduce the heat to low—you want the mixture just barely simmering with occasional small bubbles rather than actively boiling. Let it cook for about 15 to 20 minutes, stirring occasionally to prevent anything from sticking to the bottom or scorching. During this gentle simmering, several things happen: the sauce reduces and thickens to perfect coating consistency, the corn kernels absorb some of the cream and plump up until they're tender and juicy, and the flavors meld together and intensify. Don't rush this step by keeping the heat too high, which would reduce the liquid too quickly without giving the corn time to properly cook and the flavors time to develop.
- Season and finish:
- After the corn has simmered for 15 to 20 minutes and the sauce has reduced to your desired consistency—it should coat the corn kernels nicely without being soupy or too thick—taste it carefully. Season generously with salt and black pepper, starting with about half a teaspoon of salt and a quarter teaspoon of pepper, then tasting again and adjusting. The salt especially is crucial for bringing out the sweet corn flavor and making everything taste vibrant rather than flat. Keep tasting and adjusting until it tastes properly seasoned and delicious. If you want a slightly different texture with more body, you can use an immersion blender to partially blend about a cup of the mixture right in the pot, or transfer a cup to a regular blender, puree it, and stir it back in. This creates a thicker, more cohesive texture while still leaving plenty of whole kernels.
 Pin it
The technique that made the biggest difference in my creamed corn was learning to season it generously with salt rather than being timid. My early attempts tasted okay but somewhat flat and one-dimensional, and I couldn't figure out why since I was following the recipe correctly. Once I understood that sweet ingredients like corn need substantial salt to bring out their natural flavors and create balance, and I started tasting and adjusting salt multiple times rather than just adding a pinch and calling it done, the transformation was remarkable. The corn tasted sweeter, the cream tasted richer, and everything had more depth and complexity. Now I'm generous with salt from the beginning and taste multiple times as it cooks, adjusting until it tastes properly seasoned and vibrant. That willingness to use more salt than seems intuitive is what makes my creamed corn taste so much better than versions that are technically correct but underseasoned.
Understanding Roux-Based Sauces
The quick roux technique used in this creamed corn is a fundamental cooking skill that applies to countless other dishes and deserves understanding beyond just following the recipe. A roux is simply equal parts fat and flour cooked together to create a thickening agent for sauces. The butter coats the flour particles and allows them to disperse evenly when liquid is added, preventing clumps. Cooking the roux for even just a minute or two develops the flour's thickening power and removes that raw, pasty taste that uncooked flour has.
The temperature and timing when adding liquid to roux significantly affects the final texture. Adding cold or room-temperature liquid to hot roux helps prevent lumps because the temperature difference slows the starch gelatinization enough that you can whisk everything smooth before it thickens too quickly. Adding liquid gradually—starting with just a splash and whisking it smooth before adding more—further ensures lump-free sauce. Once all the liquid is incorporated, bringing the mixture to a boil fully activates the starch's thickening power through gelatinization, where starch granules absorb liquid and swell dramatically.
The gentle simmering after the initial thickening allows the sauce to reduce and concentrate while the starch network stabilizes. During this time, any excess water evaporates, the flavors intensify and meld, and the texture becomes silky and smooth rather than starchy or gloppy. This patient simmering is what separates mediocre cream sauces from excellent ones—rushing it by using high heat creates sauce that tastes less developed and has inferior texture. The corn also benefits from this gentle cooking time by absorbing flavors and becoming perfectly tender.
Fresh vs. Frozen Corn Considerations
While this recipe calls for frozen corn for convenience and consistency, understanding when and how to use fresh corn helps you make informed decisions based on season and availability. Fresh corn at peak season—roughly July through September in most of North America—offers unmatched sweetness and flavor that's genuinely superior to frozen. However, corn begins converting its sugars to starch immediately after harvest, so store-bought "fresh" corn that's been sitting for days has lost significant sweetness and may not taste better than quality frozen corn that was processed at peak ripeness.
If you want to use fresh corn, look for ears with bright green, tightly wrapped husks, moist silk, and plump kernels that release milky liquid when pierced. Use it the same day you buy it if possible. To remove kernels, stand the shucked ear upright in a large bowl and use a sharp knife to cut down along the cob, letting the kernels fall into the bowl. After cutting off all the kernels, scrape the cob firmly with the back of the knife to extract the sweet corn "milk" and pulp that clings to the cob—this adds incredible flavor and natural thickening to the dish. You'll need about 8 medium ears to yield the 4 cups of kernels this recipe requires.
Canned corn is the least desirable option but works in a pinch if that's all you have available. The canning process cooks the corn and often adds salt and sugar, which affects both texture and flavor. Canned corn tends to be mushier and less sweet than fresh or frozen, and it can taste tinny. If using canned, drain it thoroughly and rinse briefly to remove excess salt and any metallic taste. You'll need two 15-ounce cans to approximate the amount of frozen corn. The texture will be softer and less appealing, but the dish will still taste good.
Flavor Customization Options
While the base recipe is intentionally simple to let corn's natural sweetness shine, several variations can tailor it to different preferences or occasions without complicating things too much. For spicy creamed corn, increase the cayenne to a quarter teaspoon or add diced jalapeños—one small jalapeño, seeds removed and finely diced, adds pleasant heat without being overwhelming. Fresh or pickled jalapeños both work, with pickled adding tangy acidity along with heat.
Some people prefer sweeter creamed corn and add a teaspoon or two of sugar, though I find this unnecessary since quality corn is naturally sweet. If you must add sugar, start with just a teaspoon and taste before adding more—you want to enhance, not create candy. Savory variations work beautifully: crispy crumbled bacon stirred in at the end adds smoky, salty richness, while fresh herbs like chives, basil, or thyme contribute brightness. A tablespoon of cream cheese stirred in near the end creates even richer, tangier sauce.
For Mexican-inspired creamed corn, add a teaspoon of cumin and a squeeze of lime juice at the end, then garnish with crumbled cotija cheese and chopped cilantro. This variation pairs beautifully with grilled meats and tacos. For an Italian twist, stir in a tablespoon of grated Parmesan and a pinch of dried basil, which creates something closer to Italian-style creamed corn that works well alongside pasta or chicken dishes. The basic formula is forgiving enough to accommodate these variations while maintaining that essential creamy, corny character.
Serving Suggestions and Pairings
Creamed corn's mild, sweet, creamy profile makes it an incredibly versatile side dish that complements virtually any main course without competing or clashing. It pairs naturally with BBQ meats—ribs, pulled pork, brisket, or grilled chicken all benefit from the cooling, sweet contrast creamed corn provides. The richness stands up well to spicy or heavily seasoned meats while providing textural variety. For summer cookouts, serve it alongside coleslaw, baked beans, and cornbread for a complete Southern-style spread.
During holidays, creamed corn fits seamlessly into traditional spreads alongside ham, turkey, or prime rib. The creamy sweetness balances savory gravies and roasted meats while providing comfort-food appeal that everyone enjoys. It's substantial enough to feel satisfying but not so heavy that it competes with other rich dishes on a holiday table. For weeknight dinners, it elevates simple baked chicken or pork chops into a more complete, satisfying meal without requiring additional effort.
The corn works beautifully as a base for other dishes too. Leftover creamed corn can be mixed into mashed potatoes for extra richness and sweetness, stirred into scrambled eggs for a hearty breakfast, or used as a topping for baked potatoes. You can also transform it into corn chowder by adding diced potatoes and extra broth, or use it as a filling for quesadillas with some cheese and black beans. The creamy texture makes it naturally suited to repurposing in ways that plain corn wouldn't work.
 Pin it
This creamed corn has become my go-to side dish for countless occasions because it's reliable, universally appealing, and genuinely delicious without requiring any special skills or hard-to-find ingredients. The simplicity is actually its greatest strength—by keeping the ingredient list short and the technique straightforward, the natural sweetness of good corn gets to be the star rather than being masked by excessive seasonings or overwhelmed by heavy cream. I love that I can make this on a random Tuesday to elevate simple grilled chicken or reserve it for Thanksgiving dinner where it holds its own alongside traditional holiday sides. The fact that it comes together in 20 minutes with mostly hands-off simmering means I can prepare it while other dishes cook without feeling stressed or rushed. Once you taste how butter, cream, and patient simmering transform frozen corn into something that tastes almost like you spent hours making it from scratch, and how that silky sauce coats each kernel perfectly without being gloppy or soupy, you'll understand why this simple recipe has earned permanent status in my side dish rotation and why I've made it hundreds of times without ever getting tired of it.
Frequently Asked Questions
- → Can I use fresh corn instead of frozen?
- Yes, fresh corn works great. You'll need about 6-7 ears of corn to get 5 cups of kernels. Just cut the kernels off the cob and use them the same way.
- → How do I store leftover creamed corn?
- Keep it in an airtight container in the fridge for up to 4 days. Reheat gently on the stovetop with a splash of cream or milk to loosen it up if needed.
- → Can I make this ahead of time?
- Definitely. Make it a day early and reheat it before serving. It might thicken up in the fridge, so add a little half-and-half when reheating to get the right consistency.
- → What can I serve with creamed corn?
- It pairs well with grilled chicken, roasted turkey, pork chops, or steak. It's a classic side for barbecues and holiday dinners too.
- → Why is my creamed corn watery?
- It needs more time to simmer. Let it cook longer so the sauce reduces and thickens. If you're in a hurry, mix a teaspoon of cornstarch with water and stir it in.
- → Can I freeze creamed corn?
- Yes, it freezes well for up to 3 months. Let it cool completely, then store in freezer-safe containers. Thaw in the fridge overnight and reheat on the stove.