
 Pin it
These easy Halloween cupcakes have saved me countless times when I need a festive dessert without spending hours in the kitchen. Last year, my daughter announced the night before her class party that she volunteered me to bring treats for 25 kids - talk about panic mode. These cupcakes came together so quickly using a box mix and homemade buttercream that I actually had them done and decorated in under two hours. The bright neon colors and festive sprinkles make them look way more complicated than they actually are, and every single kid at that party was asking for seconds.
I used to stress about making elaborate Halloween treats until I discovered this recipe. Now it's become my go-to whenever we need something festive and delicious without all the fuss. My husband, who usually isn't big on sweets, always sneaks at least two of these when I'm not looking.
Ingredients You'll Need
For the Cupcakes:
- Box cake mix: (1 box, any flavor) - triple chocolate fudge creates the perfect dark base for those bright colors, but vanilla or yellow work great too
- Eggs, oil, and water: whatever your specific box mix calls for, follow those measurements exactly
For the Buttercream Frosting:
- Unsalted butter: (1 cup, softened) - leave this out for 1-2 hours until your finger leaves an indentation when pressed
- Powdered sugar: (4 cups, sifted) - sifting prevents lumps and makes your frosting silky smooth
- Whole milk: (3-4 tablespoons) - adjust this to get your perfect piping consistency
- Pure vanilla extract: (2 teaspoons) - the real stuff tastes so much better than imitation
- Salt: (pinch) - balances all that sweetness and makes the vanilla pop
- Gel food coloring: (neon green, orange, purple) - gel colors are much more vibrant than liquid and won't thin your frosting
For Decorating:
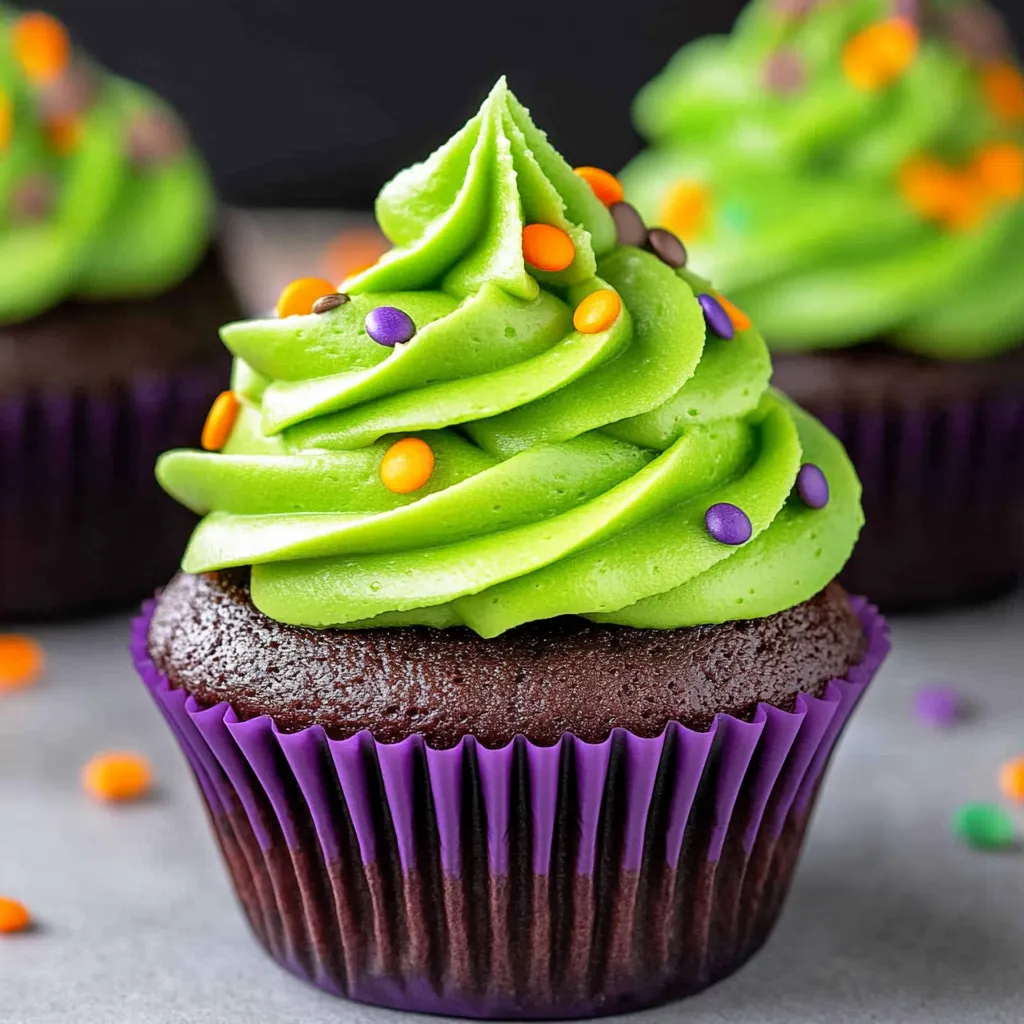
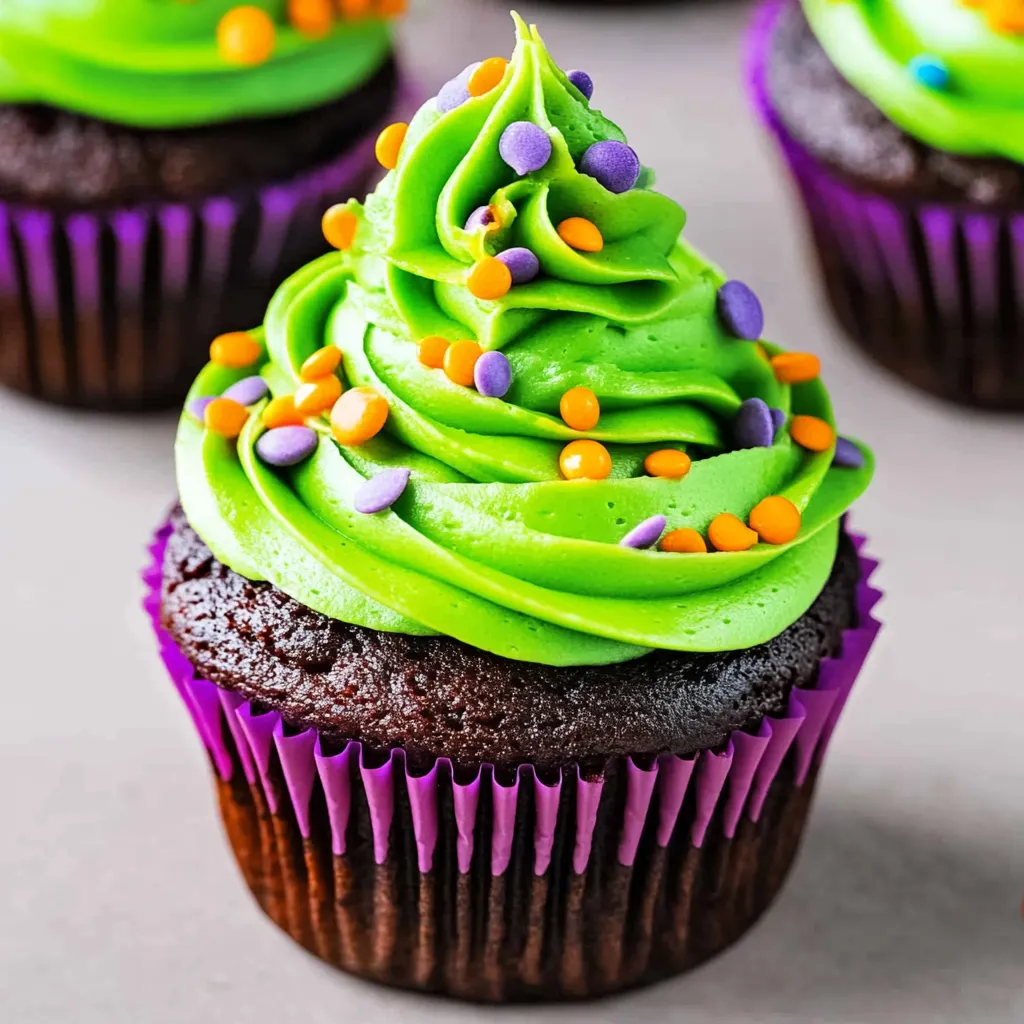
- Halloween sprinkles: orange and black nonpareils, candy corn sprinkles, or spooky shapes
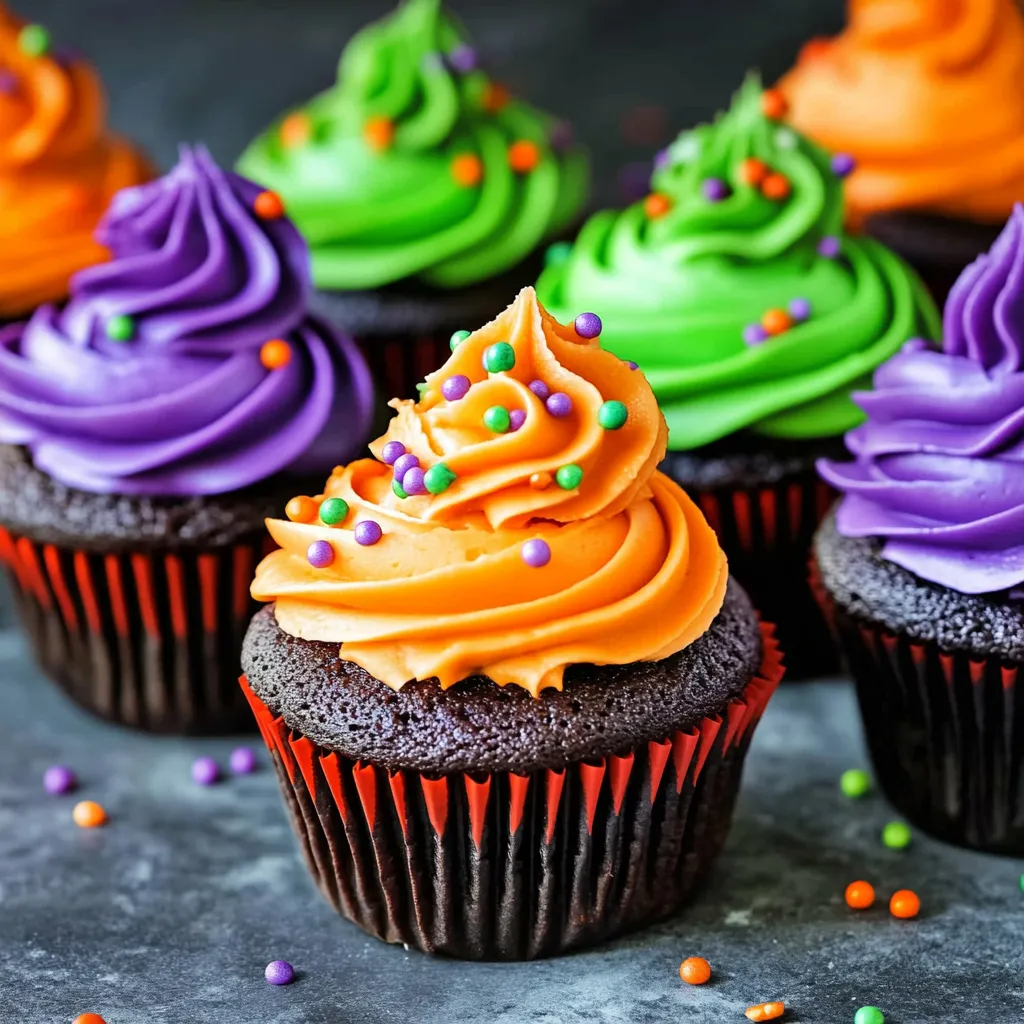
- Cupcake liners in Halloween colors: orange, purple, and green look festive in the pan
Step-by-Step Instructions
- Prepare your cupcakes according to box directions.
- Preheat your oven to whatever temperature your cake mix specifies and line a 12-cup muffin tin with colorful Halloween cupcake liners. Mix your cake batter according to package instructions, being careful not to overmix - just until the ingredients are combined and no dry streaks remain. Divide the batter evenly among the cupcake liners, filling each about 2/3 full to prevent overflow. Bake according to package directions until a toothpick inserted in the center comes out clean or with just a few moist crumbs.
- Make your fluffy buttercream while cupcakes cool.
- In a large bowl, beat the softened butter with an electric mixer on medium speed for 2-3 minutes until it's light and fluffy - this step is crucial for getting that perfect texture. Gradually add the powdered sugar, one cup at a time, beating well after each addition. The mixture will look dry and crumbly at first, but keep going. Add the vanilla extract, salt, and 3 tablespoons of milk, then beat on high speed for 3-4 minutes until the frosting is smooth, fluffy, and pale white.
- Create your vibrant Halloween colors.
- Divide the finished buttercream evenly among three separate bowls - you want roughly equal amounts in each bowl. Add a small amount of gel food coloring to each bowl, starting with just a tiny bit since gel colors are very concentrated. For the green, use neon green gel coloring. For orange, start with orange gel or mix red and yellow. For purple, use purple gel or carefully mix red and blue. Beat each colored frosting until the color is evenly distributed and vibrant.
- Set up your piping station for easy decorating.
- Fit three separate piping bags with Wilton 1M star tips - this tip creates those beautiful swirled rosettes that look so professional. If you don't have three piping bags, you can use one and wash it between colors, but having three makes the process much faster. Spoon each colored buttercream into its own piping bag, being careful not to mix the colors. Twist the tops of the bags tightly to prevent the frosting from coming out the wrong end.
- Pipe perfect rosettes on each cupcake.
- Hold the piping bag perpendicular to the cupcake surface, with the tip about 1/2 inch above the cupcake. Start piping along the outside edge of the cupcake, applying steady pressure while moving in a tight circle toward the center. As you spiral inward, gradually lift the bag to create height. Stop squeezing and lift the bag straight up to finish each rosette. Repeat this process for all 12 cupcakes, alternating colors for a festive look.
- Add the finishing touches with festive sprinkles.
- While the frosting is still soft, immediately sprinkle each cupcake with Halloween-themed sprinkles. Orange and black nonpareils look classic, while candy corn sprinkles add a fun touch. Tiny plastic spiders or pumpkin-shaped sprinkles make them extra spooky. Don't wait too long to add sprinkles, or they won't stick to the frosting properly.
 Pin it
Getting Your Butter to the Perfect Temperature
Room temperature butter is crucial for smooth buttercream. It should be soft enough that your finger leaves an indentation when pressed, but not so warm that it's melting or greasy. If you forgot to take it out early, you can soften it quickly in the microwave using 10-second intervals at 30% power, but be very careful not to melt it or your frosting will be soupy.
Achieving Vibrant Halloween Colors
Gel food coloring is your best friend for getting those bright, neon Halloween colors. Start with just a tiny amount - you can always add more, but you can't take it back. Orange can be tricky to achieve; sometimes it's easier to start with yellow and add red drop by drop until you get the perfect Halloween orange. For that neon green, look for "leaf green" or "electric green" gel coloring.
Mastering the Perfect Buttercream Consistency
Your buttercream should hold its shape when piped but not be so stiff that it's hard to squeeze out of the bag. If it's too thick, add milk one teaspoon at a time until it's right. If it's too thin, add more powdered sugar. The frosting should look smooth and glossy, not grainy or separated.
Creative Decoration Variations
Try different piping tips for variety - a round tip creates smooth dollops, while a leaf tip makes interesting textured swirls. You can also do half-and-half colors by putting two colors in the same piping bag side by side. For extra spookiness, add plastic spiders on top or stick pretzel pieces into the frosting to look like witch fingers.
Make-Ahead and Storage Strategy
These cupcakes actually taste better the next day as the flavors meld together. You can bake the cupcakes up to two days ahead and store them covered at room temperature. The buttercream can be made a day ahead and stored in the refrigerator - just bring it back to room temperature and re-whip it before piping. Fully decorated cupcakes keep for three days in an airtight container.
When my neighbor saw these cupcakes at our Halloween block party, she couldn't believe they started with a box mix. The homemade buttercream really does make all the difference - it's so much fluffier and more flavorful than store-bought frosting. My kids love helping me make the different colors, and there's something so satisfying about watching those perfect rosettes come together with just a simple piping motion.
 Pin it
These cupcakes have become our Halloween tradition, and I love how they bring just the right amount of festive fun without requiring any special skills or expensive decorating tools. The combination of rich chocolate cupcakes and that fluffy, colorful buttercream hits all the right notes, and they disappear faster than any store-bought treats I've ever served. Plus, there's something so satisfying about creating those beautiful swirled rosettes that look like they came from a professional bakery.
Frequently Asked Questions
- → Can I use a different cake mix flavor?
- Yes! Any chocolate cake mix works great, or you can use vanilla if you prefer. The colorful frosting is what makes them Halloween-themed.
- → How long do these cupcakes stay fresh?
- Store them in an airtight container at room temperature for up to 3 days. The buttercream stays creamy and delicious.
- → What if I don't have gel food coloring?
- Regular liquid food coloring works too, but gel gives brighter colors without thinning the frosting. You might need more drops with liquid.
- → Can I make the frosting ahead of time?
- Absolutely! Make the buttercream up to 2 days early and keep it covered in the fridge. Let it come to room temperature before using.
- → Do I need special piping tips for decoration?
- The Wilton 1M tip creates beautiful swirls, but you can spread the frosting with a knife or use any star tip you have at home.
- → What Halloween sprinkles work best?
- Orange and black sprinkles, candy eyeballs, mini chocolate chips, or crushed Oreos all make great Halloween decorations for these cupcakes.