
 Pin it
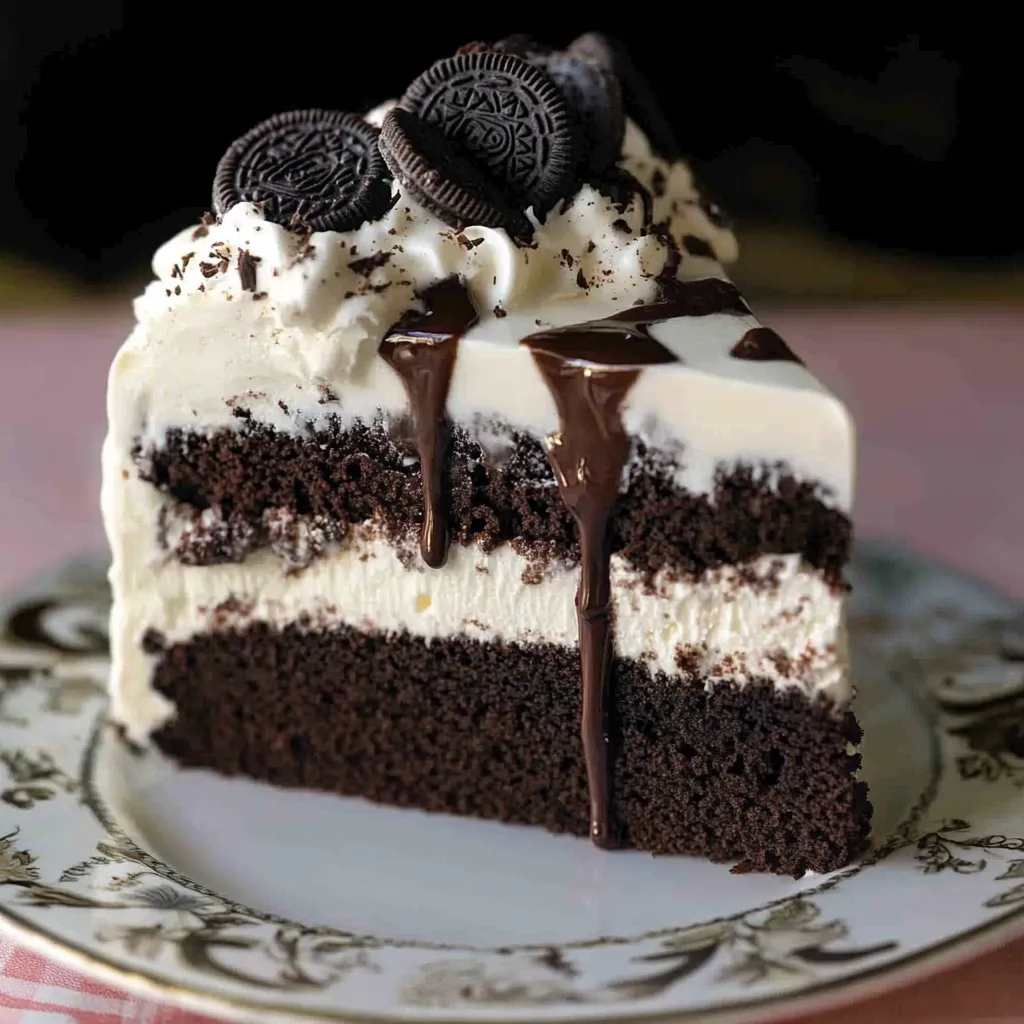
This show-stopping homemade ice cream cake combines layers of rich chocolate cake, creamy ice cream, hot fudge, and fluffy whipped cream into the ultimate summer dessert that rivals anything from a fancy ice cream shop. With crunchy Oreo cookie pieces adding texture throughout and an elegant piped whipped cream border, this impressive treat delivers maximum wow factor while being surprisingly simple to assemble. The best part is that most of the work can be done days ahead, making it perfect for birthday parties, summer gatherings, or any time you want to create something truly special.
I discovered the magic of homemade ice cream cake when I wanted to create something extra special for my daughter's birthday but couldn't find exactly what I wanted at the store. The first time I made this, I was amazed at how professional it looked and how much better it tasted than any store-bought version we'd ever had. The combination of that rich chocolate cake layer with the creamy ice cream and fluffy whipped cream creates this incredible texture contrast that makes every bite exciting. Now it's become our go-to celebration dessert, and I love how I can customize the flavors for different occasions and preferences.
Essential Ingredients and Selection Tips:
- Premium ice cream: Use real dairy ice cream rather than "frozen dessert" products for the best texture and flavor
- Quality chocolate cake: Homemade or high-quality box mix both work; the cake should be moist and flavorful
- Hot fudge sauce: Use thick hot fudge rather than chocolate syrup; it needs to firm up to help bind the layers
- Heavy whipping cream: Must be cold and fresh for proper whipping; avoid ultra-pasteurized if possible
- Oreo cookies: Choose regular Oreos for classic flavor, or experiment with different cookie varieties
- Pure vanilla extract: Real vanilla makes a noticeable difference in the whipped cream flavor
Step-by-Step Instructions:
- Prepare ice cream layer for perfect consistency:
- Line an 8-inch cake pan with plastic wrap, leaving plenty of overhang for easy removal. Let your ice cream soften at room temperature for 10-15 minutes until it's spreadable but not melted. Transfer the softened ice cream to the lined pan, pressing it down firmly with a spatula to eliminate air pockets and create an even layer. Cover tightly with plastic wrap and freeze for at least 2 hours until completely firm.
- Create the cake foundation:
- Bake your chocolate cake according to recipe directions and let it cool completely before assembly. Once cool, place the cake layer on your serving plate and spread hot fudge sauce evenly over the top using an offset spatula. The hot fudge should cover the entire surface and be thick enough to help bind the cookie pieces and ice cream layer.
- Add textural elements:
- Sprinkle chopped Oreo cookies generously over the hot fudge layer, pressing them gently into the sauce so they adhere well. This creates delicious crunchy texture throughout the cake and adds visual interest. The cookies should be chopped into bite-sized pieces that won't be too large when eating but still provide satisfying crunch.
- Assemble the ice cream layer:
- Remove the ice cream from the freezer and carefully lift it out of the pan using the plastic wrap overhang. Quickly but gently place the ice cream layer on top of the cookie-covered cake, positioning it evenly. Work quickly to prevent melting, and immediately cover the entire cake with plastic wrap. Return to the freezer for at least 1 hour to firm up completely.
- Create perfect whipped cream:
- In a large, chilled bowl, combine cold heavy whipping cream, sugar, and vanilla extract. Start mixing on low speed to prevent splattering, then gradually increase to high speed. Whip until soft peaks form, then finish by hand with a whisk to achieve firm peaks that will hold their shape during piping and spreading. Be careful not to overwhip, which would create butter.
- Apply smooth frosting layer:
- Remove the cake from the freezer and unwrap carefully. Using an offset spatula, spread a thin layer of whipped cream evenly over the entire cake, covering the top and sides completely. This creates a smooth base for decorating and seals in the layers. Work quickly but gently to maintain the cake's structure while the ice cream is still firm.
- Create decorative elements:
- Transfer remaining whipped cream to a piping bag fitted with a large star tip. Pipe decorative borders around the top edge of the cake and add any other desired decorations. For the classic drip effect, carefully drizzle additional hot fudge around the edges, allowing it to drip down the sides naturally.
- Final touches and serving preparation:
- Press additional cookie crumbs around the bottom edge of the cake for a finished appearance. Return the completed cake to the freezer for at least 30 minutes to set all the decorative elements. Remove from freezer 15-30 minutes before serving to allow slight softening for easier cutting, then slice with a knife dipped in warm water between cuts.
 Pin it
The technique I'm most excited about in this recipe is the method for creating that perfectly even ice cream layer. I used to try to spread softened ice cream directly onto the cake, which always resulted in a messy, uneven layer that would mix with the hot fudge. The breakthrough came when I started molding the ice cream separately in a lined pan, then transferring the perfectly shaped layer onto the cake. This creates clean, distinct layers and makes the whole assembly process so much easier and more professional-looking. The plastic wrap trick makes removal foolproof and ensures you get that bakery-perfect appearance every time.
Ice Cream Selection and Temperature Management
The success of this cake depends heavily on choosing the right ice cream and managing temperatures throughout assembly. Real dairy ice cream has better fat content and stabilizers that allow it to soften evenly and refreeze properly, while "frozen dessert" products often become icy or don't hold their shape well. Understanding when ice cream is at the perfect consistency for spreading versus layering is crucial for achieving professional results.
Layer Construction and Structural Integrity
Building stable layers requires understanding how each component contributes to the overall structure. The hot fudge acts as both flavor enhancer and binding agent, helping the cookie pieces adhere while creating a barrier between cake and ice cream. The sequence of assembly ensures each layer sets properly before adding the next, preventing sliding or separation during serving.
Whipped Cream Mastery and Stability
Creating whipped cream that maintains its structure in a frozen dessert requires specific techniques. The cream must be whipped to the right consistency - firm enough to hold decorative shapes but not so stiff that it becomes grainy. The gradual speed increase and hand-finishing technique ensures optimal texture, while the timing of application prevents the cream from deflating or becoming icy.
Freezing Strategy and Timing
Understanding the freezing requirements for each component helps plan the assembly timeline effectively. The ice cream layer needs sufficient time to firm up completely, while the finished cake benefits from a final freezing period to set all decorative elements. Knowing when to remove the cake from the freezer before serving ensures optimal texture for both cutting and eating.
Decoration Techniques and Professional Presentation
The visual appeal of this cake comes from understanding basic cake decorating principles adapted for frozen desserts. The smooth whipped cream base provides a clean canvas for decorative elements, while the strategic placement of cookie crumbs and fudge drips creates visual interest. Working quickly but deliberately prevents melting while achieving bakery-quality appearance.
Storage and Serving Optimization
Proper storage maintains quality while serving techniques ensure the best eating experience. The cake must remain frozen for storage but requires careful tempering before serving to achieve the ideal texture. Understanding this balance prevents serving cake that's either too hard to cut or too soft to maintain its shape.
This ice cream cake has become the star of every celebration in our house because it proves that homemade desserts can be both impressive and achievable with the right techniques. There's something magical about the way people's faces light up when they see this beautiful cake, and even more so when they taste how much better it is than anything store-bought. Every time I make it, I'm reminded that some of the most memorable desserts are the ones that combine simple ingredients in thoughtful ways to create something truly special. It's become one of those recipes that makes ordinary celebrations feel extraordinary and creates the kind of sweet memories that last long after the last bite is gone.
Frequently Asked Questions
- → How long does the ice cream cake need to freeze?
- The ice cream layer needs to freeze until completely solid, usually 2-3 hours. The finished cake should freeze for at least 30 minutes before serving.
- → Can I use store-bought cake instead of homemade?
- Yes! You can use any 8-inch chocolate cake layer, whether homemade or store-bought. Just make sure it's completely cooled before assembly.
- → What ice cream flavors work best for this cake?
- Vanilla, chocolate, or strawberry work great. You can also use multiple flavors to create layers or mix different types together.
- → How do I cut the cake without it melting?
- Let the cake sit at room temperature for 15 minutes before cutting. Run your knife under warm water between each slice for clean cuts.
- → How long can I store this ice cream cake?
- The cake will keep in the freezer for up to 1 week when properly covered with plastic wrap or stored in an airtight container.
- → Can I make this cake ahead of time?
- Absolutely! This cake is perfect for making ahead. You can assemble it completely and keep it frozen until ready to serve.