
 Pin it
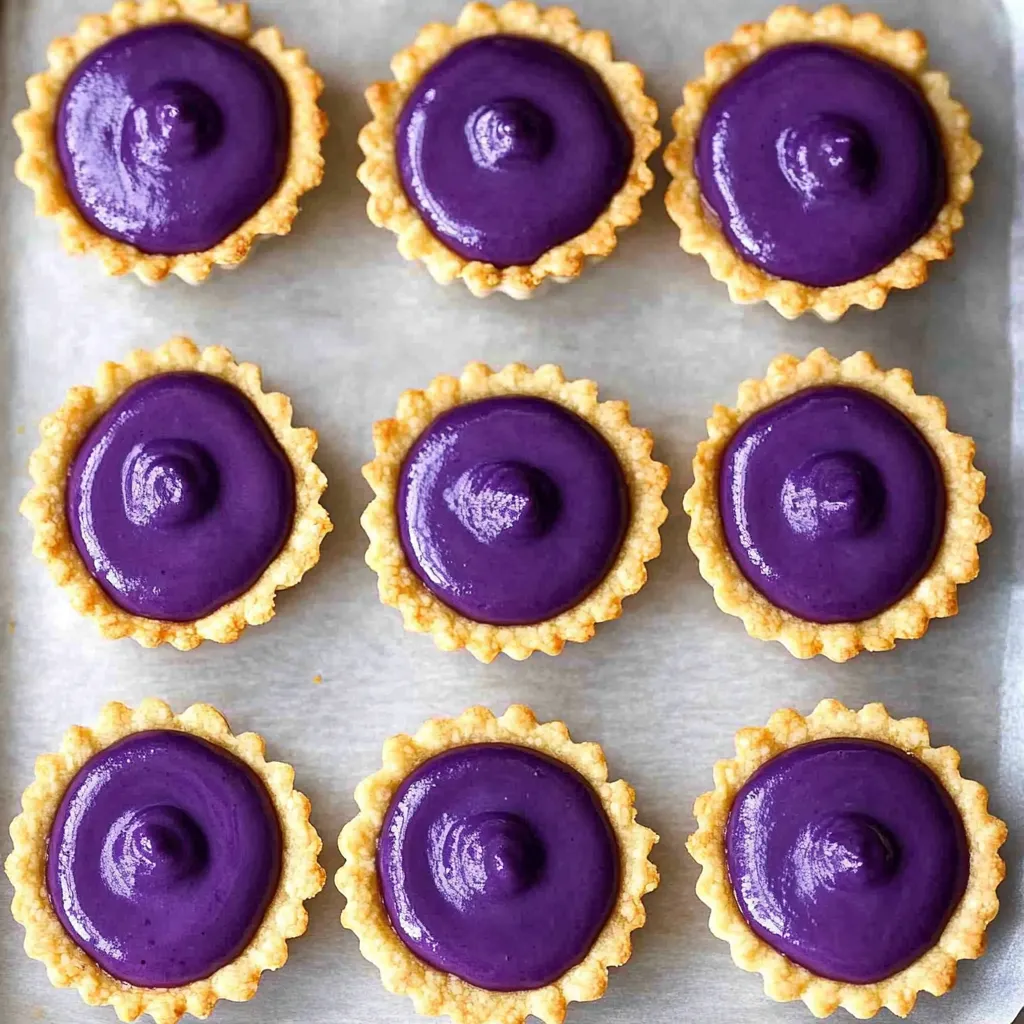
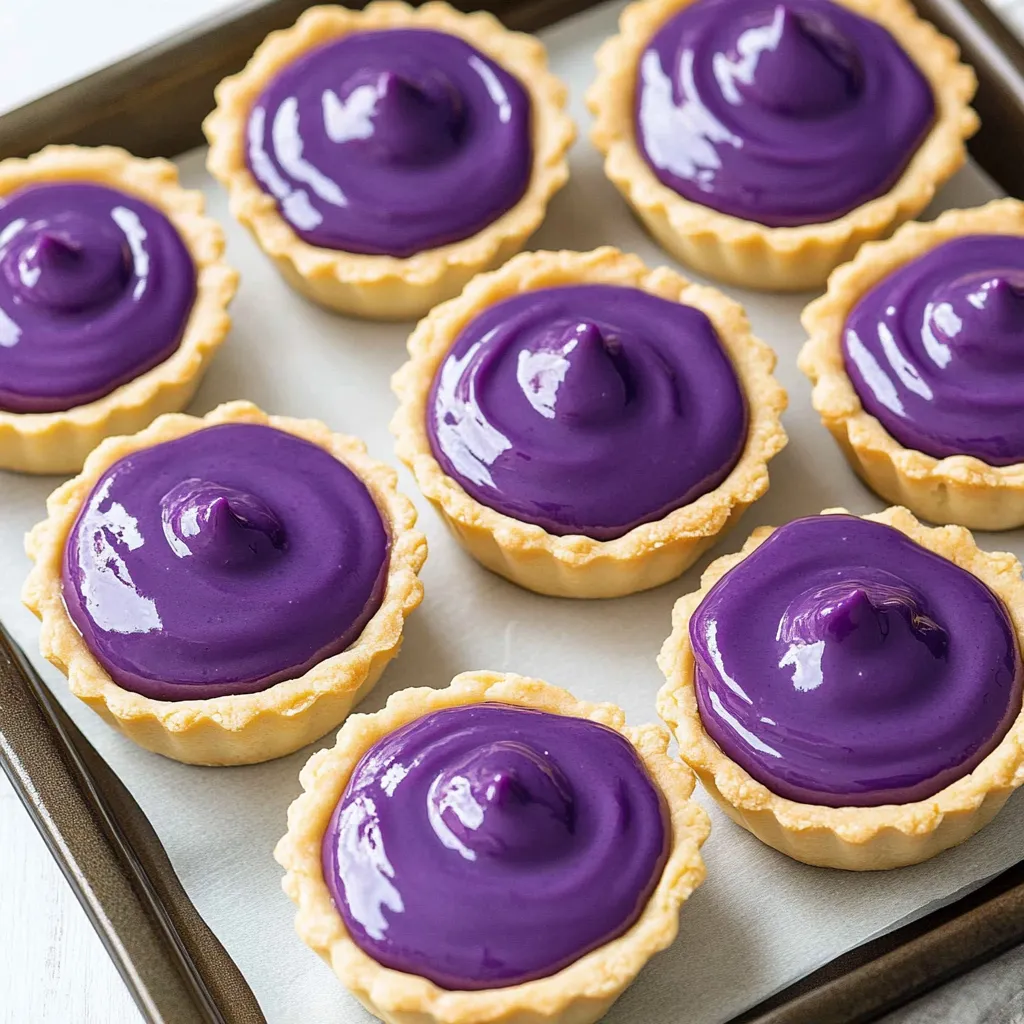
These ube tarts deliver the perfect two-bite combination of buttery, crispy shortbread crust filled with smooth, creamy ube cheesecake filling that tastes like concentrated ube halaya enriched with tangy cream cheese and sweetened condensed milk. The genius of this recipe lies in its simplicity - using store-bought frozen tart shells eliminates the most difficult and time-consuming part of tart making (preparing and shaping homemade pastry dough), while the five-ingredient filling comes together in one bowl with just a hand mixer required. What makes these tarts so special is how they capture the essence of ube in concentrated, elegant form - each miniature tart looks bakery-professional with its golden pastry cup overflowing with vibrant purple filling, creating stunning visual impact on any dessert table while the actual preparation takes less than an hour from start to finish. The no-egg filling sets beautifully during a brief baking period, creating smooth, creamy texture similar to baked cheesecake but without the fussiness or risk of cracking that comes with traditional cheesecake recipes.
The first time making these reveals just how easy tart-making can be when you skip the homemade pastry - there's no wrestling with sticky dough, no chilling for hours, no rolling and fitting into individual molds, just thawing store-bought shells and filling them with that gorgeous purple mixture. Watching them bake and seeing the filling transform from liquid to set custard while the pastry edges turn golden brown creates satisfaction without the stress that often accompanies tart recipes. Having a batch of these sitting on your counter means constantly walking by and grabbing "just one more" because their two-bite size makes them dangerously easy to pop in your mouth repeatedly.
Ingredients - What You Need and Why
- Frozen ready-made tart shells: eliminate the most challenging and time-consuming aspect of tart making while providing consistently excellent results; look for butter-based tart shells rather than shortening-based for superior flavor; two-inch diameter shells yield about thirty-six mini tarts, while three-inch shells make fewer but larger portions; brands vary in quality, so buy the best your budget allows as the pastry flavor and texture significantly impact the final result; thaw according to package directions before using
- Cream cheese: provides tangy richness and smooth, luxurious body to the filling; use full-fat block-style cream cheese (Philadelphia or similar), not spreadable cream cheese from tubs which has different moisture content and consistency; eight ounces (one standard package) softened to room temperature incorporates smoothly without lumps
- Ube halaya (purple yam jam): the star ingredient providing authentic ube flavor and natural purple color; this thick Filipino jam made from mashed purple yam, coconut milk, and condensed milk creates the characteristic taste; quality varies dramatically between brands - choose halaya you enjoy eating plain as inferior versions taste overly sweet or starchy; homemade ube halaya tastes best and lets you control sweetness and texture; you'll need about one cup
- Sweetened condensed milk: adds sweetness, creaminess, and helps create that smooth, luscious texture characteristic of Filipino desserts; the concentrated milk also contributes to proper setting of the filling; one 14-ounce can provides the right amount for the recipe; full-fat condensed milk creates richest results
- Ube extract: concentrated flavoring and coloring that intensifies both the purple hue and ube taste beyond what halaya alone provides; this is what creates that vibrant, eye-catching purple rather than the more muted natural color; one to two tablespoons depending on desired intensity; McCormick brand is widely recommended for consistent color and flavor
- Salt: just a pinch (one-eighth teaspoon or less) balances the sweetness and enhances all other flavors without making the filling taste salty; salt is crucial in sweet applications for preventing one-dimensional sugary taste
How to Make Ube Tarts - Step by Step
- Prepare oven and pre-bake tart shells:
- Position a rack in the center of your oven and preheat to 375 degrees Fahrenheit. Remove your frozen tart shells from the freezer and let them thaw according to package directions - usually about fifteen to twenty minutes at room temperature, though some brands can go directly from frozen to oven. Once thawed, arrange the tart shells on a large baking sheet, spacing them about an inch apart. They can be close together since they won't expand or spread during baking. Place the baking sheet in your preheated oven and bake for about ten minutes, watching carefully toward the end. You're looking for the shells to turn light golden brown with slightly darker edges. The bottoms should be dry and lightly colored rather than still pale and raw-looking. This pre-baking step is absolutely essential - it ensures the tart shells are fully baked and crispy rather than soggy when you add the moist filling. Underbaked shells will be soft and unpleasant to eat, while properly baked shells provide that satisfying crispy-buttery contrast against the creamy filling. Once lightly golden, remove the baking sheet from the oven. If your tart shells are in metal or foil molds, carefully remove them from the molds while still warm - they should lift out easily. If they're in paper or cardboard shells that are meant to stay on, leave them as is. Set the baked shells aside to cool slightly while you prepare the filling. Reduce your oven temperature to 350 degrees Fahrenheit for the second baking with the filling.
- Beat cream cheese and ube halaya until smooth:
- Place your eight ounces of cream cheese - which should be completely softened to room temperature, not cold from the fridge - in a large mixing bowl. If you forgot to soften it ahead of time, you can microwave it briefly in five to ten-second bursts, being very careful not to melt it, just soften it. Add one cup of ube halaya to the bowl with the cream cheese. If your ube halaya has been refrigerated, let it come to room temperature as well, which makes it easier to incorporate. Using a handheld electric mixer on medium speed (or a stand mixer with the paddle attachment), begin beating the cream cheese and ube halaya together. At first, they'll look separate and lumpy as the thick halaya resists blending with the cream cheese. Keep beating, stopping occasionally to scrape down the sides and bottom of the bowl with a rubber spatula to ensure everything gets incorporated. After about two to three minutes of beating, the mixture should transform into a smooth, uniform purple blend with no visible streaks of plain cream cheese or unmixed ube halaya. The consistency should be thick, creamy, and completely homogeneous - like thick frosting or softened ice cream. This thorough mixing is important because lumps of unmixed cream cheese or ube in the filling create unpleasant texture in the finished tarts.
- Add remaining ingredients and mix until incorporated:
- To your smooth cream cheese and ube mixture, add the entire 14-ounce can of sweetened condensed milk, one to two tablespoons of ube extract (start with one tablespoon if you're uncertain about intensity, knowing you can add more after tasting), and a small pinch of salt. Continue beating with your electric mixer on medium speed for about one to two minutes, until all the ingredients are completely incorporated and the mixture is uniform in color and consistency. The filling will become slightly thinner and more pourable after adding the condensed milk, which is exactly right. Stop and scrape down the bowl, then beat briefly once more to ensure everything is evenly distributed. Now taste the mixture - yes, raw but perfectly safe since there are no eggs. It should taste sweet with pronounced ube flavor, creamy and smooth on your tongue. The color should be a vibrant, saturated purple. If the ube flavor seems weak, beat in another half tablespoon of ube extract. If it's not purple enough for your preference, add more extract until you achieve your desired shade. Remember that the color will deepen slightly during baking and cooling. The finished filling should be smooth, creamy, pourable but thick - similar to very thick pancake batter or melted ice cream.
- Fill shells and bake until set:
- Your pre-baked tart shells should now be cooled enough to handle, though they don't need to be completely cold. Arrange them on the baking sheet if you removed them to cool. Using a small cookie scoop (which creates uniform portions and makes filling faster), spoon, or small ladle, carefully fill each tart shell with the purple ube mixture. Fill almost to the brim - the filling doesn't rise or puff during baking, so you want generous amounts in each shell for visual impact and proper filling-to-crust ratio. Work steadily through all the shells, filling them all before baking. If you have leftover filling after filling all thirty-six tart shells, you can bake it separately in a small ramekin or save it refrigerated for another use. Carefully transfer the filled tarts (still on the baking sheet) into your 350-degree oven. Set a timer for ten minutes. Every oven is different, so start checking at the eight-minute mark. The tarts are done when the filling has set - it should look matte rather than shiny and wet, and feel slightly firm when gently touched with a fingertip rather than liquid and jiggly. The edges of the tart shells should be golden brown. Don't overbake or the filling can crack and become dry rather than staying creamy. Remove from the oven and let cool on the baking sheet for about five minutes, then transfer individual tarts to a wire cooling rack to cool completely. They're delicious warm, but the filling firms up better and slices more cleanly once completely cooled.
 Pin it
The two-bite size of these mini tarts makes them absolutely perfect for parties and gatherings - guests can try one without committing to a large dessert slice, and the small size means people feel less guilty about having two or three. That gorgeous purple filling against golden pastry creates visual drama that draws people to the dessert table, while the familiar format of a tart makes ube less intimidating for people who've never tried it before.
Understanding Tart Shell Options and Selection
Navigating the world of pre-made tart shells helps you choose the best products and understand what to look for when shopping. Frozen tart shells come in various sizes - one-inch for tiny one-bite tarts, two-inch for these mini tarts, three-inch for slightly larger portions, and up to four or five inches for individual full-sized tarts. For this recipe, two-inch shells create the ideal ratio of filling to crust in perfect two-bite portions. The shells come in either metal/foil molds that you remove after baking, or paper/parchment shells meant to stay on for serving - both work fine, though removing metal molds creates prettier presentation. Quality varies dramatically between brands. Premium tart shells made with butter, flour, and minimal ingredients taste distinctly better - flaky, tender, buttery - than cheap shells made with shortening and numerous additives that taste greasy and artificial. Read ingredient lists and choose shells listing butter or vegetable oil near the beginning, avoiding those with hydrogenated fats. French-style pâte sucrée shells are sweeter and more cookie-like, while standard tart shells are less sweet and more pastry-like - both work, though the less-sweet versions better balance the very sweet ube filling. Some stores carry both regular and whole wheat tart shells, gluten-free varieties, or even chocolate tart shells for extra decadence. Storage is straightforward - keep frozen until ready to use, and they last months in the freezer.
Creating Flavor Variations and Additions
While classic ube filling is delicious on its own, exploring variations creates different flavor experiences while maintaining the fundamental technique. For ube coconut tarts, fold half a cup of shredded sweetened coconut into the filling before pouring into shells, creating textural contrast and tropical flavor. Ube cream cheese swirl tarts reserve one-quarter of the filling before adding ube, leaving it plain and white, then dolloping white and purple mixtures alternately into shells and swirling with a toothpick for marbled effect. Ube macadamia incorporates chopped toasted macadamia nuts into the filling for crunchy, buttery richness. For ube chocolate tarts, use chocolate tart shells and top finished tarts with chocolate ganache or chocolate shavings. Ube matcha creates layered flavor by mixing one teaspoon of matcha powder into half the filling, then layering green and purple mixtures in shells. Coconut whipped cream piped on top of cooled tarts adds elegant presentation and creamy contrast. Fresh mango or passion fruit spooned over finished tarts provides tropical fruit brightness. Toasted coconut flakes sprinkled on top before baking add texture and visual appeal. Each variation maintains the essential creamy ube base while exploring complementary flavors.
Troubleshooting Common Tart Problems
Even with a foolproof recipe using pre-made shells, sometimes issues arise, but understanding what went wrong helps you prevent problems next time. If your tart shells are soggy and soft rather than crispy, you either didn't pre-bake them long enough before adding filling, or they weren't fully thawed before that initial bake - make sure shells are lightly golden all over before adding filling. When filling cracks during or after baking, you overbaked the tarts, cooking them past the point where they're just set, or your oven temperature was too high - watch carefully and pull them when they look matte but still slightly soft. If the filling tastes bland despite using ube, your ube halaya was low quality with minimal actual purple yam, or you didn't use enough ube extract - invest in better halaya or make your own, and don't be shy with extract. Tarts that are difficult to remove from metal molds either weren't fully baked so they stuck, or you waited too long and they cooled completely making removal harder - remove from molds while still slightly warm. When the filling seems grainy or lumpy rather than smooth, the cream cheese wasn't fully softened to room temperature before mixing, or you didn't beat long enough to break down all lumps - patience during mixing creates silky texture. If shells break or crumble when removing from molds, they were overbaked making them too brittle, or you removed them too roughly - handle gently and don't bake past light golden color.
Storage, Freezing, and Make-Ahead Strategies
Proper storage keeps these tarts at optimal freshness and texture for several days, making them excellent for advance preparation before parties or holidays. Store completely cooled tarts in a single layer in an airtight container, or carefully stack with parchment paper between layers to prevent sticking. Refrigerate for up to five days. The tarts maintain their texture remarkably well - the filling stays creamy rather than weeping or separating, and the crust remains relatively crisp. For best results, bring refrigerated tarts to room temperature about thirty minutes before serving, as cold tarts have muted flavors and firmer texture. These tarts freeze beautifully for up to two months, making them perfect for batch baking and storing. Freeze in a single layer on a baking sheet until solid, then transfer to freezer bags or containers with parchment between layers. Thaw overnight in the refrigerator, or at room temperature for about an hour. For maximum make-ahead convenience, you can bake the empty tart shells several days ahead and store them at room temperature in an airtight container, then prepare the filling and bake the assembled tarts the day you plan to serve them. The filling can also be made one day ahead and refrigerated, then given a quick re-mix before spooning into shells. These flexible timing options eliminate stress when preparing for gatherings.
Serving Suggestions for Different Occasions
These elegant mini tarts adapt beautifully to various serving scenarios and occasions throughout the year. For holidays like Thanksgiving or Christmas, arrange them on a tiered dessert stand alongside other Filipino desserts or traditional American pies, offering something unique that honors diverse culinary traditions. The purple color feels festive during the holidays, particularly when topped with white coconut whipped cream that evokes snow. For Easter celebrations, the pastel purple perfectly fits spring color palettes. Mother's Day brunches benefit from these elegant, manageable portions that guests can enjoy with coffee or tea. At Filipino celebrations, weddings, or gatherings, these tarts represent cultural heritage in accessible, beautiful form. For afternoon tea parties, arrange mini tarts on delicate serving platters with other petit fours and pastries. At potlucks and parties, these travel well and their small size means people can try them without feeling over-committed. For gift-giving, package four to six tarts in clear boxes tied with ribbons - they look professional enough to give teachers, neighbors, or friends. Birthday parties appreciate individually-sized desserts that eliminate the need for cutting and plating cake. Each tart's two-bite size means you can serve them as passed appetizers at cocktail parties, creating elegant finger food desserts.
Teaching Beginner Bakers Through This Recipe
This recipe provides an ideal opportunity for teaching baking fundamentals to beginners or children without overwhelming them with complex techniques. The pre-made tart shells remove the most intimidating aspect of pastry-making, allowing focus on understanding mixing techniques and baking principles. Learning to properly soften ingredients teaches temperature's role in successful mixing - beginners see firsthand how room temperature cream cheese blends smoothly while cold cheese stays lumpy. Using an electric mixer teaches basic tool operation and recognizing when mixtures are properly combined. Understanding visual cues for doneness - matte surface, slight firmness - builds intuition that transfers to countless other recipes. The concept of pre-baking crusts demonstrates how different components sometimes need different cooking times. Working with delicate tart shells teaches careful handling of fragile baked goods. The one-bowl method shows that not all baking requires extensive equipment or complicated multi-step processes. Success with this recipe builds tremendous confidence because the results look so impressive and professional despite minimal difficulty. This confidence encourages continued baking experimentation, gradually building skills and knowledge. For children specifically, the bright purple color makes baking fun rather than intimidating, and the small size of the tarts means each child can have their own creation to personalize and enjoy.
The Economics of Homemade Versus Bakery Tarts
Understanding cost comparisons between making these at home versus purchasing similar items reveals significant savings while achieving superior quality and customization. A package of frozen tart shells containing thirty-six shells costs about eight to twelve dollars depending on brand quality. One package of cream cheese costs about three to four dollars. A jar of ube halaya runs eight to twelve dollars but makes multiple batches. Sweetened condensed milk is about three dollars per can. Ube extract costs about eight to twelve dollars but lasts through many recipes. Total cost for thirty-six tarts works out to roughly twenty-five to thirty-five dollars, or about seventy cents to one dollar per tart. Filipino bakeries or specialty shops charge two to four dollars each for similar ube tarts, while gourmet bakeries can charge even more. Making your own saves substantial money - potentially one hundred dollars or more for a batch compared to buying equivalent number from bakeries. Beyond cost savings, homemade tarts offer control over ingredient quality, sweetness level, and customization that purchased items can't match. The fresher taste of just-baked tarts beats day-old bakery items stored in display cases. For parties or holidays when you need dozens of desserts, the economics become even more compelling.
Understanding Ube Halaya Quality and Sources
The quality of ube halaya varies dramatically between brands and preparation methods, significantly impacting your final tarts, so understanding what to look for helps ensure excellent results. Premium ube halaya lists purple yam (ube) as the first ingredient, followed by coconut milk, condensed milk, and butter, with minimal other additives. The texture should be thick and spreadable but smooth, not stiff or dry. Color ranges from light purple to deep violet depending on the ube variety and amount of extract added. Taste should be sweet but not cloying, with pronounced purple yam flavor that's nutty and vanilla-like rather than artificial. Good Shepherd brand from Baguio, Philippines, is considered the gold standard - if you can find authentic Good Shepherd halaya, buy it. Other quality Filipino brands include Magnolia and Ramar Foods. Inferior halaya lists cornstarch before ube, indicating it's thickened with starch rather than actual purple yam. These taste overly sweet and artificial without genuine ube character. For best results, make your own ube halaya using frozen grated ube, coconut milk, condensed milk, butter, and ube extract - homemade takes about forty-five minutes of active stirring but tastes dramatically better than most commercial versions. Homemade also lets you control sweetness and adjust texture to your preference. Store ube halaya refrigerated in an airtight container where it keeps for up to two weeks.
Exploring the Popularity of Mini Desserts
The recent trend toward mini, individually-portioned desserts reflects changing preferences in entertaining and dining, making these ube tarts perfectly positioned for current tastes. Miniature desserts offer several advantages over traditional full-sized versions. Portion control becomes easier - people can enjoy a sweet treat without committing to a large slice of cake or pie, reducing guilt and food waste. Variety increases since guests can try multiple types of mini desserts rather than choosing just one large portion. Presentation improves as mini desserts create visual interest and elegance on dessert tables, looking more sophisticated than sheet cakes. Sharing becomes easier at parties where standing and mingling is common - one-handed eating of mini desserts beats trying to juggle plates and forks. The psychological appeal of "just a little treat" makes people more likely to try unfamiliar flavors like ube when portions are small and non-threatening. For bakers, mini desserts often bake faster than full-sized versions and are easier to transport without damage. The trend toward mini desserts emerged from restaurant tasting menus where multiple small courses allow broader flavor exploration, then translated to home entertaining. These ube tarts capitalize on all these advantages while introducing Filipino flavors in approachable format.
Building Confidence with Filipino Pastries
For people unfamiliar with Filipino baking, these tarts serve as an accessible gateway to exploring broader Filipino pastry traditions while building confidence to attempt more complex recipes. Success with these simple tarts encourages trying other Filipino pastries - perhaps ensaymada (Filipino brioche with butter and cheese), pan de sal (Filipino bread rolls), Spanish bread (sweet bread rolls with filling), hopia (flaky pastries with bean paste), or the famous ube pandesal. Each exploration teaches about Filipino baking traditions that blend Spanish, Chinese, and indigenous influences into something distinctly Filipino. Learning about merienda culture - the Filipino tradition of afternoon snacks that often feature sweet breads and pastries - provides cultural context. Understanding how Filipinos balance sweet and savory, incorporate tropical ingredients like ube and coconut, and create pastries that are often less sweet than American desserts but still satisfying opens new culinary horizons. Sharing these tarts with others spreads awareness and appreciation for Filipino baking beyond just the baker themselves. The confidence gained from successfully making one Filipino pastry translates to willingness to try others, gradually building repertoire and understanding. For Filipino bakers, making traditional recipes connects them to heritage and allows sharing cultural identity through food, while for non-Filipino bakers, learning these recipes with respect and attribution demonstrates appreciation for Filipino culinary contributions.
The Role of Condensed Milk in Filipino Desserts
Sweetened condensed milk appears in countless Filipino desserts and understanding its role helps explain why so many traditional recipes incorporate it. Condensed milk - whole milk with sixty percent of water removed and sugar added - was introduced to the Philippines during Spanish colonization and remained after independence due to limited refrigeration infrastructure making fresh milk impractical. Filipinos incorporated it into traditional desserts, creating new flavor profiles and textures. In ube tarts, condensed milk provides sweetness, creaminess, helps the filling set during baking, and contributes that characteristic slightly caramelized sweetness found in many Filipino desserts. It appears in leche flan (Filipino caramel custard), halo-halo (shaved ice dessert), maja blanca (coconut pudding), and countless cakes and pastries. The thick, concentrated sweetness pairs particularly well with tropical flavors like ube, coconut, and mango. For people trying to recreate authentic Filipino desserts, understanding that condensed milk is often essential rather than optional helps explain why substitutions may not work. Coconut condensed milk exists for vegan/dairy-free applications, though it's not as readily available. The role of condensed milk in Filipino cuisine reflects how colonial history and practical concerns about food preservation shaped culinary traditions that persist today.
 Pin it
These ube tarts represent the perfect intersection of convenience and homemade quality, proving that using some store-bought components doesn't mean sacrificing flavor, beauty, or the satisfaction of creating something special. What makes this recipe genuinely valuable is how it removes the most intimidating barrier to tart-making (pastry dough preparation) while still delivering impressive, bakery-quality results that showcase Filipino ingredients and flavors beautifully. The minimal time investment - less than an hour from start to finish - makes these perfect for busy bakers who want homemade desserts without marathon baking sessions. Whether you're Filipino and want to share ube in elegant, accessible form, hosting parties and need individually-portioned desserts that look professional, searching for make-ahead treats that hold up well and travel easily, or simply love ube and want another delicious way to enjoy it, these tarts deliver completely. The two-bite size creates that perfect balance where they feel special and indulgent without being overwhelming, making people reach for seconds and thirds because "they're so small, just one more won't hurt." Once you've experienced how easy these are and how enthusiastically people respond to the combination of buttery pastry and creamy purple filling, you'll likely find yourself making batch after batch for every possible occasion, experimenting with variations, and converting tart skeptics who discover that yes, sometimes store-bought components combined with quality homemade filling create results that rival anything from expensive bakeries.
Frequently Asked Questions
- → Can I use fresh ube instead of ube jam?
- Fresh ube needs cooking and mashing first. Ube jam is already sweetened and ready to use, which makes this recipe so quick and easy.
- → Do these tarts need to be refrigerated?
- Yes, store them in the fridge in a sealed container. They'll stay fresh for up to 5 days. You can eat them cold or at room temperature.
- → Can I make these ahead of time?
- Absolutely! These tarts are great for meal prep. Bake them a day or two before your party and keep them chilled until serving time.
- → Where can I buy ube jam and extract?
- Check Asian grocery stores, especially Filipino markets. You can also order both online. Good brands include Magnolia and Vitarich.
- → What if my filling is too runny?
- Make sure your cream cheese is at room temperature, not melted. Also, don't add extra liquid. The filling firms up nicely during baking.
- → Can I freeze these tarts?
- Yes! Freeze them in a single layer on a tray first, then transfer to a freezer bag. They'll keep for up to 2 months. Thaw in the fridge before eating.