
 Pin it
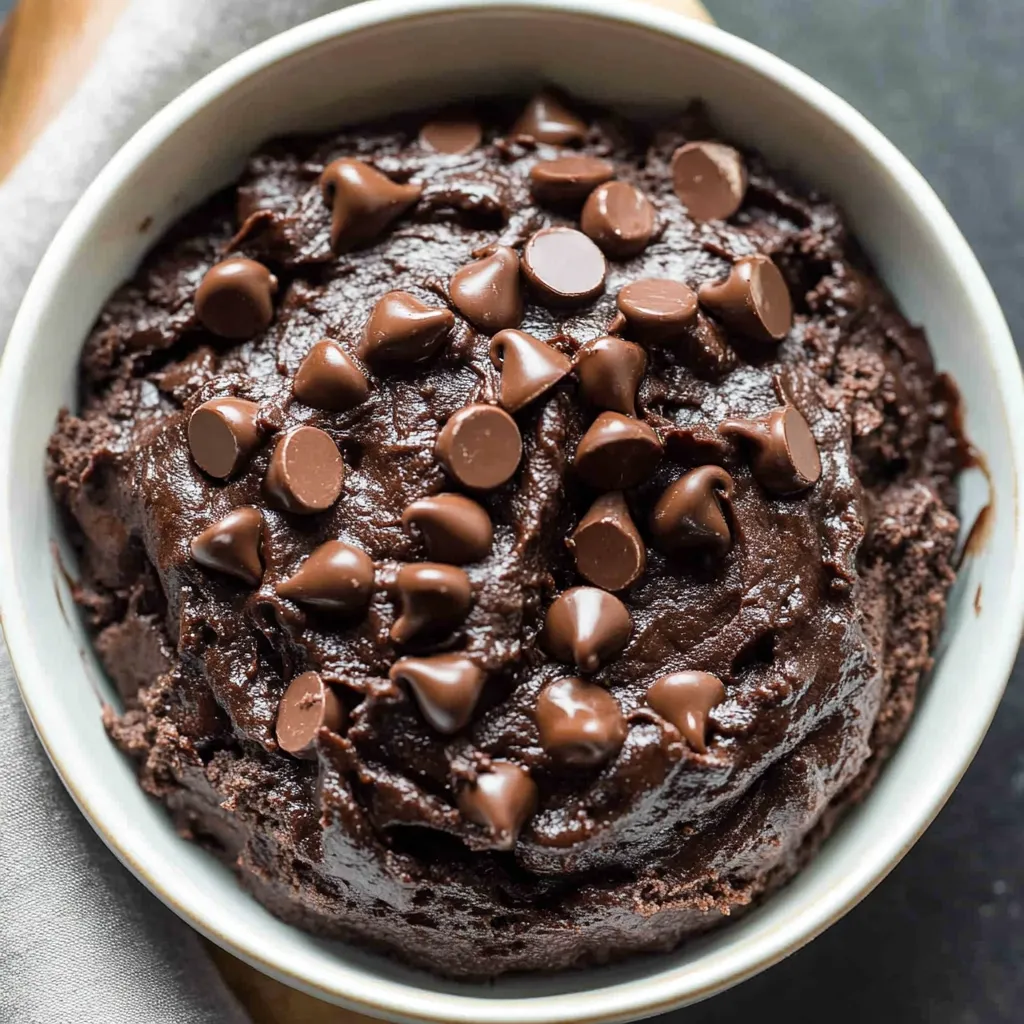
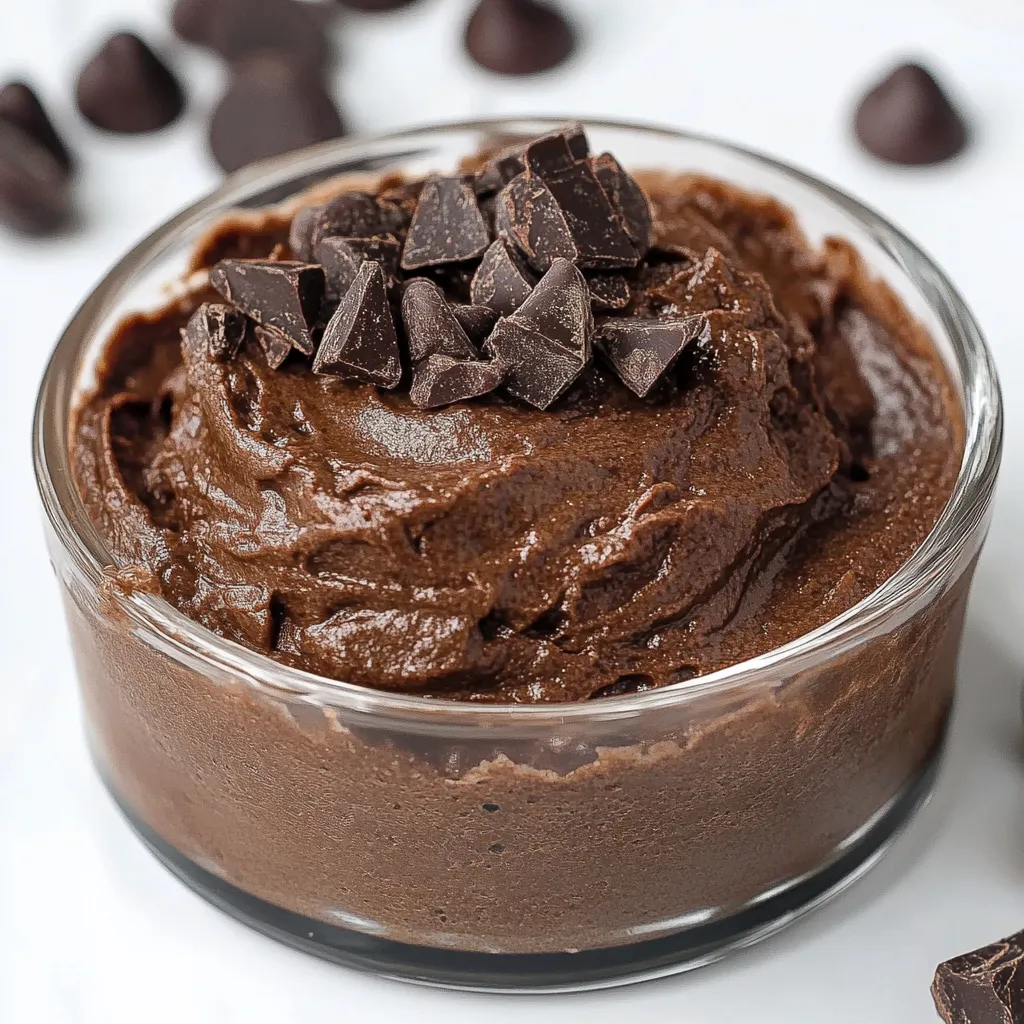
This edible brownie batter delivers all the decadent, fudgy goodness of brownie batter without any of the wait time or safety concerns of raw flour and eggs. Rich, chocolatey, and studded with chocolate chips, it satisfies those intense chocolate cravings in just 10 minutes from start to finish. Unlike traditional brownie batter that requires baking, this version is specifically designed to be eaten by the spoonful, straight from the bowl.
I created this recipe during a summer heatwave when the thought of turning on my oven was unbearable, but my chocolate craving was relentless. After experimenting with different flour alternatives and egg replacements, I landed on this version that my family now requests more often than actual baked brownies! My teenage son's friends have been known to stop by just to see if there's any in the fridge, and I've started keeping individual portions in the freezer for chocolate emergencies.
Ingredients
- 1 cup oat flour or almond flour: These flours don't need to be heat-treated and provide a nutty, complementary flavor to the chocolate
- ¼ cup unsweetened cocoa powder: Provides that deep chocolate flavor – Dutch process gives a richer result
- ½ cup butter, melted: Creates a silky, rich texture – European-style butter adds extra richness
- ⅓ cup light brown sugar, packed: Adds depth with its subtle molasses notes
- ¼ cup granulated sugar: Provides sweetness and helps create that classic brownie texture
- ¼ cup milk: Acts as an egg replacement and helps achieve the perfect consistency
- 1 teaspoon vanilla extract: Enhances the chocolate flavor with its warm, aromatic notes
- ¼ teaspoon salt: Balances the sweetness and intensifies the chocolate flavor
- ¾ cup chocolate chips or chunks: Adds pockets of melty chocolate throughout for textural contrast
Step-by-Step Preparation Instructions
- Step 1:
- Prepare your flour: If using oat flour or almond flour, you can skip heating the flour as these alternatives don't carry the same raw flour risks as all-purpose flour. Simply measure the flour into a medium mixing bowl and whisk in the salt until well combined. If you prefer using all-purpose flour, you'll need to heat-treat it first (instructions for this are included in the variations section below).
- Step 2:
- Melt the butter: Place the butter in a microwave-safe bowl and heat for 45 seconds. Stir to distribute the heat and help melt any remaining solid pieces. If needed, microwave for an additional 10-15 seconds until completely melted but not hot. You want the butter melted but not so hot that it cooks the other ingredients or melts the chocolate chips too quickly when added later.
- Step 3:
- Combine wet ingredients: Add both sugars to the melted butter and whisk vigorously until well combined and slightly lighter in color, about 1 minute. This helps dissolve the sugar crystals for a smoother batter. Add the cocoa powder, vanilla extract, and salt, whisking until the mixture is smooth and glossy with no cocoa powder lumps remaining. The mixture will be thick at this stage, similar to a cookie dough.
- Step 4:
- Incorporate the flour: Add the flour mixture to the wet ingredients, gently folding it in with a spatula until just combined. Over-mixing can make the batter tough rather than tender. Pour in the milk gradually, mixing after each addition until you reach your desired consistency. For a thicker, more scoopable batter, use less milk; for a softer, more spreadable texture, add a bit more.
- Step 5:
- Add mix-ins: Fold in the chocolate chips or chunks, distributing them evenly throughout the batter but being careful not to overmix. The residual warmth from the melted butter might slightly melt some of the chocolate, creating delicious fudgy streaks throughout the batter.
- Step 6:
- Chill and enjoy: The brownie batter can be enjoyed immediately, but I find a 15-minute rest in the refrigerator helps the flavors meld and the texture firm up to the perfect consistency. Scoop into bowls, add to ice cream, or eat straight from the container with a spoon – no judgment here!
 Pin it
The Science of Safe Raw Batter
Traditional brownie batter isn't safe to eat raw due to two potential health concerns: uncooked eggs (salmonella risk) and raw flour (E. coli risk). This recipe cleverly eliminates both concerns.
I discovered through research that the egg in brownies serves primarily as a binding agent, providing structure during baking. Since we're not baking this batter, we can simply omit the eggs entirely. The milk steps in to provide the necessary moisture, while the melted butter and sugars create a cohesive mixture that holds together beautifully without eggs.
The flour solution was a bit trickier to crack. While you can heat-treat all-purpose flour (instructions below), I found that starting with oat flour or almond flour eliminates this step entirely. These alternative flours don't carry the same contamination risks as wheat flour. As a delightful bonus, both add subtle flavor notes that enhance the chocolate rather than muting it as all-purpose flour sometimes can.
Last winter, I brought individual jars of this brownie batter to a neighborhood holiday cookie exchange. Initially, people were confused by the unbaked contribution, but after one taste, several neighbors asked if they could trade their cookies for extra jars of my brownie batter! Now it's become my signature contribution to our annual exchange, and I've even started including little wooden spoons tied to each jar with festive ribbon.
Creative Variations
While the classic version is irresistible on its own, I love experimenting with different flavors and mix-ins. Here are a few variations that have become favorites in our house:
For a mint chocolate version that tastes like those famous Girl Scout cookies, add ¼ teaspoon of peppermint extract along with the vanilla and swap the regular chocolate chips for mint chocolate chips. The cool mint flavor paired with rich chocolate is especially refreshing during summer months.
Coffee lovers should try adding 1 teaspoon of espresso powder to the cocoa mixture. The coffee doesn't make the batter taste like coffee – it actually enhances and deepens the chocolate flavor in a remarkable way. This is my husband's preferred version, especially when made with dark chocolate chunks.
For a touch of indulgence, swirl in 2 tablespoons of caramel sauce or peanut butter after mixing in the chocolate chips. The ripples of flavor add complexity and make each spoonful a surprise. My kids love the peanut butter version, claiming it tastes like a famous candy cup in brownie batter form.
I've been refining this recipe for about three years now, tweaking proportions and ingredients each time to achieve the perfect consistency and flavor. What started as a desperate attempt to satisfy a chocolate craving during a heatwave has evolved into a family favorite that's requested far more often than actual baked brownies. There's something uniquely satisfying about enjoying brownie batter exactly as nature intended – straight from the bowl, no baking required!
Frequently Asked Questions
- → Do I need to bake this brownie batter?
- No, this is an edible brownie batter that's meant to be eaten raw. Just make sure to heat-treat the flour first if using all-purpose flour.
- → How long does edible brownie batter last?
- When stored in an airtight container in the fridge, it will last up to one week. For longer storage, roll into balls and freeze.
- → Can I use different types of flour?
- Yes, you can use all-purpose flour (heat-treated), oat flour, or almond flour in this recipe.
- → Why do I need to heat-treat flour?
- Raw flour can contain harmful bacteria. Heat-treating brings it to a safe temperature (165°F) for consumption without baking.
- → What can I do with edible brownie batter?
- Enjoy it as a dip, eat it by the spoonful, roll into bite-sized balls, or mix into ice cream as a delicious add-in.
- → Can I make this recipe dairy-free?
- Yes, substitute the butter with plant-based butter, use dairy-free milk, and dairy-free chocolate chips.