
 Pin it
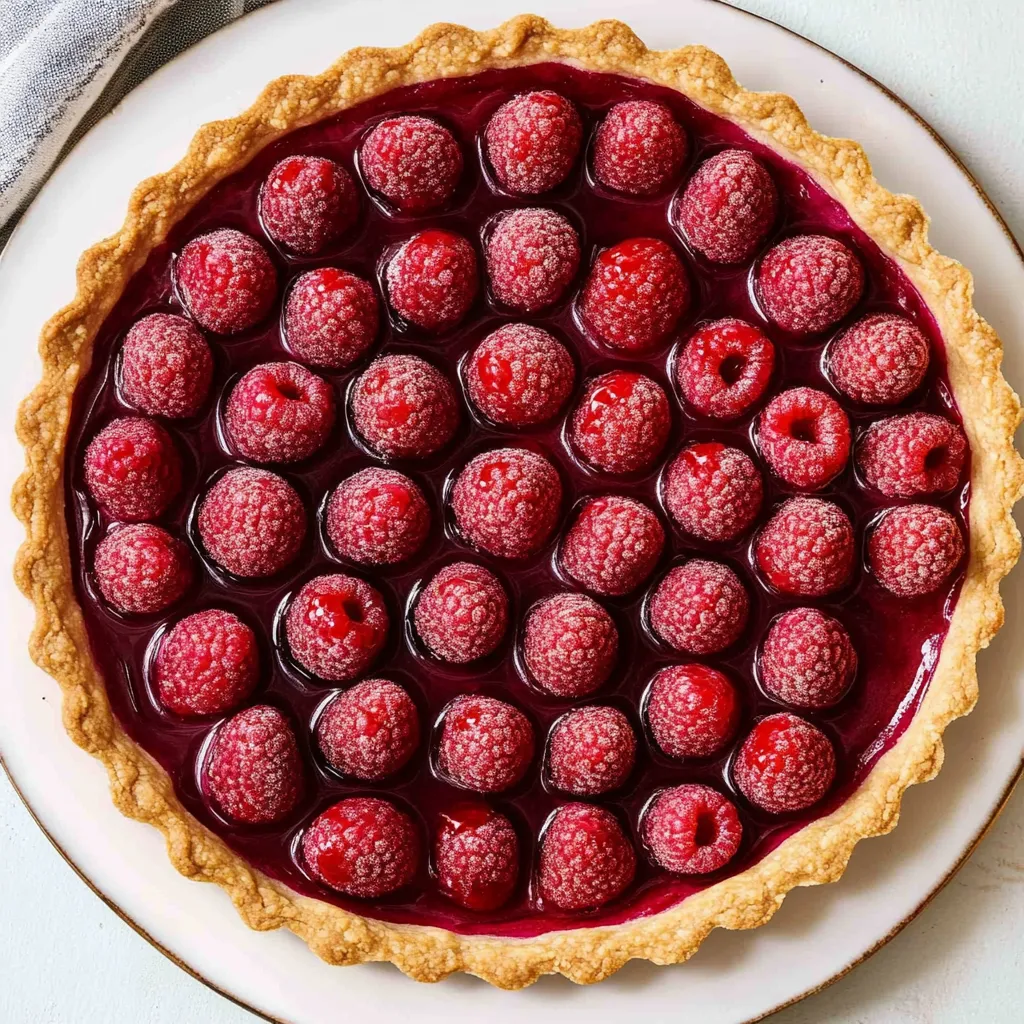
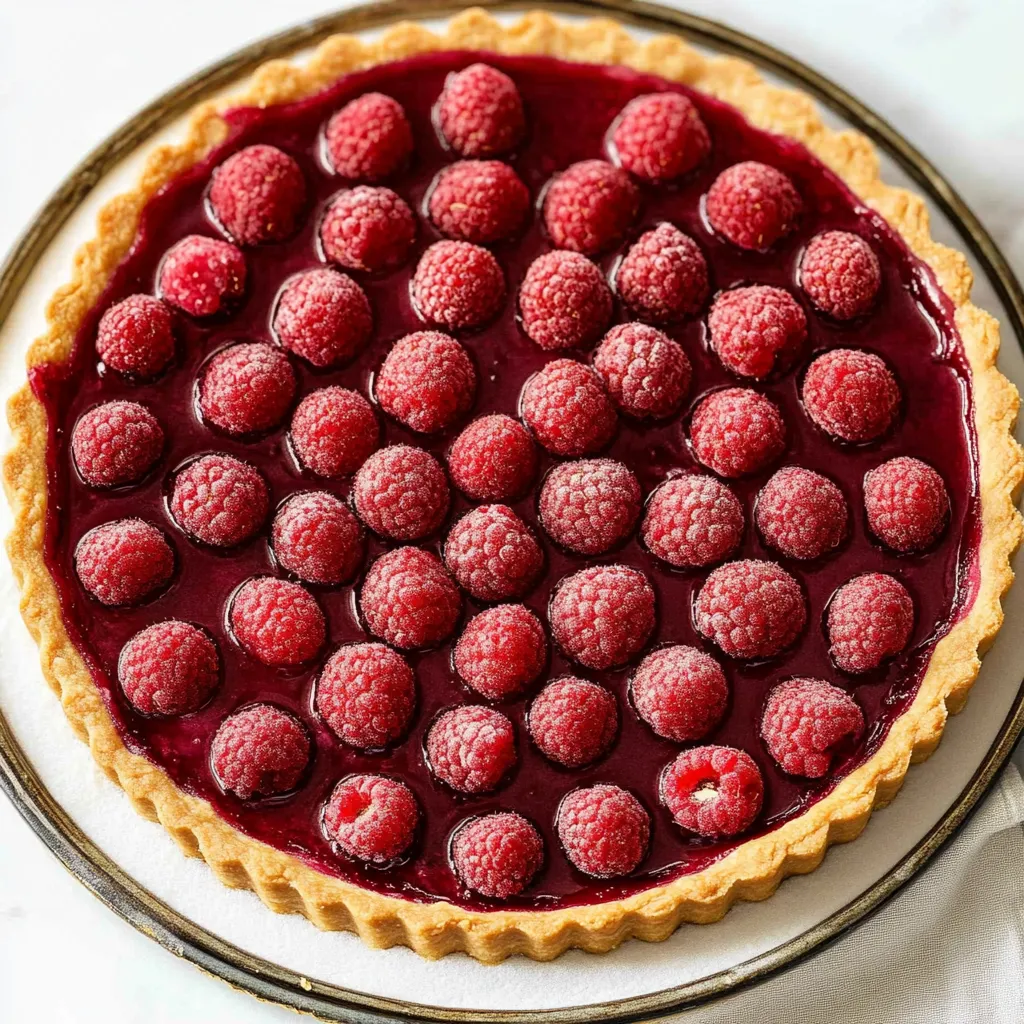
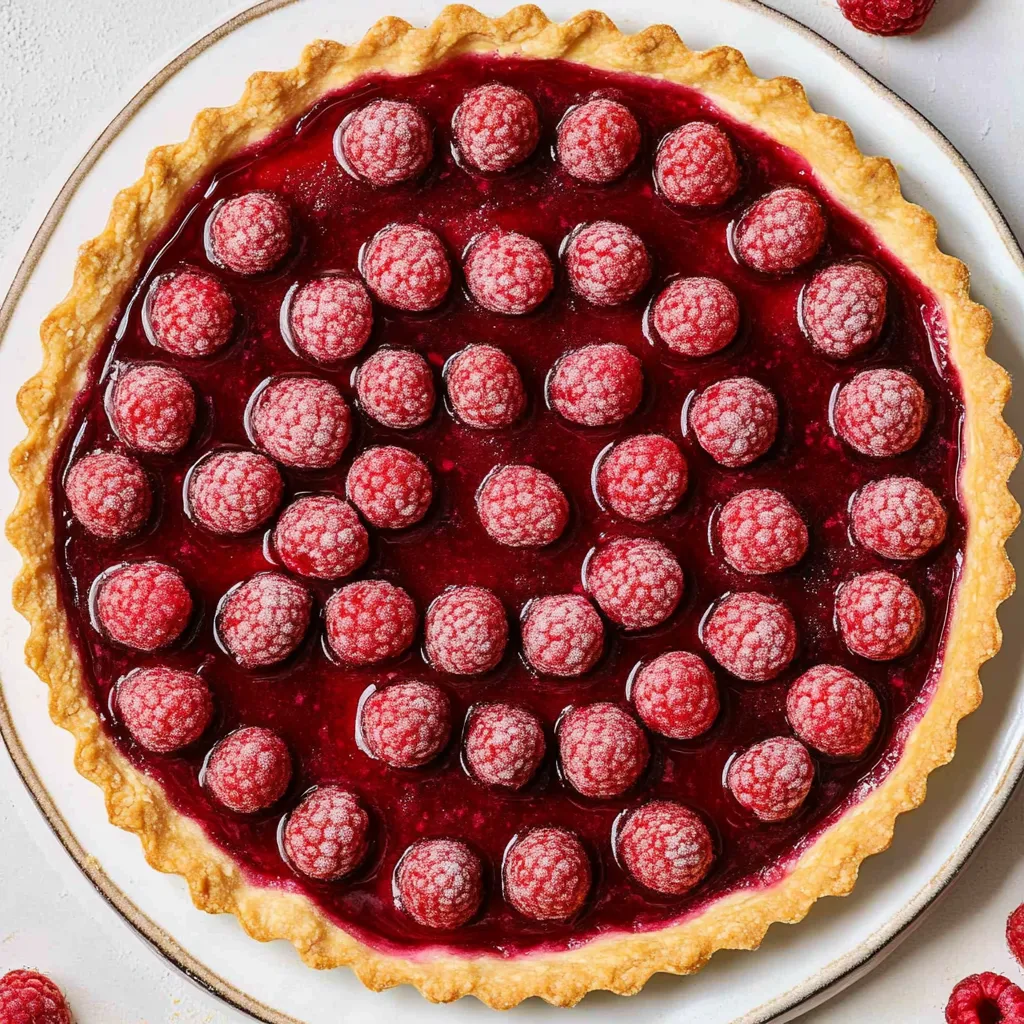
Raspberry tart is one of those French-style desserts that looks like it requires pastry school training - a buttery pâte sucrée crust filled with vibrant pink raspberry curd, topped with fresh raspberries piped full of jam - but actually breaks down into manageable steps that anyone can execute with patience and attention to detail. The pâte sucrée (sweet shortcrust pastry) differs from regular pie dough through higher butter and sugar content plus the addition of almond flour, creating a cookie-like texture that's crumbly and tender rather than flaky. The raspberry curd filling gets its intensity from fresh or frozen raspberries blended and strained into smooth puree, then cooked with egg yolks, sugar, and butter until thick enough to set firmly when chilled. What makes this particularly impressive is the finishing touch of pressing fresh raspberries hollow-side-up into the curd, then piping each one full of raspberry jam, creating these jewel-like decorations that are almost too pretty to eat.
I started making raspberry tarts about six years ago after eating a version at a French bakery and being shocked by the forty-dollar price tag for what was essentially pastry, fruit curd, and berries. The first attempt failed because I didn't chill the pastry long enough between steps and it shrank dramatically during baking, leaving me with a misshapen crust. After learning that pâte sucrée requires multiple resting periods in the refrigerator to prevent shrinkage, and that raspberry curd needs constant stirring over low heat to prevent scrambling, it became one of my most reliable impressive desserts. Now I make it regularly for special occasions because people consistently think it's more difficult than it actually is.
Ingredients and What Makes Them Essential
For the Pâte Sucrée (Sweet Shortcrust Pastry):
- Unsalted Butter (½ cup, 1 stick, very soft but not melted): Butter provides richness and tender texture. It should be soft enough to leave a deep indent when pressed but not greasy or melting.
- Powdered Sugar (½ cup): Powdered sugar dissolves more completely than granulated and creates more tender texture. Sift it if lumpy.
- Large Egg (1, at room temperature): Egg binds the dough and adds richness. Room temperature egg incorporates more easily.
- Almond Flour (¼ cup): Almond flour adds subtle nutty flavor and creates tender, cookie-like texture. You can substitute additional all-purpose flour if nut-free is required.
- All-Purpose Flour (1½ cups): Flour provides structure. Measure by spooning into your cup and leveling off.
- Fine Salt (¼ teaspoon): Salt enhances all the flavors.
For the Raspberry Curd:
- Fresh or Frozen Raspberries (2 cups, about 10 ounces): Raspberries provide the intense flavor and vibrant color. Frozen work perfectly if fully thawed and drained. Blend and strain to remove seeds.
- Granulated Sugar (½ cup): Sugar sweetens and helps thicken the curd.
- Large Egg Yolks (4, at room temperature): Egg yolks provide richness and thickening power. Room temperature yolks are essential to prevent curdling.
- Cornstarch (2 tablespoons): Cornstarch provides additional thickening for firmer, sliceable curd. You can substitute all-purpose flour.
- Unsalted Butter (6 tablespoons, ¾ stick, cut into cubes): Butter adds richness and creates silky texture. Cut into small cubes so it melts quickly.
For Assembly:
- Fresh Raspberries (2 cups, about 10 ounces): Fresh berries for topping. Must be fresh, not frozen.
- Raspberry Jam (½ cup): For piping into the berries. Homemade or store-bought works.
Step-by-Step Instructions
- Make the Pâte Sucrée:
- In the bowl of a stand mixer fitted with the paddle attachment (or using a hand mixer), beat ½ cup of very soft butter and ½ cup of sifted powdered sugar together on medium speed for about 2 minutes until just smooth and creamy. Don't overbeat - you're not trying to incorporate air. Add 1 egg and ¼ cup of almond flour. Mix on low speed until just combined, stopping to scrape down the sides of the bowl. The mixture will look like a thick, coarse paste. Add 1½ cups of flour and ¼ teaspoon of salt. Mix on the lowest speed just until the dough comes together into a rough, crumbly mixture. Stop as soon as no dry flour remains - don't overmix or you'll develop too much gluten and the pastry will be tough. The dough will look crumbly but should stick together when pressed.
- Rest the Dough:
- Turn the dough out onto a large piece of parchment paper. Use your hands to press the crumbs together into a ball, then flatten slightly into a disk about 1 inch thick. Cover with another piece of parchment paper. Roll the dough between the parchment sheets to about ¼ inch thickness (about 11-12 inches in diameter). Transfer the rolled dough (still between parchment) to a baking sheet and refrigerate for at least 1 hour, or up to 24 hours.
- Line the Tart Pan:
- Remove one sheet of parchment. Flip the dough into a 9-inch tart pan with removable bottom, then peel off the second sheet of parchment. If the dough is too firm and cracks, let it sit at room temperature for 5 minutes to soften slightly. Gently press the dough into the bottom and up the sides of the pan, creating a 90-degree angle where the bottom meets the sides. If it cracks, patch it with your fingers - this dough is very forgiving. Use a small knife to trim excess dough from the top edge. Refrigerate for at least 2 hours, preferably overnight.
- Blind Bake:
- Preheat oven to 325°F. Remove the tart pan from the refrigerator and use a fork to prick holes all over the bottom (this is called "docking" and prevents bubbling). Place the pan directly in the freezer while the oven preheats - about 10 minutes. Transfer frozen tart shell directly to the oven and bake for 40 to 45 minutes until evenly golden brown and completely dry throughout. If properly chilled, you shouldn't need pie weights. Optional: brush the inside with beaten egg white during the last 5 minutes of baking to seal the crust. Remove from oven and cool completely on a wire rack.
- Make the Raspberry Curd:
- Place 2 cups of raspberries in a blender and blend until completely smooth. Set a fine-mesh strainer over a medium saucepan. Pour the raspberry puree through the strainer, using a spatula to press it through and extract all the liquid while leaving seeds behind. Discard the seeds. You should have about 1 cup of seedless raspberry puree. Add ½ cup of sugar, 4 egg yolks, and 2 tablespoons of cornstarch to the raspberry puree in the saucepan. Whisk until completely smooth.
- Cook the Curd:
- Place the saucepan over low heat. Cook, stirring constantly with a heat-proof spatula or wooden spoon, for 3 to 4 minutes until the sugar dissolves and the mixture starts to thicken slightly. Add the cubed butter a few pieces at a time, whisking after each addition until completely melted before adding more. Continue cooking, stirring constantly, for about 5 more minutes until the curd is thick enough to coat the back of a spoon. It should reach about 180°F on an instant-read thermometer. Don't let it boil or the eggs will scramble. If you want extra-smooth curd, pour it through the fine-mesh strainer again to catch any bits of cooked egg.
- Fill the Tart:
- Pour the warm raspberry curd into the cooled tart shell. Use an offset spatula to spread it into an even layer. Refrigerate for 1 hour until the curd is set but still slightly soft to the touch.
- Decorate with Berries:
- Gently wash and thoroughly dry 2 cups of fresh raspberries. Press them hollow-side-up into the raspberry curd in concentric circles or whatever pattern you like. Place ½ cup of raspberry jam in a piping bag or zip-top bag and cut a very small hole at the tip. Pipe jam into each raspberry to fill the hollow. This creates beautiful jewel-like decoration. Refrigerate for at least 2 more hours until the curd is completely set and firm.
- Serve:
- Remove the outer ring of the tart pan. Use a sharp knife to slice the tart, wiping the knife clean between cuts for neat slices. Serve cold.
 Pin it
My friend who's an excellent baker but claims she "can't do French pastry" was convinced this tart was beyond her abilities and that pâte sucrée required special training. After I walked her through making it and she successfully produced a gorgeous tart, she looked annoyed that something so intimidating was actually straightforward. Now she makes it regularly and no longer claims French pastry is difficult. Getting the experienced baker to admit technique matters more than mystique feels like breaking down unnecessary barriers.
Understanding Pâte Sucrée Versus Pie Dough
Pâte sucrée (pronounced "pot sue-CRAY") is fundamentally different from American pie dough despite both being pastry. Pie dough uses cold butter cut into flour, creating layers that puff into flaky texture. Pâte sucrée uses very soft butter creamed with sugar, creating a dough more similar to cookie dough that bakes into tender, crumbly, almost sandy texture. The high sugar and butter content creates richness, while the almond flour adds nutty flavor and tenderness. Pâte sucrée is also more forgiving - if it cracks during rolling or lining the pan, you can patch it with your fingers and it will bake seamlessly. The cookie-like texture provides sturdy base for wet fillings like curd without becoming soggy, while still being tender enough to cut cleanly with a fork. This is why French tarts use pâte sucrée rather than pie dough - the texture better complements creamy fillings.
The Importance of Multiple Chilling Periods
The recipe requires refrigerating the dough at several stages, and these aren't optional or interchangeable. After mixing, the dough is rolled and chilled to firm up the butter and allow gluten to relax, making it easier to handle. After lining the tart pan, it's chilled again (preferably overnight) to firm the shaped pastry. This second chill is crucial - it allows the gluten to relax completely and the butter to solidify. When chilled pastry hits the hot oven, the cold butter takes time to melt, allowing the flour structure to set before the fat can escape. Unchilled pastry has soft butter that melts immediately, causing the pastry to slump and shrink before the structure sets. The overnight chill also allows moisture to distribute evenly, creating better texture. Skipping or shortening these chilling times results in dramatic shrinkage and potentially collapsed sides.
Cooking Fruit Curd Without Scrambling
Fruit curd is essentially a custard thickened with egg yolks. The challenge is heating it enough to thicken the eggs and dissolve the sugar without scrambling the eggs into lumpy mess. This requires low heat and constant stirring. Egg yolks begin coagulating (cooking and thickening) around 160°F and scramble (form curds) around 185°F. The target temperature for fruit curd is 180°F - thick enough to set when chilled but not scrambled. Low heat allows gradual, even warming. Constant stirring prevents hot spots where eggs might cook too quickly. Using room temperature yolks is crucial because cold yolks might shock when added to warm puree, causing immediate curdling. The cornstarch provides insurance - it thickens at lower temperatures than eggs alone, allowing you to achieve proper consistency without pushing too close to the scrambling point. If curd does develop lumps, immediately strain it through fine-mesh sieve to catch the scrambled bits.
Why Straining Raspberries Is Essential
Raspberries contain numerous tiny seeds that create unpleasant gritty texture in smooth curd. Straining the blended raspberry puree through fine-mesh sieve removes these seeds while retaining all the flavor and color. Press the puree through with a spatula, extracting as much liquid as possible while leaving seeds behind. You'll lose maybe ¼ cup of volume from the seeds, but the smooth result is worth it. Some recipes suggest straining the finished curd as well, which catches any remaining seeds and any bits of cooked egg that might have formed despite careful cooking. This creates ultra-smooth curd, though it's optional - a few seeds add slight texture that some people prefer. The key is removing the bulk of seeds from the raw puree before cooking.
Storage, Make-Ahead, and Freezing
This tart is excellent for advance preparation with proper planning. The baked tart shell can be stored at room temperature in an airtight container for up to 2 days before filling. The raspberry curd can be made up to 3 days ahead and refrigerated in an airtight container - just give it a whisk before using. The assembled tart should be refrigerated and is best eaten within 2 days, as the crust begins softening from the moist filling after that. For freezing, freeze the unbaked pastry either rolled flat and wrapped well, or already fitted in the tart pan and wrapped. Frozen unbaked pastry keeps for up to 3 months. Bake from frozen, adding about 5 minutes to the baking time. Don't freeze the finished tart or the curd separately - the dairy-based curd doesn't freeze well and becomes grainy when thawed.
Variations and Flavor Combinations
While classic raspberry is beautiful, you can create variations using the same technique. For mixed berry tart, use half raspberries and half strawberries or blackberries in the curd. For chocolate raspberry tart, spread a thin layer of melted chocolate on the baked crust before adding curd. For lemon raspberry tart, add 1 tablespoon of lemon zest to the curd. For different crusts, substitute pâte sablée (which is more crumbly) for different texture. For different fruit curds, substitute blueberries, strawberries, or passion fruit for the raspberries using the same technique. For different decorations, arrange berries in patterns, dust with powdered sugar, or drizzle with white chocolate. Each variation maintains the elegant presentation while creating different flavor profiles.
Troubleshooting Common Problems
When raspberry tart doesn't turn out right, there's usually a fixable cause. If the pastry shrinks dramatically during baking, you didn't chill it long enough after lining the pan - refrigerate overnight next time. If the pastry is tough, you overmixed the dough - mix just until combined. If the curd is lumpy, the heat was too high or you didn't stir constantly - use low heat and constant motion. If the curd won't thicken, you didn't cook it long enough - continue cooking to 180°F. If the pastry cracks during rolling, it's too cold - let it warm slightly at room temperature. If it's too sticky, it's too warm - refrigerate for 10 minutes. If the curd is too runny after setting, you didn't cook it to proper temperature - it must reach 180°F. Most issues relate to chilling time, heat management, or mixing technique.
 Pin it
After making raspberry tarts probably thirty times over the past six years, they've become one of my most reliable impressive desserts because they consistently wow people while being genuinely achievable with proper technique and patience. I appreciate how pâte sucrée is actually more forgiving than regular pie dough despite seeming fancier, and how raspberry curd creates intensity that artificial flavoring can't match. The ability to make components ahead and assemble when needed removes stress from entertaining. Knowing the simple secrets - chill thoroughly between steps, low heat for curd, strain the puree - transforms something that seems like it requires French pastry training into something completely manageable. This represents exactly what impressive desserts should be - beautiful enough for special occasions, genuinely delicious rather than just pretty, technique-focused rather than requiring expensive equipment, and achievable enough that you'll actually make it instead of just admiring pictures and feeling inadequate.
Frequently Asked Questions
- → Can I use frozen raspberries instead of fresh?
- Yes, frozen raspberries work great for the curd filling. Just make sure they're completely thawed and well-drained before blending. Use fresh raspberries for the topping though.
- → How long does this tart keep in the fridge?
- The tart stays fresh for about 3 days when covered and refrigerated. The crust might soften slightly over time, so it's best enjoyed within the first two days.
- → Do I really need to chill the dough for that long?
- Yes, chilling is important. It helps the pastry hold its shape during baking and prevents shrinkage. The overnight rest makes a noticeable difference in the final texture.
- → Can I make the curd ahead of time?
- Absolutely. Make the raspberry curd up to 3 days in advance and keep it covered in the fridge. Just give it a good stir before pouring it into the baked shell.
- → What if my curd turns out lumpy?
- Strain it through a fine mesh sieve to remove any lumps. This usually happens if the heat was too high. Low and slow is the way to go when making curd.
- → Can I skip the almond meal in the pastry?
- You can replace it with the same amount of flour, but the almond meal adds a nice flavor and helps create a more tender crust.