
 Pin it
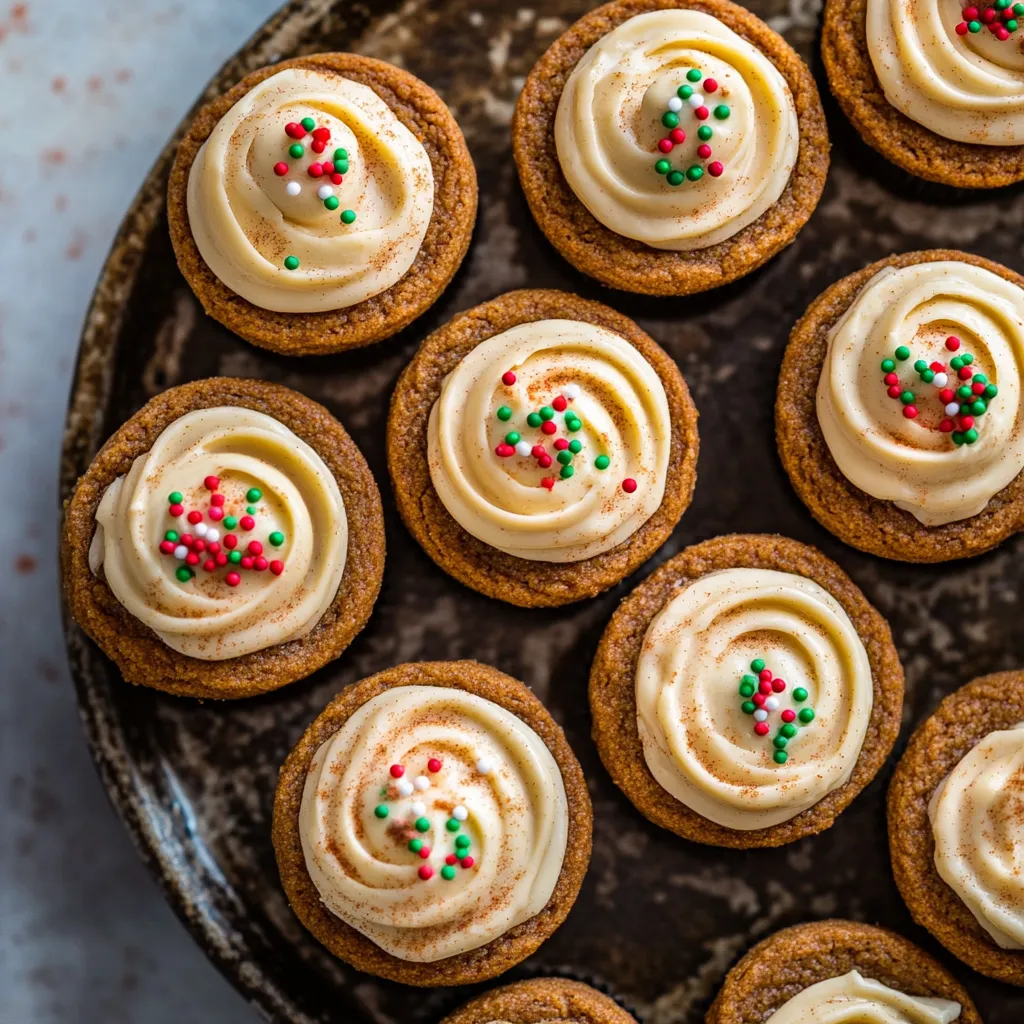
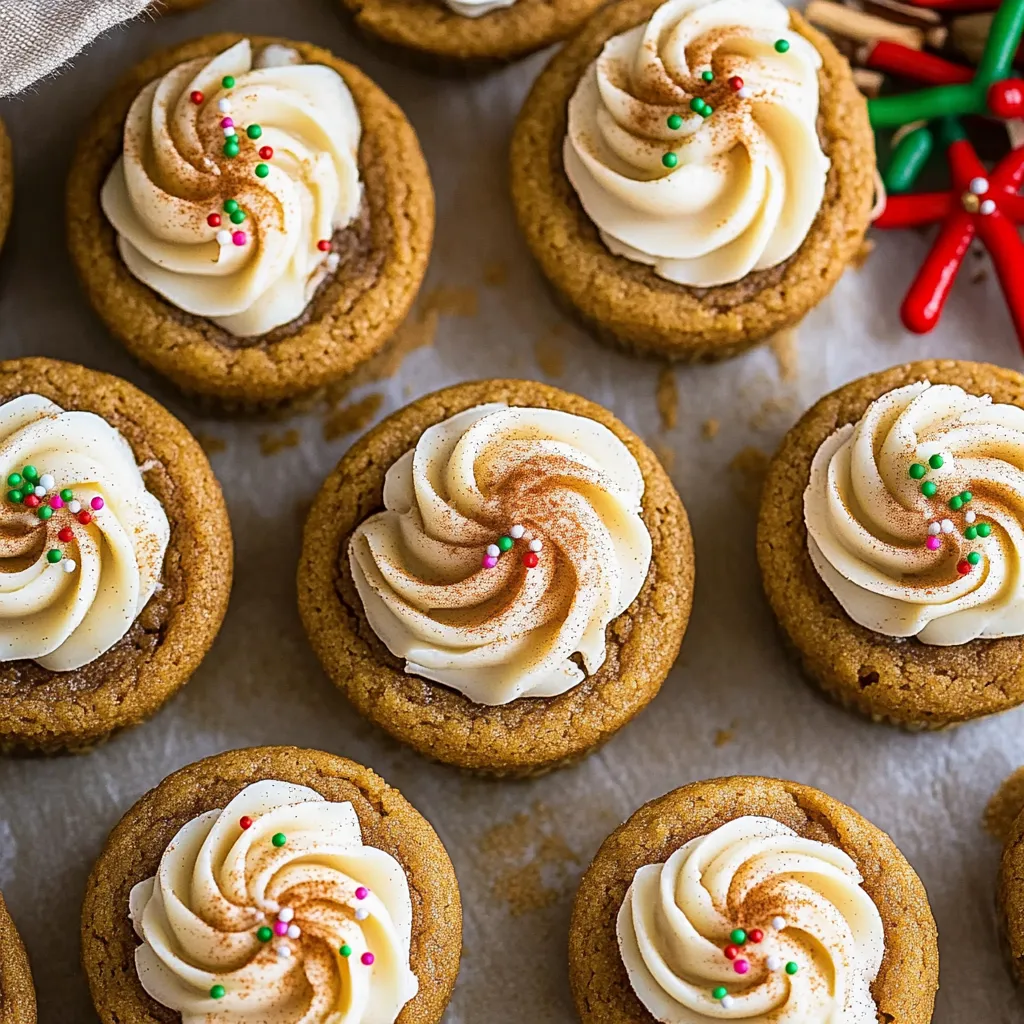
These gingerbread cheesecake cookies combine the warm, spicy comfort of classic gingerbread with the creamy richness of no-bake cheesecake filling, all served in adorable edible cookie cups that look impressive but come together surprisingly easily. Soft, buttery gingerbread cookie dough gets pressed into muffin tins to create little cups that bake up with slightly crisp edges and tender centers, then get filled with a fluffy cream cheese frosting spiced with cinnamon and ginger that echoes the cookie base. What makes these so special is how they deliver two desserts in one bite - you get that cozy gingerbread flavor from molasses and warming spices in the cookie, plus that tangy, sweet cheesecake element from the frosting that balances and lightens everything. The individual portions make them perfect for holiday parties, cookie exchanges, or gift platters where people can grab one and go without needing plates or forks, and the festive appearance with swirled frosting and colorful sprinkles screams Christmas in the best possible way.
The first batch of these usually disappears faster than you'd expect because people can't resist grabbing "just one more" - that combination of spicy-sweet cookie with cool, creamy filling creates this wonderful contrast that keeps you reaching for another. There's something about serving cookies in unexpected forms that makes them feel more special than regular round cookies, even when the actual effort is minimal. Watching the cookie cups puff up slightly during baking and then pressing them down with a spoon to create that perfect indentation for filling feels satisfying in a way that regular cookie baking doesn't quite match.
Ingredients - What You Need and Why
- All-purpose flour: provides the structure and body for the cookie cups; measure carefully using the spoon-and-level method rather than scooping directly from the bag, which compacts flour and leads to dry, tough cookies; you'll need about two and a quarter cups for the right tender texture
- Baking soda: the leavening agent that creates slight rise and spread in the cookies while helping them develop that characteristic slightly cracked surface; about three-quarters teaspoon gives you the right amount of lift without making them puff too much; make sure yours isn't expired or cookies won't rise properly
- Butter: contributes rich, creamy flavor and creates tender texture; it should be softened to room temperature so it creams properly with sugar; salted butter works fine and eliminates the need to add separate salt, though unsalted with a quarter teaspoon of salt added works equally well; you'll need half a cup (one stick)
- Molasses: the signature ingredient that makes these gingerbread rather than just spice cookies, providing deep, almost bittersweet flavor, dark color, and moisture that keeps cookies soft; use regular (not blackstrap) molasses which is less intense; about one-third cup adds pronounced molasses presence without being overwhelming
- Brown sugar: sweetens while adding moisture and chewiness that white sugar alone can't provide; the molasses in brown sugar contributes to that gingerbread flavor profile; light or dark brown sugar both work, with dark creating slightly stronger molasses notes; pack it firmly into your measuring cup when measuring
- Large egg: binds everything together while adding richness; use a room-temperature egg for better incorporation into the butter mixture; cold eggs can cause the butter to seize up and create lumpy dough rather than smooth
- Ground spices: the essential flavors that make these gingerbread cookies; ground ginger provides that characteristic spicy warmth, cinnamon adds sweet spiciness, nutmeg contributes aromatic depth, and cloves bring pungent intensity; together they create that cozy, holiday flavor everyone associates with gingerbread
- Cornstarch: a small amount helps create more tender, delicate texture in the cookie cups by interfering with gluten development; just a tablespoon makes a noticeable difference in how soft the cookies stay
- Cream cheese: forms the base of the cheesecake frosting, providing tangy richness; use full-fat block-style cream cheese softened to room temperature, not the spreadable kind from a tub which has different consistency; about eight ounces (one package) gives you enough frosting for all the cups
- Powdered sugar: sweetens the frosting while creating smooth, pipeable consistency; the cornstarch in powdered sugar also helps stabilize the frosting; about two cups gives you the right sweetness level without being cloying
- Milk: thins the frosting slightly so it pipes easily; just a tablespoon or two of whole milk creates the perfect consistency; add gradually since you can always add more but can't remove it
- Vanilla extract: enhances all the other flavors in the frosting; use pure vanilla extract rather than imitation for the best results; about one teaspoon provides background depth
- Additional spices for frosting: echoing the cookie's gingerbread spices in the frosting ties everything together; ground cinnamon and ground ginger in the cream cheese frosting create flavor harmony between cookie and filling
How to Make Gingerbread Cheesecake Cookies - Step by Step
- Cream butter and sugar until fluffy:
- Take your softened butter - it should be soft enough that your finger leaves an indent when pressed but not greasy or melting - and place it in the bowl of your stand mixer fitted with the paddle attachment, or in a large mixing bowl if using a hand mixer. Add your brown sugar, making sure it's firmly packed when measured. Turn the mixer to medium speed and beat the butter and sugar together for about three to four minutes, stopping occasionally to scrape down the sides and bottom of the bowl with a rubber spatula. You're looking for the mixture to transform from separate butter and sugar into something fluffy, pale, and increased in volume. The color should lighten from the dark brown of the sugar to a paler, tannish shade, and the texture should look whipped and airy rather than dense and grainy. This creaming process is crucial for creating tender cookies with good texture, so don't rush it. Once properly creamed and fluffy, crack your room-temperature egg into a small bowl to check for shell pieces, then add it to the butter mixture along with the molasses. Beat on medium speed for about one minute until everything is completely combined and you can't see any streaks of egg or molasses. The mixture will look darker now from the molasses and might seem slightly looser, which is normal. Scrape down the bowl again to ensure everything mixes evenly.
- Mix and incorporate dry ingredients:
- In a separate medium bowl, combine two and a quarter cups of all-purpose flour (measured by spooning into the measuring cup and leveling off), three-quarters teaspoon of baking soda, one tablespoon of cornstarch, one and a half teaspoons of ground ginger, one teaspoon of ground cinnamon, half a teaspoon of ground nutmeg, and a quarter teaspoon of ground cloves. Using a whisk, stir these dry ingredients together thoroughly for about thirty seconds to ensure all the spices and leavening are evenly distributed throughout the flour. This mixing is important because you want every cookie to have the same amount of spice and rise rather than some being bland and others overly spiced. Add this bowl of dry ingredients to your butter mixture all at once. Turn your mixer to the lowest speed and mix slowly, watching carefully as the flour starts to incorporate. Mix only until you can barely see a few streaks of flour remaining and the mixture starts coming together into a cohesive dough. This should take no more than thirty seconds to one minute maximum. It's crucial not to overmix at this stage because excessive mixing develops gluten in the flour, which makes cookies tough and dense rather than tender. The dough will be quite soft and sticky at this point, which is exactly right. Use your spatula to scrape down the sides and fold in any flour that might be hiding. The finished dough should be a rich brown color from the molasses and spices, and it should smell incredible with all those warm spices coming through.
- Chill dough for easier handling:
- Cover your bowl of dough tightly with plastic wrap, pressing it directly against the surface of the dough to prevent a skin from forming. Place the covered bowl in the refrigerator and let it chill for at least thirty minutes, though up to two hours works if you want to prepare ahead. This chilling time serves multiple purposes - it firms up the butter in the dough so it's easier to handle and shape, it allows the flour to fully hydrate and the gluten to relax, and it gives all those spice flavors time to meld and develop. When you're ready to bake, the dough should be firm enough to scoop and press without being overly sticky, but not rock-hard from the fridge. If it's too hard to work with after chilling, let it sit at room temperature for about five to ten minutes to soften slightly. While the dough chills, this is a good time to prepare your muffin tins and preheat your oven.
- Prepare muffin tins and shape cookie cups:
- About fifteen minutes before your dough is done chilling, position racks in the upper and lower thirds of your oven and preheat it to 350 degrees Fahrenheit. Take two standard twelve-cup muffin tins and spray them generously with nonstick cooking spray, making sure to coat both the bottoms and sides of each cup thoroughly - these cookies have a tendency to stick if the pan isn't well greased. Remove your chilled dough from the refrigerator. Using a cookie scoop or tablespoon, scoop out about two tablespoons of dough per cookie cup - you should have enough for twenty-four cookie cups total. Drop one portion of dough into each muffin cup. Now here's the important part - using your fingers or the back of a spoon, press the dough firmly into the bottom of each cup first, then work it up the sides, creating a cup shape. You want the dough to come about halfway to two-thirds up the sides of the muffin cup, with the bottom layer relatively thin and the sides forming walls. Don't make the bottom too thick or it won't bake through properly and will be doughy. Press firmly and evenly, trying to create a consistent thickness throughout. The dough might be a bit sticky, so you can lightly flour your fingers or dip them in water occasionally as you work. Continue pressing dough into all twenty-four muffin cups until they're all shaped and ready to bake.
- Bake and form the perfect cup shape:
- Place both muffin tins in your preheated 350-degree oven, one on each rack. Set a timer for twelve minutes. As the cookies bake, they'll puff up slightly and the edges will begin turning golden brown. After twelve minutes, check them - the edges should be lightly golden and set, while the centers might still look slightly soft, which is perfect. Remove the pans from the oven and work quickly while the cookies are still hot and pliable. Take the back of a tablespoon, a small round measuring spoon, or the top of a small spice jar and gently but firmly press it down into the center of each cookie cup, creating an indentation for the filling. The cookies will have puffed up during baking, so this pressing step reforms that cup shape and creates more room for frosting. Press gently but firmly - you're not trying to smash them flat, just creating a deeper well in the center. Work through all twenty-four cups while they're still hot, as they firm up quickly as they cool and won't reshape once set. Let the cookie cups cool in the muffin tins for about ten minutes, which allows them to firm up enough to handle. After ten minutes, carefully run a butter knife around the edge of each cookie cup to loosen it, then gently lift them out and transfer to a wire cooling rack. Let them cool completely to room temperature before filling - this is crucial because warm cookies will melt the cream cheese frosting.
- Make cheesecake frosting and assemble:
- While your cookie cups cool completely, make the cream cheese frosting. Take eight ounces of cream cheese that you've softened to room temperature and place it in a medium mixing bowl. Using an electric hand mixer or your stand mixer with the paddle attachment, beat the cream cheese on medium speed for about one minute until it's smooth and creamy with no lumps. Add two cups of powdered sugar (sifted if it's lumpy), one tablespoon of milk, one tablespoon of brown sugar, one teaspoon of vanilla extract, half a teaspoon of ground cinnamon, and a quarter teaspoon of ground ginger. Beat on low speed first to prevent powdered sugar from flying everywhere, then increase to medium-high and beat for about two minutes until the frosting is light, fluffy, and completely smooth. If the frosting seems too thick to pipe, add another teaspoon or two of milk until you reach a good piping consistency - it should hold its shape but flow easily when piped. Taste and adjust if needed, adding more cinnamon or ginger if you want stronger spice notes. Transfer the frosting to a piping bag fitted with a large star tip - this creates those pretty swirled rosettes on top. If you don't have piping bags, you can use a ziplock bag with the corner snipped off, though you won't get the decorative swirl. Pipe frosting into each completely cooled cookie cup, filling them generously and creating a swirled peak on top. If desired, immediately sprinkle with festive Christmas sprinkles, crushed candy canes, or other decorative toppings before the frosting sets. Serve immediately or refrigerate until ready to serve.
 Pin it
Ground ginger has become an absolutely essential spice in holiday baking, bringing that warm, slightly spicy bite that immediately signals gingerbread and Christmas. The way fresh ginger root transforms into dried ground powder concentrates its flavor compounds while mellowing some of the sharp pungency, creating something that works beautifully in sweet applications. Combining it with cinnamon, nutmeg, and cloves creates layers of warmth and complexity that no single spice could achieve alone. These cookies filled with spiced cream cheese frosting and topped with festive sprinkles sitting on a holiday platter create this visual and aromatic signal that special times are here, making them worth the effort even during the busiest season.
The History and Tradition of Gingerbread
Gingerbread has a rich culinary history dating back centuries, with variations appearing across Europe and eventually becoming deeply associated with Christmas celebrations. The use of ginger in baking originated in the Middle East and spread to Europe during the Crusades, where it was prized not only for flavor but also for its preservative properties. Medieval European monasteries were known for baking elaborate gingerbread creations, and by the 16th century, gingerbread had become associated with fairs and festivals. The tradition of gingerbread houses emerged in Germany, possibly inspired by the Brothers Grimm fairy tale Hansel and Gretel. In America, gingerbread men became iconic Christmas cookies, with their shapes allowing for creative decoration and personalization. The combination of warming spices - ginger, cinnamon, cloves, and nutmeg - wasn't just about flavor; these expensive imported spices also signaled wealth and celebration during times when such ingredients were luxury items. Today, the smell of gingerbread baking immediately evokes holiday nostalgia and comfort for many people, connecting us to centuries of tradition. These cookie cups represent a modern twist on that heritage, maintaining the essential flavors while presenting them in a new, creative format.
Mastering Cream Cheese Frosting Consistency
Getting cream cheese frosting to the perfect consistency - thick enough to hold its shape when piped but smooth and creamy enough to flow easily - requires understanding how the ingredients interact and knowing how to adjust when needed. The cream cheese must start at true room temperature, not cold from the fridge, as cold cream cheese creates lumpy frosting no matter how long you beat it. Beating the cream cheese alone first until completely smooth before adding other ingredients ensures you won't have lumps later. The ratio of powdered sugar to cream cheese determines thickness - more sugar creates stiffer frosting, less creates looser frosting. The small amount of milk provides moisture that makes the frosting spreadable and pipeable, but add it gradually because too much turns frosting into soup that won't hold any shape. If your frosting seems too thick and you're struggling to pipe it, add milk one teaspoon at a time, beating well after each addition until you reach the right consistency. If it's too thin and won't hold peaks, add more powdered sugar a quarter cup at a time. Temperature matters too - if your kitchen is very warm, the frosting will soften and lose structure, so you can refrigerate it briefly to firm it up. For piping decorative swirls, you want frosting that's on the thicker side so it holds those pretty shapes rather than melting into smooth domes.
Creating Different Flavor Variations and Adaptations
While the classic gingerbread and cream cheese combination is delicious as written, understanding variations lets you customize these cookie cups for different tastes and occasions. For chocolate lovers, add two tablespoons of cocoa powder to the cookie dough and reduce flour by two tablespoons, creating chocolate gingerbread cups that pair beautifully with either the classic cream cheese frosting or chocolate cream cheese frosting made by adding melted and cooled chocolate. Coffee enthusiasts can add one tablespoon of instant espresso powder to the dough for mocha gingerbread cookies with deeper, more complex flavor. For a boozy adult version, add one tablespoon of bourbon or dark rum to the frosting, which enhances the warm spice flavors. White chocolate gingerbread variations incorporate white chocolate chips folded into the dough before baking, creating melty pockets throughout. Instead of cream cheese frosting, try maple buttercream made with real maple syrup, which complements gingerbread spices beautifully while being less rich than cream cheese. Lemon cream cheese frosting with lemon zest and juice creates surprising but delicious contrast against the warm spices. For a lighter filling, whipped cream stabilized with a bit of powdered sugar and flavored with vanilla makes an elegant alternative. Caramel lovers can drizzle salted caramel sauce over the cream cheese frosting for extra decadence. Each variation maintains that fundamental gingerbread cookie cup structure while exploring different flavor combinations that keep things interesting if you're making multiple batches.
Perfecting the Cookie Cup Shape and Consistency
Getting consistently shaped cookie cups that hold their form during and after baking requires understanding a few key techniques. The dough needs to be properly chilled before shaping - too warm and it's sticky and hard to work with, too cold and it's stiff and cracks when pressed. Working with about two tablespoons of dough per cup creates the right proportion for standard muffin tins. When pressing dough into the muffin cups, focus on creating an even layer across the bottom first - about a quarter inch thick - then work the dough up the sides, making sure the walls are thick enough to hold their shape but not so thick they don't bake through. The walls should be roughly the same thickness throughout rather than thin at the bottom and thick at the rim. If you find the dough sticky as you work, keep a small bowl of water nearby and lightly dampen your fingers occasionally, which prevents sticking without adding flour that would change the dough consistency. The pressing step immediately after baking while cookies are still hot is crucial - this is when they're pliable enough to reshape but firm enough to hold the indentation. If you wait too long and they cool completely, they'll crack if you try to press them. Some bakers prefer using mini muffin tins for bite-sized versions, which bake faster at about eight to ten minutes and create adorable tiny treats perfect for large parties. Regular muffin-sized cups are ideal for more substantial individual servings.
Decorating Ideas for Different Occasions
While Christmas sprinkles are classic and festive, exploring different decoration options lets you customize these cookie cups for various events and personal preferences. For elegant adult gatherings, skip sprinkles entirely and top with a light dusting of cinnamon through a fine-mesh sieve, or add candied ginger pieces for sophisticated flavor and texture. Crushed gingersnap cookies sprinkled over the frosting echo the gingerbread flavor while adding crunch. Toasted chopped pecans or walnuts provide nutty richness and textural contrast. White chocolate shavings made by running a vegetable peeler along a white chocolate bar create delicate curls that look fancy with minimal effort. For kids' parties, let children decorate their own cookies with various sprinkles, mini chocolate chips, crushed candy canes, or small candies, which makes the dessert interactive and fun. Edible gold leaf or gold dust transforms these into showstopping treats for New Year's Eve or winter weddings. Piping a small gingerbread man cookie on top of each frosted cup creates an adorable presentation that's Instagram-worthy. During other seasons, adapt the decorations - orange and black sprinkles for Halloween, pastel spring sprinkles for Easter, or patriotic red, white, and blue for summer celebrations. The cookie cups themselves work year-round if you adjust decorations to match the occasion.
Make-Ahead Strategies and Freezing Options
These gingerbread cheesecake cookies are ideal for advance preparation, which reduces stress during busy holiday weeks when you're juggling multiple obligations. The cookie dough can be made up to three days ahead and stored tightly wrapped in the refrigerator, or frozen for up to three months. To freeze dough, wrap the ball tightly in plastic wrap and then place in a freezer bag, squeezing out air. Thaw overnight in the refrigerator before shaping and baking. For even more convenience, shape the dough into balls (not pressed into cups yet), freeze them on a baking sheet until solid, then transfer to a freezer bag where they keep for three months. Bake from frozen, adding two to three minutes to the baking time. The baked cookie cups without frosting store beautifully at room temperature in an airtight container for up to five days, or freeze for up to two months wrapped carefully. This means you can bake the cups a week before your party, freeze them, then just make frosting and assemble on the day of serving. The cream cheese frosting can be made one to two days ahead and stored in the refrigerator in an airtight container. Bring it to room temperature and beat it briefly before piping to restore smooth consistency. Once assembled with frosting, the completed cookies keep for about three to four days refrigerated in an airtight container, though they're best served within the first day or two when the cookie texture is optimal. For gifting or transporting, consider keeping cookies and frosting separate until just before serving to maintain the best texture.
Tips for Cookie Exchanges and Holiday Gifting
These gingerbread cheesecake cookies excel in cookie exchange scenarios because they're visually impressive, taste unique compared to typical exchange offerings, and transport reasonably well with proper packing. For cookie swaps, bake and fill the cookies the day before, then arrange them in a single layer in sturdy containers with high sides that prevent the frosting from smashing. Place parchment paper between layers if you need to stack, though single layers work best. Plastic containers with snap-on lids work better than boxes that can shift and allow cookies to slide around. For a beautiful presentation at exchanges, arrange cookies on a decorative platter and bring the container separately for people taking cookies home. When gifting to neighbors or friends, package four to six cookies in clear cellophane bags tied with festive ribbon, which shows off the pretty frosting while protecting them. Small bakery boxes lined with tissue paper create a professional presentation perfect for teacher gifts or hostess gifts. Include a small card with the cookie name and a note that they should be refrigerated, though they're fine at room temperature for several hours. For shipping these cookies to distant friends and family, it's better to ship the cookie cups and frosting ingredients separately with assembly instructions, as the frosting doesn't ship well and can melt or separate during transit. Alternatively, use a more stable buttercream frosting instead of cream cheese frosting if you must ship assembled cookies.
Understanding Gingerbread Spice Blends
While this recipe lists individual spices, understanding how they work together helps you adjust ratios to personal taste or create your own custom blend. Ground ginger is the dominant spice that gives these cookies their gingerbread identity - it provides that warm, slightly spicy bite with subtle sweetness. Too much ginger becomes overwhelming and medicinal, too little and you lose that characteristic flavor. Cinnamon adds sweet warmth and aromatic quality that most people find comforting and familiar - it's more crowd-pleasing than ginger and rounds out sharp edges. Nutmeg contributes earthy, slightly sweet notes with a warm, aromatic quality that adds depth without being identifiable. Use it sparingly as too much creates a soapy or perfume-like taste. Cloves are the most intense and pungent spice in the blend, providing that sharp, almost numbing quality in tiny amounts. A little goes a long way - too much cloves overwhelms everything else and creates bitter, medicinal flavor. Some recipes include allspice, which tastes like a combination of cinnamon, nutmeg, and cloves, adding another layer of complexity. Cardamom occasionally appears in gingerbread, bringing floral, eucalyptus-like notes that create more sophisticated flavor. Black pepper seems unusual but adds subtle heat and complexity that enhances other spices. For a balanced blend, use ginger as your primary spice (most volume), followed by cinnamon (about half to two-thirds the amount of ginger), then smaller amounts of nutmeg and cloves. Taste the dough before chilling and adjust if needed - you can always add more spices but can't remove them once mixed.
Troubleshooting Common Cookie Cup Problems
Even with careful following of directions, sometimes cookie cups don't turn out perfectly, but understanding what went wrong helps you fix it next time. If your cookie cups spread too much during baking and lose their cup shape, becoming flat rather than having tall sides, several factors could be at fault - the butter may have been too soft or melted, the dough wasn't chilled long enough before shaping, or your oven temperature is too low causing slow setting. Make sure butter is only softened (not greasy), chill dough a full thirty minutes, and verify oven temperature with an oven thermometer. When cookie cups are tough and hard rather than tender and slightly chewy, you either overmixed the dough after adding flour which developed too much gluten, measured too much flour which created a dry dough, or overbaked them. Mix just until combined, measure flour carefully using spoon-and-level method, and watch baking time closely. If cookies stick to the muffin tin and won't release cleanly, you didn't grease the pan thoroughly enough - be generous with cooking spray, getting into all the corners and sides. Cookie cups that taste bland despite the spices may have used old, stale spices that have lost potency - ground spices lose flavor over time, so replace them yearly for best results and don't be shy about adding more than you think necessary. When the frosting melts into the cookie cups and won't hold its shape, you filled them before they cooled completely and the heat melted the cream cheese frosting - patience is crucial here, wait until cookies are totally room temperature before filling.
Nutritional Considerations and Dietary Modifications
While these are decidedly an indulgent treat rather than health food, understanding modifications for different dietary needs helps more people enjoy them. For gluten-free versions, substitute a good quality gluten-free all-purpose flour blend containing xanthan gum or guar gum, which provides structure that gluten usually creates. The cookies will be slightly more delicate but still work well. Dairy-free adaptations require using vegan butter in the cookies and vegan cream cheese in the frosting, both of which are widely available and work surprisingly well. Make sure your molasses is vegan as some brands add honey. For reduced sugar versions, you can decrease the brown sugar in the cookies by up to one-quarter without dramatically affecting texture, though they'll be less sweet and slightly less chewy. Sugar-free versions using erythritol or monk fruit sweeteners work reasonably well in the cookies, though the frosting is harder to adapt since powdered sugar substitutes don't always dissolve smoothly. For egg-free cookies to accommodate allergies, try replacing the egg with a flax egg (one tablespoon ground flaxseed mixed with three tablespoons water, left to sit five minutes) or a quarter cup of applesauce, though texture will be slightly different. Lower-fat versions using reduced-fat cream cheese in the frosting work acceptably, though the frosting won't be quite as rich and creamy. Each modification changes the final result slightly, but these cookies are forgiving enough to accommodate most adjustments while still producing delicious results.
 Pin it
These gingerbread cheesecake cookies represent the perfect holiday dessert - combining nostalgic flavors that everyone associates with Christmas while presenting them in a creative format that feels special and different from typical holiday cookies. What makes this recipe genuinely valuable is how it achieves bakery-quality results using simple techniques and common ingredients, proving that impressive doesn't have to mean difficult or requiring specialized skills. The combination of warm, spicy gingerbread cookie cups with cool, tangy cream cheese frosting creates textural and flavor contrast that makes each bite interesting rather than one-dimensional. The individual portion format eliminates the need for cutting and plating, making these ideal for parties, potlucks, and gift-giving scenarios where convenience matters. Whether you're an experienced baker looking for something new to add to your holiday repertoire or a beginner wanting to try something that looks impressive but isn't actually complicated, these cookie cups deliver on taste, appearance, and ease of preparation. The smell of gingerbread spices baking fills your home with that quintessential holiday aroma that creates warm memories and brings people together, while the fun of filling and decorating the cups makes the baking process itself feel celebratory. Once you've experienced how good these taste and seen how enthusiastically people respond to them, they'll likely become a permanent fixture in your holiday baking rotation, requested year after year by family and friends who remember that perfect bite of spicy-sweet cookie giving way to creamy, tangy frosting that somehow captures everything wonderful about the season.
Frequently Asked Questions
- → Can I make these cookies ahead of time?
- Yes, you can bake the cookie cups up to 2 days ahead and store them in an airtight container. Add the cream cheese filling just before serving to keep it fresh.
- → Do these need to be refrigerated?
- Yes, once filled with the cream cheese frosting, these should be kept in the fridge. They'll stay good for about 4 days in an airtight container.
- → Can I use unsalted butter instead?
- Sure! Just add a pinch of salt to the dough if using unsalted butter to balance the flavors.
- → What if I don't have a piping bag?
- No problem! You can simply spoon the cream cheese filling into each cookie cup. It won't look as fancy but will taste just as good.
- → Can I freeze these cookies?
- The unfilled cookie cups freeze well for up to 2 months. Thaw them before adding the cream cheese filling. Don't freeze the filled cookies as the frosting doesn't freeze well.
- → Why do I need to chill the dough?
- Chilling helps the dough firm up so it's easier to press into the muffin tins and helps the cookies hold their cup shape while baking.