
 Pin it
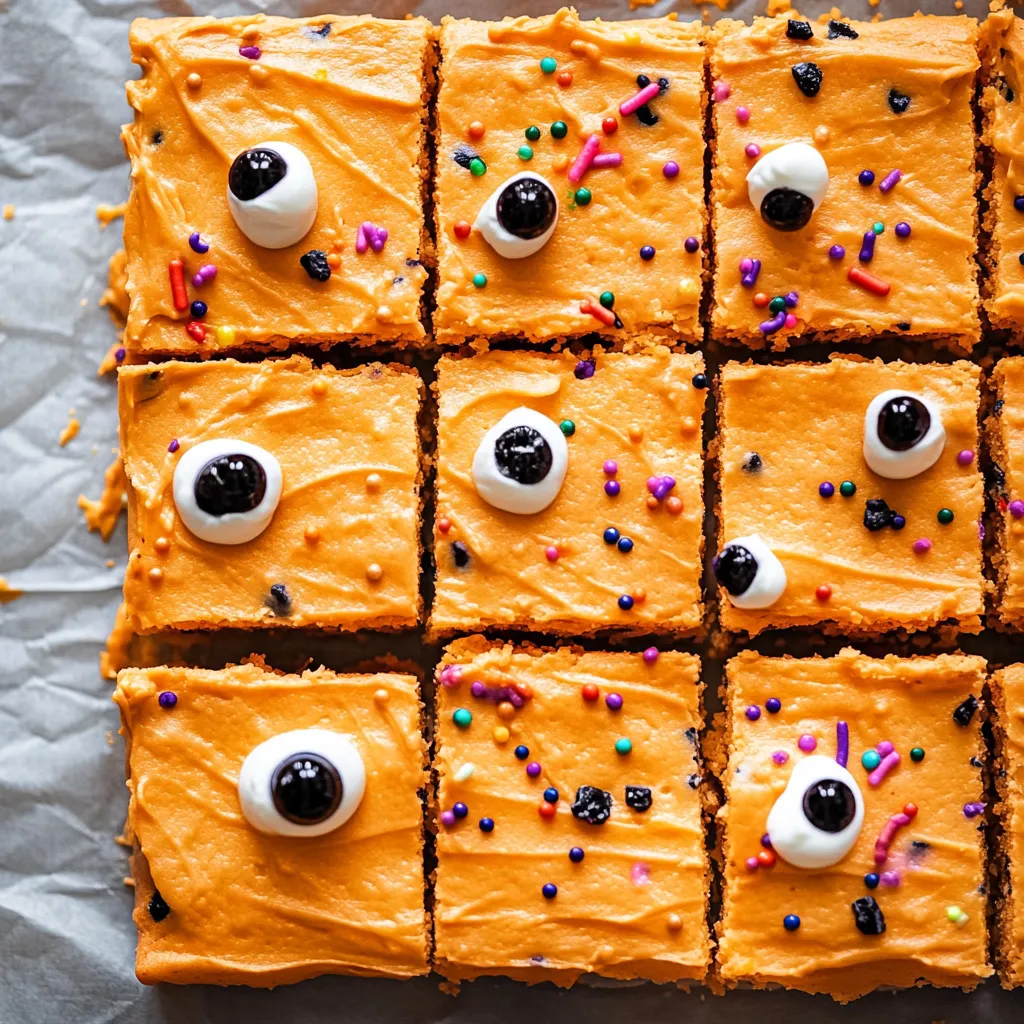
These Halloween sugar cookie bars have saved me countless hours during October when I'm trying to make festive treats but don't have time for the whole roll-and-cut cookie process. The thick, soft sugar cookie base topped with colorful frosting and spooky sprinkles delivers all the fun of decorated sugar cookies without any of the tedious work. I started making these when my kids wanted Halloween cookies for their class parties but I had approximately zero free time, and now they're my secret weapon for looking like a super-organized parent when I'm really just being efficient.
My daughter loves helping make these because she gets to pick the sprinkle combinations and go wild decorating the top, and there's no precision required like there is with decorated cut-out cookies. Watching her dump handfuls of candy eyes and Halloween shapes all over the frosting brings her so much joy that I don't even care about the sprinkle explosions all over my counter.
Ingredients You'll Need
- Salted butter (softened, about three-quarters of a cup for the cookies plus half a cup for frosting): Creates rich flavor and that soft, tender texture; make sure it's truly soft, not melted or cold
- Granulated sugar (about three-quarters of a cup): Sweetens the cookie base and contributes to the texture and structure
- Eggs (one whole egg plus one extra egg yolk): The extra yolk makes the dough richer and helps the bars hold together without falling apart; this ratio is key
- Pure vanilla extract (for both cookies and frosting): Provides that classic sugar cookie flavor; use good quality extract since the flavor is so prominent
- All-purpose flour (about two cups): Forms the structure of the cookie bars; you can try gluten-free 1-to-1 baking flour but results may vary
- Baking powder (about three-quarters of a teaspoon): Gives the bars a slight rise and makes them softer and more tender than they'd be without leavening
- Salt (about half a teaspoon): Enhances all the other flavors and prevents the cookies from tasting flat
- Powdered sugar (about three cups for the frosting): Creates that classic American buttercream sweetness and structure
- Heavy cream (a few tablespoons for the frosting): Makes the buttercream smooth and spreadable; regular milk works in a pinch
- Gel food coloring (orange, purple, green, or whatever Halloween colors you prefer): Concentrated gel colors give you vibrant frosting without adding excess liquid
- Halloween sprinkles (as many as your heart desires): The fun finishing touch that makes these festive; look for candy eyes, bats, pumpkins, or themed mixes
Step-by-Step Instructions
- Preheat oven and prepare the baking pan:
- Turn your oven to 350 degrees Fahrenheit and let it preheat completely while you prepare the dough, which ensures even baking throughout. Spray a 9x13 inch baking pan with non-stick cooking spray, making sure to get the corners and sides thoroughly coated, or line it with parchment paper cut to fit with some overhang on the sides. The parchment sling method is my favorite because you can lift the entire baked cookie out of the pan for easier cutting and serving, though greasing works fine too.
- Cream butter and sugar until light and fluffy:
- Place your softened butter in the bowl of a stand mixer fitted with the paddle attachment, or use a large bowl with hand beaters if that's what you have. Add the granulated sugar and beat everything together on medium speed for about two full minutes, stopping to scrape down the sides of the bowl halfway through. The mixture should transform from grainy and yellow to pale, fluffy, and almost white in color as air gets incorporated, which is what creates that tender cookie texture. Don't rush this creaming step even though it seems minor because it makes a real difference in the final result.
- Add eggs, yolk, and vanilla:
- Crack your whole egg into the bowl with the creamed butter and sugar, then separate your second egg and add just the yolk, discarding or saving the white for another use. Pour in your vanilla extract, then beat everything together on medium speed until completely combined and smooth with no visible streaks of egg. Stop the mixer and use a rubber spatula to scrape down the sides and bottom of the bowl thoroughly, making sure no pockets of unmixed butter are hiding there, then beat briefly one more time.
- Mix in dry ingredients and press into pan:
- Add your all-purpose flour, baking powder, and salt to the bowl all at once, then mix on low speed just until the dry ingredients are incorporated and you can't see any more streaks of flour. Don't overmix or the cookies will be tough instead of tender, so stop as soon as everything comes together into a cohesive dough. Dump the dough into your prepared pan and use your hands or the back of a rubber spatula to press it into an even layer that reaches all the corners and edges. The dough will be quite thick and may seem stiff, but keep pressing and smoothing until the surface is relatively level.
- Bake until just barely golden:
- Slide your pan into the preheated oven and bake for twenty to twenty-five minutes, checking around the twenty-minute mark to see how it's progressing. The cookie bars are done when the edges just barely start turning a light golden brown but the center still looks pale and possibly even slightly underdone. This is exactly what you want because the bars continue baking from residual heat as they cool in the pan, and pulling them out at this stage ensures they stay soft and chewy instead of becoming dry and hard. If you wait until they look completely done in the oven, they'll be overbaked once cool.
- Cool completely before frosting:
- Remove the pan from the oven and set it on a wire cooling rack or heat-safe surface, then let it cool completely to room temperature before even thinking about frosting. This takes at least an hour, maybe longer if your kitchen is warm, and trying to frost warm cookies will melt the buttercream and create a soupy mess. I usually bake these in the morning and frost them in the afternoon, or bake them one day and frost the next, which actually makes the whole process feel less rushed and more manageable.
- Make the buttercream frosting:
- While your cookies are cooling or when you're ready to frost, place your softened butter for the frosting in a large bowl and beat it with an electric mixer on medium speed for about a minute until it's creamy and smooth. Add all of your powdered sugar at once, then mix on low speed to prevent a sugar cloud explosion until the sugar is mostly incorporated. Pour in your heavy cream and vanilla extract, then beat on medium-high speed for two to three minutes until the frosting is light, fluffy, and perfectly spreadable. Add your gel food coloring a little at a time, mixing between additions until you reach the exact Halloween shade you're going for.
- Spread frosting and add sprinkles:
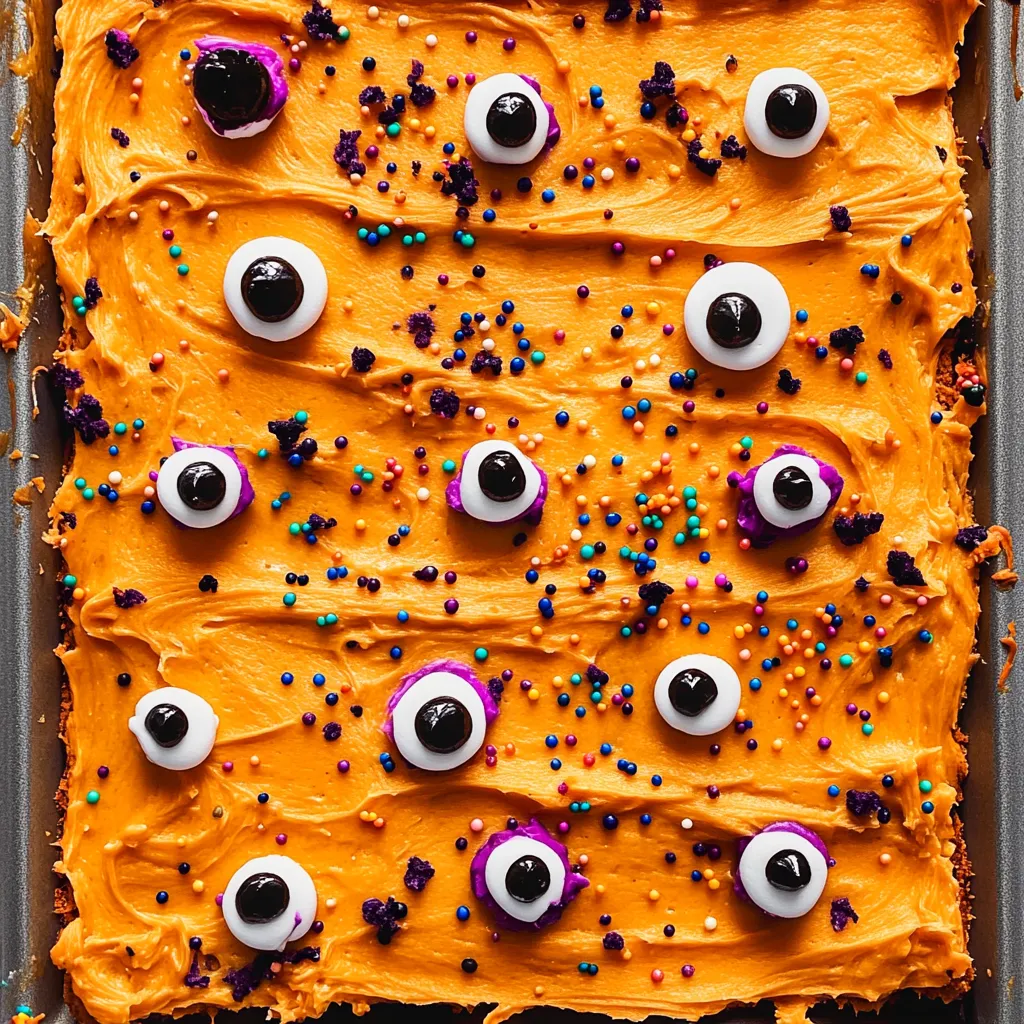
- Use an offset spatula or butter knife to spread your colored buttercream frosting evenly over the top of the completely cooled cookie bars, working it all the way to the edges and corners. The frosting layer should be generous and smooth, about a quarter inch thick all over. While the frosting is still soft and sticky, immediately sprinkle your Halloween decorations all over the top, going as wild or as restrained as you prefer. Press gently on any larger decorations to help them stick, then let the frosting set for about thirty minutes before cutting into bars.
- Cut into bars and serve:
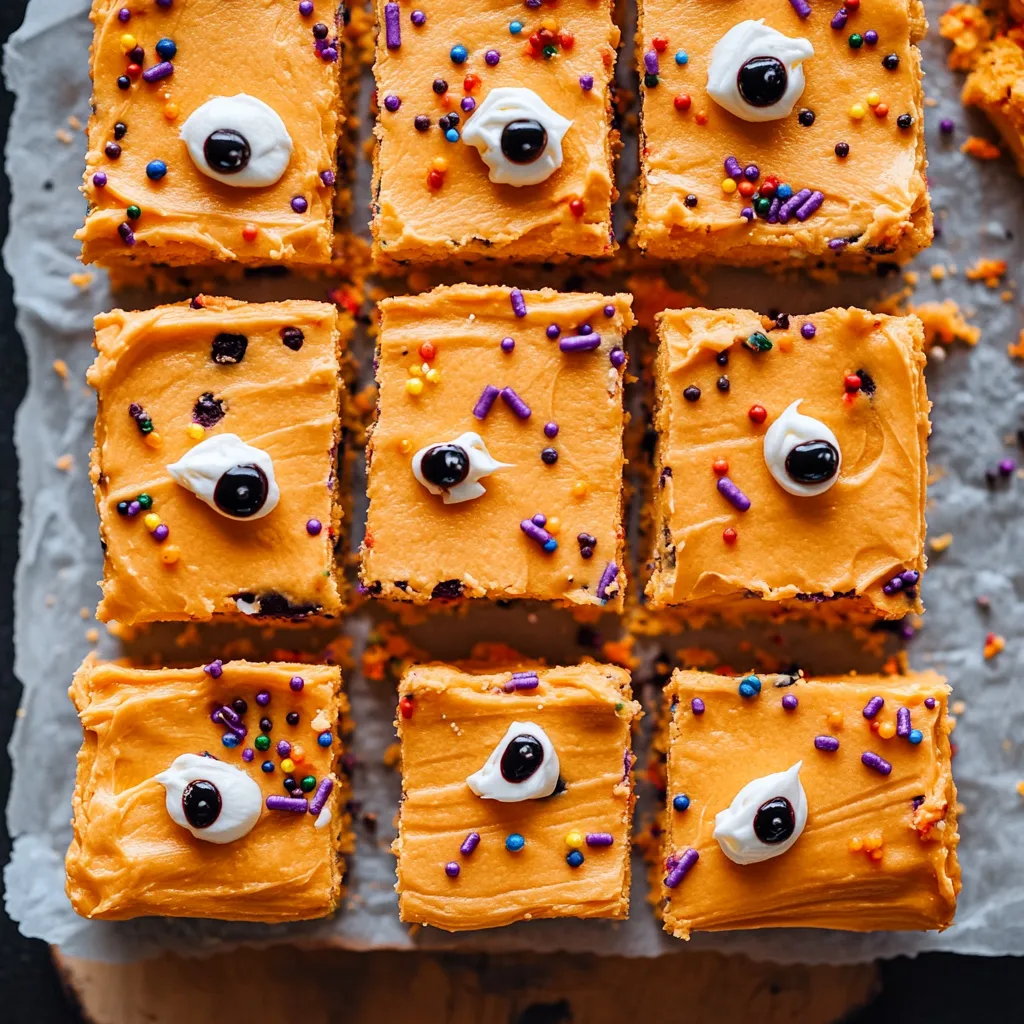
- Use a sharp knife to cut the frosted cookie into eighteen equal bars, wiping the knife clean between cuts for the neatest edges. If you used a parchment sling, lift the entire cookie out of the pan first and place it on a cutting board, which makes cutting much easier. Arrange the bars on a serving platter and watch them disappear, or store them in an airtight container for later.
 Pin it
I once tried frosting these when they were still slightly warm because I was impatient and in a hurry, and I watched in horror as my beautiful orange buttercream melted into an oily puddle. Now I force myself to wait even though it's hard, and the results are always worth the patience.
Understanding Bar Cookie Benefits
The genius of bar cookies is how they eliminate all the most annoying parts of cookie baking while still delivering that homemade sugar cookie experience everyone loves. You don't need to chill the dough for hours before working with it, which means you can go from deciding to bake to having cookies in the oven in under thirty minutes. There's no rolling dough to perfect thickness or cutting shapes that invariably spread and lose their details. You don't have to bake multiple sheets in batches, rotating them in and out of the oven and washing baking sheets between each round. Everything bakes at once in one pan, and you get perfectly uniform pieces when you cut them. The thicker format also means more soft, tender cookie in every bite compared to thin cut-outs that can be crispy.
Achieving the Perfect Texture
That ideal soft, chewy texture in sugar cookie bars comes from several factors working together, and understanding them helps you nail it every time. Using both a whole egg and an **extra yolk** adds richness and moisture that keeps the bars tender instead of dry and crumbly. The ratio of butter to flour creates a dough that's rich enough to stay soft but structured enough to hold its shape. **Creaming the butter and sugar properly** incorporates air that makes the texture lighter. **Not overbaking** is absolutely critical because sugar cookies can go from perfect to dry in just a minute or two. The slight leavening from baking powder gives you a softer crumb than you'd get without it. All these elements combine to create bars that are thick, soft, and absolutely delicious.
Frosting Colors and Decorating
Choosing your frosting color is part of the fun with these Halloween bars, and you can go traditional or get creative with unexpected shades. Classic **orange** is always festive and screams Halloween, especially when topped with black and orange sprinkles. Deep **purple** looks spooky and elegant, working beautifully with silver and black decorations. Bright **green** gives you that monster or witch vibe that kids especially love. You could even divide the frosting and make multiple colors, spreading them in stripes or swirls for a more complex look. Black frosting is dramatic but requires a lot of food coloring and can temporarily stain mouths, so maybe save that for adult gatherings. The sprinkle options are endless from **candy eyes** to plastic spiders to themed mixes with bats, pumpkins, ghosts, and more.
Make-Ahead and Storage
These bars are fantastic for making ahead, which is why they're so practical for busy parents managing multiple Halloween events. You can bake the unfrosted cookie base up to **two days ahead**, cool it completely, and store it tightly wrapped at room temperature until you're ready to frost. The frosted bars keep well in an airtight container at room temperature for **four to five days**, staying soft and delicious throughout. For longer storage, you can freeze the fully decorated bars for up to three months using the flash freeze method where you freeze them individually on a baking sheet first, then pack them into containers with parchment between layers. This prevents the frosting from sticking and keeps them looking perfect.
Customizing for Different Occasions
While these are formatted as Halloween bars here, the basic recipe is incredibly versatile and works for any holiday or celebration throughout the year. Use **red and green sprinkles** with peppermint extract in the frosting for Christmas. **Pink frosting** with heart sprinkles transforms them into Valentine's treats. **Pastel colors** and egg-shaped decorations make them perfect for Easter. **Red, white, and blue** with star sprinkles creates patriotic bars for Fourth of July. You could even make them for birthdays with the birthday person's favorite color frosting and their name written in sprinkles. The base sugar cookie recipe is a blank canvas that adapts to literally any occasion.
Getting Kids Involved
Bar cookies are some of the best recipes for involving kids in the kitchen because most steps are simple enough for little hands. Younger children can help measure ingredients, **press the dough into the pan** with their hands, and definitely help with the best part of **adding sprinkles**. Elementary-aged kids can often handle the whole decorating process independently once the bars are baked and frosted by an adult. Tweens and teens might be able to make the entire recipe themselves with minimal supervision. The forgiving nature of bar cookies means imperfections don't matter, and kids feel proud of creating something that looks festive and tastes delicious regardless of their skill level.
 Pin it
These Halloween sugar cookie bars have become such a reliable part of our October traditions that I can't imagine the month without them, and the fact that they're genuinely easy while looking impressive makes them the kind of recipe I'm always happy to share with other busy parents looking for festive treats that don't require culinary school. The combination of being delicious, customizable, kid-friendly, and practical means they check every box for the perfect holiday cookie, and watching my kids' excitement when they see that pan of orange-frosted bars covered in spooky sprinkles makes all the effort worthwhile.
Frequently Asked Questions
- → Can I make these cookie bars ahead of time?
- Yes, you can bake and frost them up to 2 days early. Keep them covered at room temperature, or freeze for up to 3 months.
- → Do I have to use salted butter?
- Salted butter works great, but unsalted is fine too. If using unsalted, add a pinch more salt to the dough.
- → Why did my bars turn out dry?
- Overbaking is usually the culprit. Take them out when the edges just start turning golden, even if the center looks slightly soft.
- → Can I use regular milk instead of heavy cream?
- Absolutely. Regular milk works fine for the frosting. You might need slightly less since it's thinner than cream.
- → How do I get clean cuts when slicing?
- Use a sharp knife and wipe it clean between cuts. Chilling the frosted bars for 15 minutes before slicing also helps.
- → Can I skip the food coloring?
- Of course. White frosting looks great too, and you can let the sprinkles add all the color.