
 Pin it
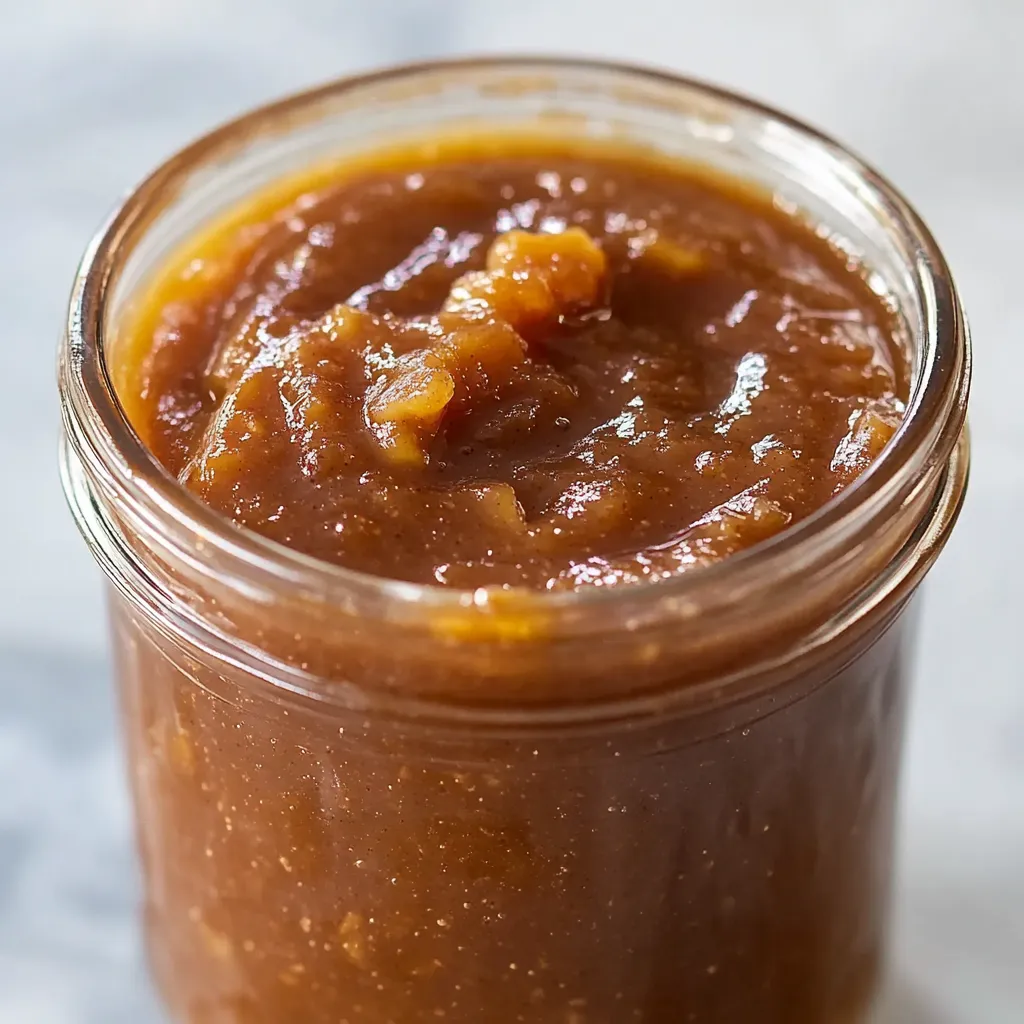
This apple butter transforms pounds of fresh apples into thick, creamy, intensely flavored spread through long, slow cooking that concentrates natural sweetness and develops deep caramel notes. Apples get simmered with brown sugar, cinnamon, and nutmeg until completely tender, then pureed smooth before continuing to cook for hours until the mixture reduces by nearly half and turns dark, rich, and spreadable. The long cooking caramelizes the natural sugars and develops complex flavors that taste like autumn concentrated into a jar. This is the perfect solution for using up abundant apple harvest, and the finished butter slathers beautifully on everything from morning toast to savory pork chops.
I started making apple butter after getting completely carried away at an apple orchard and coming home with far more apples than my family could possibly eat fresh or bake into pies. The first time I made it, I was amazed by how the long cooking transformed ordinary apples into something that tasted intensely apple-y with deep caramel notes and luxurious texture. Now I make it every fall when apples are abundant and inexpensive, and having jars of homemade apple butter in the refrigerator feels like capturing autumn to enjoy all winter long. The fact that it works with any apple variety means I can use whatever's available or on sale rather than seeking out specific types, making it practical and economical.
Ingredients and What Makes Them Essential
- Apples (8 pounds, mixed varieties): Fresh apples provide the base for everything and determine the final flavor. Using a mixture of tart apples like Granny Smith and sweet apples like Fuji, Gala, or Honeycrisp creates complex, balanced flavor with depth that single-variety batches lack. The tart apples contribute bright acidity while sweet apples provide natural sweetness and round out harsh edges. You need a significant quantity because the apples cook down dramatically—8 pounds of raw apples yields about 4 to 5 cups of finished apple butter. Any combination works, so use what you have or what's affordable rather than buying specific varieties.
- Water (1 cup): A small amount of liquid prevents the apples from burning during initial cooking and helps them soften and break down. The water evaporates during the long cooking process, so it doesn't dilute the final product. Some recipes use apple cider or apple juice instead of water for more pronounced apple flavor, which is a nice upgrade if you have it. The liquid is essential for the first cooking stage but disappears by the end.
- Lemon juice (2 tablespoons): Fresh lemon juice adds brightness and acidity that balances the sweetness and prevents the apple butter from tasting flat or one-dimensional. The acid also helps preserve the apple butter's color and extends shelf life slightly. Use fresh lemon juice rather than bottled for best flavor. The amount seems small but is important for creating balanced flavor rather than cloying sweetness.
- Dark brown sugar (2 cups, packed): Brown sugar sweetens the apples while adding deep molasses notes and caramel flavor that complement the cooked apples beautifully. Dark brown sugar has more molasses than light brown, creating richer, more complex flavor, though light brown sugar works if that's what you have. The sugar also helps with preservation by creating an environment less hospitable to bacteria. Pack the sugar firmly when measuring to ensure accurate sweetness. Granulated sugar can substitute but won't provide the same depth.
- Ground cinnamon (2 teaspoons): Cinnamon provides warm, sweet-spicy flavor that's classic with apples and essential to apple butter's characteristic taste. The amount is conservative—you can increase to 1 tablespoon if you love cinnamon. Use relatively fresh ground cinnamon rather than ancient jars that have lost potency and taste dusty. The cinnamon infuses throughout during the long cooking, creating aromatic depth.
- Ground nutmeg (½ teaspoon): Nutmeg adds subtle warmth and complexity with its slightly sweet, aromatic quality. Freshly grated nutmeg tastes dramatically better than pre-ground if you have whole nutmegs and a microplane, though ground works fine. The small amount provides background complexity without being identifiable. Other warm spices like cardamom, ginger, allspice, or cloves can supplement or replace the nutmeg for different flavor profiles.
Step-by-Step Instructions
- Prepare the apples efficiently:
- Wash all 8 pounds of apples thoroughly under running water to remove any dirt or residue. Core each apple using an apple corer or a sharp paring knife, removing the entire core, seeds, and stem. You don't need to peel the apples—the skins contain pectin and flavor that contribute to the final product, and they'll become completely soft and blend smooth during processing. Chop the cored apples into roughly 1-inch chunks. Uniformity isn't critical since everything will be pureed eventually, but similarly sized pieces cook at the same rate. As you work, place the chopped apples in a large, heavy-bottomed pot to prevent oxidation and browning.
- Initial cooking to soften apples:
- Add the water, lemon juice, brown sugar, cinnamon, and nutmeg to the pot with the chopped apples. Stir everything together thoroughly so the sugar and spices distribute evenly. Place the pot over medium-high heat and bring to a boil, stirring occasionally to prevent sticking. Once boiling, reduce the heat to maintain a gentle simmer. Cover the pot with a lid and cook for about 45 minutes to 1 hour, stirring every 10 to 15 minutes, until the apples are completely tender and falling apart when pressed with a spoon. The exact time depends on your apple varieties—some soften faster than others. The mixture should be very soft and almost sauce-like.
- Puree until completely smooth:
- Once the apples are completely tender, remove the pot from heat. Use an immersion blender to puree the apple mixture directly in the pot, blending thoroughly for several minutes until you have a completely smooth, uniform puree with no visible chunks or pieces remaining. Work the blender around the entire pot to catch all the apples. Alternatively, working in batches, carefully transfer the hot apple mixture to a countertop blender and blend on high until smooth. If using a countertop blender, be extremely careful with hot liquids—never fill more than halfway full, hold the lid down firmly with a towel, and start on low speed. Return the pureed mixture to the pot if you used a countertop blender.
- Long, slow reduction:
- Return the pot with the pureed apples to the stove over low to medium-low heat. You want a gentle simmer where you see small bubbles occasionally breaking the surface but not aggressive boiling. Leave the pot uncovered so steam can escape and the mixture can reduce. Cook for approximately 3 hours, stirring every 15 to 20 minutes to prevent scorching on the bottom. As it cooks, the apple butter will darken from pale tan to deep brown and thicken dramatically as moisture evaporates. The mixture is done when it has reduced by almost half, has turned dark brown, and is thick enough that when you drag a spoon through it, it holds a clear path for a few seconds. The apple butter should coat the back of a spoon thickly and mound on the spoon rather than running off.
- Test for proper consistency:
- To verify your apple butter is thick enough, place a small spoonful on a plate and let it cool for a minute. It should mound on the plate without spreading or weeping liquid. If liquid separates around the edges, continue cooking for another 15 to 30 minutes and test again. The butter will thicken slightly more as it cools, so don't worry if it seems slightly loose when hot. Better to err on the side of slightly loose than over-reducing and making it too thick or developing burnt flavors.
- Cool and store properly:
- Once the apple butter reaches proper consistency and color, remove it from heat and let it cool for about 15 to 20 minutes in the pot, stirring occasionally to release heat. Transfer the warm (not hot) apple butter to clean, sterilized jars or airtight containers, leaving about half an inch of headspace at the top. Wipe the rims clean before sealing to ensure proper seal. Let the containers cool to room temperature before refrigerating. The apple butter will continue thickening as it cools completely. Refrigerated apple butter keeps for up to 2 weeks, or freeze for up to 3 months for longer storage.
 Pin it
The technique that improved my apple butter most dramatically was learning to be truly patient with the reduction phase rather than trying to rush it by increasing the heat. My early attempts either burned on the bottom from too-high heat or never developed proper dark color and deep flavor because I removed them from heat too soon. Once I learned to maintain gentle, patient simmering for the full 3 hours (or even longer if needed) while stirring regularly to prevent scorching, my apple butter transformed completely. The color became deep, rich brown rather than pale tan, the flavor developed incredible complexity with caramel notes, and the texture was perfectly thick and spreadable. Now I'm disciplined about that long, slow reduction even though it requires monitoring and stirring for hours, because I know it's what creates genuine apple butter rather than just thick applesauce.
Understanding the Reduction Process
The magic of apple butter happens during the long, patient reduction after pureeing when the mixture transforms from pale, thin apple sauce into dark, thick, intensely flavored spread. This transformation occurs through multiple chemical and physical processes working together. Water evaporation is the most obvious—as the apple butter simmers uncovered for hours, water molecules escape as steam, concentrating everything that remains. What started as watery puree becomes thick and spreadable as moisture content drops dramatically.
Maillard reactions and caramelization develop during this extended cooking at relatively low temperatures. The natural sugars and added brown sugar undergo chemical changes when exposed to prolonged heat, breaking down into hundreds of new flavor compounds that create that characteristic deep, complex taste. The mixture darkens from pale tan to rich brown as these reactions progress. This is why homemade apple butter tastes so much better than commercial versions that use faster, higher-heat processing or add thickeners—the long, slow cooking develops flavors that can't be rushed.
Pectin from the apple skins and flesh concentrates during reduction, providing natural gelling that creates proper texture without requiring added pectin or thickeners. Pectin molecules form networks as water evaporates, trapping the remaining liquid and suspended solids into that characteristic spreadable consistency. Stirring prevents these pectin networks from setting too firmly at the bottom while allowing the mixture to thicken overall. The balance between evaporation, caramelization, and pectin concentration is what creates perfect apple butter texture.
Apple Variety Selection Strategy
While any apples work for apple butter, understanding how different varieties contribute to final flavor helps you make informed choices when you have options. Tart apples like Granny Smith provide bright acidity and apple flavor that prevents the finished product from tasting dull or one-dimensional despite all the added sugar. Their firm texture also holds up well during cooking without turning to mush too quickly. However, using only tart apples would require excessive sugar to achieve pleasant sweetness.
Sweet apples like Fuji, Gala, Honeycrisp, or Golden Delicious contribute natural sweetness, round out harsh edges, and provide mellow apple flavor that balances the tart varieties. Their softer texture breaks down easily during cooking. However, using only sweet apples would create apple butter that tastes flat and lacks complexity. The ideal approach combines roughly equal amounts of tart and sweet varieties, which creates balanced flavor with both brightness and sweetness, depth and accessibility.
Aromatic apples like Braeburn, Jonagold, or Winesap add complexity and interesting flavor notes beyond basic sweet or tart. These varieties contribute floral or spicy undertones that make the apple butter taste more sophisticated. If you're buying apples specifically for apple butter and want to create something special, include some aromatic varieties in your mix. However, if you're using up whatever you have on hand or orchard surplus, any combination works beautifully—even single-variety batches produce good results, just potentially less complex flavor.
Spice Variations and Customization
The basic cinnamon and nutmeg combination is classic and crowd-pleasing, but apple butter welcomes endless spice variations that create different flavor profiles. For intensely spiced apple butter reminiscent of apple pie, increase cinnamon to 1 tablespoon, add ½ teaspoon ground ginger, ¼ teaspoon ground cloves, and ¼ teaspoon allspice. This creates warming, complex spice that tastes quintessentially autumnal and works beautifully spread on morning toast or stirred into oatmeal.
For chai-spiced apple butter, add cardamom, ginger, cloves, and black pepper along with the cinnamon. This creates exotic, aromatic flavor that's delicious on scones or swirled into yogurt. Maple apple butter uses maple syrup in place of some of the brown sugar and increases nutmeg for subtle maple-forward flavor that pairs beautifully with breakfast foods. Bourbon or rum apple butter adds a couple tablespoons of alcohol during the reduction phase for subtle boozy warmth that makes it sophisticated enough for gifting.
Apple pie spice blend—which typically contains cinnamon, nutmeg, allspice, ginger, and sometimes cardamom—provides convenient, balanced seasoning in one measurement. Use 2 to 3 tablespoons of apple pie spice in place of the individual spices for easy, foolproof seasoning. Vanilla extract added at the very end after cooking creates additional aromatic complexity. Experiment with different combinations to create signature apple butter that reflects your preferences.
Uses Beyond Simple Spreading
While apple butter is wonderful slathered on toast, biscuits, or pancakes, its versatility extends far beyond breakfast spreads. In baking, apple butter replaces oil or butter in quick breads, muffins, and cakes, adding moisture and apple flavor while reducing fat. It also works beautifully swirled into cheesecake, layered in cinnamon rolls, or spread between cake layers. The concentrated apple flavor enhances baked goods without adding excess moisture that would affect texture.
For savory applications, apple butter makes excellent glaze for pork chops, pork tenderloin, or roasted chicken. Brush it on during the last 15 minutes of cooking for caramelized, flavorful coating. It also works in pan sauces—deglaze the pan after cooking pork with apple butter, mustard, and broth for quick, impressive sauce. Mix apple butter with whole grain mustard for sophisticated sandwich spread or charcuterie board condiment that pairs beautifully with aged cheddar and prosciutto.
Apple butter enriches oatmeal, yogurt, or cottage cheese for easy breakfasts that feel special without requiring cooking. It makes excellent filling for hand pies or turnovers, base for fruit tarts, or topping for ice cream. Stirred into barbecue sauce, it adds sweetness and depth that works particularly well with smoked meats. The concentrated flavor means a little goes a long way, making each jar valuable for countless applications beyond just spreading on bread.
 Pin it
This apple butter has become my favorite way to preserve autumn's apple abundance because it concentrates all that fresh apple flavor into something shelf-stable and incredibly versatile. The long, meditative process of stirring and watching it transform feels almost therapeutic, and the finished product tastes so much better than store-bought that there's simply no comparison. I love having jars in my refrigerator throughout fall and winter to spread on morning toast, swirl into oatmeal, or use as glaze for pork roasts. The fact that it works with any combination of apples means I never waste fruit—bruised apples, odd shapes, or varieties that don't taste great fresh all become excellent apple butter. Once you taste how long, slow cooking develops deep caramel flavors and dark color that commercial versions rarely achieve, and how satisfying it is to make something genuinely artisanal from simple, abundant ingredients, you'll understand why apple butter-making has been a beloved autumn tradition for generations.
Frequently Asked Questions
- → What kind of apples work best for apple butter?
- A mix of sweet and tart apples gives the best flavor. Try combining Granny Smith with Honeycrisp or Fuji. The variety creates depth and balance in taste.
- → How long does homemade apple butter last?
- When stored in clean, airtight containers in the refrigerator, your apple butter will stay fresh for about 2-3 weeks. You can also freeze it for up to 6 months.
- → Do I need to peel the apples?
- No, you don't need to peel them. Since you'll be blending everything smooth, the peels break down completely and actually add extra nutrients and color to your apple butter.
- → Can I make this in a slow cooker instead?
- Yes! After the initial 30-minute stovetop cook, transfer everything to a slow cooker. Cook on low for 8-10 hours with the lid slightly open, stirring occasionally.
- → What's the difference between apple butter and applesauce?
- Apple butter is cooked much longer than applesauce, making it thicker, darker, and more concentrated. It has a richer, deeper flavor and a spreadable consistency like soft butter.
- → How do I know when the apple butter is done?
- It should be thick enough to stay on a spoon without dripping off quickly. The color will be deep brown, much darker than applesauce, and it should have reduced by about half.