
 Pin it
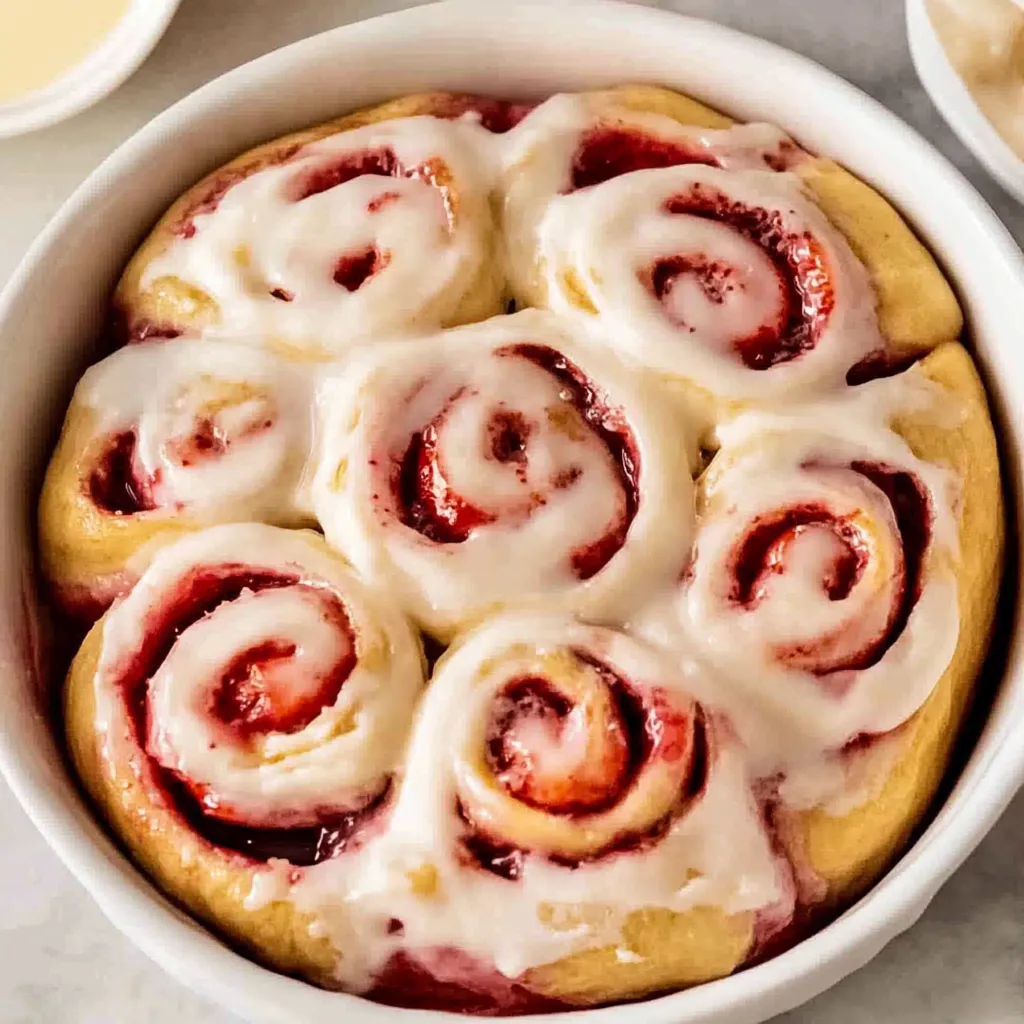
The perfect marriage of summer's sweet strawberries and a classic breakfast treat comes together in these irresistible strawberry rolls. Tender, fluffy dough wrapped around fresh strawberry filling and topped with rich cream cheese icing creates a breakfast experience that's both familiar and excitingly new. Unlike their cinnamon counterparts, these rolls capture the essence of summer with bright berry flavor in every bite—making them the ideal special breakfast for lazy weekend mornings or a stunning centerpiece for your next brunch gathering.
I first made these rolls when searching for a way to use the abundance of strawberries from our local farmers' market. My family was skeptical about a "fruity" cinnamon roll, but after one bite, they were completely won over! Now they specifically request these over traditional cinnamon rolls during strawberry season.
Ingredients That Make All The Difference
- Whole milk: Creates a richer, more tender dough than lower-fat alternatives. The extra fat content is key to achieving that perfect soft texture.
- Fresh strawberries: Select the reddest, ripest berries for the sweetest flavor. Their natural juiciness infuses the rolls during baking.
- Strawberry jam: Intensifies the berry flavor while adding sweetness and creating the perfect consistency for the filling. Homemade jam works beautifully if you have it.
- Full-fat cream cheese: Provides the tangy richness essential for a proper cream cheese icing. Block-style (not spreadable) delivers the best texture.
- Room temperature butter: Incorporated more easily into both dough and icing for smooth, consistent results.
Step-by-Step Instructions
- Begin by activating your yeast:
- In a small bowl, combine warm milk (105-110°F—any hotter could kill the yeast), 1 teaspoon of sugar, and the yeast. Stir gently and let it sit for about 5-10 minutes until it becomes foamy and bubbly. This step is crucial as it ensures your yeast is alive and will properly leaven the dough. If the mixture doesn't bubble, your yeast may be expired, and you'll need to start again with fresh yeast.
- While the yeast activates:
- prepare your mixer. In the bowl of a stand mixer, combine the remaining sugar, flour, softened butter, salt, and egg. Using the paddle attachment, mix on medium-low speed until the mixture resembles coarse crumbs. This cutting-in process creates pockets of butter throughout the dough, which will result in a tender, flaky texture once baked.
- Switch to the dough hook attachment:
- and add the activated yeast mixture to the bowl. Beat at medium-low speed until a smooth, sticky dough forms. The dough should pull away from the sides of the bowl but still stick to the bottom. If it's too sticky, add flour a tablespoon at a time; if too dry, add milk a tablespoon at a time. The perfect dough will be soft and tacky but not so sticky that it coats your fingers completely.
- Transfer the dough:
- to a lightly oiled large bowl, turning once to coat all sides with oil. This prevents the dough from drying out during rising. Cover the bowl with plastic wrap or a clean kitchen towel and place it in a warm, draft-free location until doubled in size, about 1 hour. Creating a warm environment is crucial for proper rising—a slightly warmed oven (preheated for just a minute then turned off) works perfectly.
- While the dough rises:
- prepare your strawberry filling. Hull and dice the fresh strawberries into small pieces, then combine them with strawberry jam in a bowl. The jam not only adds sweetness but helps bind the filling together. Allow this mixture to sit at room temperature, which will draw out some of the strawberry juices and create a more cohesive filling.
- Once the dough has doubled in size:
- turn it out onto a lightly floured surface. Using a rolling pin, roll it into a 12×16-inch rectangle. Aim for even thickness throughout to ensure uniform rolls. Spread the strawberry filling over the dough, leaving a ½-inch border along one short side. This clean edge will help seal the roll once it's formed.
- Starting at the short side opposite the clean border:
- carefully roll the dough into a log, keeping it relatively tight but not so tight that the filling squeezes out. When you reach the end, pinch the seam firmly to seal it closed. Position the log seam-side down to prevent it from unraveling.
- Using a sharp serrated knife or unflavored dental floss:
- (which gives the cleanest cut without compressing the dough), trim ½-inch off each end of the log and discard. These end pieces typically have less filling. Then cut the log into 8 equal rolls, each about 1½ inches thick. Place the rolls cut-side up in a greased 10-inch pie dish, arranging them with a little space between each.
- Cover the rolls loosely:
- with plastic wrap or a clean kitchen towel and let them rise again in a warm place until noticeably puffy and almost doubled in size, about 30-45 minutes. During this time, preheat your oven to 350°F. When properly risen, the rolls should be touching each other slightly.
- Bake the rolls:
- for 25-30 minutes until golden brown on top. If they begin to brown too quickly, loosely cover with aluminum foil. While the rolls bake, prepare the cream cheese icing by beating room temperature cream cheese and butter until smooth and fluffy. Add powdered sugar, milk, and vanilla extract, and beat until creamy. When the rolls come out of the oven, let them cool for just 5 minutes before spreading the icing over the top—this allows the icing to melt slightly into the warm rolls.
 Pin it
I learned the importance of proper dough rising through trial and error with these rolls. My first batch didn't rise adequately because my kitchen was too cool, resulting in dense, heavy rolls. Now I create a warm environment by briefly warming my oven, then turning it off to create the perfect rising spot—this simple step transformed my results completely!
Making Ahead and Storage Tips
These rolls can be prepared the night before for fresh morning baking. After placing the cut rolls in the pie dish, cover tightly with plastic wrap and refrigerate overnight. In the morning, remove from the refrigerator and let stand at room temperature for 45-60 minutes before baking as directed. Already baked rolls will keep at room temperature for up to 2 days in an airtight container, or can be frozen for up to 1 month. To reheat, warm individual rolls in the microwave for 15-20 seconds.
Seasonal Variations
While fresh strawberries create the ideal summer version, this adaptable recipe works beautifully with other fruits throughout the year. Try blueberries with lemon zest in midsummer, peaches and cinnamon in late summer, or orange zest with cranberries for a festive holiday morning treat. The technique remains the same—simply adjust the fruit and complementary flavors.
Serving Suggestions
These strawberry rolls make a stunning centerpiece for a brunch spread. Pair them with a savory egg dish like a frittata or quiche to balance the sweetness. Fresh fruit salad and crispy bacon or breakfast sausage round out the meal perfectly. For beverages, consider mimosas for celebrations or a rich coffee with cream to complement the sweet rolls.
I've come to treasure this recipe not just for its delicious results, but for how it celebrates the fleeting beauty of strawberry season. There's something magical about transforming simple ingredients into something so impressive and delicious. Whether served for a special occasion brunch or just because it's Saturday morning, these strawberry rolls bring a moment of joy to ordinary days—and isn't that what the best recipes do?
Frequently Asked Questions
- → Can I make the dough the night before?
- Yes! After shaping the rolls and placing them in the pie dish, cover tightly and refrigerate overnight. The next morning, let them sit at room temperature for 30-45 minutes before baking.
- → Can I use frozen strawberries?
- Yes, but thaw and drain them well first to avoid excess moisture that could make your filling too runny.
- → How do I store leftover strawberry rolls?
- Store in an airtight container at room temperature for up to 2 days, or refrigerate for up to 5 days. Reheat in the microwave for 15-20 seconds before serving.
- → Can I freeze these strawberry rolls?
- Yes! Freeze fully baked and cooled rolls (before icing) for up to 2 months. Thaw overnight in the refrigerator, then warm in the oven at 300°F for 10 minutes and add fresh icing.
- → Why is my dough not rising?
- Make sure your yeast is fresh and your milk is the right temperature (105-110°F). If your kitchen is cold, create a warm spot by preheating the oven for 1 minute, then turning it off before placing the dough inside.
- → Can I use a different fruit instead of strawberries?
- Absolutely! Try raspberries, blueberries, or a mix of berries. Just make sure to chop larger fruits and adjust the jam flavor to match.