
 Pin it
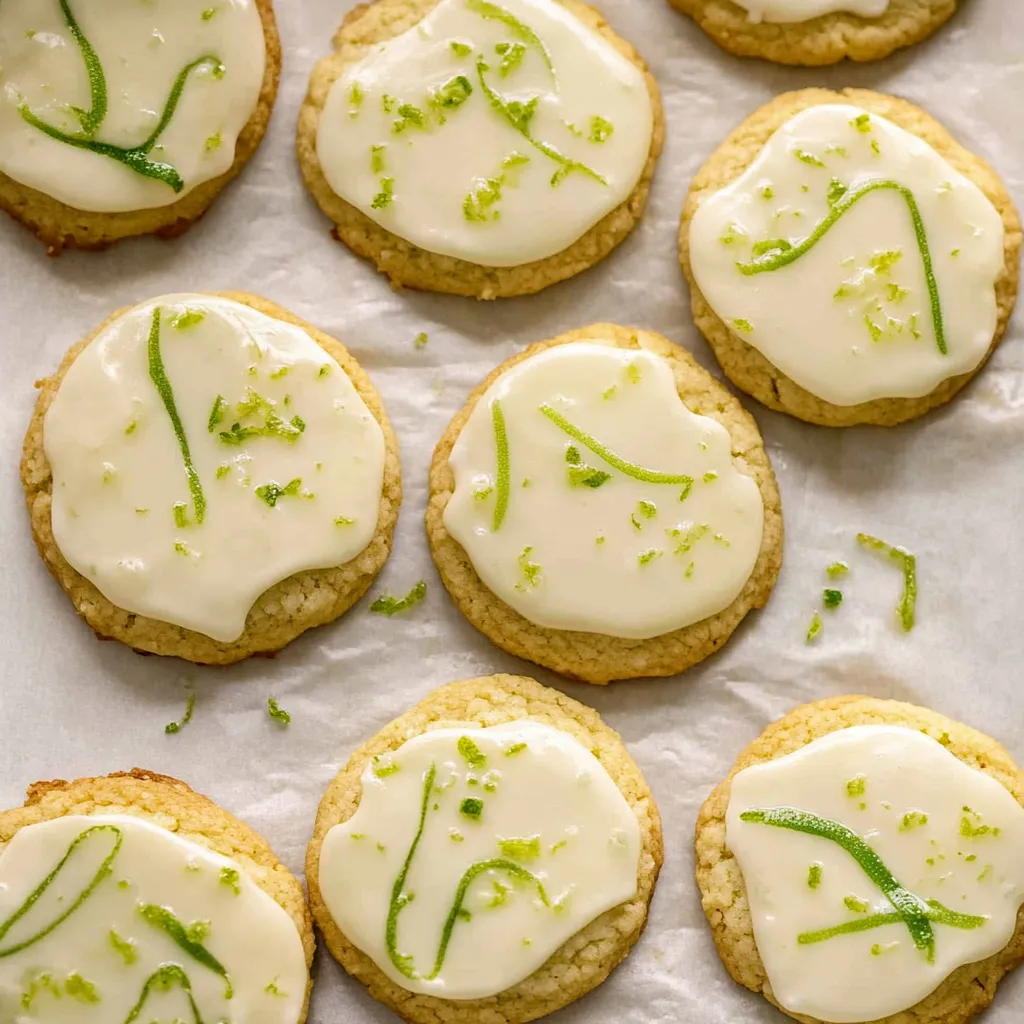
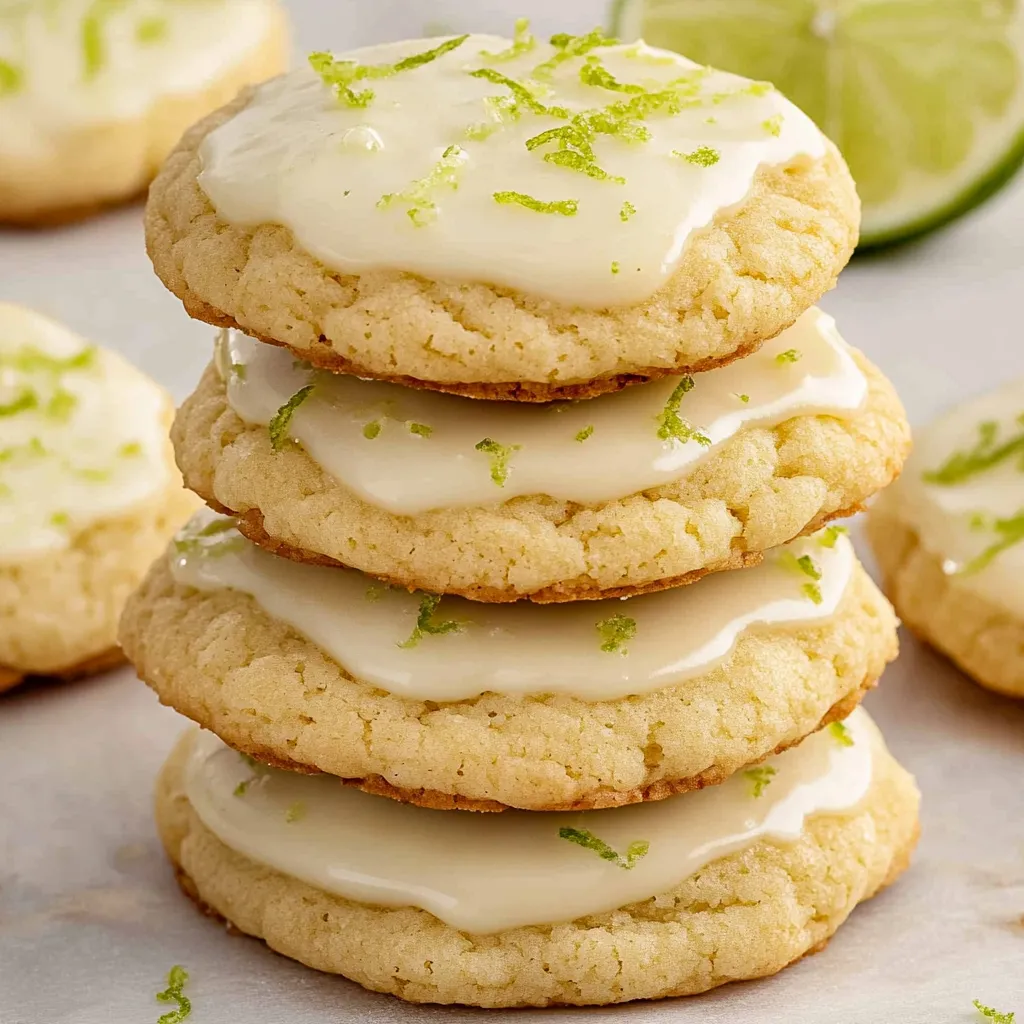
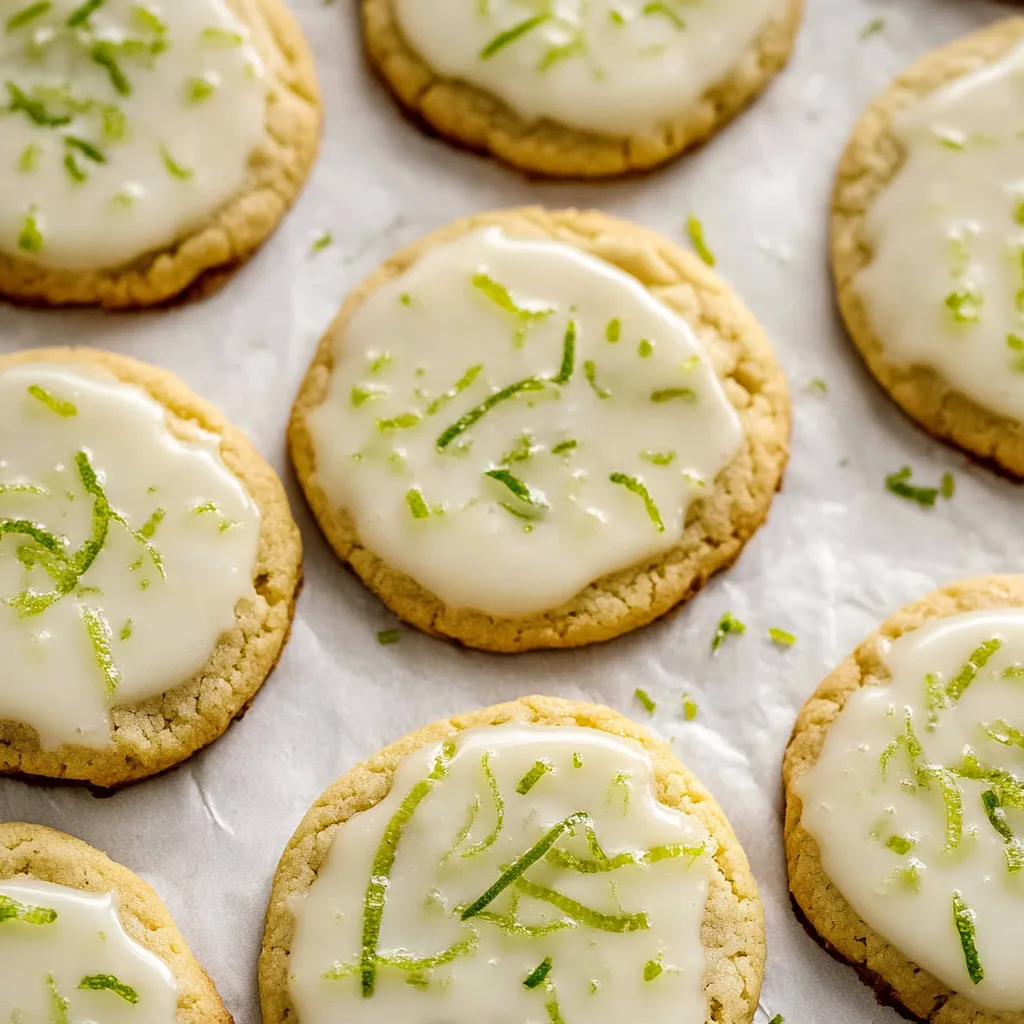
These key lime cookies deliver everything you want from a citrus-forward treat - soft, pillowy centers that stay chewy even days after baking, crisp edges that provide textural contrast, intense lime flavor from both zest in the dough and a tangy-sweet glaze drizzled over the top, and that distinctive key lime character that's more aromatic, floral, and complex than regular Persian limes, all achieved through simple creaming method that takes just ten minutes of active work before the oven does the rest. What makes these cookies so irresistible is how they balance sweetness with citrus brightness: the brown sugar in the dough provides caramel undertones and moisture that keeps cookies soft, the key lime zest releases essential oils during baking creating perfume-like aroma throughout your kitchen, and the powdered sugar glaze spiked with fresh key lime juice adds concentrated citrus punch plus visual appeal with its pale green-white sheen that makes these look as special as they taste. The technique of slightly underbaking - pulling cookies from the oven when centers still look barely set and edges are just beginning to firm - creates that coveted soft-chewy texture that cookie enthusiasts crave, while the choice to use key limes specifically rather than regular limes provides more intense, sophisticated flavor with floral hints and aromatic complexity that elevates these beyond ordinary citrus cookies into something genuinely special that makes you understand why key lime pie became so iconic.
The first time making these reveals how powerful citrus zest is for flavoring - that moment when you zest the limes and the essential oils release, filling your kitchen with intense lime aroma, demonstrates why zest is crucial and juice alone isn't sufficient. Watching the cookies puff up in the oven then settle slightly as they cool, creating those characteristic cracks on top, provides visual satisfaction. That first bite where you get soft, chewy cookie with sweet-tart glaze and that unmistakable key lime flavor creates understanding of why citrus cookies deserve a place alongside chocolate chip in your regular rotation.
Ingredients - What You Need and Why
For the Cookies:
- Unsalted butter: about half a cup (one stick or eight tablespoons) softened to room temperature provides fat that creates tender texture and carries flavor; softened butter (not melted, not cold) creams properly with sugar, incorporating air that makes cookies light rather than dense; unsalted allows you to control salt level; the butter should be soft enough to leave a slight fingerprint when pressed but still hold its shape
- Light brown sugar: about three-quarters cup provides sweetness plus moisture from molasses content that keeps cookies soft and chewy; brown sugar's acidic nature also helps cookies spread properly and creates chewier texture than white sugar alone; light brown sugar is milder than dark brown, letting lime flavor shine; measure packed for accuracy
- Large egg: one egg at room temperature acts as binder and adds moisture, richness, and structure; room temperature eggs incorporate more smoothly into the batter; eggs also contribute to browning and help cookies spread properly
- Vanilla extract: one teaspoon adds aromatic sweetness and enhances other flavors; pure vanilla extract tastes better than imitation; you could reduce to half a teaspoon and add half a teaspoon of lime extract for more pronounced lime character, though the lime zest provides plenty of flavor on its own
- Key lime zest: about one tablespoon from approximately three to four key limes provides the signature bright, aromatic lime flavor; the zest contains essential oils that are far more concentrated and aromatic than the juice; key limes are smaller, rounder, thinner-skinned, and more aromatic-tart-floral than regular Persian limes; if you can't find key limes, regular lime zest works well though the flavor is slightly less complex; zest only the green outer layer, avoiding the bitter white pith underneath
- All-purpose flour: about one and three-quarters cups (219 grams if weighing, which is most accurate) provides structure; the gluten in flour creates the cookie's framework; measuring by weight is more accurate than volume since flour settles and packs differently; if measuring by volume, use the spoon-and-level method (fluff the flour, spoon into measuring cup, level with knife edge) rather than scooping directly which compacts flour and leads to dry cookies
- Baking soda: half a teaspoon provides leavening that makes cookies rise and spread; baking soda also helps with browning and creates slightly crispy edges; too much creates excessive spreading and metallic taste; too little makes dense, cakey cookies
- Salt: about one-quarter teaspoon balances sweetness and enhances all other flavors; even sweet cookies need salt to prevent one-dimensional sugariness
For the Key Lime Glaze:
- Powdered sugar (confectioners' sugar): about one and a half to two cups creates the sweet glaze base; powdered sugar dissolves instantly in the lime juice without graininess; the cornstarch in powdered sugar also helps the glaze set slightly rather than staying completely wet
- Key lime juice: about three to four tablespoons from those same key limes provides tangy, tart liquid that turns powdered sugar into pourable glaze; fresh-squeezed tastes dramatically better than bottled; start with less liquid and add gradually to achieve desired consistency - too much makes runny glaze that won't set, too little makes thick paste
- Additional key lime zest: for sprinkling on top of the glazed cookies provides visual appeal and extra burst of lime aroma when you bite in
How to Make Key Lime Cookies - Step by Step
- Cream butter and sugar to incorporate air:
- Preheat your oven to 350°F and line two baking sheets with parchment paper or silicone baking mats. In a large mixing bowl (or the bowl of a stand mixer), place half a cup (one stick) of softened unsalted butter and three-quarters cup of packed light brown sugar. Using an electric hand mixer on high speed or a stand mixer with the paddle attachment on medium-high, beat the butter and sugar together vigorously for a full two to three minutes. Don't rush this creaming step - it's crucial for proper texture. You're looking for the mixture to become noticeably lighter in color (pale tan rather than deep brown), increased in volume, and fluffy rather than dense. The sugar crystals cut into the butter creating tiny air pockets that make cookies light and help them rise. Scrape down the sides of the bowl halfway through to ensure everything creams evenly. Once properly creamed, the mixture should look almost mousse-like and hold soft peaks when you lift the beaters. If it still looks grainy and dark, keep beating another minute. This is the foundation of proper cookie texture, so invest the time.
- Add wet ingredients and combine:
- Add one large egg (at room temperature) and one teaspoon of vanilla extract to the creamed butter-sugar mixture. Beat on medium speed for about thirty seconds until the egg is fully incorporated and the mixture looks smooth and homogeneous. Scrape down the sides of the bowl to catch any unmixed bits. The mixture should look creamy, glossy, and uniform in color. Now add your tablespoon of key lime zest (or regular lime zest). You can add it directly to the wet mixture or wait to add it with the dry ingredients - either works. If your limes were cold from the refrigerator, let the zest come to room temperature before adding so it doesn't firm up the butter. The zest should be finely grated - just the green outer layer with none of the bitter white pith. Give the mixture a few beats to distribute the zest throughout. The batter should smell intensely limey and aromatic at this point, promising the final cookies will have plenty of flavor.
- Incorporate dry ingredients carefully:
- In a separate medium bowl, whisk together one and three-quarters cups of all-purpose flour, half a teaspoon of baking soda, and one-quarter teaspoon of salt. Whisk thoroughly for about thirty seconds to ensure the leavening and salt are evenly distributed throughout the flour - this prevents pockets of baking soda that would create uneven rising or salty spots. Now add the dry ingredients to the wet mixture in three additions. Add about one-third of the flour mixture and mix on low speed (or stir by hand with a wooden spoon) just until the flour disappears into the batter. Stop the mixer, scrape down the sides, add the second third of flour, mix just until incorporated, then add the final third and mix just until no flour streaks remain. Here's critical: stop mixing as soon as the flour is incorporated. Over-mixing once flour is added develops the gluten excessively, creating tough, cakey cookies rather than tender, chewy ones. The dough should look cohesive but still slightly rough - not perfectly smooth and silky like overmixed dough. If you see flour streaks, mix just a few more seconds. If the dough looks very smooth and elastic, you've overmixed slightly (cookies will still be good but slightly less tender).
- Shape and bake the cookies:
- The dough should be soft but not sticky, able to be rolled into balls without extensive chilling. If your kitchen is very warm and the dough feels too soft to handle, refrigerate for fifteen minutes. Otherwise, proceed directly to shaping. Using your hands (not a cookie scoop for prettiest results, though a scoop works fine for efficiency), pinch off portions of dough and roll between your palms into smooth balls about one and a half inches in diameter - roughly the size of a walnut or ping pong ball. You should get about eighteen to twenty-four cookies depending on exact size. Place the dough balls on your prepared baking sheets, spacing them about two inches apart as they will spread during baking. Don't flatten them - they'll flatten naturally. Place one sheet in the preheated 350°F oven and bake for nine to eleven minutes. Here's the crucial timing: pull the cookies from the oven when the edges are just barely set (they'll look slightly firmer and matte rather than wet and shiny) but the centers still look slightly underdone - they should still appear puffy and soft in the middle. They will NOT look fully baked and that's exactly right. The tops will have characteristic cracks but won't be browned - key lime cookies stay quite pale. If you wait until they look completely done, they'll overbake and become dry. After removing from the oven, let the cookies sit on the baking sheet for two minutes (they continue cooking slightly from residual heat), then transfer to a wire cooling rack using a thin spatula. Let them cool completely before glazing - warm cookies will make the glaze melt and run off.
- Make glaze and finish the cookies:
- Once cookies are completely cool (at least thirty minutes), make the glaze. In a medium bowl, sift or whisk one and a half cups of powdered sugar to remove any lumps. Zest another half teaspoon of key lime zest directly into the sugar for extra punch. Juice your key limes - you'll need about three to four tablespoons of fresh juice. Start by adding just two tablespoons of juice to the powdered sugar. Whisk vigorously until smooth. Check the consistency - it should be thick but pourable, like honey or thin syrup. If it's too thick (it holds a tall peak when you lift the whisk), add more juice a teaspoon at a time. If it's too thin (it runs off the spoon immediately like water), whisk in more powdered sugar a tablespoon at a time. The ideal consistency is when you drizzle it from a spoon and it slowly flows and settles, creating a smooth surface. Let the glaze sit for five to ten minutes after mixing - this allows the powdered sugar to fully hydrate and the glaze becomes slightly less runny, making it easier to work with. To glaze the cookies, you can either dip the top of each cookie directly into the bowl of glaze (let excess drip off), or use a spoon to drizzle glaze over each cookie. Work quickly before the glaze sets. While the glaze is still wet, sprinkle each cookie with a tiny pinch of additional lime zest for visual appeal and extra aroma. Let the glazed cookies sit at room temperature for at least thirty minutes to allow the glaze to set before serving or storing.
 Pin it
Understanding that citrus zest contains essential oils concentrated in tiny pockets in the peel helps you appreciate why zesting (not just juicing) is crucial - the oils provide intense flavor and aroma that juice alone can't match, and they're released during baking, filling your kitchen with fragrance.
Understanding Key Limes and Their Distinctive Character
Key limes (Citrus aurantiifolia), also called Mexican limes or West Indian limes, differ significantly from the Persian limes (Citrus latifolia) found in most supermarkets. Key limes are smaller (about one to two inches in diameter versus three inches for Persian limes), rounder, have thinner, smoother skin that's yellowish-green when ripe rather than dark green, and contain more seeds. Most importantly, their flavor is more intense, aromatic, tart, and complex with subtle floral notes that Persian limes lack. Key limes also have higher acidity and unique aromatic compounds that create that distinctive "key lime pie" flavor. They're native to Southeast Asia but became associated with the Florida Keys where they grew prolifically until a hurricane in 1926 destroyed most crops. Today they're grown in Mexico, Central America, and some Caribbean islands. Key limes are seasonal and can be hard to find in regular supermarkets, though Latin markets, specialty stores, or online sources often carry them. If you can only find Persian limes, the cookies will still be delicious - the flavor will be slightly less aromatic and complex but still bright and citrusy. The main point is using fresh limes regardless of variety rather than bottled juice which lacks the essential oils and bright flavor of fresh.
Creating Flavor Variations and Creative Twists
While classic key lime cookies are delicious as written, exploring variations keeps your cookie repertoire interesting while maintaining the fundamental soft-chewy citrus cookie template. For lemon cookies, substitute lemon zest and juice for the lime in equal amounts, creating that classic lemon sugar cookie flavor. Orange cookies use orange zest and juice for sweeter, less tart citrus character - you may need slightly more zest (about one and a half tablespoons) since oranges are less intensely flavored. Lime-coconut cookies add one-quarter cup of sweetened shredded coconut to the dough for tropical twist and textural interest. White chocolate lime cookies fold in one-half cup of white chocolate chips that complement the lime beautifully. Lime-ginger cookies incorporate one tablespoon of finely minced crystallized ginger or one teaspoon of ground ginger for spicy warmth. Basil-lime cookies add one tablespoon of finely minced fresh basil to the dough for herbaceous complexity that's surprisingly sophisticated. Raspberry-lime variation adds freeze-dried raspberry powder to the glaze (about two tablespoons) for pink color and fruity depth. Lime shortbread cookies use the same lime zest in shortbread dough formula for more buttery, crumbly texture. Lime thumbprint cookies press an indentation in each ball before baking, filling with lime curd after cooling. Each variation maintains the citrus-forward character while exploring different complementary flavors.
Troubleshooting Common Cookie Problems
Even with straightforward technique, sometimes cookies don't turn out perfectly, but understanding what went wrong helps you prevent issues next time. If cookies spread too much and become flat rather than thick, your butter was too warm or melted, your dough was too warm when it went in the oven, or you need to chill the dough for fifteen minutes before baking - butter should be softened but still cool to the touch. When cookies are cakey and dry rather than chewy, you overbaked them (pull them out earlier next time), measured too much flour (use the spoon-and-level method or weigh flour), or overmixed the dough after adding flour developing too much gluten - mix just until flour disappears. If cookies are too crispy and hard rather than soft, again you overbaked them or used all granulated sugar instead of brown sugar which provides moisture - brown sugar's molasses keeps cookies tender. Cookies that don't spread at all and stay in puffy balls indicate your baking soda was old and lost its leavening power, the dough was too cold, or you packed too much flour - test baking soda by adding a pinch to vinegar (it should bubble vigorously), and measure flour carefully. When the glaze is too thin and runs off completely, you added too much lime juice - whisk in more powdered sugar a tablespoon at a time until thickened. Glaze that's too thick and paste-like needs more lime juice added gradually. If cookies taste bland despite adding zest, your limes weren't very flavorful (varies by season and source), or you didn't use enough zest - be generous with zest for bold lime flavor.
Complete Meal Planning and Serving Suggestions
Understanding how to serve and present these cookies creates occasions and contexts beyond just having them sitting on a plate. For summer gatherings, arrange cookies on a tiered stand with other citrus desserts like lemon bars and orange pound cake for a citrus-themed dessert table. Pool parties benefit from these cookies since they're refreshing and not chocolate-based (which melts), served alongside fruit salad and iced tea. For afternoon tea or coffee, these pair beautifully with hot beverages - the citrus cuts through coffee's bitterness while the sweetness complements tea. Package individually wrapped cookies in cellophane bags tied with ribbon for party favors at bridal showers, baby showers, or summer celebrations. Create cookie sandwiches by spreading lime buttercream or white chocolate ganache between two cookies. Serve with key lime pie ice cream or vanilla ice cream for cookies-and-cream dessert. For elegant presentation, arrange cookies on a white platter garnished with fresh mint sprigs and thin lime slices. Crumble cookies over lime or vanilla yogurt for breakfast parfaits. Use as a component in trifles, layering with whipped cream and lime curd. Pair with tropical fruit salad featuring mango, pineapple, and kiwi. For beverage pairings, serve with limeade, lemonade, iced coffee, or frozen margaritas (for adults). The refreshing citrus character makes these surprisingly versatile across different serving contexts.
Storage Guidelines and Maintaining Optimal Texture
Understanding proper storage ensures these cookies maintain their soft-chewy texture as long as possible. Store completely cooled, glazed cookies in an airtight container at room temperature for four to five days. Layer cookies with parchment paper or wax paper between layers to prevent the glaze from sticking to cookies above. The cookies taste best within the first three days when texture is optimal - still soft and chewy with glaze that's set but not completely hard. After day three, they're still perfectly edible but may lose some softness. Don't refrigerate unless absolutely necessary (very hot, humid climate) as refrigeration can actually dry out cookies and make glaze weep moisture - if you must refrigerate, store in airtight container and bring to room temperature before serving. For longer storage, freeze baked but unglazed cookies: let them cool completely, freeze in a single layer on a baking sheet until solid, then transfer to freezer bags or containers, separating layers with parchment. Frozen cookies keep for up to three months. Thaw at room temperature, then glaze just before serving for best appearance and texture. You can also freeze the shaped but unbaked dough balls: freeze on a baking sheet until solid, transfer to freezer bags, and bake directly from frozen adding two to four minutes to baking time. The dough balls keep frozen for three months, providing fresh-baked cookies whenever you want them without mixing new dough.
The Science of Soft-Chewy Versus Crispy Cookies
Understanding the chemistry that creates different cookie textures helps explain why ingredient ratios and techniques matter. Several factors determine whether cookies turn out soft-chewy versus crispy-crunchy. Moisture content is primary: more moisture (from brown sugar's molasses, eggs, less baking time) creates softer cookies, while less moisture creates crispy ones. Sugar type affects texture: brown sugar contains molasses which is hygroscopic (attracts and holds moisture), creating chewy texture; white sugar alone creates crisper cookies. Fat type matters: butter creates more spread and crisper edges due to its water content and melting point, while shortening creates softer, cakier cookies. The ratio of flour to fat and sugar determines structure: more flour relative to fat creates sturdier, crisper cookies, while relatively less flour creates softer, chewier ones. Baking time is crucial: underbaking leaves more moisture in the cookies creating soft centers, while fully baking or overbaking drives out moisture creating crispy texture throughout. Cooling on the pan versus wire rack: leaving cookies on the hot pan continues cooking them (creating firmer texture), while transferring to a rack immediately stops cooking preserving softness. Understanding these factors helps you manipulate recipes to achieve desired textures.
Teaching Fundamental Baking Skills
This recipe provides excellent opportunity to learn essential techniques that transfer to countless other baked goods. The creaming method - beating butter and sugar together to incorporate air - appears in most cookies, cakes, and many other baked goods; learning to cream properly (full two to three minutes, not rushed) builds foundational baking skills. Understanding proper flour measurement (spoon-and-level or weighing) prevents the most common baking mistake - too much flour - that creates dry, crumbly results. The skill of mixing just until combined once flour is added (avoiding overmixing) teaches you to recognize proper dough consistency and understand gluten development. Learning to judge cookie doneness by appearance rather than just timing (edges set, centers still soft) builds baking intuition applicable to all cookies. Working with glazes and understanding liquid-to-sugar ratios teaches basic frosting principles. The technique of shaping uniform dough balls creates evenly-sized cookies that bake consistently - this precision matters in baking more than savory cooking. For beginners intimidated by baking's reputation for requiring precision, this recipe builds tremendous confidence because it's quite forgiving - even slightly imperfect cookies taste delicious - yet teaches proper technique that applies broadly.
The Economics of Homemade Versus Bakery Cookies
Understanding cost comparisons between homemade and purchased cookies reveals substantial savings while achieving superior quality and freshness. The ingredients - butter (three dollars), brown sugar (pennies from a bag you keep stocked), eggs (pennies), flour (pennies), key limes (three to four dollars for a bag), powdered sugar (two dollars) - total approximately ten to twelve dollars for eighteen to twenty-four cookies, or about fifty cents per cookie. Bakery specialty cookies cost two to four dollars each, making a dozen cost twenty-four to forty-eight dollars versus six dollars homemade - saving eighteen to forty-two dollars per batch. Even grocery store bakery cookies cost one to two dollars each. Beyond monetary savings, homemade offers complete control over ingredients, freshness, and customization. You can use organic butter, adjust sweetness, make them larger or smaller, and ensure they're baked fresh rather than sitting in a case for days. The satisfaction of making impressive citrus cookies from scratch creates value beyond just cost. For people who regularly buy bakery cookies, switching to homemade saves hundreds of dollars annually while actually getting better, fresher results. The initial investment in basic baking tools (mixing bowls, mixer, baking sheets) pays for itself within a few batches.
Understanding Citrus in Baking and Optimal Usage
Citrus fruits contribute both flavor and functionality in baking, but understanding how to use them properly maximizes their impact. The zest (outermost colored layer of peel) contains essential oils in tiny pockets that provide intensely concentrated flavor and aroma - far more potent than the juice. These oils are released during mixing and baking, flavoring the entire cookie. The zest should be finely grated using a Microplane or fine grater, taking only the colored layer and avoiding the white pith underneath which tastes bitter. Room temperature citrus yields more juice than cold citrus - let fruit sit at room temperature thirty minutes or microwave ten to fifteen seconds before juicing. Roll citrus firmly on the counter before cutting and juicing to break cell walls and release more juice. Zest before juicing since it's much easier to zest whole fruit than halved, juiced fruit. Citrus juice provides acidity that brightens flavor and reacts with baking soda creating leavening (though this recipe uses minimal juice in the dough). Fresh citrus always tastes better than bottled - the essential oils and bright flavor dissipate quickly after juicing. One lime typically yields one to two teaspoons of zest and one to two tablespoons of juice depending on size. Understanding these principles helps you maximize citrus impact in any recipe.
Cultural Context and Regional Variations
While these specific key lime cookies are a modern American creation rather than traditional recipe, they draw inspiration from key lime pie - Florida's signature dessert that emerged in the late 1800s or early 1900s in the Florida Keys. Key lime pie traditionally features sweetened condensed milk (which became widely available in the late 1800s), key lime juice, and egg yolks in a graham cracker or pastry crust, topped with meringue or whipped cream. The pie became so iconic that it's now Florida's official state pie. The flavor combination of tart lime and sweet condensed milk resonated so strongly that it spawned countless variations - key lime cheesecake, key lime tarts, key lime bars, key lime truffles, and these cookies. Beyond American desserts, limes play important roles in many cuisines: Latin American cooking uses lime extensively in both savory and sweet applications; Southeast Asian desserts often feature lime or kaffir lime leaves; Caribbean baking incorporates lime in cakes and pastries. Understanding this broader citrus-in-desserts tradition helps appreciate that while this specific recipe is contemporary, it participates in long traditions of using citrus to create refreshing, bright desserts that feel lighter and more exciting than chocolate or vanilla-based sweets.
 Pin it
These key lime cookies represent the perfect intersection of familiar comfort (soft sugar cookies) and exciting refreshment (bright citrus flavor), proving that sometimes the best recipes aren't the most complicated but rather those that execute simple concepts exceptionally well through proper technique and quality ingredients. What makes this recipe genuinely valuable is how it teaches fundamental cookie-making skills - creaming butter and sugar, incorporating dry ingredients properly, judging doneness by appearance, making simple glazes - through an accessible preparation that produces impressive, bakery-quality results that look and taste special enough for gifting or entertaining. The transformation of basic pantry ingredients plus a few key limes into soft, chewy, beautifully glazed cookies that taste like sunshine and summer demonstrates that baking doesn't require professional training or expensive equipment when you understand proper ratios and techniques. Whether you're a citrus enthusiast seeking alternatives to chocolate-chip-cookie monotony, a baker looking for refreshing summer cookies that won't heat up the kitchen too much, someone wanting to showcase seasonal key limes when you can find them, a home cook building confidence through achievable recipes that impress, or simply anyone who loves the sweet-tart balance of key lime desserts in a portable, shareable cookie format, this delivers completely. The ten-minute prep time and no-chill-required convenience make these realistic for busy schedules when you want homemade cookies without extensive planning, while the make-ahead and freezer-friendly nature means you can always have fresh-baked cookies available with minimal effort. Once you've experienced how those key limes transform simple sugar cookie dough into something extraordinary, tasted how the tangy glaze perfectly balances the sweet cookie, watched how family and friends immediately reach for seconds while asking for the recipe, and understood how something so simple can be so impressive, you'll find yourself making batch after batch throughout citrus season, experimenting with lemon and orange variations, confidently baking for parties and potlucks knowing these cookies always disappear first, and appreciating how proper technique applied to quality ingredients creates results that rival any professional bakery despite requiring minimal time, skill, or investment.
Frequently Asked Questions
- → Can I use regular limes instead of key limes?
- Yes, regular limes work fine. The flavor will be a bit different but still tasty. You might need slightly less zest since regular limes are more tart.
- → How do I store these cookies?
- Keep them in a sealed container at room temperature for up to 5 days. The glaze stays firm and the cookies stay soft.
- → Can I freeze the cookie dough?
- Absolutely! Roll the dough into balls and freeze them on a tray. Once solid, transfer to a freezer bag. Bake from frozen, adding 1-2 extra minutes.
- → Why are my cookies spreading too much?
- Make sure your butter isn't too soft or melted. You can also chill the dough balls for 30 minutes before baking to reduce spreading.
- → Can I make these without the glaze?
- Sure! The cookies are delicious on their own. You could also dust them with powdered sugar instead of making the glaze.
- → Do I need to use both white and brown sugar?
- The brown sugar adds chewiness and depth, but you can use all white sugar in a pinch. The texture will be slightly different though.