
 Pin it
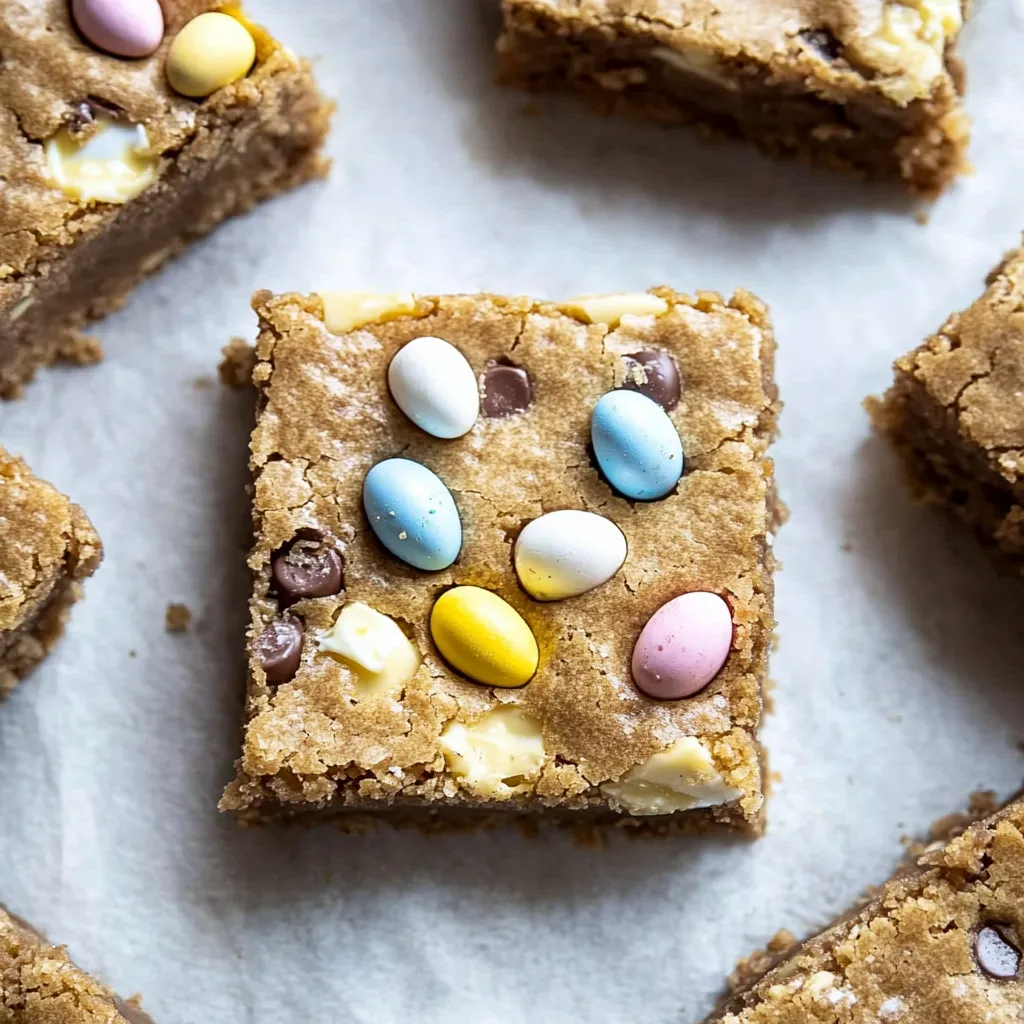
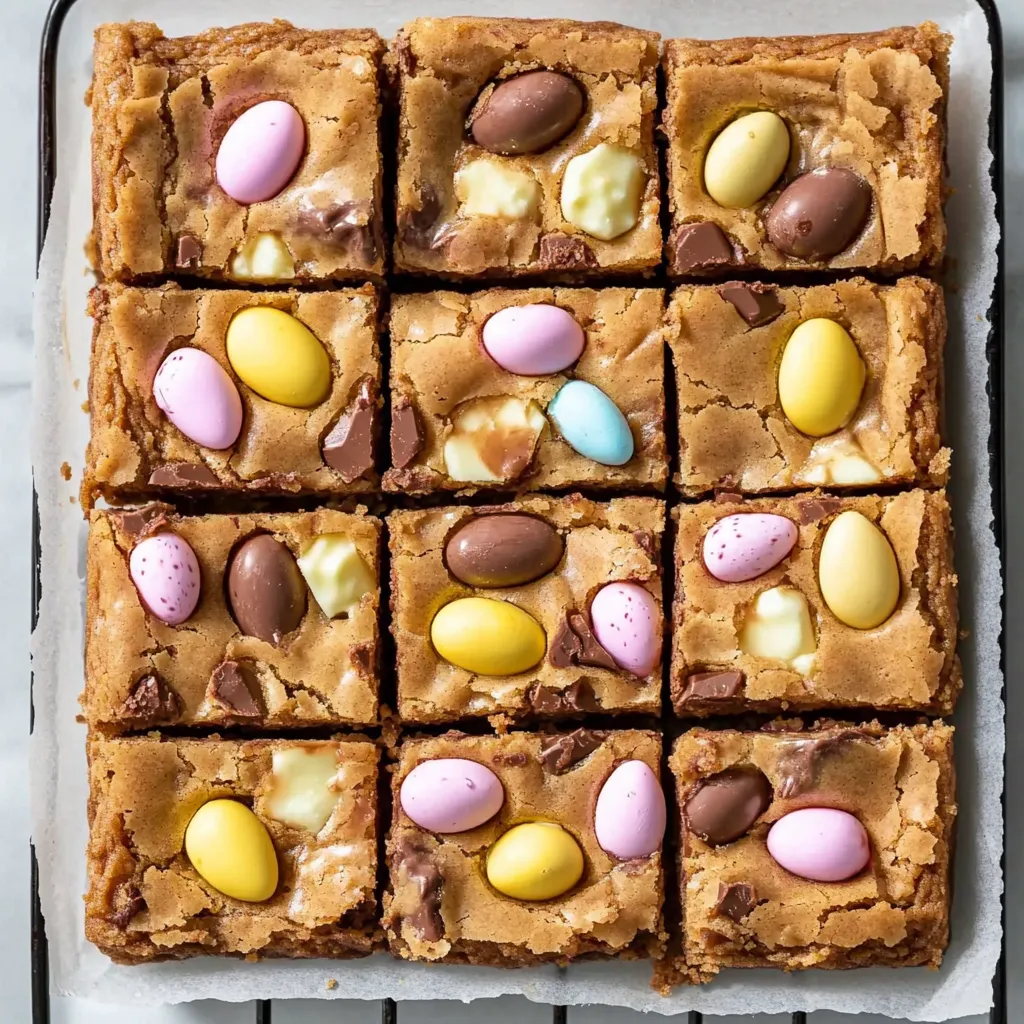
Mini egg blondies combine the buttery richness of a classic blondie with the festive charm of chocolate mini eggs for a treat that's irresistibly delicious. These delightful squares feature a perfect texture contrast – a soft, gooey center studded with chunks of creamy white chocolate, topped with colorful candy-coated chocolate eggs that add a satisfying crunch. Whether you're looking for an Easter dessert that will wow your guests or simply craving something sweet and indulgent, these blondies deliver big flavor with minimal effort.
I first made these blondies for my daughter's spring birthday party, and they were such a hit that they've become our official Easter tradition. There's something magical about cutting into that first warm square and watching the gooey center stretch slightly before yielding to your fork. My husband, who usually reaches for chocolate desserts, ended up eating three pieces in one sitting! When my neighbor's children came over later that day, their eyes lit up at the colorful mini eggs nestled on top, and they've been requesting "those rainbow candy squares" ever since.
Ingredients & Selection Tips
- Butter: Use unsalted butter to control the salt content. There's no need to bring it to room temperature as you'll be melting it. European-style butter with its higher fat content makes these blondies especially rich.
- Brown Sugar: Soft light brown sugar provides that signature caramel-like flavor and contributes to the chewy texture. Make sure it's fresh and soft without hard lumps for even distribution.
- Golden Caster Sugar: Adds sweetness while keeping the color light. Regular caster sugar works perfectly if you can't find the golden variety.
- Eggs: Large eggs provide structure and richness. Always bring refrigerated eggs to room temperature before using to ensure even incorporation.
- Vanilla Extract: Pure vanilla extract enhances all the other flavors. Never substitute with artificial vanilla essence, as the flavor difference is noticeable.
- Plain Flour: Standard all-purpose flour works perfectly. Measure accurately by spooning into your measuring cup and leveling off with a knife.
- White Chocolate: Choose a good quality white chocolate that contains real cocoa butter for the best melting properties and flavor. Chips hold their shape better while chopped bars create more melty pockets.
- Mini Eggs: Cadbury mini eggs are the classic choice with their crisp candy shell and milk chocolate center, but any similar chocolate Easter egg candy will work beautifully.
Step-by-Step Cooking Instructions
- Prepare Your Baking Tin:
- Start by preheating your oven to 350°F (175°C). Line an 8×8 inch square baking tin with parchment paper, leaving some overhang on the sides to easily lift out the finished blondies. The parchment prevents sticking and makes cleanup a breeze. Spray the parchment lightly with cooking spray or brush with a thin layer of butter for extra insurance against sticking.
- Create Your Butter-Sugar Base:
- In a medium saucepan, melt 1 cup (225g) of cubed unsalted butter over low heat. Once it's mostly melted, add 3/4 cup (150g) of light brown sugar and 1/2 cup (100g) of golden caster sugar. Stir constantly until the sugars have completely dissolved into the butter and the mixture becomes thick and glossy, about 2-3 minutes. This melting process creates the caramel notes that make blondies so irresistible. Remove from heat and allow to cool slightly for about 5 minutes – this cooling step is crucial to prevent the eggs from cooking when added.
- Add The Eggs and Vanilla:
- Once the butter-sugar mixture has cooled slightly but is still warm, add 2 large eggs one at a time, whisking vigorously after each addition until fully incorporated. The mixture should become smooth and shiny. Stir in 2 teaspoons of pure vanilla extract and 1/2 teaspoon of salt, mixing until combined. The vanilla enhances the butterscotch flavor while the salt balances the sweetness.
- Incorporate the Flour and Chocolate:
- Add 2 cups (250g) of plain flour to the wet ingredients, folding gently with a spatula until just combined. Be careful not to overmix – a few small streaks of flour are perfectly fine and will prevent tough blondies. Gently fold in 1 cup (175g) of chopped white chocolate or white chocolate chips, distributing them evenly throughout the batter. The batter will be thick and sticky – this is exactly what you want!
- Bake and Add Mini Eggs:
- Scrape the batter into your prepared tin, smoothing the top with a spatula. Bake in the preheated oven for exactly 20 minutes – at this point, the blondies will have started to set around the edges but still be very soft in the center. Remove from the oven and immediately press about 1 cup (200g) of mini eggs into the surface, gently pushing them down so they sink in slightly. Some may crack the surface – that's perfectly fine and adds to the rustic charm. Return to the oven and bake for another 10-15 minutes, until the edges are golden and the center still has a slight wobble when you gently shake the tin.
 Pin it
I've always been partial to the corner pieces of these blondies, where the edges get slightly crisp while the center remains deliciously soft. My husband surprised me once by assembling a tray of these with candles stuck in them instead of a birthday cake – he knows they're my favorite! There's something nostalgic about the combination of buttery blondie and candy-coated chocolate that takes me back to childhood Easter celebrations, though nowadays I appreciate the sophisticated flavor balance much more.
Achieving the Perfect Texture
The hallmark of an excellent blondie is its texture – they should be chewy around the edges and soft in the center, similar to a slightly underdone cookie. The key to achieving this perfect texture is timing. When you remove the blondies from the oven, they should still have a slight wobble in the center. They'll continue to set as they cool, resulting in that coveted gooey middle.
Another crucial factor is allowing them to cool completely before cutting. I know it's tempting to dig in while they're still warm, but patience pays off here. Let them cool in the tin for at least an hour, then use the parchment overhang to lift them out and cool completely on a wire rack before cutting. This cooling period allows the structure to set properly so they'll hold their shape when sliced.
Creative Variations
While these blondies are perfect as written, they're also a wonderful canvas for creativity. During summer, I often add fresh raspberries which create tart pockets that contrast beautifully with the sweet white chocolate. For autumn gatherings, I'll swap the mini eggs for caramel chunks and add a teaspoon of cinnamon to the batter.
One particularly successful variation involves adding 40g of malted milk powder (replacing an equal amount of flour), which enhances the buttery notes and adds a nostalgic flavor reminiscent of malted milkshakes. For a more sophisticated twist, try browning the butter before mixing it with the sugars – this extra step adds a nutty depth that transforms these blondies into something truly special.
Make-Ahead and Gifting
These blondies are perfect for advance preparation. The batter can be made up to a day ahead and refrigerated in the baking tin, ready to bake when needed. Just add a few extra minutes to the baking time if starting from cold. Baked blondies freeze beautifully for up to three months – perfect for unexpected guests or sweet-tooth emergencies.
They also make thoughtful homemade gifts. Cut into squares, stack them in a decorative tin lined with parchment paper, and tie with a ribbon for a personal touch. I've given these as teacher appreciation gifts and housewarming presents, always to rave reviews and requests for the recipe.
I've come to appreciate these blondies as the perfect balance of simplicity and impact. They require minimal effort yet always draw compliments when served. The contrast between the butterscotch-like base, creamy white chocolate, and the colorful candy coating of the mini eggs creates a multi-dimensional treat that satisfies on every level. While they may have begun as an Easter specialty in our home, they've earned their place in our year-round dessert rotation. There's something deeply satisfying about a recipe that requires so little fuss yet delivers such consistent joy – the very definition of baking magic, if you ask me.
Frequently Asked Questions
- → Can I make these blondies ahead of time?
- Yes! These blondies actually taste better the next day. Make them up to 3 days in advance and store in an airtight container.
- → How do I know when the blondies are done baking?
- Take them out when the edges are golden but the center still looks slightly underdone. They'll continue cooking as they cool and should be fudgy, not cakey.
- → Can I freeze mini egg blondies?
- Absolutely! Once cooled, wrap them well and freeze for up to 3 months. Thaw overnight in the fridge before serving.
- → Can I use regular chocolate chips instead of white chocolate?
- Yes, you can substitute milk or dark chocolate chips for the white chocolate if you prefer.
- → Why did my blondies turn out cakey instead of fudgy?
- Cakey blondies usually mean they were overbaked. Next time, reduce the baking time by 3-5 minutes for a gooier texture.
- → Can I use different Easter candies on top?
- Definitely! Try using chopped chocolate bunnies, regular M&Ms, or any other Easter candy you like.