
 Pin it
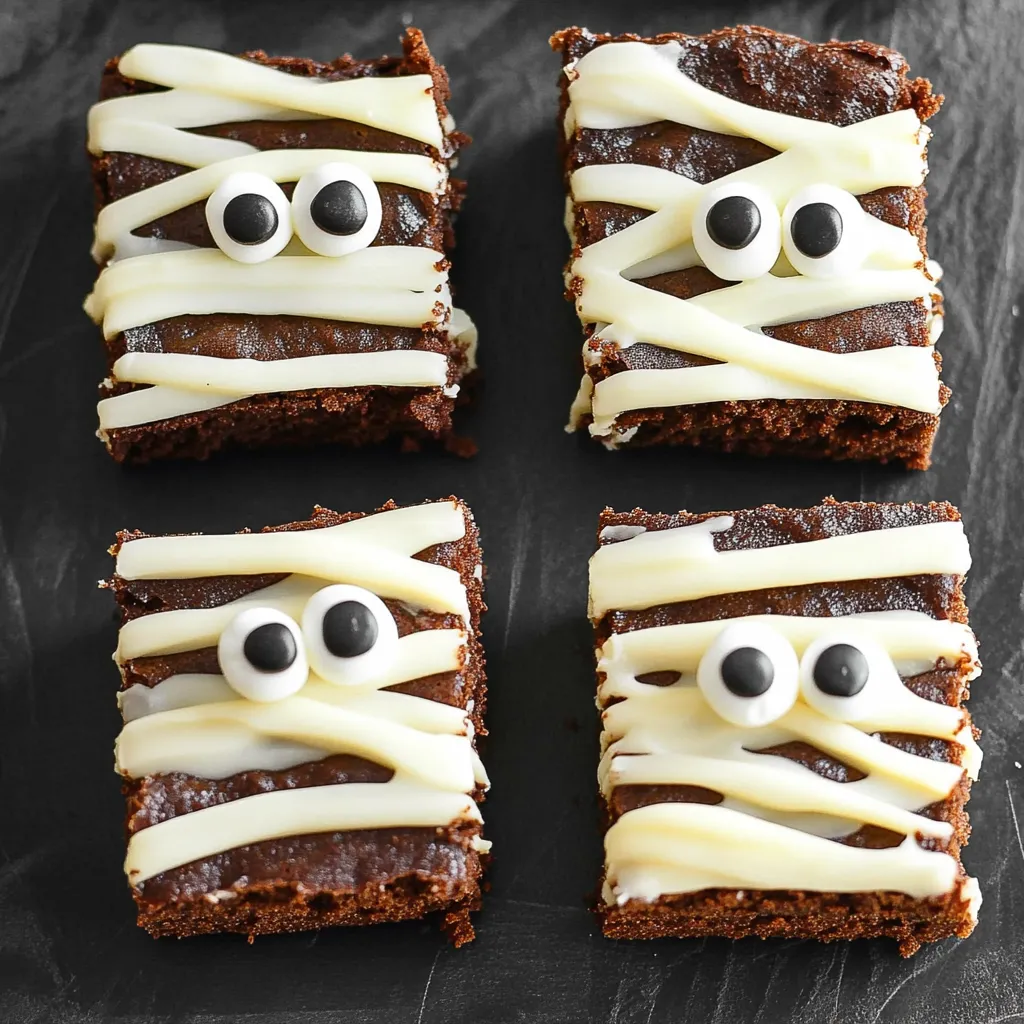
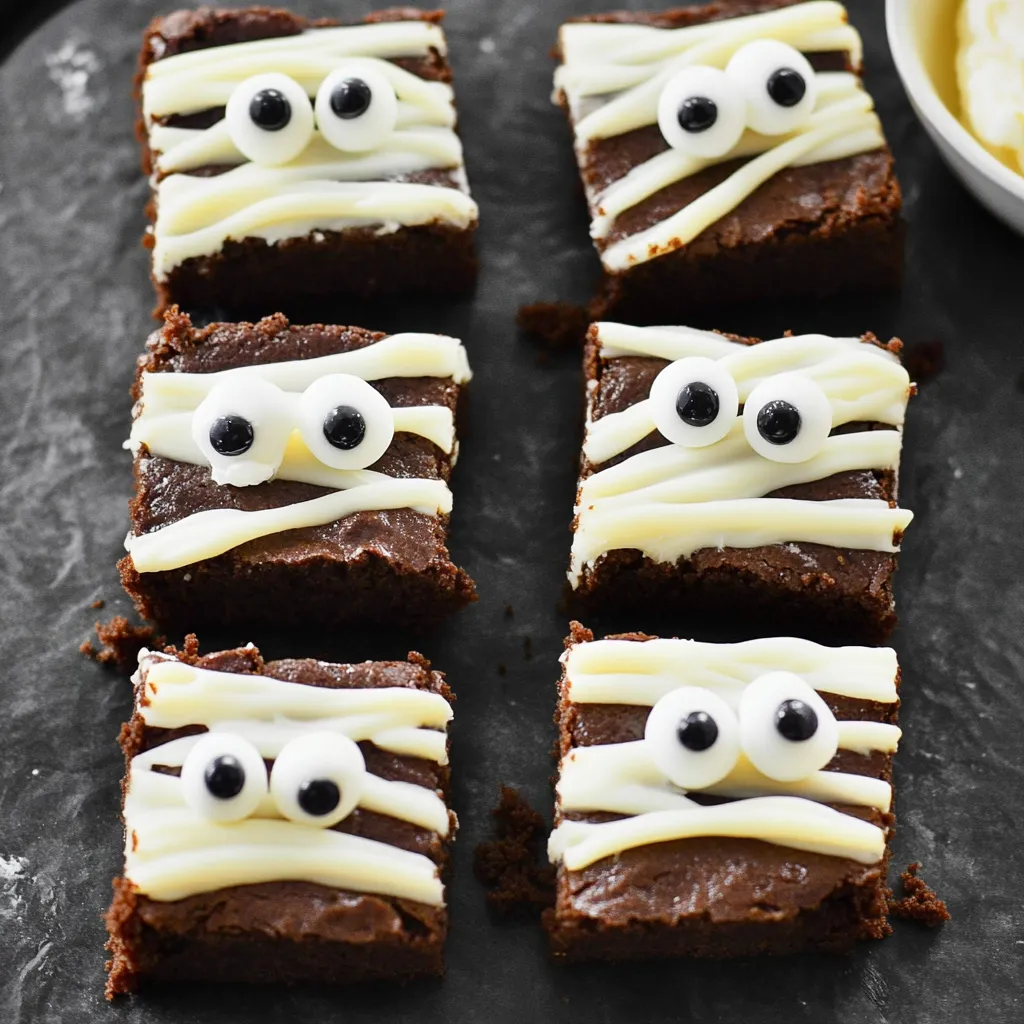
These mummy brownies transform ordinary fudgy brownies into the most adorable Halloween treat that manages to be both spooky and irresistibly cute at the same time. The magic happens when you pipe white cream cheese icing in zigzag patterns across dark chocolate brownies, creating those perfect mummy bandage wrappings that look authentically creepy yet completely approachable. What makes this recipe particularly brilliant is how it turns simple ingredients into something that looks incredibly impressive while remaining completely achievable for bakers of any skill level.
I discovered this recipe during my years as a room parent when I needed something that would engage a classroom full of excited elementary students while actually tasting delicious. The combination of hands-on decorating and chocolate brownies made it an instant hit that had kids asking if they could make more.
Essential Ingredients and Selection Tips
- Quality brownie base: Whether using homemade or boxed mix, choose rich, fudgy brownies rather than cake-like varieties for the best contrast with white icing
- Full-fat cream cheese: Philadelphia brand works best as it whips smoothly and holds its shape; reduced-fat versions can be too thin for proper piping
- Room temperature dairy: Both cream cheese and butter must be completely softened for smooth, lump-free icing that pipes easily
- Candy eyeballs: Found in most grocery store baking aisles; choose various sizes for different mummy personalities
Detailed Step-by-Step Instructions
- Create the perfect brownie foundation:
- Bake your brownies according to package or recipe directions, ensuring they're completely cool before decorating. The brownies should be fudgy rather than cake-like for the best visual contrast with the white icing. Allow at least 2 hours cooling time, or make them 1-2 days ahead for ultimate convenience.
- Master the cream cheese icing technique:
- Remove cream cheese and butter from refrigerator 30 minutes before mixing to ensure proper temperature. Using an electric mixer, whip the cream cheese alone for 30 seconds until smooth, then add softened butter and beat for 1 minute until creamy and well combined.
- Achieve perfect icing consistency:
- Gradually add powdered sugar and vanilla extract, beating for several minutes until the mixture is completely smooth with no lumps. The icing should be thick enough to hold its shape when piped but smooth enough to flow easily. Adjust with additional powdered sugar if too thin.
- Firm the icing for better piping:
- Refrigerate the finished icing for 30 minutes before using. This crucial step helps it hold its shape better during piping and prevents it from running or losing definition on the brownies.
- Prepare your piping system:
- Transfer about one-third cup of chilled icing to a piping bag or gallon-sized zip-top bag. If using a zip-top bag, twist the top tightly while pushing icing toward one corner, then snip a small diagonal cut about 1/8 inch wide for proper flow control.
- Execute the mummy bandage technique:
- Starting from the top left corner of each brownie, apply steady, gentle pressure while piping in continuous zigzag patterns across the surface. The lines should overlap slightly and vary in spacing to create authentic-looking bandage wrappings. End at the bottom right corner, or add crossing lines in an X pattern for fuller coverage.
- Bring mummies to life with personality:
- While the icing is still soft, gently press two candy eyeballs into the icing, positioning them to create different expressions and personalities. Some mummies can look surprised with wide-set eyes, while others appear sleepy with closer-together placement.
- Allow proper setting time:
- Let the decorated brownies sit at room temperature for 15-20 minutes to allow the icing to set before serving or storing. This prevents smudging and maintains the crisp bandage appearance.
 Pin it
My kids still request these brownies every October, and now they've become skilled enough to help their younger cousins create their own mummy masterpieces. There's something magical about watching children's creativity bloom as they decide where to place eyes and how to wrap their mummy's bandages.
Advanced Decorating Techniques
For even more dramatic mummies, consider varying the icing thickness by using different piping tip sizes or bag openings. Thicker lines create bold bandages, while thinner lines add delicate details. Some decorators like to leave small gaps in the bandages to reveal "dark spaces" that add to the spooky effect.
Creative Variations and Themes
While classic white bandages work perfectly, you can customize for different occasions. Pastel-colored icing creates Easter mummies, while green icing makes alien-themed treats. For advanced decorators, try adding small tears or "blood" spots using red gel food coloring for more dramatic Halloween appeal.
Storage and Make-Ahead Strategies
These brownies store beautifully when handled properly. Keep them in airtight containers with the layers separated by parchment paper to prevent icing transfer. The cream cheese icing actually improves in flavor after a day, making these perfect for advance party preparation. Refrigerate decorated brownies for up to a week.
Scaling for Large Groups
This recipe doubles and triples easily for classroom parties or large gatherings. When making multiple batches, prepare extra icing since enthusiastic decorators often use more than expected. Consider setting up decorating stations with pre-filled piping bags to streamline the process for large groups.
Troubleshooting Common Issues
If icing becomes too soft during decorating, return it to the refrigerator for 10-15 minutes to firm up. Lumpy icing usually indicates ingredients weren't at proper temperature - strain it through a fine mesh to remove lumps. If piping bags break, double-bag or use a sturdier piping bag for better control.
These mummy brownies represent the perfect Halloween treat because they combine the comfort of rich chocolate brownies with the excitement of creative decorating. They're proof that the most memorable treats don't require advanced baking skills - just creativity, enthusiasm, and quality ingredients. Whether you're entertaining kids or adults who are young at heart, these mummies deliver both visual impact and delicious satisfaction.
Frequently Asked Questions
- → Can I make these brownies ahead of time?
- Yes, you can bake the brownies 1-2 days ahead. Just store them covered and add the frosting when ready to serve.
- → What if I don't have candy eyeballs?
- You can make eyes with mini chocolate chips or small pieces of white chocolate with dark chocolate dots.
- → How do I store leftover mummy brownies?
- Keep them covered in the fridge for up to 3 days. The cream cheese frosting needs to stay cold.
- → Can I use homemade brownies instead of a mix?
- Absolutely! Any brownie recipe works. Just make sure they're completely cool before adding the frosting.
- → Why should I chill the frosting before piping?
- Chilling helps the frosting hold its shape better and makes it easier to pipe clean lines on the brownies.