
 Pin it
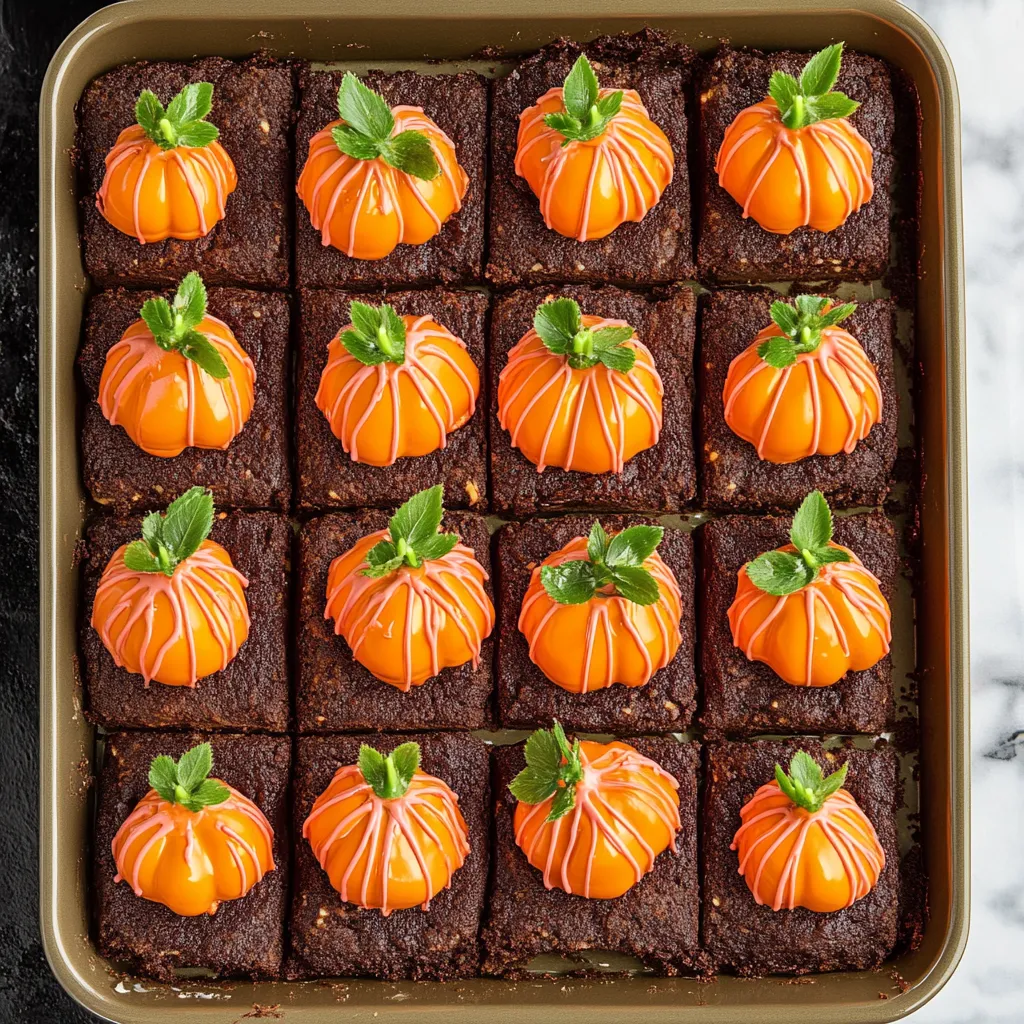
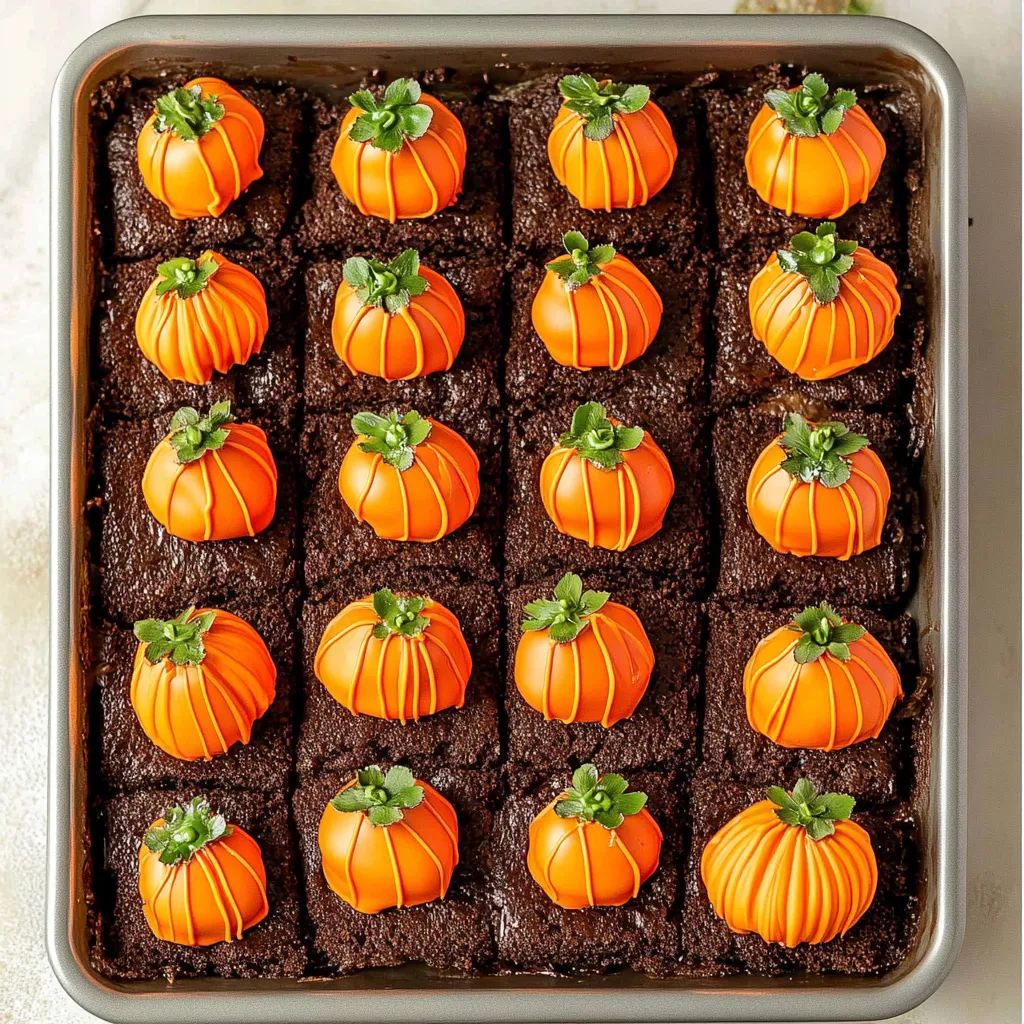
These absolutely adorable pumpkin patch brownies transform ordinary box mix brownies into the most charming fall dessert that looks like a miniature pumpkin patch right on your plate. Rich, fudgy brownies get topped with silky Nutella frosting, chocolate cookie crumbs for "dirt," and the cutest little strawberry pumpkins that are almost too adorable to eat. The best part is how this impressive-looking dessert uses simple shortcuts and techniques that make it completely achievable for bakers of any skill level while creating something that will have everyone reaching for their cameras before diving in.
I created this recipe when I needed something festive for my daughter's school Halloween party but didn't have time for complicated from-scratch baking. The idea of turning strawberries into tiny pumpkins was so charming that even the adults at the party were amazed by how adorable they looked. Now this has become our signature fall dessert because it combines the satisfaction of creating something beautiful with the practicality of using shortcuts that actually work. Every time I make these brownies, people assume they took hours to create, but the secret is that most of the "wow factor" comes from simple decorating techniques that anyone can learn.
Ingredients
- Fudgy brownie mix (18 oz box): Choose a quality brand like Duncan Hines, Betty Crocker, or Ghirardelli for the best texture and flavor
- Ingredients called for on brownie box: Typically eggs, oil, and water, following package directions exactly
- Nutella (1/2 cup): Slightly warmed for easier mixing, but not hot enough to melt the butter
- Unsalted butter (1/2 cup, softened): Should be at room temperature for smooth, creamy frosting
- Powdered sugar (2 cups, sifted): Sifting prevents lumps and creates silky smooth texture
- Vanilla extract (1 teaspoon): Use pure vanilla for the best flavor enhancement
- Salt (pinch): Balances sweetness and enhances chocolate flavors
- Heavy whipping cream (2-3 tablespoons): Adjust amount for desired consistency
- Fresh strawberries (12-15 medium): Choose firm, well-shaped berries with fresh green tops attached
- Orange candy melts (1 cup): Wilton brand melts smoothly and sets with perfect finish
- Green candy melts or chocolate (optional): For creating pumpkin stems if desired
- Oreo cookies (15-20 cookies): Original flavor creates the perfect dark "soil" color
- Fresh mint leaves (optional): Can represent little plants growing in the pumpkin patch
Instructions
- Prepare and bake the brownie foundation.
- Preheat oven to 350°F and grease a 9x13 inch baking pan. Prepare brownie mix according to package directions and bake as instructed. Cool completely on wire rack before proceeding - this is crucial for successful frosting.
- Prepare strawberries for dipping.
- Wash strawberries thoroughly and pat completely dry with paper towels. Any moisture will prevent proper chocolate adhesion. Line a baking sheet with parchment paper for easy cleanup.
- Melt orange candy melts properly.
- Place candy melts in microwave-safe bowl and heat at 50% power for 1 minute. Stir, then continue heating in 30-second intervals, stirring between each, until completely smooth. Don't overheat or candy will become thick and difficult to work with.
- Create adorable strawberry pumpkins.
- Holding each strawberry by its green top, dip carefully into melted candy, allowing excess to drip off. Place on prepared parchment paper. Work quickly as candy melts set fast.
- Add pumpkin details while candy is soft.
- Using remaining melted candy in a piping bag or squeeze bottle fitted with small tip, pipe vertical lines down each strawberry to create pumpkin ridges. Work quickly before candy hardens completely.
- Prepare the luscious Nutella frosting.
- Warm Nutella in microwave for 15 seconds to soften slightly. In mixing bowl, cream softened butter with warmed Nutella until smooth and fluffy, about 2-3 minutes.
- Finish the frosting to perfect consistency.
- Gradually add sifted powdered sugar, beating until combined. Add vanilla, salt, and cream, mixing until frosting is smooth and spreadable. Adjust cream as needed for desired consistency.
- Create chocolate cookie "dirt."
- Process Oreo cookies in food processor until they form fine, even crumbs resembling soil. Alternatively, crush in sealed plastic bag with rolling pin until desired texture is achieved.
- Assemble the charming pumpkin patch.
- Spread Nutella frosting evenly over cooled brownies using offset spatula. Sprinkle chocolate cookie crumbs over entire surface to create "dirt" effect.
- Add final decorative touches.
- Arrange strawberry pumpkins on top of "dirt," spacing them naturally like a real pumpkin patch. Add mint leaves as little plants if desired. Serve immediately or store covered until ready to present.
 Pin it
Creating Perfect Strawberry Pumpkins
The key to adorable strawberry pumpkins lies in proper preparation and technique. Choose strawberries that are similar in size and have attractive shapes - avoid overly large or irregularly shaped berries that won't look as much like pumpkins. The berries must be completely dry before dipping, as any moisture will cause the candy coating to seize up or not adhere properly.
When piping the pumpkin lines, work quickly but deliberately. The candy melts set fast, so have your piping bag ready before you start dipping. If the melted candy becomes too thick while working, briefly reheat it at 50% power for 10-15 seconds and stir until smooth again.
Mastering Nutella Frosting
The secret to perfect Nutella frosting is achieving the right temperature balance. Slightly warming the Nutella makes it easier to cream with butter, but if it's too warm, it will melt the butter and create a greasy mess. The Nutella should be just soft enough to mix easily - warm to the touch but not hot.
Sifting the powdered sugar is crucial for achieving that silky smooth texture that makes this frosting so luxurious. Unsifted powdered sugar often contains lumps that won't break down during mixing, creating grainy frosting that doesn't look or taste professional.
Timing and Assembly Strategy
Success with this recipe depends on proper timing and organization. Make the brownies first and let them cool completely - this can even be done a day ahead. The strawberry pumpkins can also be made several hours in advance and stored at room temperature (avoid refrigerating, which causes condensation and makes them "sweat").
Make the frosting just before assembly, as it's best when fresh and hasn't had time to set up. Assemble the entire dessert as close to serving time as possible for the best appearance and texture, though it can sit at room temperature for several hours if needed.
Storage and Make-Ahead Tips
These brownies are best enjoyed within 24 hours of assembly for optimal texture and appearance. Store at room temperature covered with plastic wrap or in an airtight container. The strawberry pumpkins are the most delicate component and should be stored separately if making ahead.
The brownies themselves can be made up to two days ahead and stored covered, while the Nutella frosting can be made a day ahead and stored in the refrigerator (bring to room temperature and re-whip before using). This advance preparation makes entertaining much more manageable.
Creative Variations and Seasonal Adaptations
While this pumpkin patch theme is perfect for fall, the basic technique adapts beautifully to other seasons and occasions. Use different colored candy melts to create strawberry flowers for spring, berries for summer, or even little ghosts for Halloween by using white candy melts and chocolate chip faces.
The brownie base and frosting combination works with many different toppings. Try crushed graham crackers instead of Oreos for a different "dirt" effect, or use different cookie flavors to match your theme. The key is maintaining the contrast between the dark base and colorful decorative elements.
Presentation and Serving Ideas
These brownies are naturally stunning when presented, but a few simple touches can make them even more special. Serve on a large platter or cake stand where guests can appreciate the full pumpkin patch effect. Individual squares can be cut and plated for more formal presentations.
For parties, consider making these as the centerpiece dessert and providing small plates so guests can admire the design before serving. The visual impact is so strong that people often want to take photos before eating, which makes these perfect for social media-worthy gatherings.
Working with Kids and Family Projects
This recipe is absolutely perfect for involving children in the kitchen because most of the techniques are simple and safe while still creating impressive results. Kids love dipping the strawberries and piping the pumpkin lines, while the assembly process gives them a sense of artistic accomplishment.
Set up individual workstations with small bowls of melted candy and let each child create their own strawberry pumpkins. The imperfect, handmade look actually adds to the charm, and children feel so proud when they see their creations as part of the finished dessert.
I love how this recipe proves that impressive-looking desserts don't have to be complicated or time-consuming to create. Every time I make these pumpkin patch brownies, I'm reminded that some of the most memorable treats are the ones that bring families together in the kitchen, creating something beautiful while making lasting memories. The joy on children's faces when they see their strawberry pumpkins transformed into a magical pumpkin patch is worth every minute spent in preparation.
This pumpkin patch brownie recipe embodies everything I love about seasonal baking - taking simple ingredients and techniques to create something that brings pure joy and wonder to everyone who sees it. Every time I serve these brownies, whether at a family gathering or school party, I'm reminded that some of the most precious moments in the kitchen happen when we're creating something beautiful together, making memories that last long after the last delicious bite is gone.
Frequently Asked Questions
- → Can I make these brownies ahead of time?
- Yes! Bake the brownies and make the frosting up to 2 days ahead. Add strawberry pumpkins just before serving for best results.
- → How do I store leftover pumpkin patch brownies?
- Keep brownies covered at room temperature for 3 days. Store strawberry pumpkins separately in the fridge with paper towels.
- → What can I use instead of strawberries?
- Raspberries work great for smaller pumpkins! You can also use cherry tomatoes or small orange candies as alternatives.
- → Do I have to use Nutella for the frosting?
- No, you can substitute any chocolate hazelnut spread or even peanut butter for a different flavor profile.
- → Why shouldn't I refrigerate the chocolate strawberries?
- Cold temperatures cause condensation which makes the chocolate coating sweat and look less appealing. Room temperature is best.
- → Can I use homemade brownies instead of a mix?
- Absolutely! Any fudgy brownie recipe will work perfectly as the base for these decorated treats.