
 Pin it
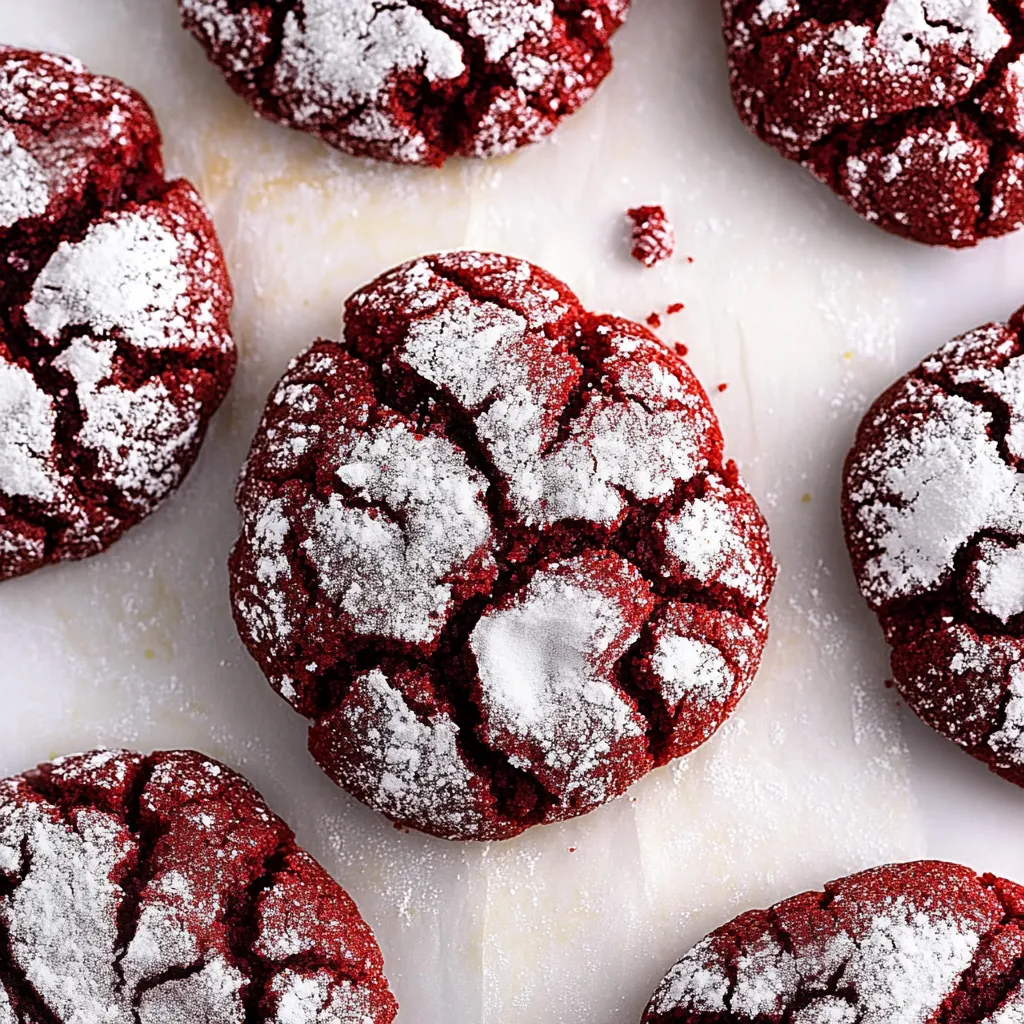
Red velvet crinkle cookies stuffed with cream cheese filling sound complicated and fussy - the kind of thing you'd see in a bakery case and assume requires professional skills - but they're actually remarkably straightforward once you understand that the key is freezing the filling into solid dollops before assembly. The red velvet cookie dough itself is soft and batter-like, more similar to cake batter than typical cookie dough, which creates those gorgeously soft and chewy cookies that stay tender for days. The cream cheese filling gets mixed with sour cream and sugar until smooth, then frozen into balls that you can easily enclose in cookie dough without everything turning into a sticky mess. Rolling the assembled cookies in powdered sugar before baking creates that signature crinkle pattern where the dark red dough cracks through the white sugar coating. What makes these particularly impressive for the effort required is how they combine two beloved flavors - red velvet cake and cheesecake - into one handheld cookie that looks bakery-professional and tastes genuinely exceptional.
I avoided making stuffed cookies for years because I assumed they'd be messy disasters where filling would leak out during baking and create a mess. The first time I tried making these after seeing the freeze-the-filling technique, I was shocked by how simple it actually was. The frozen filling stays solid long enough to get enclosed in dough and rolled in sugar, then melts into creamy pockets during baking without leaking everywhere. Now these are my go-to impressive holiday cookie because people think they're complicated but they're genuinely easy once you understand the process.
Ingredients and What Makes Them Essential
For the Cream Cheese Filling:
- Cream Cheese (8 ounces, full-fat, softened): Full-fat cream cheese is essential for rich, tangy flavor. Don't substitute low-fat or Neufchâtel which have too much moisture. The cream cheese should be softened to room temperature for smooth mixing. If it's cold, microwave for 10 to 15 seconds.
- Granulated Sugar (¼ cup): Sugar sweetens the filling and helps create that cheesecake-like flavor. The sugar dissolves into the softened cream cheese.
- Sour Cream (2 tablespoons): Sour cream adds extra tang and creates a more authentic cheesecake flavor than cream cheese alone would provide. Don't skip this.
- Pure Vanilla Extract (½ teaspoon): Vanilla enhances the cheesecake flavor. Use pure extract, not imitation.
For the Cookie Dough:
- All-Purpose Flour (1½ cups): Flour provides structure. Measure by spooning into your cup and leveling off for accuracy.
- Unsweetened Cocoa Powder (¼ cup): Cocoa provides the chocolate flavor that makes red velvet distinctly chocolate rather than just red cake. Use natural cocoa powder, not Dutch-processed.
- Baking Powder (½ teaspoon): Provides leavening for slight rise.
- Baking Soda (¼ teaspoon): Additional leavening that also helps with color retention.
- Salt (¼ teaspoon): Enhances all the flavors and balances sweetness.
- Unsalted Butter (6 tablespoons, ¾ stick, melted): Butter adds richness and helps create tender texture. Melted butter incorporates easily into this batter-like dough.
- Granulated Sugar (1 cup): Sugar sweetens and helps create tender, chewy texture.
- Buttermilk (½ cup): Buttermilk adds tang and moisture while creating tender crumb. If you don't have buttermilk, make it by adding 1½ teaspoons of lemon juice to regular milk and letting it sit 5 minutes.
- Red Food Coloring (1-2 tablespoons, liquid or gel): Food coloring creates that signature red velvet color. This is technically optional but highly recommended for visual impact. Gel paste creates more vibrant color with less liquid.
- Large Eggs (2): Eggs bind everything together and add richness.
- Powdered Sugar (about 1 cup, for coating hands and rolling cookies): Powdered sugar keeps the sticky dough manageable during assembly and creates the crinkle pattern when rolled before baking.
Step-by-Step Instructions
- Make the Cream Cheese Filling:
- In a medium bowl using a hand mixer or in a stand mixer with the paddle attachment, beat together 8 ounces of softened cream cheese, ¼ cup of granulated sugar, 2 tablespoons of sour cream, and ½ teaspoon of vanilla extract. Beat on medium speed for about 1 to 2 minutes until completely smooth with no lumps. Line a baking sheet with parchment paper. Using a small cookie scoop or tablespoon, drop dollops of the cream cheese mixture onto the prepared baking sheet - you want 12 equal portions, each about 1½ tablespoons. Try to make them relatively round and uniform in size. Place the baking sheet in the freezer and freeze for at least 2 hours, though overnight is fine, until the cream cheese balls are completely solid and hard. These frozen balls are what makes assembly possible.
- Make the Cookie Dough:
- In a medium bowl, sift together 1½ cups of flour, ¼ cup of cocoa powder, ½ teaspoon of baking powder, ¼ teaspoon of baking soda, and ¼ teaspoon of salt. Sifting removes lumps and aerates the dry ingredients. In a large bowl, whisk together 6 tablespoons of melted butter, 1 cup of granulated sugar, ½ cup of buttermilk, 1 to 2 tablespoons of red food coloring (start with 1 tablespoon and add more for deeper color), and 2 eggs. Whisk vigorously until smooth and well combined. The mixture should look bright red. Add the sifted dry ingredients to the wet ingredients and use a spatula to fold them together gently just until combined with no streaks of flour remaining. Don't overmix. The dough will be very soft and batter-like - more like thick cake batter than cookie dough. This is correct. Cover the bowl with plastic wrap and refrigerate for at least 1 hour until the dough firms up slightly. It will still be quite soft even after chilling.
- Prepare Your Work Station:
- Once the dough has chilled and the cream cheese balls are frozen solid, set up your assembly area. Place about ½ cup of powdered sugar in a shallow bowl for coating your hands. Line two large baking sheets with parchment paper. Have your bowl of chilled dough and the frozen cream cheese balls ready. Generously coat your hands with powdered sugar - this is essential because the dough is sticky.
- Assemble the Cookies:
- Scoop a generous tablespoon of cookie dough (about 1½ tablespoons) using a cookie scoop or spoon. Place it in your powdered sugar-coated palm. Place one frozen cream cheese ball in the center of the dough. Scoop another generous tablespoon of dough and place it on top of the cream cheese ball. Now gently press and squeeze the dough around the cream cheese filling, working it with your fingers to completely enclose the filling. Roll the whole thing into a smooth ball between your palms, making sure there are no cracks or openings where filling can leak out. The dough will be soft and sticky - coat your hands with more powdered sugar as needed. Place the assembled ball on a prepared baking sheet. Repeat with remaining dough and cream cheese balls, spacing the cookies at least 2 inches apart because they will spread during baking. You should get 12 large cookies total.
- Roll in Sugar and Bake:
- Preheat your oven to 350°F. Put about ½ cup of fresh powdered sugar in a clean shallow bowl. Roll each assembled cookie ball generously in the powdered sugar, coating it completely and heavily. The thick coating is what creates the dramatic crinkle effect. Return the sugar-coated balls to the baking sheet. Bake for 12 to 15 minutes until the cookies have spread, the edges are set, and dramatic cracks have formed through the powdered sugar coating revealing the red dough underneath. The centers should look slightly underdone when you remove them - they'll continue setting as they cool. Don't overbake or they'll be dry instead of soft and chewy.
- Cool:
- Let the cookies cool on the baking sheets for 10 minutes. They'll be very soft and fragile when hot but will firm up as they cool. After 10 minutes, use a spatula to transfer them to a wire cooling rack to cool completely. The cream cheese filling will be molten when hot and will set into creamy pockets as the cookies cool.
 Pin it
My coworker who bakes constantly and always brings elaborate desserts to office parties was convinced these had to be difficult when she saw them, insisting there was no way I'd made them myself. When I explained the freeze-the-filling technique and walked her through the simple assembly, she looked genuinely annoyed that something so impressive was actually easy. She made them the following weekend and grudgingly admitted they were "surprisingly achievable" while also being better than her usual Christmas cookies. Getting the advanced baker to feel slightly outdone by simple technique feels like validation.
Understanding Red Velvet Flavor and History
Red velvet isn't just chocolate cake with red food coloring, though that's a common misconception. Traditional red velvet has a subtle chocolate flavor from a small amount of cocoa powder, along with characteristic tang from buttermilk and vinegar. The original red color came from a chemical reaction between acidic ingredients and natural cocoa powder, which contains anthocyanins that turn reddish when exposed to acid. This created a subtle reddish-brown color. When Dutch-processed cocoa became common and lost this reactive quality, bakers started adding red food coloring to maintain the expected appearance. The flavor profile is distinctly different from chocolate cake - it's milder, tangier, and more complex. For cookies, the cocoa provides subtle chocolate notes while buttermilk creates the characteristic tang. The red color has become iconic and expected, though the dye is technically optional.
Why This Cookie Dough Is Batter-Like
The soft, almost pourable consistency of this cookie dough might seem wrong if you're used to traditional cookie dough that you can handle and shape. However, this batter-like texture is intentional and creates the soft, tender, almost cake-like interior texture that makes red velvet cookies special. Traditional cookie dough has a higher flour-to-liquid ratio, creating firm dough you can roll and cut. This recipe has more liquid (buttermilk, eggs, melted butter) relative to flour, similar to cake batter. The result after baking is cookies with tender, soft texture rather than crisp or chewy. The dough firms up slightly during refrigeration but never becomes as solid as typical cookie dough. This is why the powdered sugar coating on your hands is essential - it creates a barrier that lets you handle the sticky dough long enough to assemble the cookies. Don't add extra flour thinking the dough is wrong - that would make the cookies dry and cakey.
The Science of Freezing the Filling
Freezing the cream cheese filling before assembly isn't just convenient - it's what makes stuffed cookies possible without professional pastry skills. At room temperature or even refrigerator temperature, cream cheese filling is too soft to enclose in dough without creating a mess. It would smush out when you tried to seal the dough around it, and might leak during baking. Frozen solid, the filling balls act like firm objects you can easily wrap dough around. They stay solid long enough to get enclosed, shaped, and coated in sugar. During baking, they gradually thaw and heat up, but by that time the cookie dough exterior has set enough to contain them. The result is pockets of creamy filling that stay enclosed rather than leaking everywhere. This technique works for any stuffed cookie - freeze the filling solid before assembly. Some bakers even use this method for cookie dough itself, freezing balls of dough to make shaping easier.
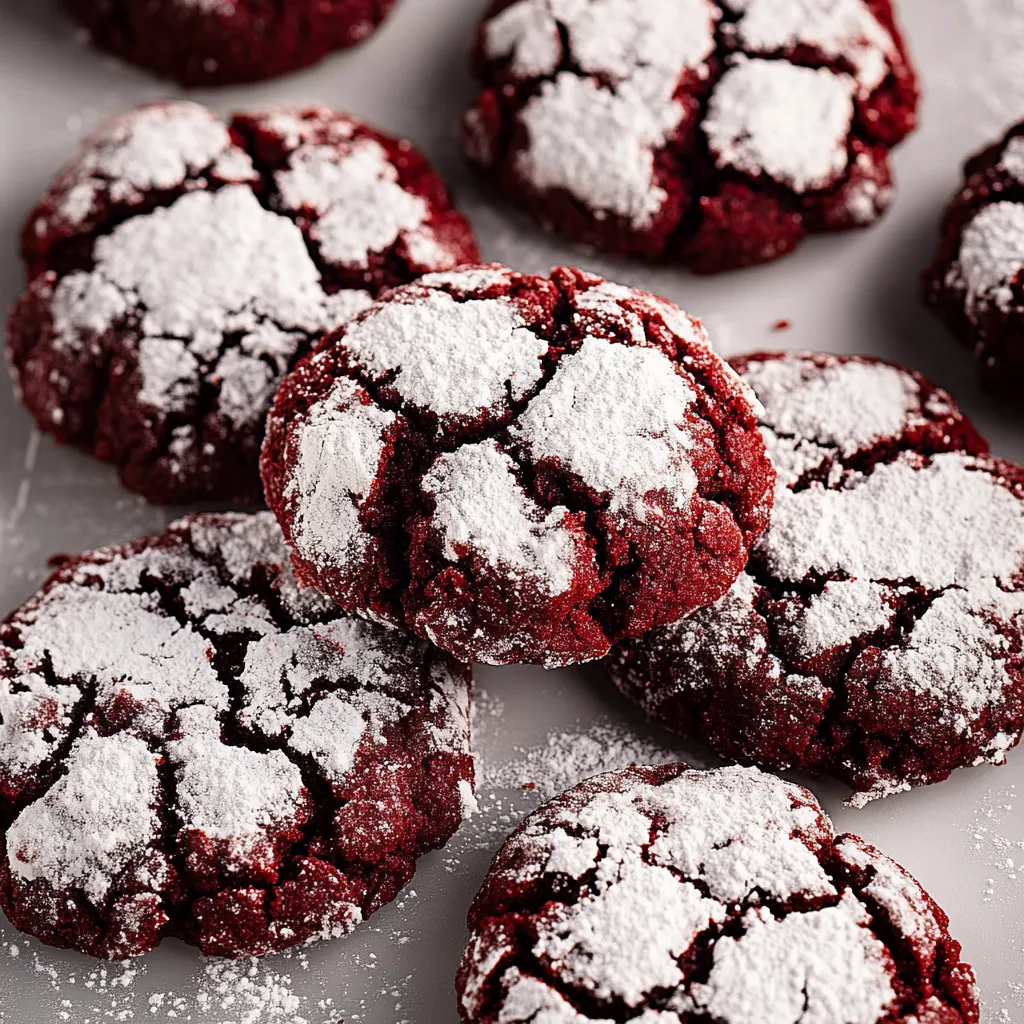
Creating the Crinkle Effect
The dramatic crinkle pattern where dark red dough cracks through white powdered sugar coating requires specific technique. First, the cookies must be heavily coated in powdered sugar - a light dusting won't create visible cracks. Roll each ball generously until completely white. Second, the cookies need to spread and crack during baking, which happens through the combination of soft dough and oven heat. As cookies bake, they spread outward while the surface sets. This spreading creates tension that causes the powdered sugar coating to crack dramatically, revealing the red dough underneath. The cracks form in irregular patterns, creating that distinctive crinkle look. If cookies don't crinkle properly, possible causes include: not enough powdered sugar coating, dough that's too stiff (from too much flour or over-refrigeration), or insufficient spreading during baking. The soft, batter-like dough is actually essential for proper crackling.
Storage, Freezing, and Make-Ahead
These cookies store well and actually improve slightly after a day as flavors meld. Store cooled cookies in an airtight container at room temperature for up to 3 days or refrigerated for up to 1 week. The soft texture is maintained remarkably well. For freezing, freeze baked cookies in a single layer on a baking sheet until solid, then transfer to a freezer bag for up to 3 months. Thaw at room temperature for about 30 minutes before serving. For make-ahead convenience, you can prepare the cream cheese filling up to 1 week ahead and keep it frozen until ready to use. The cookie dough can be made a day ahead and refrigerated. For maximum convenience, assemble the cookies completely, freeze them unbaked on a baking sheet until solid, then transfer to a freezer bag. Bake from frozen, adding 2 to 3 minutes to the baking time. This is perfect for baking fresh cookies as needed throughout the holidays.
Variations and Customization Ideas
While the classic red velvet with cream cheese is perfect, you can create variations. For chocolate crinkle cookies, omit the red food coloring and increase cocoa powder to ½ cup for deeper chocolate flavor. For peppermint version, add ½ teaspoon of peppermint extract to both the filling and the dough, and mix crushed candy canes into the powdered sugar coating. For espresso cookies, add 1 tablespoon of instant espresso powder to the dough. For different fillings, try Nutella, peanut butter mixed with powdered sugar, or white chocolate ganache - all should be frozen solid before assembly. For smaller cookies, divide dough and filling into 24 portions instead of 12. For different colors, use different food coloring - green for Christmas, pink for Valentine's Day, or omit for classic chocolate crinkle. Each variation maintains the soft texture and dramatic crinkle pattern.
Troubleshooting Common Problems
When these cookies don't turn out right, there's usually a fixable cause. If filling leaks out during baking, it wasn't frozen solid enough or you didn't seal the dough completely around it - freeze thoroughly and seal carefully with no cracks. If cookies don't crinkle, you didn't use enough powdered sugar or the dough was too stiff - coat heavily and don't add extra flour. If they're dry and cakey, you overbaked them or added too much flour - remove when slightly underdone and measure flour accurately. If they spread too much and are flat, your oven temperature is too low - verify with an oven thermometer. If the dough is impossible to handle even with powdered sugar, it wasn't chilled long enough - refrigerate until slightly firmer. If cookies are too soft and fall apart, you underbaked them - bake until edges are set. Most issues relate to filling temperature, dough consistency, or baking time.
 Pin it
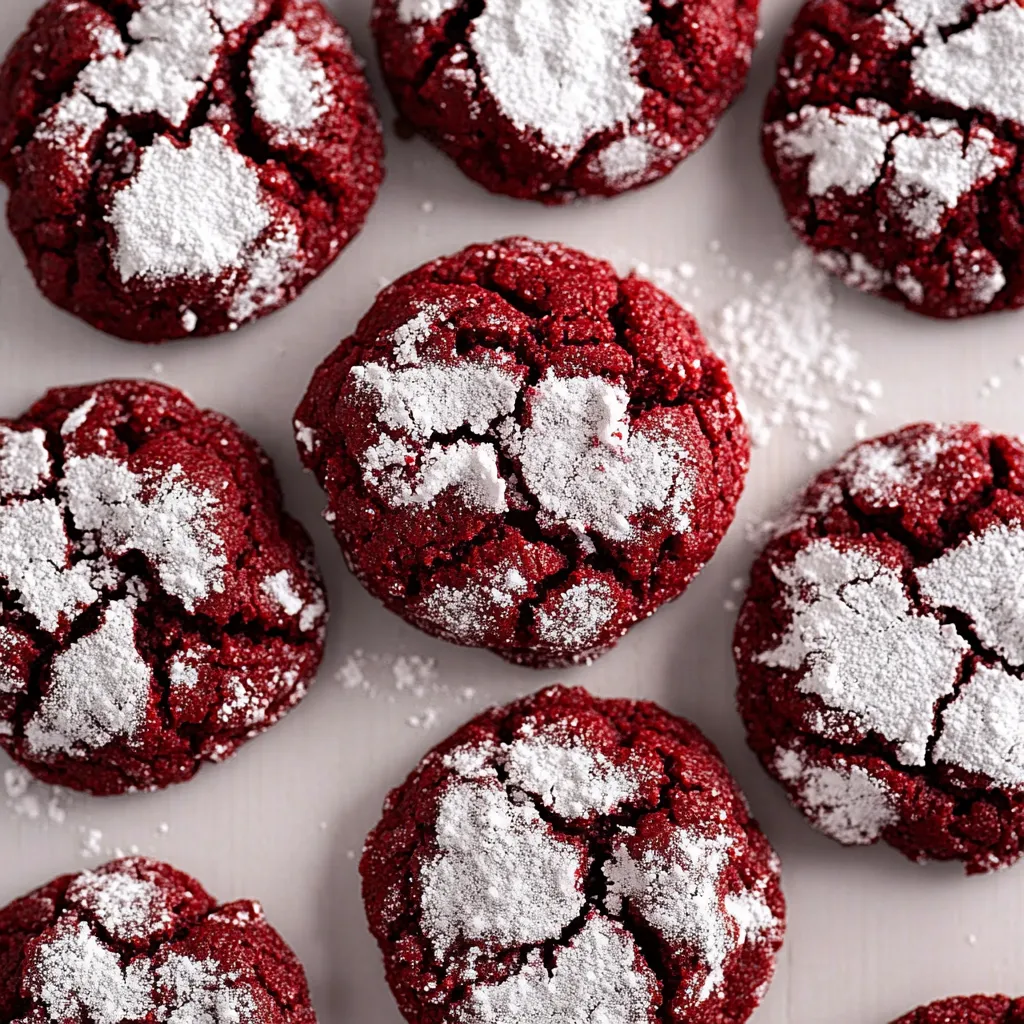
After making these red velvet crinkle cookies countless times for various holidays and events over the past few years, they've become my signature impressive cookie because people consistently assume they're complicated when they're actually quite straightforward once you understand the freeze-the-filling technique. I appreciate how they combine two beloved flavors into one handheld treat that looks bakery-professional without requiring professional skills. The soft, chewy texture with creamy pockets of tangy filling creates satisfaction that regular cookies can't match. Knowing the simple trick of freezing the filling solid makes stuffed cookies accessible rather than intimidating, which opens up endless possibilities for other filled cookie variations. These represent exactly what holiday baking should be - impressive enough to feel special, genuinely delicious rather than just pretty, and achievable enough that you'll actually make them instead of just admiring pictures and feeling inadequate.
Frequently Asked Questions
- → Can I make these cookies without food coloring?
- Yes, you can skip the red food coloring. The cookies will taste the same but look more like chocolate crinkle cookies instead of red velvet.
- → Do I really need to freeze the filling first?
- Yes, freezing the cream cheese filling keeps it from melting out during baking. It stays creamy and centered in each cookie.
- → What if I don't have buttermilk?
- Mix regular milk with a splash of vinegar or lemon juice and let it sit for 5 minutes. This makes a great buttermilk substitute.
- → How should I store these cookies?
- Keep them in an airtight container in the fridge for up to 4 days. The cream cheese filling needs to stay cold.
- → Why is my dough too sticky to work with?
- Make sure you chill the dough for the full 30 minutes. Also, coat your hands heavily with powdered sugar before shaping each cookie.
- → Can I freeze the unbaked cookies?
- Yes, shape the stuffed cookies and freeze them on a tray. Once solid, store in a freezer bag. Bake from frozen, adding 2-3 extra minutes.