
 Pin it
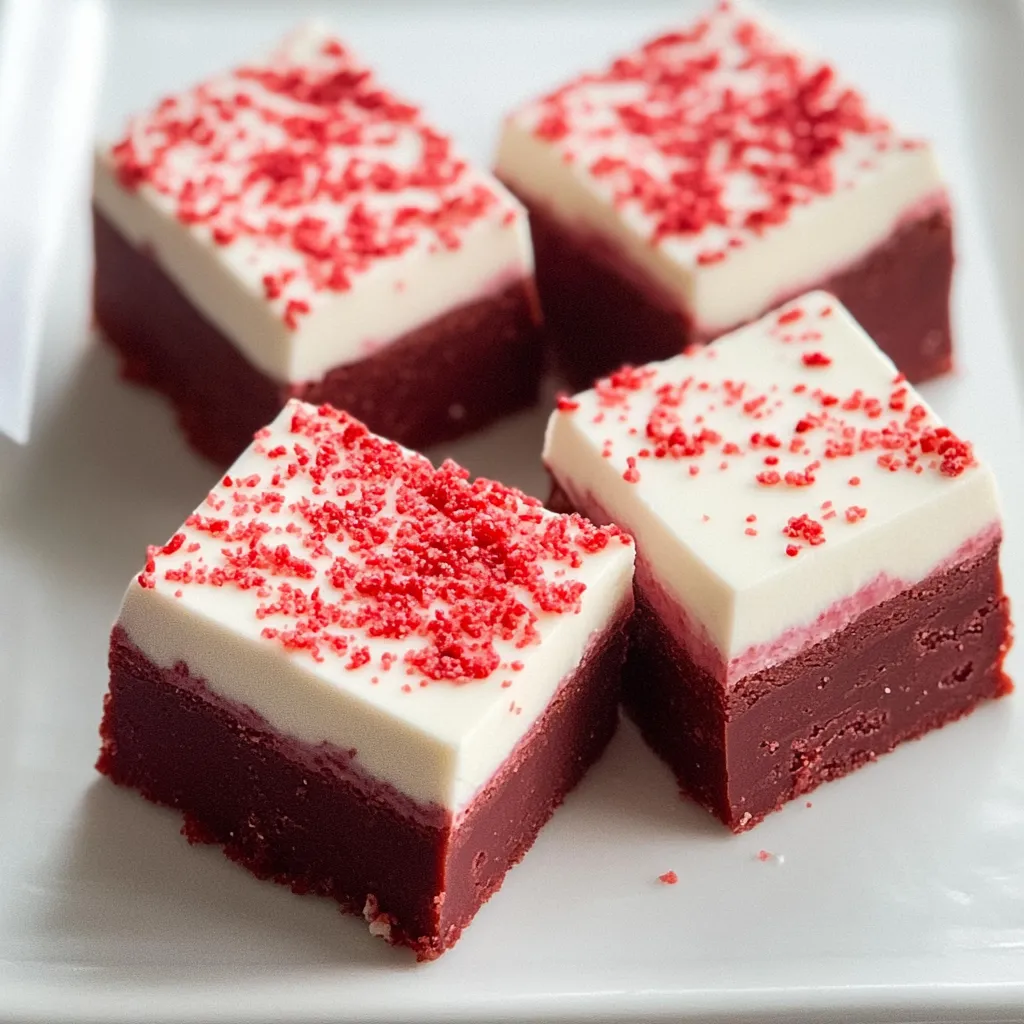
This red velvet fudge has become my secret weapon for Valentine's Day and Christmas because it looks absolutely stunning with those contrasting red and white layers, yet it's so much easier than traditional fudge recipes. The combination of smooth chocolate fudge with that tangy cream cheese layer creates something that tastes like red velvet cake in candy form. I started making this when I needed an impressive dessert for a Valentine's party but didn't have time for anything complicated, and now people specifically request it every February.
My daughter loves helping make these because she gets to add the red food coloring and watch the fudge transform into that vibrant color, and the fact that we can make impressive candy together without any special equipment or candy thermometers makes her feel like a professional chocolatier.
Ingredients You'll Need
- White chocolate chips: (divided, about 1.5 cups total) - Forms the base of both layers and must be good quality for the best flavor and texture; taste-test your brand before using
- Mini marshmallows: (about 1.5 cups for the red layer) - The secret ingredient that creates smooth, velvety fudge without traditional candy-making techniques
- Heavy whipping cream: (about half a cup) - Essential for proper fudge texture and cannot be substituted with milk or half-and-half; the high fat content is crucial
- Granulated sugar: (about three-quarters of a cup for the red layer) - Sweetens and helps create the fudge texture
- Unsweetened cocoa powder: (about two tablespoons) - Provides that subtle chocolate flavor that defines red velvet and helps deepen the red color
- Butter: (softened, divided between both layers) - Adds richness and helps everything melt smoothly; salted or unsalted both work fine
- Red gel food coloring: - Creates that vibrant red color without affecting taste or consistency; gel works better than liquid for intense color
- Pure vanilla extract: (for both layers) - Balances all the flavors and adds depth
- Cream cheese: (softened, 4 ounces for the white layer) - Creates that tangy, rich topping that's essential to red velvet flavor
- Powdered sugar: (about 1.5 cups for the white layer) - Sweetens the cream cheese frosting and helps it set properly
- Red sprinkles: (optional for decoration) - Adds a festive finishing touch before the white layer sets
Step-by-Step Instructions
- Prepare the pan and make the red fudge base
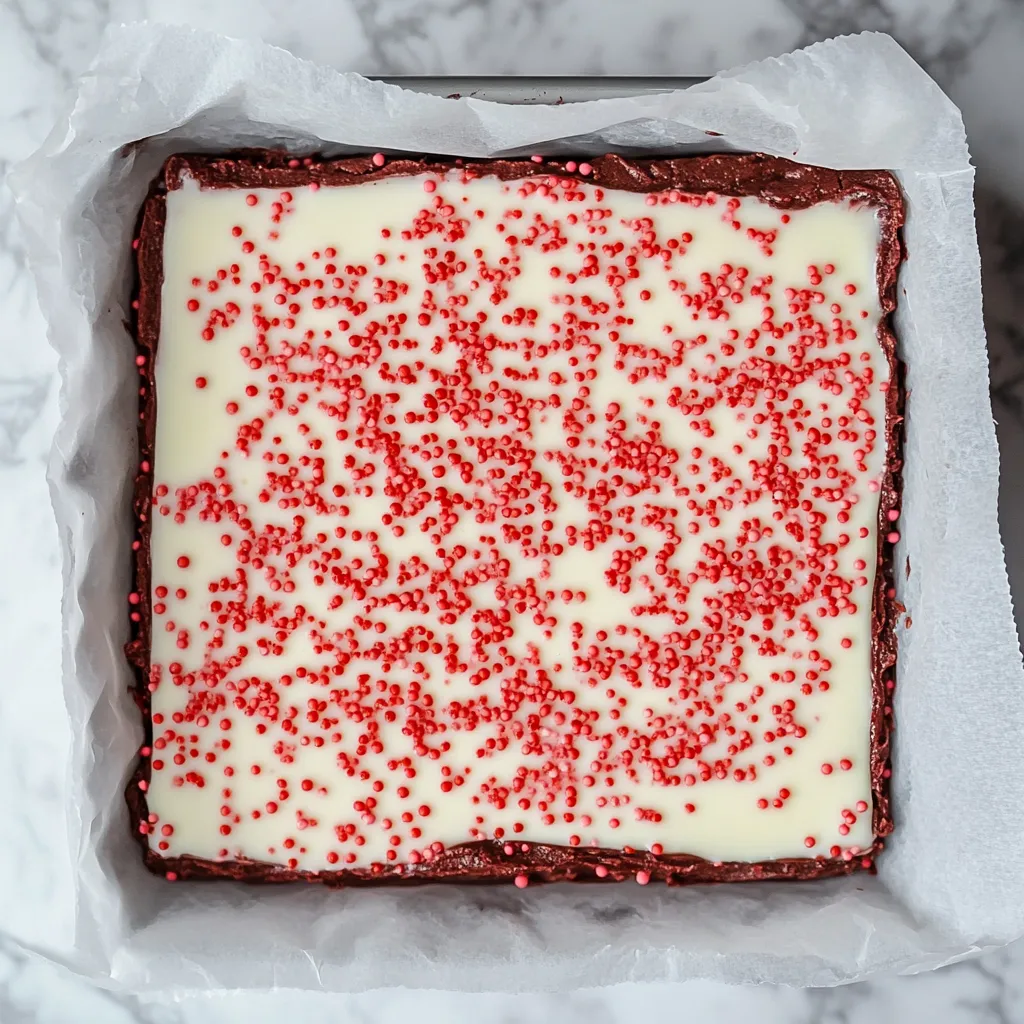
- Line an 8x8 inch square baking pan with parchment paper, leaving some overhang on the sides so you can lift the fudge out easily later. Butter the parchment paper generously or spray it with cooking spray to prevent sticking. In a medium saucepan over medium-low heat, combine four tablespoons of butter, the mini marshmallows, granulated sugar, cocoa powder, and heavy whipping cream. Stir the mixture frequently with a wooden spoon or silicone spatula as everything melts together, which takes about five to seven minutes. You want the butter completely melted and the mixture smooth and well combined with no lumps of marshmallow remaining.
- Add chocolate chips and color the fudge
- Once your marshmallow mixture is smooth and hot, reduce the heat to low and add one cup of white chocolate chips along with a teaspoon of vanilla extract. Stir constantly until the chocolate chips melt completely into the mixture, creating a smooth, glossy fudge base with no visible chips remaining. Remove the pan from the heat and add your red gel food coloring, starting with about half a teaspoon and stirring thoroughly to distribute the color evenly. Add more coloring gradually until you reach that vibrant red velvet color you're looking for, keeping in mind the color will be slightly deeper once it sets.
- Pour and chill the red layer
- Carefully pour your red fudge mixture into the prepared pan, using your spatula to scrape every bit out of the saucepan. Spread it into an even layer that reaches all the corners and is level across the top, tapping the pan gently on the counter to release any air bubbles. Place the pan in the refrigerator for at least one hour, or until the fudge is completely firm to the touch and no longer warm. This chilling step is essential before adding the cream cheese layer, so don't rush it even if you're impatient.
- Make the cream cheese frosting layer
- While the red layer chills, or when you're ready to add the topping, beat together the softened cream cheese and remaining butter in a medium bowl using an electric mixer on medium speed. Mix for about two minutes until the mixture is smooth, light, and fluffy with no lumps of cream cheese remaining. Add the powdered sugar and remaining vanilla extract, then beat again on low speed at first to prevent a sugar cloud, then increase to medium until everything is completely incorporated and smooth. The mixture should be thick and spreadable like frosting.
- Melt remaining chocolate and combine with frosting
- Place the remaining one-third cup of white chocolate chips in a microwave-safe bowl and microwave in thirty-second intervals, stirring thoroughly between each one. Continue this process until the chocolate is completely melted and smooth, which usually takes about one to one and a half minutes total. Pour the melted white chocolate into your cream cheese mixture and beat on low speed just until everything is blended together and uniform. Work relatively quickly because the chocolate will start to set as it cools.
- Spread white layer over red and chill again
- Remove your chilled red fudge layer from the refrigerator and pour the white cream cheese mixture over the top, using an offset spatula or the back of a spoon to spread it into an even layer that covers the red completely. Work it all the way to the edges and corners, smoothing the top so it's level and attractive. If you're using sprinkles for decoration, add them now while the white layer is still soft and they'll stick. Return the pan to the refrigerator and chill for at least another hour, or until the cream cheese layer is completely firm and set.
- Cut into squares and serve
- Once both layers are completely chilled and firm, use the parchment paper overhang to lift the entire fudge slab out of the pan and place it on a cutting board. Use a sharp knife to cut the fudge into sixteen equal squares, wiping the knife clean between cuts for the neatest edges. For the cleanest cuts, run your knife under hot water, dry it completely, then make your cut, repeating this process for each cut. Arrange the squares on a serving platter or package them in cellophane bags for gifts.
 Pin it
I tried making this once with milk instead of heavy cream because that's all I had, and the fudge never set properly, staying soft and almost gooey instead of firm. Now I always make sure I have real heavy cream before starting, and the results are perfect every time.
Understanding the Marshmallow Method
Traditional fudge requires boiling sugar syrup to exact temperatures and then beating it extensively to achieve the right crystalline structure, which is finicky and requires experience. The **marshmallow method is a brilliant shortcut** that eliminates all that difficulty because marshmallows already contain the right ratios of sugar, gelatin, and air. When you melt marshmallows with butter, cream, and chocolate, the **gelatin in the marshmallows creates smooth texture** without any crystallization issues. The result is **foolproof fudge** that sets up perfectly every time without needing candy thermometers or special techniques. This method has made fudge accessible to home cooks who were previously intimidated by candy-making.
Achieving Perfect Red Color
Getting that vibrant red velvet color requires understanding how food coloring works with chocolate. **Gel food coloring is vastly superior to liquid** for this application because it's highly concentrated, so you need less to achieve deep color without adding excess moisture. The **cocoa powder** in the recipe actually helps create a deeper, richer red rather than bright pink because the brown undertones add depth. Add the coloring gradually because you can always add more but can't remove it if you add too much. The color will appear slightly darker once the fudge is chilled, so aim for slightly lighter than your ideal shade while it's still warm. Remember that different brands of gel coloring vary in intensity, so start conservatively.
The Cream Cheese Layer Secret
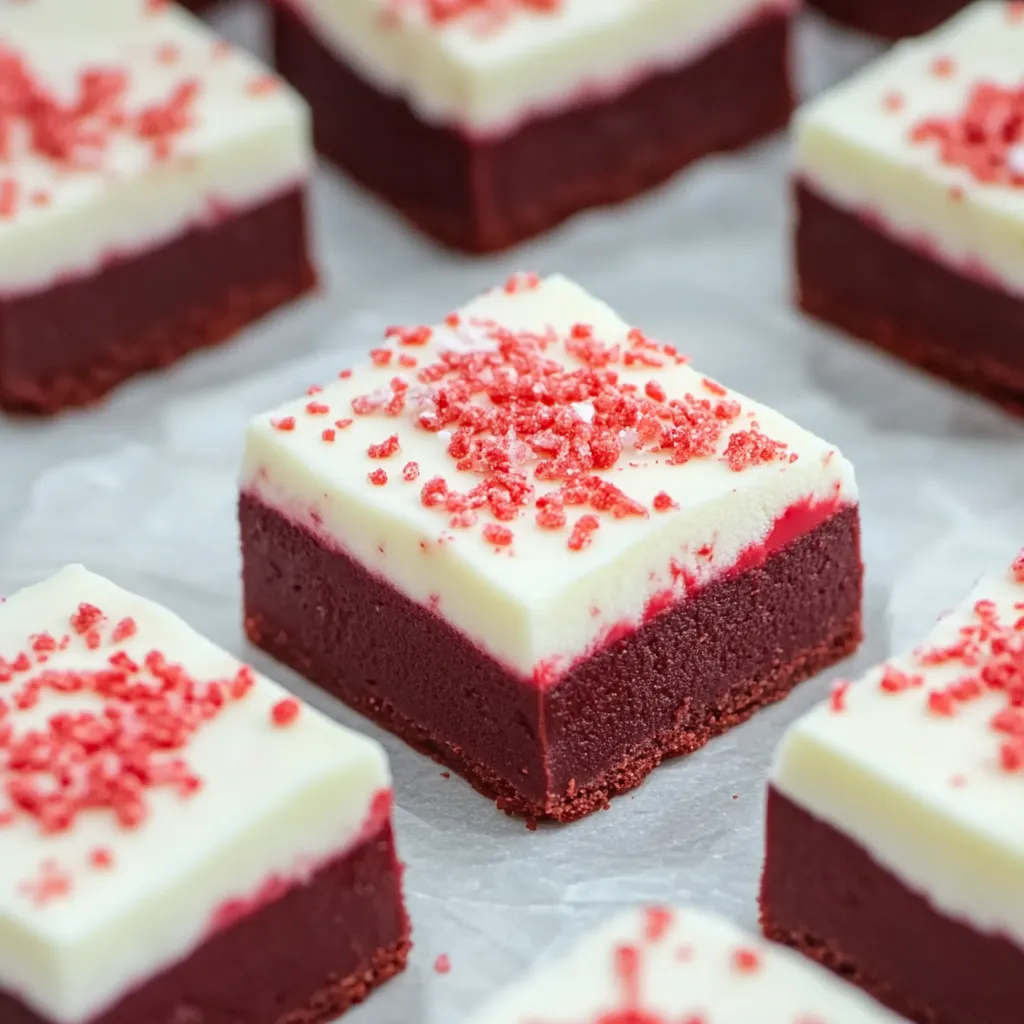
What makes this fudge taste distinctly like red velvet cake is that cream cheese frosting layer on top, which provides tangy richness that balances the sweet chocolate layer below. **Softening the cream cheese completely** before mixing prevents lumps that are impossible to smooth out later. The **melted white chocolate mixed into the cream cheese frosting helps it set firmly** instead of staying soft like regular frosting would, creating a sliceable layer rather than a gooey topping. This combination creates a firm but creamy layer that tastes exactly like cream cheese frosting but has the structure to work as fudge. The contrast between the chocolate layer and cream cheese layer is what makes each bite interesting.
Storage and Make-Ahead Tips
This fudge is actually perfect for **making ahead** because it needs extensive chilling anyway and the flavors improve after sitting for a day. Store cut squares in an **airtight container in the refrigerator** where they'll keep fresh for up to **two weeks**, separated by layers of parchment paper to prevent sticking. The fudge must be kept chilled because the cream cheese layer will soften at room temperature and become messy. For longer storage, wrap individual pieces or the whole slab tightly in wax paper, then plastic wrap, and **freeze for up to three months**. Thaw frozen fudge in the refrigerator overnight before serving, never at room temperature where condensation can form and make it weepy.
Customizing for Different Occasions
While this is formatted as Valentine's or Christmas fudge, the color scheme and flavors are **easily adaptable for other celebrations** throughout the year. Use **blue sprinkles** on the white layer for patriotic holidays like Fourth of July or Memorial Day. Leave out the red coloring entirely and use **green** for St. Patrick's Day or Christmas with a different vibe. **Pink** coloring instead of red makes it perfect for baby showers or breast cancer awareness. **Orange** coloring transforms it into Halloween candy. The base recipe is so versatile that you can match it to literally any holiday or event just by changing the food coloring and decorations.
Flavor Variations
Beyond just changing colors, you can transform the flavor profile completely with simple substitutions. **Replacing the vanilla extract with peppermint extract** creates a chocolate-mint fudge that's perfect for Christmas, reminiscent of peppermint patties. Using **almond extract** gives you a subtle nutty flavor that's sophisticated and less common. Adding finely chopped **pecans or walnuts** to the red layer before it sets creates texture and makes it taste more like traditional Southern red velvet cake. Stirring in mini chocolate chips to either layer adds extra chocolate intensity. Experimenting with different extracts and mix-ins keeps this base recipe interesting and allows you to create countless variations.
 Pin it
This red velvet fudge has become one of those recipes I make every single year because it never fails to impress people with how beautiful it looks and how delicious it tastes, all while being secretly simple to make. The combination of being genuinely easy, incredibly festive, wonderfully delicious, and perfect for gifting means it checks every box for a special occasion treat, and watching people's faces when they bite into that first piece and discover the cream cheese layer makes all the effort worthwhile every single time.
Frequently Asked Questions
- → Can I make this fudge ahead of time?
- Yes, you can make this fudge up to 5 days ahead. Just keep it stored in an airtight container in the fridge until you're ready to serve.
- → What if I don't have red food coloring?
- You can skip the food coloring and make a chocolate fudge instead. It will still taste amazing, just without the signature red color.
- → Why is my fudge too soft to cut?
- The fudge needs at least an hour in the fridge to set properly. If it's still soft, give it more time to chill before cutting.
- → Can I use regular marshmallows instead of mini ones?
- Yes, regular marshmallows work fine. You'll need about 40 regular marshmallows to equal 3 cups of mini marshmallows.
- → How should I store leftover fudge?
- Store the fudge in an airtight container in the refrigerator for up to a week. You can also freeze it for up to 3 months.
- → Can I use milk chocolate chips instead of white chocolate?
- White chocolate chips work best for this recipe because they keep the red color bright. Milk chocolate would change the color and flavor.
- → Do I need to use gel food coloring?
- Gel food coloring gives the best results because it's more concentrated. Liquid food coloring can work but you'll need more of it.