
 Pin it
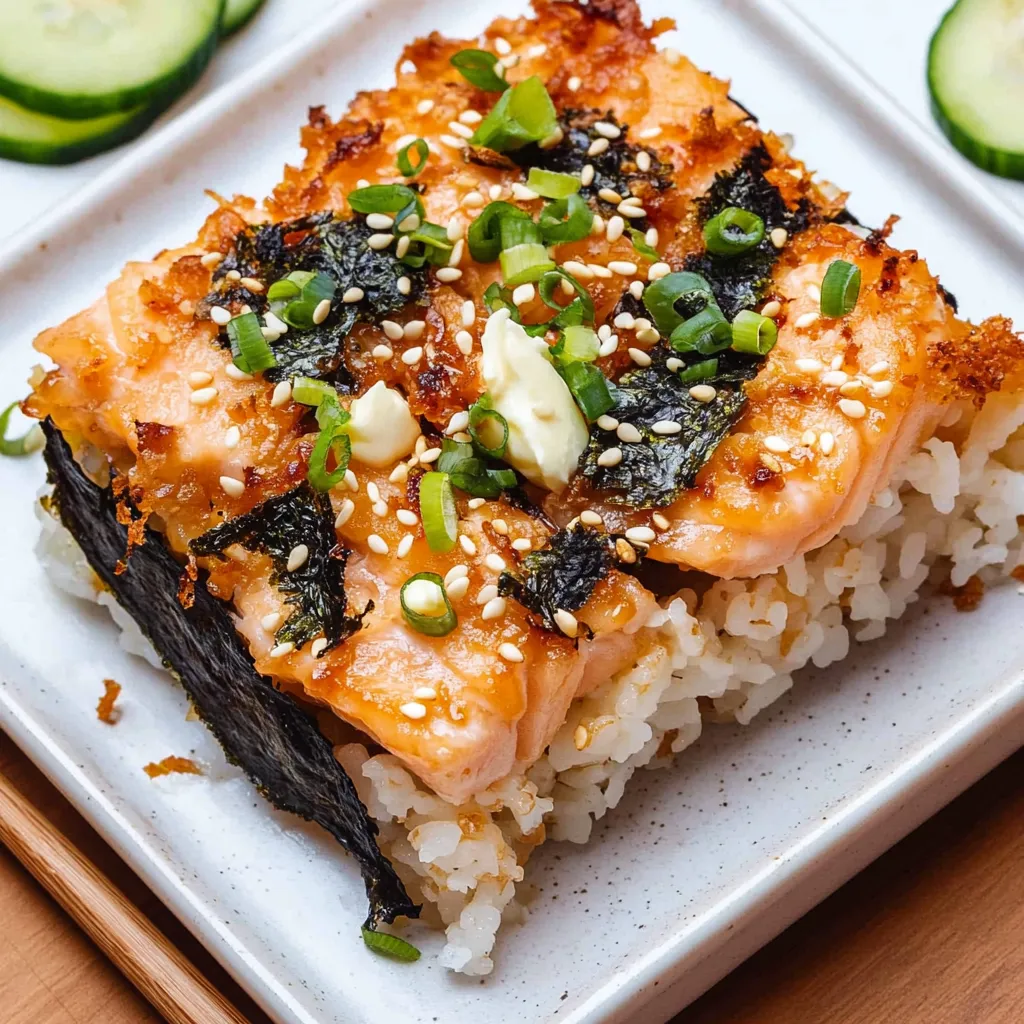
This salmon sushi bake reimagines all the familiar flavors of your favorite sushi roll in a comforting, homestyle casserole. Tender flakes of seasoned salmon nestle into a bed of perfectly seasoned sushi rice, all topped with a creamy, slightly spicy sauce that bubbles and caramelizes in the oven. It's the perfect bridge between traditional Japanese cuisine and Western comfort food—ideal for sushi lovers and skeptics alike.
I first created this recipe during a cold winter evening when I was craving the flavors of sushi but wanted something warm and comforting. After experimenting with different combinations, this version became an instant family favorite. Even my father-in-law, who's always been wary of anything resembling sushi, helped himself to seconds and asked for the recipe! It's become our go-to dish when hosting friends who love Asian flavors but might be hesitant about raw fish.
Ingredients
- 2 cups sushi rice: Creates the perfect sticky base for our casserole—the backbone of any good sushi dish
- 2½ cups water: For cooking the rice to the ideal texture
- 3 tablespoons rice vinegar: Adds that signature tangy flavor that makes sushi rice distinctive
- 1 tablespoon sugar: Balances the tangy vinegar with just a touch of sweetness
- 1 teaspoon salt: Enhances all the flavors without making the dish taste salty
- 1 pound salmon fillet, skin removed: The star of our dish, providing rich flavor and plenty of protein
- 2 tablespoons coconut aminos or soy sauce, divided: Adds umami depth to both the salmon and the creamy topping
- 1 teaspoon garlic powder: Infuses the salmon with savory notes
- 4 oz cream cheese, softened: Creates a creamy, indulgent layer that melts beautifully in the oven
- ¼ cup Japanese mayonnaise: Kewpie mayo adds richness and a subtle tanginess that's distinctively Japanese
- 2 tablespoons sweet chili sauce: Provides the perfect balance of sweetness and mild heat
- ¼ teaspoon chili flakes: Adds a gentle kick that cuts through the richness
- 2 tablespoons sesame seeds: For that authentic sushi flavor and delightful crunch
- 2 sheets nori, cut into strips: Adds the distinctive seaweed flavor that makes it truly taste like sushi
- ½ cucumber, thinly sliced: Provides fresh crunch and color
- 1 avocado, sliced: Adds creamy richness and makes each serving feel special
- 2 green onions, thinly sliced: For a mild onion flavor and bright color contrast
Step-by-Step Cooking Instructions
- Step 1:
- Prepare the rice: Rinse the sushi rice in cold water, swirling it with your fingers, until the water runs relatively clear. This removes excess starch and prevents the rice from becoming too gummy. Drain well. In a medium pot, combine the rinsed rice with 2½ cups water. Bring to a boil over high heat, then reduce to a simmer, cover, and cook for 15-20 minutes until the water is absorbed and the rice is tender. Remove from heat and let stand, covered, for 10 minutes to finish steaming.
- Step 2:
- Season the rice: While the rice is cooking, prepare the seasoning. In a small saucepan, combine rice vinegar, sugar, and salt. Warm over low heat, stirring until the sugar and salt dissolve completely. Don't let it boil—you just want the ingredients to meld together. When the rice has finished steaming, transfer it to a large bowl and gently fold in the vinegar mixture while the rice is still warm. The rice will absorb the flavors better when it's hot. Fan the rice as you mix to help it cool more quickly and develop a nice shine.
- Step 3:
- Prepare the salmon: Preheat your oven to 400°F. Place the salmon fillet on a parchment-lined baking sheet. In a small bowl, mix 1 tablespoon of coconut aminos or soy sauce with the garlic powder. Brush this mixture evenly over the salmon. Bake for 15-20 minutes until the salmon is cooked through and flakes easily with a fork. Remove from the oven and let cool slightly before flaking it into bite-sized pieces with a fork.
- Step 4:
- Make the creamy topping: In a medium bowl, combine the softened cream cheese, Japanese mayonnaise, remaining 1 tablespoon of coconut aminos or soy sauce, sweet chili sauce, and chili flakes. Mix until smooth and well-blended. Gently fold in the flaked salmon, being careful not to break the pieces too small—you want nice chunks of salmon throughout the dish.
- Step 5:
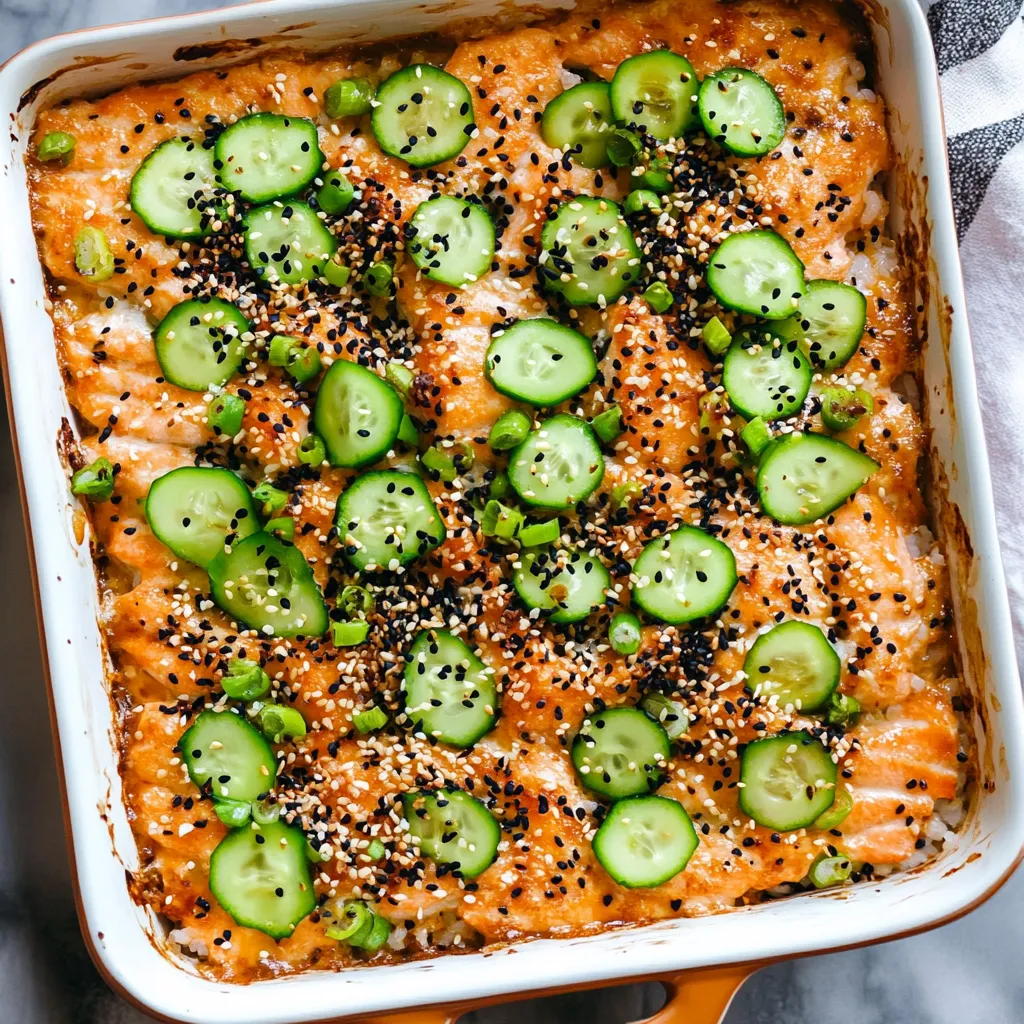
- Assemble the casserole: Lightly grease an 8×8-inch baking dish. Spread the seasoned sushi rice evenly in the bottom of the dish, pressing gently to create a compact layer. Dipping your fingers in cold water before pressing helps prevent the rice from sticking to your hands. Spread the salmon and cream cheese mixture evenly over the rice layer. Sprinkle with half of the sesame seeds.
- Step 6:
- Bake to perfection: Return the assembled dish to the 400°F oven and bake for 15 minutes until heated through and beginning to bubble around the edges. For the last 5 minutes, switch your oven to broil to achieve a beautifully caramelized top. Watch carefully during this step to prevent burning—broilers can be unpredictable!
- Step 7:
- Garnish and serve: Remove from the oven and let cool for 5 minutes. Sprinkle with the remaining sesame seeds, strips of nori, sliced cucumber, avocado, and green onions. Serve warm, offering additional coconut aminos or soy sauce on the side for drizzling.
 Pin it
The Magic of Fusion Cooking
What makes this salmon sushi bake so special is how it bridges two culinary worlds. It respects the essential flavors of traditional sushi while transforming them into something entirely new and accessible.
I discovered this balance through several test batches, finding that maintaining authentic elements—like properly seasoned sushi rice and nori—was crucial, even while reimagining the format. The vinegar-seasoned rice truly makes this dish recognizable as sushi-inspired, rather than just another fish casserole.
The creamy topping is what really takes this dish to the next level. Traditional sushi doesn't include these rich, melty elements, but they create that comforting, Western casserole feel that makes this dish so satisfying. The slight heat from the chili flakes and sweet chili sauce cuts through the richness, creating a perfect balance of flavors.
Last summer, I brought this to a potluck where one guest was a former sushi chef. I was nervous about his reaction to this unconventional take, but he not only approved but asked for details about the sauce! He mentioned that while it's certainly not traditional, it captures the essence of what makes sushi appealing: the perfect balance of flavors and textures, with each component complementing the others.
Creative Variations
The beauty of this recipe is how easily it adapts to different preferences and what you have on hand. Here are some variations I've tried with great success:
For a spicier version, add a drizzle of sriracha to the cream cheese mixture and top with thinly sliced jalapeños. The heat works beautifully with the rich salmon and creamy sauce, creating a dish reminiscent of spicy salmon rolls.
When serving guests with different dietary needs, I sometimes make a "split" version: half with salmon and half with thinly sliced avocado and cucumber for vegetarians. The plant-based section is just as delicious and satisfying as the salmon side!
For a more substantial meal, I occasionally add a layer of thinly sliced cooked sweet potato between the rice and salmon mixture. The subtle sweetness complements the other flavors while making the dish even more filling.
I've been making variations of this salmon sushi bake for nearly four years now, and it's evolved from a random experiment into one of my signature dishes. What started as a craving for something comforting yet sophisticated has become a recipe friends and family specifically request. There's something so satisfying about transforming a food typically enjoyed cold into a warm, bubbling casserole perfect for chilly evenings or gatherings where you want to impress without spending hours in the kitchen.
Frequently Asked Questions
- → Can I make this salmon sushi bake ahead of time?
- Yes! Prepare the rice and salmon mixture up to a day ahead, then assemble and bake when ready to serve. Add fresh toppings right before eating.
- → What can I use instead of Japanese mayo?
- Regular mayo works fine - just mix in a little rice vinegar and sugar to mimic the tangy-sweet flavor of Japanese mayo.
- → Is this recipe gluten-free?
- Yes, if you use coconut aminos or gluten-free soy sauce. All other ingredients are naturally gluten-free.
- → What sides go well with salmon sushi bake?
- Try a simple miso soup, cucumber salad with rice vinegar dressing, or edamame for a complete Japanese-inspired meal.
- → Can I use canned salmon instead of fresh?
- Absolutely! Drained canned salmon works in a pinch. You can skip the initial baking step and just mix it with the sauce ingredients.