
 Pin it
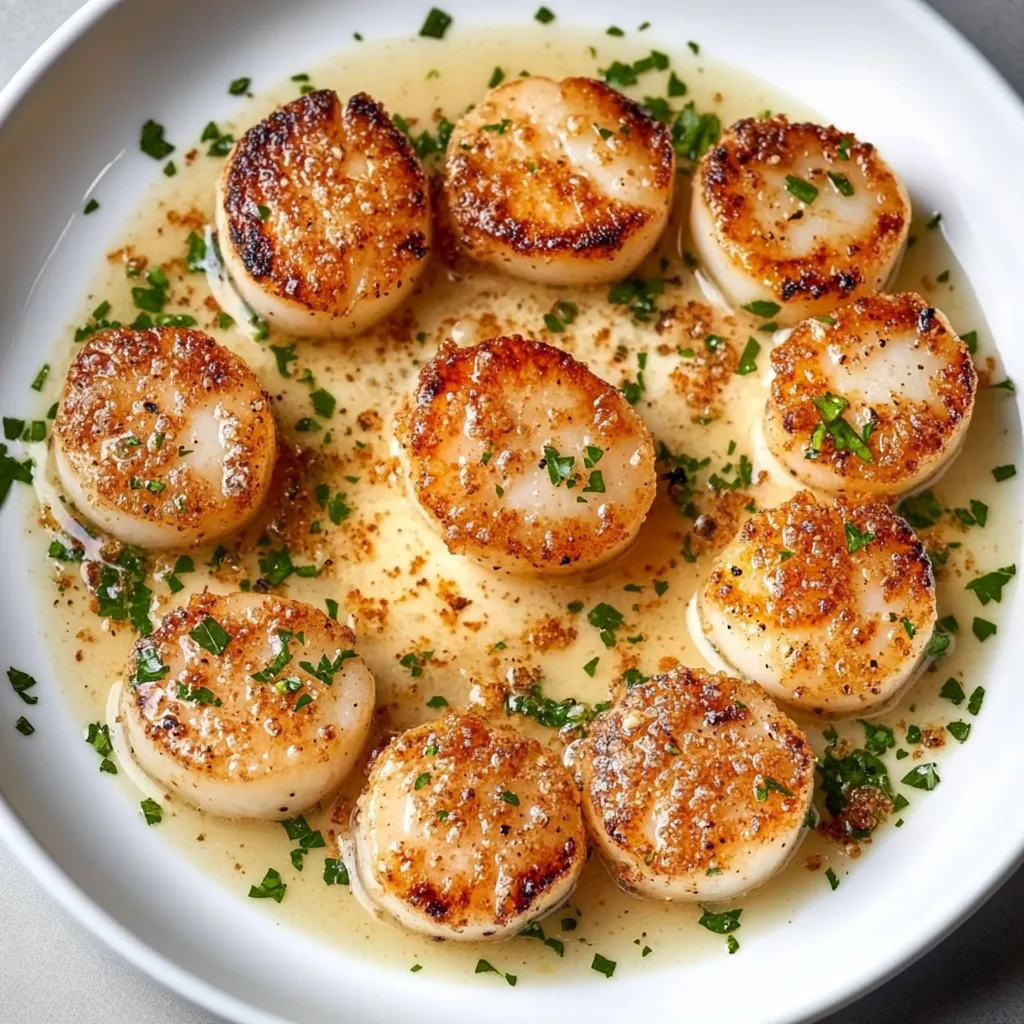
Seared scallops are one of those restaurant dishes that seem intimidating until you understand the technique is actually straightforward - buy dry-packed scallops, remove all surface moisture by patting them completely dry, heat a pan until almost smoking, then sear undisturbed for about two minutes per side until a golden-brown crust forms while the interior stays translucent and tender. The transformation from raw to perfectly seared happens quickly because scallops are delicate and cook through in literally four minutes total, which means the window between perfectly cooked and rubbery is narrow but entirely manageable once you understand the visual and tactile cues. What makes scallops particularly appealing beyond their sweet, buttery flavor is how cooking them at home costs a fraction of restaurant prices while delivering the same impressive results, and how they work as both elegant appetizers and substantial main courses depending on portion size and accompaniments.
I started making seared scallops about ten years ago after paying thirty dollars for four scallops at a restaurant and realizing I could buy a pound for that price and cook them myself. The first batch stuck to the pan and tore apart because I tried to flip them too early, and they were rubbery because I didn't remove enough moisture before cooking. After learning that completely dry scallops are essential for proper searing, and that they release naturally from the pan when ready to flip, they became one of my most reliable impressive dinners. Now I make them constantly when I want something special that doesn't actually require significant effort.
Ingredients and What Makes Them Essential
- Sea Scallops (1½ pounds, about 12 large scallops): Buy "dry-packed" sea scallops labeled 10-20 count (meaning 10-20 per pound), which are large enough to sear properly. Avoid "wet-packed" scallops treated with preservatives that retain water and prevent browning. Look for ivory or pale pink scallops that smell sweet and oceanic, not fishy. If buying frozen, that's actually preferable to "fresh" thawed scallops in the display case.
- Panko Bread Crumbs (½ cup, optional): Bread crumbs create a protective coating that adds texture and prevents delicate scallops from overcooking. Panko creates crispier coating than regular bread crumbs. This is optional - many people prefer naked scallops to show off the natural sear.
- Unsalted Butter (2 tablespoons): Butter provides rich flavor and helps with browning. Use unsalted so you control salt levels.
- Olive Oil (2 tablespoons): Oil raises the smoke point and prevents butter from burning. The combination provides both butter flavor and high-heat capability.
- Dry White Wine (¼ cup): White wine creates a light pan sauce that doesn't overpower scallops' delicate flavor. Substitute low-sodium chicken broth if you don't cook with wine.
- Fresh Lemon Juice (2 tablespoons, from ½ lemon): Lemon's acidity brightens and enhances seafood. Fresh-squeezed tastes better than bottled.
- Garlic (2 cloves, minced): Just a touch of garlic adds depth without overwhelming. Fresh minced tastes better than jarred.
- Fresh Flat-Leaf Parsley (2 tablespoons, chopped): Fresh parsley adds color and herbal brightness. Flat-leaf has better flavor than curly.
- Kosher Salt and Black Pepper (to taste): Season the bread crumbs if using, or season scallops directly.
Step-by-Step Instructions
- Prepare the Scallops:
- Remove scallops from packaging and inspect each one. Look for the small, tough rectangular piece of connective tissue (called the "foot" or "catch muscle") on the side - it looks opaque against the translucent scallop flesh. Pinch it off and discard if present. Place scallops on a plate lined with several layers of paper towels. Cover with more paper towels and press gently but firmly to remove all surface moisture. This is crucial - wet scallops steam instead of sear. Let them sit for about 5 minutes, then replace the damp paper towels with fresh ones and pat dry again. The scallops should feel completely dry to the touch.
- Bread the Scallops (Optional):
- If using bread crumbs, mix ½ cup of panko with ¼ teaspoon of salt in a shallow bowl. Press both flat sides of each scallop into the bread crumbs, coating evenly and patting gently so the coating adheres. Place breaded scallops on a clean plate. If not breading, simply season the dried scallops lightly with salt and pepper on both sides.
- Heat the Pan:
- Place a large skillet (12-inch cast iron or stainless steel works best - avoid nonstick which doesn't get hot enough) over medium-high heat. Let it heat for about 2 minutes until very hot. Add 2 tablespoons of butter and 2 tablespoons of olive oil. Swirl the pan as the butter melts and foams - this helps water evaporate and prevents excessive splattering. When the butter foam subsides and the oil is shimmering (but not smoking), you're ready to add scallops.
- Sear the Scallops:
- Working carefully to avoid splashing, add scallops to the hot pan in a single layer with at least 1 inch of space between each - don't crowd them or they'll steam instead of sear. You may need to cook in batches. Once you place them, resist the urge to move them. Let them cook completely undisturbed for 1½ to 2 minutes. You'll know they're ready to flip when they release easily from the pan without sticking - if they resist, they're not ready. The bottom should be deep golden brown, almost caramel-colored. Using tongs or a thin spatula, flip each scallop. Cook the second side for another 1½ to 2 minutes until golden and the scallops feel just firm when pressed gently. The centers should still be slightly translucent - not opaque all the way through. Transfer cooked scallops to a plate and tent loosely with foil to keep warm.
- Make the Pan Sauce:
- With the skillet still over medium-high heat (don't wipe it out - the browned bits are flavor), add ¼ cup of white wine, 2 tablespoons of lemon juice, and 2 cloves of minced garlic. The liquid will sizzle and deglaze the pan. Use a wooden spoon to scrape up any browned bits stuck to the bottom. Let the mixture boil for about 1 to 2 minutes until it reduces slightly. Remove from heat and stir in 2 tablespoons of chopped parsley. Taste and adjust seasoning with salt and pepper if needed.
- Serve:
- Arrange scallops on plates and drizzle the pan sauce over them. Serve immediately with lemon wedges on the side. Scallops are best eaten right away while hot and the crust is still crispy.
 Pin it
My father-in-law who's an accomplished home cook was convinced seared scallops required professional technique and refused to attempt them, insisting they were "too fancy" for home cooking. After I demonstrated the process - dry thoroughly, hot pan, don't touch for two minutes per side - and he successfully made them himself, he looked annoyed that something so seemingly complicated was actually straightforward. Now he makes them regularly and no longer gives me credit for teaching him. Getting the experienced cook to admit restaurant dishes can be simple feels like validation.
Understanding Dry-Packed Versus Wet-Packed
The distinction between dry-packed and wet-packed scallops is crucial to successful searing and not just marketing terminology. Dry-packed scallops (also called "dry" or "chemical-free") are harvested, shucked, and immediately frozen or refrigerated with no additives. They have natural moisture content and weight. Wet-packed scallops are soaked in a solution of sodium tripolyphosphate (STP) and water to extend shelf life and increase weight (since you're paying by the pound for added water). This treatment causes several problems: the scallops absorb water and become bloated, the preservatives make them taste soapy and chemical, they release excess water during cooking which prevents browning, and they often turn rubbery. Dry-packed scallops may look smaller and less plump, but they're actually fresher, taste sweeter, and sear beautifully because they don't release water. Always look for labels saying "dry," "chemical-free," or "untreated." If unlabeled, ask your fishmonger or look for scallops that appear ivory or slightly pink rather than bright white and puffy.
The Science of the Golden Sear
That signature golden-brown crust on perfectly seared scallops develops through the Maillard reaction - a complex series of chemical reactions between amino acids and sugars when exposed to high heat (above 300°F). Scallops naturally contain both proteins (amino acids) and sugars (mainly glycogen), making them ideal for this reaction. When dry scallops hit a hot pan, the surface dehydrates quickly and the temperature rises above the boiling point of water. The amino acids and sugars react, creating hundreds of new flavor and aroma compounds along with brown pigments. This is why moisture is the enemy - if the scallops are wet, the water must evaporate first before browning can begin, and by the time the surface dries, the interior is overcooked. The butter and oil provide fat that conducts heat efficiently and contributes to flavor. The result is that butterscotch-colored crust with complex, nutty, sweet flavor.
Why Scallops Must Be Completely Dry
The instruction to remove all surface moisture isn't fussiness - it's absolutely essential to achieving proper sear. Water boils at 212°F, while the Maillard reaction (browning) requires temperatures above 300°F. If scallops have surface moisture, the water must completely evaporate before the surface temperature can rise high enough to brown. During this evaporation time, the scallops are essentially steaming, and by the time the surface finally dries and begins to brown, the interior has overcooked and become rubbery. Completely dry scallops begin browning immediately upon contact with the hot pan, developing that golden crust while the interior remains tender and slightly translucent. This is why the recipe emphasizes patting scallops dry multiple times with paper towels - you want them feeling almost tacky-dry to the touch, with no visible moisture.
The Importance of Not Moving Them
The instruction to leave scallops undisturbed for the full searing time goes against natural cooking instincts - we want to check them, adjust them, peek underneath. Resist completely. When scallops first hit the hot pan, proteins on the surface begin denaturing and forming chemical bonds with the metal. If you try to move them before this process completes, the bonds are still forming and the scallops stick and tear, ruining the crust. After about 90 seconds to 2 minutes, the proteins have fully denatured and the crust has developed enough that the scallops naturally release from the pan. You'll feel this - if you try to flip and they resist, they're not ready. Wait another 30 seconds and try again. When ready, they'll release easily with a gentle lift. This principle applies to all protein searing - steaks, fish, chicken - but is especially crucial for delicate scallops.
Storage, Reheating, and Make-Ahead
Seared scallops are definitely best eaten immediately when the crust is crispy and the interior is tender. However, you can store leftovers in an airtight container in the refrigerator for 3 to 4 days. Reheating is tricky because scallops quickly shift from tender to rubbery when heated a second time. If you must reheat, do so very gently - a quick sauté over medium-low heat for just 30 seconds per side, or a brief sear on a hot grill. Avoid the microwave which overcooks the edges and draws out moisture. Many people prefer eating leftover cooked scallops cold - slice them and add to salads, grain bowls, or pasta salads. For make-ahead purposes, you can pat scallops dry and have them ready to cook up to 2 hours before searing - keep them refrigerated on paper towels. Don't bread them more than 30 minutes ahead or the coating becomes soggy.
Variations and Different Preparations
While the classic pan-seared preparation is excellent, you can create variations. For naked scallops, skip the bread crumbs entirely and sear them directly - this shows off the natural golden crust. For baked scallops, arrange dried scallops in a baking dish, toss with olive oil, sprinkle with bread crumbs toasted in butter, and bake at 425°F for about 10 minutes. For grilled scallops, thread onto skewers and grill over high heat for 2 minutes per side. For different seasonings, mix spices like garam masala, Cajun seasoning, or za'atar into the bread crumbs. For different sauces, try browned butter with capers, cream sauce with white wine, or Asian-style with soy and ginger. For herb variations, substitute basil, chives, or tarragon for parsley. Each preparation maintains the essential principle of high heat and quick cooking.
Serving Suggestions and Complete Meals
Seared scallops work beautifully in various meal contexts. As a main course, serve 4 to 5 scallops per person (about 6 ounces) with sides like risotto, pasta, roasted vegetables, or mashed potatoes. For appetizers, serve 2 to 3 scallops per person on a bed of greens or with a small salad. For surf-and-turf, pair with filet mignon and baked potato. For pasta dishes, toss with fettuccine Alfredo or garlic butter linguine. For grain bowls, serve over quinoa or rice with vegetables. For salads, slice seared scallops over romaine or arugula with citrus vinaigrette. For sliders, place on small buns with aioli and pickled onions. For lettuce cups, serve in butter lettuce with mango and avocado. The delicate sweetness pairs well with bright, acidic accompaniments and rich, buttery sides.
Troubleshooting Common Problems
When seared scallops don't turn out right, there's usually a fixable cause. If they stick to the pan, they weren't dry enough or you tried to flip too early - pat completely dry and wait until they release naturally. If they won't brown, they were too wet or the pan wasn't hot enough - remove all moisture and use higher heat. If they're rubbery, you overcooked them - cook only until barely opaque in center. If they're raw inside, you removed them too early or heat was too high - cook slightly longer or reduce heat. If bread crumbs fall off, you didn't pat them on firmly enough or the coating was too thick - press coating on gently but firmly. If the sauce is too acidic, you used too much lemon - reduce lemon juice. Most issues relate to moisture removal, pan temperature, or cooking time.
 Pin it
After making seared scallops probably two hundred times over the past ten years, they've become one of my most reliable impressive dinners because they consistently deliver restaurant-quality results while requiring minimal actual cooking skill once you understand the key principles. I appreciate how scallops' natural sweetness needs almost no enhancement beyond proper searing and a simple pan sauce, and how the technique is actually straightforward despite seeming intimidating. The ability to serve something this elegant in fifteen minutes makes weeknight special occasions actually feasible. Knowing the simple secrets - buy dry-packed, remove all moisture, hot pan, don't touch - transforms something that seems like it requires professional training into something genuinely foolproof. This represents exactly what impressive cooking should be - simple ingredients treated properly to showcase their natural qualities, technique that seems complicated but is actually straightforward, and results that make people think you're more skilled than you actually are once you know the basics.
Frequently Asked Questions
- → How do I know when scallops are done cooking?
- Scallops are done when they feel firm to the touch and have turned opaque. They should cook about 1-2 minutes per side. Overcooked scallops become rubbery, so watch them closely.
- → Should I rinse scallops before cooking?
- Yes, give them a quick rinse under cold water, then pat them completely dry with paper towels. Dry scallops will sear better and develop that nice golden crust.
- → Can I use frozen scallops for this recipe?
- Absolutely. Just thaw them in the fridge overnight, then pat them very dry before breading. Frozen scallops often have extra moisture, so drying is extra important.
- → What can I substitute for white wine in the sauce?
- Low-sodium chicken broth works great as a substitute. You can also use vegetable broth or even a splash of dry vermouth if you have it on hand.
- → Why are my scallops sticking to the pan?
- Make sure your pan is hot enough before adding the scallops, and don't move them around once they hit the pan. Let them develop a crust for the first minute or two, then they'll release easily.
- → What should I serve with seared scallops?
- These go great with pasta tossed in butter, rice pilaf, or roasted vegetables. A simple green salad or garlic bread also makes a nice side.