
 Pin it
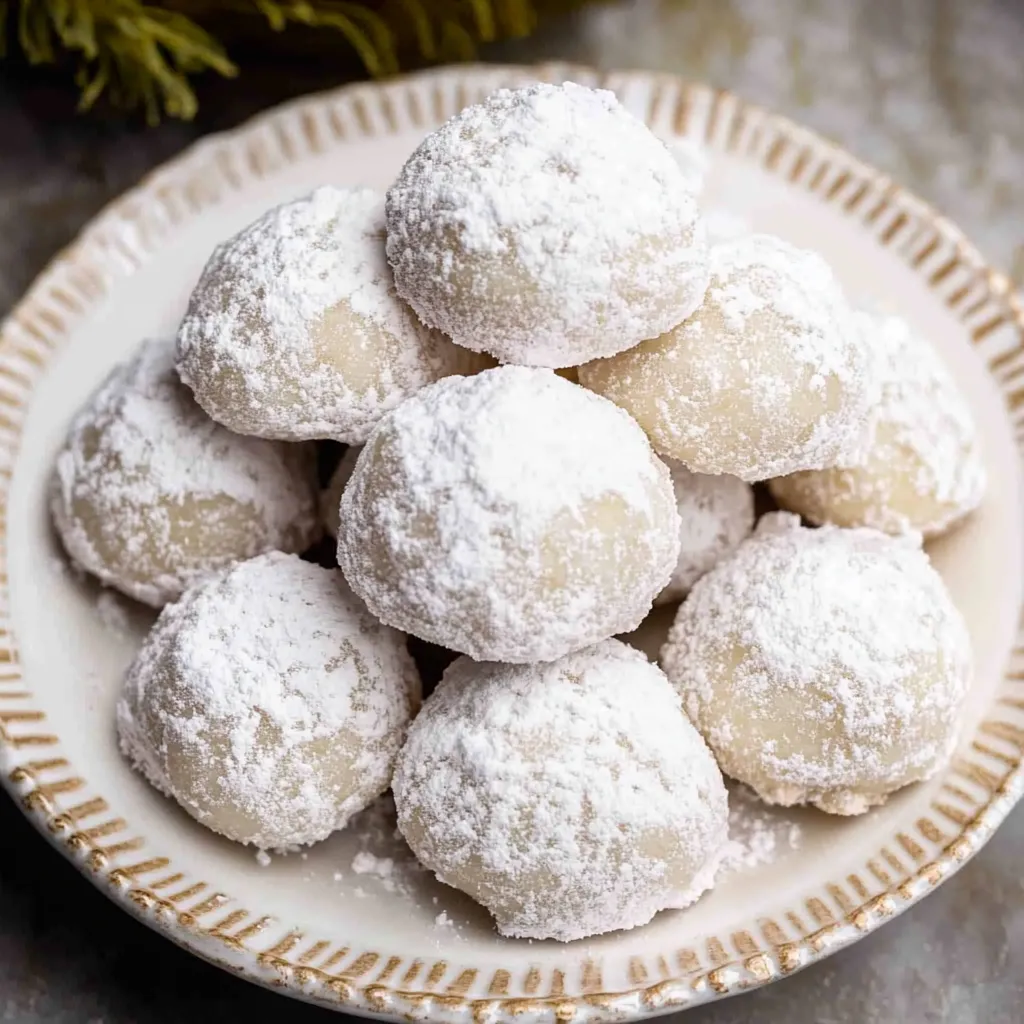
Snowball cookies are deceptively simple - just butter, flour, and powdered sugar rolled into balls, baked until barely golden, then coated twice in more powdered sugar while they're still warm so it melts into a sweet crust - yet they deliver that irresistible melt-in-your-mouth texture that makes you reach for a second and third before you realize what happened. These cookies have been around for generations under various names - Russian tea cakes, Mexican wedding cookies, butterballs - but regardless of what you call them, they're essentially tender shortbread formed into rounds and hidden under a thick layer of white sugar that looks like freshly fallen snow. What makes them particularly appealing for holiday baking is how they require no special skills, no fancy equipment, no complicated techniques, just one bowl and five ingredients you probably already have, yet they look elegant and professional on a cookie platter alongside fussier recipes that took three times as long to make.
I've been making snowball cookies for probably fifteen years, and they're one of those recipes I return to constantly because they never fail and everyone loves them despite being so simple. The first batch I made used granulated sugar instead of powdered sugar in the dough because I misread the recipe, and they spread into flat disks instead of staying round. After learning that powdered sugar is essential for both the dough and the coating, and that rolling them twice in sugar while warm creates that thick white crust, they became foolproof. Now I make quadruple batches every December for cookie tins because they're so easy to mass-produce.
Ingredients and What Makes Them Essential
- Unsalted Butter (1 cup, 2 sticks, at room temperature): Butter is the dominant flavor and determines the entire character of these cookies. Use the best quality butter you can afford because you'll taste it. The butter must be at proper room temperature - softened enough to cream but not so soft it's melting. If you press your finger into it, it should leave an indent without your finger sinking through.
- Powdered Sugar (¾ cup for dough, plus 2 cups for coating): Powdered sugar, also called confectioners' sugar or icing sugar, is essential in both the dough and for coating. It dissolves completely into butter and creates tender texture. Don't substitute granulated sugar which makes cookies spread and lose their shape. Buy at least 3 cups total - ¾ cup goes in the dough, the rest is for coating.
- All-Purpose Flour (2¼ cups): Flour provides structure. Measure by spooning into your cup and leveling off - scooping directly packs in too much and makes cookies dry. Don't use self-rising flour which contains leavening.
- Pure Vanilla Extract (1 teaspoon): Vanilla enhances the butter flavor. Use pure extract, not imitation. Vanilla bean paste or scraped seeds from half a vanilla bean work beautifully as substitutes.
- Salt (¼ teaspoon, optional if using salted butter): Just a pinch balances sweetness and makes flavors taste more pronounced. Use fine salt which distributes evenly. If using salted butter, you can omit this.
Optional but Recommended:
- Pecans (1 cup, finely chopped and toasted): Toasted pecans add nutty richness and pleasant crunch that transforms these from good to exceptional. Toast them at 350°F for 8 to 10 minutes until fragrant. You can substitute walnuts, almonds, pistachios, hazelnuts, or macadamia nuts.
Step-by-Step Instructions
- Cream the Butter and Sugar:
- Place 1 cup of room temperature butter in a large mixing bowl or the bowl of a stand mixer fitted with the paddle attachment. Add ¾ cup of powdered sugar and 1 teaspoon of vanilla extract. Beat on medium speed for about 2 to 3 minutes until light and fluffy. The mixture should be noticeably paler in color and airy in texture. Stop the mixer and scrape down the sides and bottom of the bowl to ensure everything is evenly mixed.
- Add the Dry Ingredients:
- Add 2¼ cups of flour and ¼ teaspoon of salt (if using) to the creamed butter mixture. If adding nuts, add 1 cup of finely chopped toasted pecans now. Turn the mixer to low speed and begin mixing. At first, the mixture will look impossibly dry and crumbly like it will never come together - this is completely normal and expected. Keep the mixer running on low to medium-low speed. After about 1 to 2 minutes of mixing, you'll start to see the flour get coated with butter. Little clumps will form and gradually stick together. After about 3 to 4 minutes total, the dough will start cleaning the sides of the bowl and coming together into larger clumps. It will still look quite crumbly but should hold together when squeezed.
- Bring Dough Together:
- Stop the mixer and use your hands to squeeze and press the dough together in the bowl, gathering all the crumbs into one cohesive mass. Don't knead it - just press and squeeze gently until it holds together. The dough should be very thick and dense, more crumbly than typical cookie dough. This texture is correct.
- Chill the Dough:
- Cover the bowl with plastic wrap or transfer the dough to a container with a lid. Refrigerate for 30 minutes. This chilling time firms up the butter so the cookies maintain their round shape instead of spreading flat during baking. While the dough chills, preheat your oven to 350°F and line two baking sheets with parchment paper.
- Shape the Cookies:
- After 30 minutes, remove the chilled dough from the refrigerator. Use a tablespoon measure or small cookie scoop to portion the dough - each cookie should be about 1 tablespoon of dough. Roll each portion between your palms into a smooth ball. The dough may still feel slightly crumbly but should hold together when pressed. Place the balls on the prepared baking sheets, spacing them about 1 inch apart. They don't spread much during baking.
- Bake:
- Place the baking sheets in the preheated 350°F oven. Bake for 12 to 15 minutes until the bottoms are lightly golden but the tops still look quite pale. These cookies should remain very light-colored - they're not supposed to turn golden brown all over. If they're deeply browned, they'll be dry instead of tender. Remove from the oven when just set and the bottoms are starting to color.
- First Sugar Coating:
- Place about 1 cup of powdered sugar in a shallow bowl. While the cookies are still warm - give them maybe 2 to 3 minutes to cool slightly so they're not burning hot but are still quite warm - carefully transfer each cookie to the bowl of powdered sugar. Gently roll each cookie to coat completely in sugar. The warmth of the cookies will cause some of the sugar to melt into them, which tastes amazing and helps create a base for the second coating. Place the sugar-coated cookies on a wire rack to cool completely.
- Second Sugar Coating:
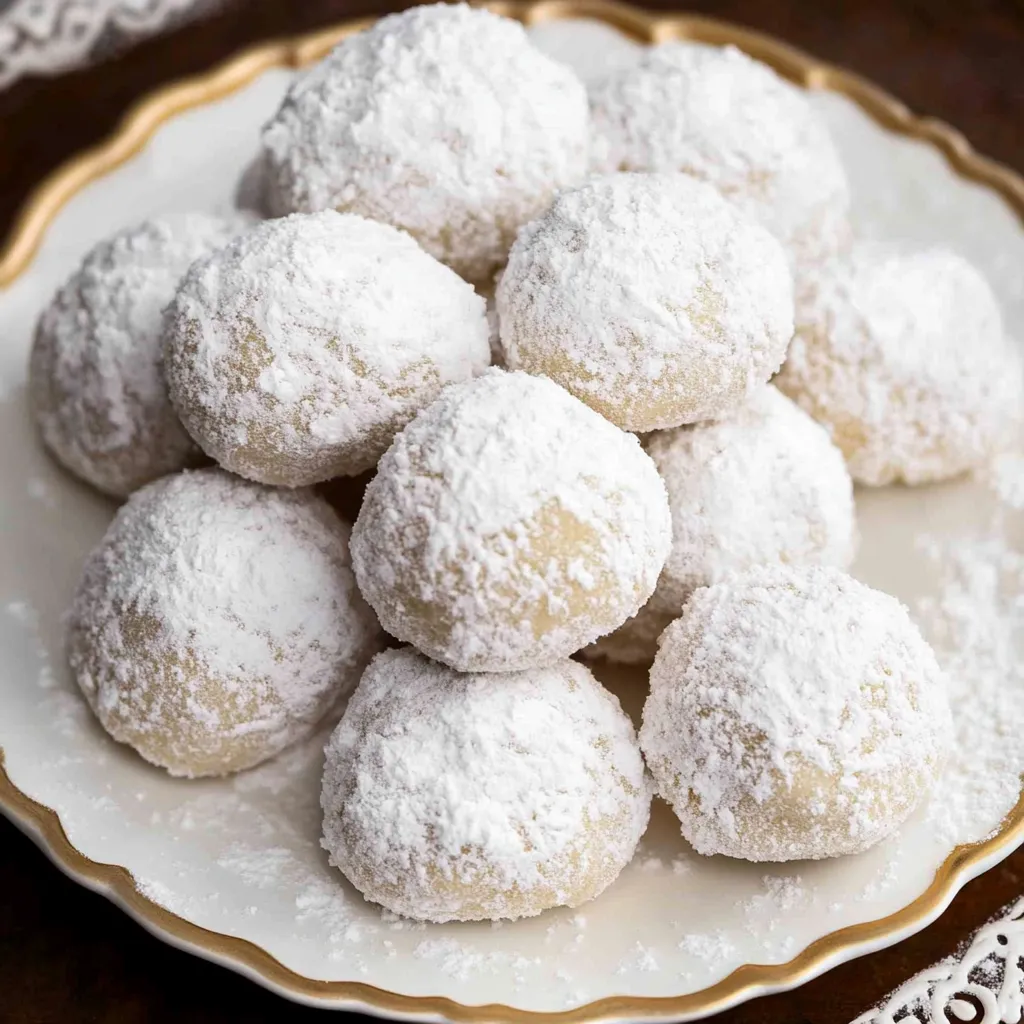
- Once the cookies have cooled completely to room temperature - this takes about 30 to 45 minutes - put another cup or so of fresh powdered sugar in a clean shallow bowl. Roll each cookie again in the fresh sugar, coating generously. This second coating creates that thick, snowy white exterior that makes these look so beautiful. The sugar will stick better now because the first coating has set. These cookies should be completely white with a generous coating.
- Store:
- Store the cooled, double-coated cookies in an airtight container at room temperature. They'll keep for up to 2 weeks, maintaining their tender texture remarkably well.
 Pin it
My neighbor who's an excellent baker and makes elaborate decorated sugar cookies every Christmas was skeptical when I told her my favorite holiday cookies only have five ingredients and take thirty minutes from start to finish. She tried them somewhat condescendingly, clearly expecting them to be boring, then ate three more and grudgingly admitted they were "surprisingly good for something so simple." Now she makes them alongside her fancy cookies and says people actually request the snowballs more often. Getting the accomplished baker to admit simple cookies can be just as good as complicated ones feels like validation.
Understanding the Texture and Why It Works
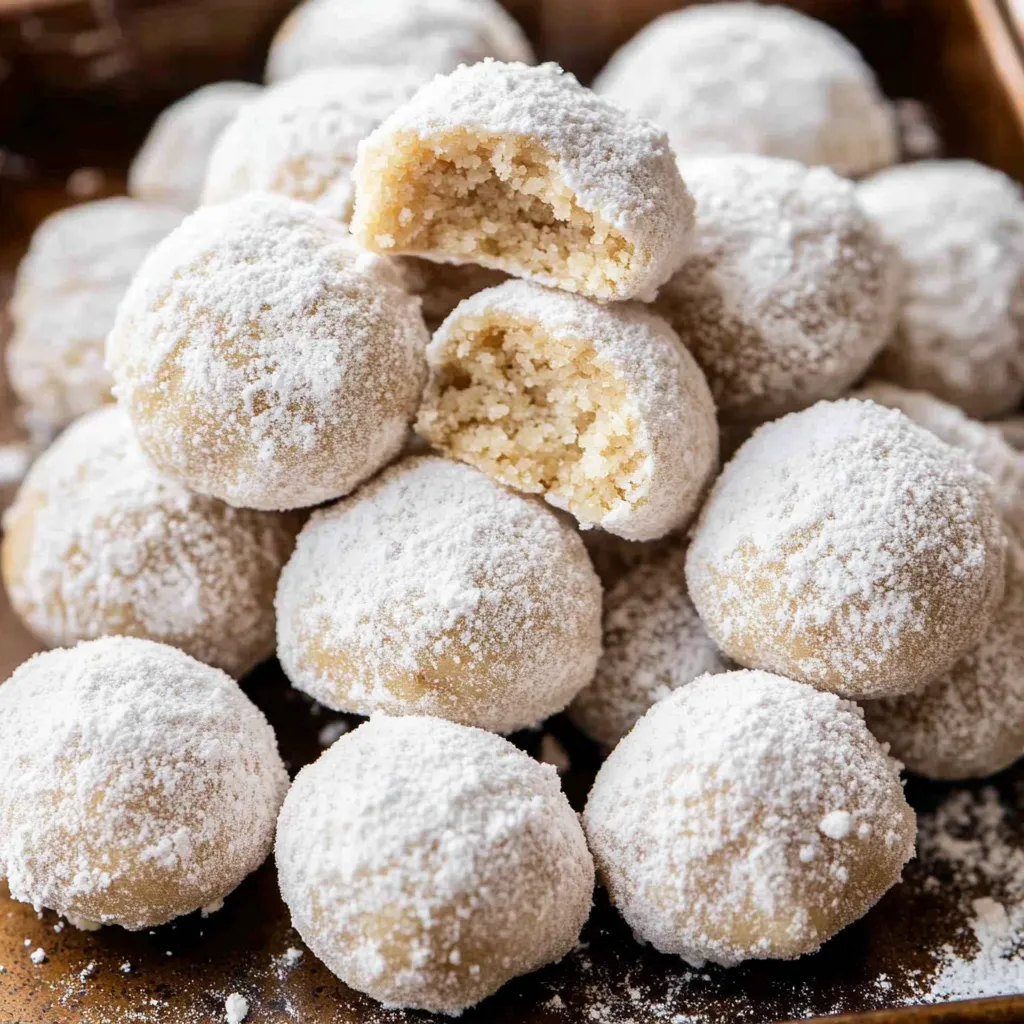
Snowball cookies have a unique texture that's hard to describe - they're dense and crumbly yet somehow melt in your mouth, almost dissolving on your tongue rather than requiring chewing. This texture comes from the specific ratio of butter to flour to powdered sugar, combined with the lack of eggs or leavening. The high butter-to-flour ratio (nearly 1:2 by weight) creates maximum tenderness through fat coating flour particles and preventing gluten development. Powdered sugar contributes to tenderness because it contains cornstarch (about 3%) that further inhibits gluten and creates delicate texture. The lack of eggs means there's no protein network forming structure, and the lack of leavening means no air pockets creating cake-like texture. Instead, you get cookies that are almost sandy in texture - they crumble easily but also melt from body heat. This is the defining characteristic that makes snowballs special and different from all other cookies.
Why Powdered Sugar Is Essential
Using powdered sugar instead of granulated sugar in the dough isn't just preference - it fundamentally changes the cookies' behavior and texture. Granulated sugar is large crystals that don't dissolve completely during mixing and baking. These crystals interfere with the dough structure, create spread during baking through caramelization, and produce crispy rather than tender texture. Powdered sugar is granulated sugar ground to fine powder and mixed with about 3% cornstarch to prevent clumping. The fine particle size means it dissolves almost completely into butter during creaming, creating smooth texture. The cornstarch inhibits gluten development and adds tenderness. Cookies made with powdered sugar stay compact and round, while cookies made with granulated sugar spread flat and become crispy. This is why the recipe specifically requires powdered sugar - using granulated would create completely different cookies that don't deserve the name snowballs.
The Double Coating Technique
Rolling cookies twice in powdered sugar isn't fussy decoration - it's what creates that thick, snowy white coating that makes these instantly recognizable. The first coating while cookies are still warm serves multiple purposes: the warmth melts some of the sugar, creating a thin glaze that adheres to the cookie and tastes sweet. This melted layer also provides a sticky base for the second coating to grab onto. If you only rolled once when warm, the sugar would mostly melt and disappear, leaving you with barely-coated beige cookies. If you only rolled once when cool, the sugar wouldn't stick well and would fall off when you touched the cookies. The two-step process - once warm, once cool - creates that professional bakery appearance where cookies are completely white with a generous, stable coating that doesn't fall off. The timing matters: roll the first time when cookies are warm but not burning hot (2-3 minutes out of the oven), and the second time when completely cool.
Toasting Nuts and Why It Matters
If you're adding nuts - and you really should because they transform these from good to exceptional - toasting them first is essential. Raw nuts have muted flavor and can taste slightly bitter or flat. Toasting nuts at 350°F for 8 to 10 minutes activates their natural oils, creates browning through the Maillard reaction, and develops complex nutty flavors with slight caramel notes. You'll know nuts are done when they smell amazing and have turned slightly darker. Toasted pecans are traditional and provide buttery, sweet flavor. Walnuts offer earthier flavor. Almonds add delicate nuttiness. The nuts should be chopped finely - not into powder but small enough that they distribute throughout the dough rather than creating large chunks. A food processor makes this easy with a few quick pulses. Adding 1 cup of chopped nuts to this recipe doesn't make the cookies taste overwhelmingly nutty but adds depth and texture that makes them more interesting.
Storage, Freezing, and Make-Ahead Strategies
Snowball cookies are excellent for advance preparation and have impressive shelf life. Unbaked dough can be shaped into balls, placed on a baking sheet, frozen until solid, then transferred to a freezer bag and frozen for up to 3 months. Bake from frozen, adding 1 to 2 minutes to the baking time. Baked cookies can be stored in an airtight container at room temperature for up to 2 weeks - they actually improve slightly after a day as flavors meld. For longer storage, freeze baked cookies (already coated in sugar) in airtight containers for up to 3 months. Thaw at room temperature for about 30 minutes before serving - they may need a quick roll in fresh powdered sugar to refresh the coating. For holiday cookie tins, these are ideal because they transport well, don't require refrigeration, and maintain quality for weeks. The high butter content acts as a preservative while the powdered sugar coating protects them from drying out.
Variations and Different Names
While the basic butter-sugar-flour formula remains constant, snowball cookies appear across many cultures with regional variations. Russian tea cakes typically include finely chopped walnuts. Mexican wedding cookies (polvorones) use pecans and sometimes include cinnamon. Greek kourabiethes are similar but often formed into crescents and include brandy or ouzo. Viennese crescents use hazelnuts or almonds and are shaped like crescents. Italian butterballs sometimes include almond extract. Despite different names and minor variations, they're all based on the same concept. For flavor variations while maintaining the classic recipe, try adding ½ teaspoon of almond extract, 1 teaspoon of orange zest, ½ teaspoon of cinnamon, or substituting different nuts. For visual variety, roll in colored sugar instead of white, or press a chocolate chip into the center before baking. Each variation maintains the tender, melt-in-your-mouth texture while creating different flavor profiles.
Troubleshooting Common Problems
When snowball cookies don't turn out right, there's usually a fixable cause. If cookies are dry and crumbly to the point of falling apart, you used too much flour or overbaked them - measure flour carefully by spooning and leveling, and remove from oven when just barely golden on bottom. If they're hard instead of tender, you overbaked them or used granulated instead of powdered sugar - bake just until set and use only powdered sugar. If they spread flat instead of staying round, you didn't chill the dough or your butter was too soft when mixing - always chill for 30 minutes and use proper room temperature butter. If the powdered sugar coating won't stick, you only rolled once or rolled when cookies were completely cool - always roll twice, once warm and once cool. If they taste greasy, your butter was too soft during mixing - butter should be softened but still hold its shape. Most issues relate to ingredient temperature, sugar type, or baking time.
 Pin it
After making snowball cookies hundreds of times over the past fifteen years for countless cookie exchanges, holiday parties, and gift tins, they've become one of my most reliable recipes because they never fail and everyone loves them despite being so simple. I appreciate how five ingredients create something genuinely delicious and how the minimal technique requirements mean I can make massive batches without stress. The melt-in-your-mouth texture that properly made snowballs achieve is unique and addictive in ways that keep people reaching for more. Knowing the simple secrets - proper butter temperature, powdered sugar in the dough, thirty-minute chill, double sugar coating - transforms something that seems basic into cookies that rival much fussier recipes. These represent exactly what holiday baking should be - traditional, reliable, genuinely delicious rather than just pretty, and simple enough to make even when you're overwhelmed with everything else December demands.
Frequently Asked Questions
- → Can I make snowball cookies without nuts?
- Yes! The pecans are totally optional. You can leave them out or replace them with sprinkles for a fun twist.
- → Why do I need to roll the cookies in sugar twice?
- The first coating melts into the warm cookies. Rolling them again after they cool gives you that thick, snowy white coating that looks so pretty.
- → How long do snowball cookies stay fresh?
- They'll keep for up to a week in an airtight container at room temperature. You can also freeze them for up to 3 months.
- → Can I freeze the cookie dough?
- Absolutely! Roll the dough into balls and freeze them for up to 3 months. Bake them straight from the freezer, just add an extra minute to the baking time.
- → What if my dough seems too crumbly?
- Don't worry! It looks dry at first, but once you turn the mixer to high speed after adding all the flour, it will come together perfectly.
- → Can I use salted butter instead?
- Yes, just skip the pinch of salt in the recipe if you're using salted butter.