
 Pin it
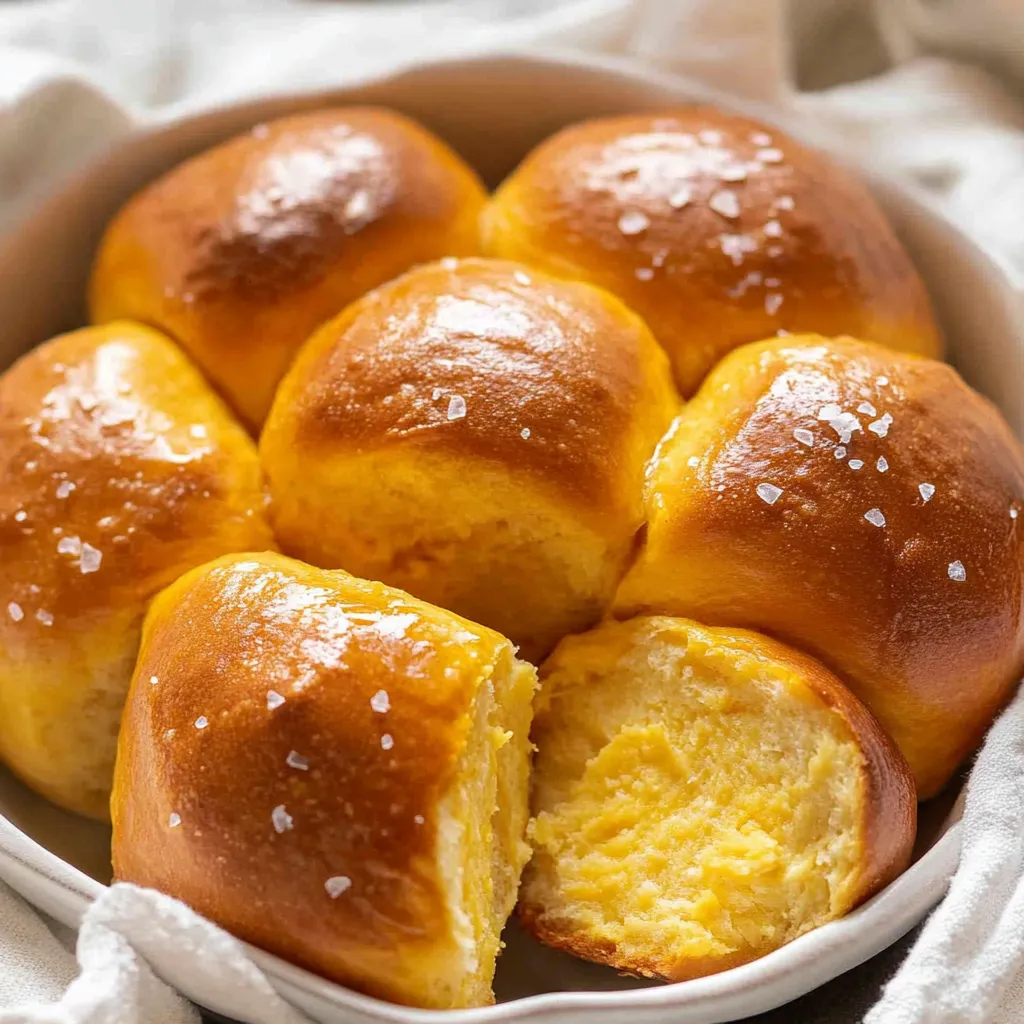
These sweet potato dinner rolls deliver extraordinarily soft, pillowy texture with subtle sweetness and gorgeous golden color that makes them stand out on any table. Mashed sweet potato gets incorporated into enriched dough along with butter, eggs, and milk, creating rolls that stay incredibly tender and moist for days thanks to the starch's moisture-retaining properties. The sweet potato adds nutritional value—extra vitamin A and potassium—while contributing mild sweetness that complements rather than overwhelms savory dishes. Shaped into tall, fluffy rounds and baked until golden, these rolls emerge from the oven with that irresistible fresh-bread aroma and soft interior that practically melts in your mouth, yet they somehow taste even better after cooling completely, which makes them perfect for advance preparation when your oven will be occupied with other holiday dishes.
I started experimenting with sweet potato rolls after tasting a version at a friend's Thanksgiving dinner that was so good I couldn't stop thinking about it for weeks afterward. My early attempts were disappointing—either too sweet and cake-like, or so loaded with sweet potato that they turned orange and tasted more like dessert than dinner rolls. After testing four different versions with varying amounts of sweet potato, butter, and flour, I finally found the perfect balance where the sweet potato enhances without dominating. The rolls have beautiful golden color and subtle sweetness that works equally well with savory gravy or sweet butter. My family has been my enthusiastic taste-testing crew through all these experiments, and now these rolls have become our standard for every holiday meal and special dinner. The kids actually request them specifically, which never happens with regular dinner rolls.
Ingredients and What Makes Them Essential
- Sweet potato (1 medium, about 8 ounces): This provides the signature flavor, gorgeous golden color, and moisture-retaining starch that makes these rolls exceptionally soft and long-lasting. The sweet potato needs to be cooked until completely tender, then mashed smooth so it incorporates evenly into the dough without leaving lumps. Choose a medium-sized sweet potato with orange flesh—the deeper the color, the more beautiful your finished rolls will be. The starch in sweet potatoes absorbs and holds moisture better than wheat flour alone, which translates to rolls that stay soft for days rather than drying out overnight like many homemade breads.
- Whole milk (1 cup, warmed): Milk provides the liquid that activates the yeast and creates the dough base while adding richness and tender texture. Whole milk is ideal because the fat contributes to softer crumb and more flavorful rolls. The milk needs to be warmed to about 110°F—pleasantly warm to the touch but not hot—which is the optimal temperature for activating yeast without killing it. You can use lower-fat or non-dairy milk if necessary, though the rolls won't be quite as rich or tender. Never use cold milk straight from the refrigerator, which won't activate the yeast properly.
- Instant yeast (1 packet, 2¼ teaspoons): Yeast is the living organism that makes the dough rise and creates that characteristic bread texture and flavor through fermentation. Instant yeast works quickly and doesn't require proofing in liquid first, though this recipe includes a proofing step to verify the yeast is active and strong. Platinum yeast by Red Star is excellent because it's specially formulated to be very reliable and produce strong rises. Active dry yeast works with no changes to the recipe—just proof it the same way to ensure it's alive and active before proceeding.
- Honey (3 tablespoons): Honey feeds the yeast to accelerate its activity, tenderizes the dough for softer texture, and adds subtle sweetness that complements the sweet potato without making the rolls taste dessert-like. Honey also helps the rolls brown beautifully during baking and contributes to longer shelf life by retaining moisture. The amount seems substantial but is balanced by the other ingredients—you want gentle sweetness rather than aggressive sugariness. Regular granulated sugar can substitute if you don't have honey, though the flavor will be slightly different.
- Large eggs (2): Eggs provide structure and richness while contributing to the tender, soft texture of these enriched rolls. The proteins in eggs create scaffolding that supports the dough as it rises and bakes, while the fat in the yolks adds richness and helps create fine, tender crumb. Using two eggs rather than one makes a noticeable difference—rolls made with just one egg tend to be drier and more crumbly. Room temperature eggs incorporate more smoothly into the dough than cold eggs, though either works.
- Unsalted butter (6 tablespoons, melted and slightly cooled): Butter adds rich, buttery flavor and creates incredibly soft texture by coating the flour proteins and preventing them from forming tough gluten networks. The fat keeps the rolls tender and contributes to that melt-in-your-mouth quality. Unsalted butter lets you control the salt level precisely. Make sure the melted butter has cooled slightly before adding it to avoid cooking the eggs or killing the yeast with excessive heat. Save extra melted butter for brushing the baked rolls, which adds shine and extra flavor.
- Salt (1½ teaspoons): Salt is essential for developing flavor in bread—without it, the rolls would taste flat and bland no matter how good the other ingredients are. Salt also strengthens gluten structure and controls yeast activity, preventing the dough from rising too quickly and developing off flavors. Don't reduce or omit the salt even though it seems like a lot—bread requires more salt than you might expect because the volume of dough dilutes it significantly.
- Bread flour (4 to 4½ cups): Bread flour contains more protein than all-purpose flour, which creates stronger gluten networks that give these rolls their wonderfully chewy, bread-like texture and help them rise tall. The extra gluten also provides structure that supports the soft, tender crumb without being dense. Start with 4 cups and add more gradually until the dough reaches the right consistency—slightly tacky but not sticky. All-purpose flour can substitute if that's what you have, though the rolls will be slightly less chewy and may not rise quite as tall.
Step-by-Step Instructions
- Prepare the sweet potato:
- Start by peeling one medium sweet potato with a vegetable peeler, removing all the skin completely. Cut the peeled potato into roughly 1-inch chunks so they cook quickly and evenly—smaller pieces cook faster than large ones. Bring a medium pot of water to a boil, add the sweet potato chunks, and boil for 10 to 12 minutes until they're completely tender when pierced with a fork. You should be able to insert a fork easily without any resistance at all. Drain the cooked sweet potato thoroughly in a colander, shaking off excess water, then transfer the chunks to a bowl. Mash them completely smooth using a potato masher, fork, pastry cutter, or even a food processor—you want absolutely no lumps remaining that would create uneven texture in the finished dough. You need 1 cup of mashed sweet potato for this recipe. Set the mashed potato aside to cool while you prepare the other ingredients—it needs to cool to lukewarm rather than hot, or it will be too warm when you add it to the dough and could kill the yeast.
- Proof the yeast:
- Warm your milk to about 110°F—test it by dipping your finger in, and it should feel pleasantly warm but not hot, similar to comfortable bathwater. If you have an instant-read thermometer, use it to verify the temperature since yeast is sensitive to heat. Pour the warm milk into the bowl of a stand mixer or a large mixing bowl if working by hand. Add the packet of yeast and the honey, stirring briefly just to combine everything. Cover the bowl with a clean kitchen towel or plastic wrap and let it sit undisturbed for 5 to 10 minutes. During this time, the yeast will activate and create foam on the surface—you should see bubbles and froth forming, which proves your yeast is alive and ready to work. If nothing happens after 10 minutes and the mixture looks flat, your yeast is dead and you need to start over with fresh yeast.
- Mix the dough ingredients:
- Once your yeast mixture is foamy and active, add the cooled mashed sweet potato, eggs, melted butter, and salt to the bowl. If using a stand mixer, attach the dough hook. Mix on low speed (or stir by hand with a wooden spoon) until everything combines into a shaggy mixture—it will look quite wet and messy at this stage. Begin adding the bread flour one cup at a time, mixing thoroughly after each addition before adding more. After adding about 3½ to 4 cups of flour, the dough will start pulling away from the sides of the bowl and forming a cohesive mass. Continue adding flour gradually—a few tablespoons at a time—until the dough is slightly tacky to the touch but not wet or sticky. You want it to be soft and pliable without leaving excessive residue on your fingers when you touch it. The exact amount of flour needed varies based on humidity, how you measure, and the moisture content of your sweet potato, so go by feel rather than measuring exactly.
- Knead the dough thoroughly:
- If using a stand mixer, increase the speed to medium and knead with the dough hook for 6 to 8 minutes until the dough becomes smooth, elastic, and springs back when you poke it. If kneading by hand, turn the dough out onto a lightly floured surface and knead for 8 to 10 minutes using the heels of your hands in a push-fold-turn motion. Push the dough away from you with your palms, fold it back over itself, give it a quarter turn, and repeat. The dough should transform from rough and shaggy to completely smooth and stretchy. When properly kneaded, the dough will be silky, elastic, and pass the windowpane test—stretch a small piece between your fingers, and if it stretches thin enough to see light through without tearing, the gluten is fully developed.
- Let the dough rise:
- Grease a large bowl generously with butter or cooking spray. Shape your kneaded dough into a smooth ball and place it in the greased bowl, turning it over so all surfaces get coated with the grease. Cover the bowl tightly with plastic wrap or a damp kitchen towel and set it in a warm, draft-free spot. Let it rise for 1 to 2 hours until it has doubled in size—it should look puffy and filled with air. The rising time varies based on the temperature of your kitchen—warmer rooms speed fermentation while cooler rooms slow it down. Don't rush this step by placing it somewhere too warm, which can kill the yeast or create off flavors. When the dough is ready, it should hold an indent when you poke it with your finger rather than springing back immediately.
- Shape the rolls methodically:
- Once the dough has doubled, punch it down with your fist to release the built-up gases and deflate it back to its original size. Turn the dough out onto a clean, lightly floured work surface. Use a bench scraper or sharp knife to divide the dough into 20 equal pieces—weigh them on a kitchen scale if you want precision (each piece should be 65 to 75 grams), though eyeballing works fine too. Take one piece of dough and use both hands to stretch the top surface while simultaneously pinching and gathering the bottom, creating tension on the top that makes a smooth, taut ball. Seal the gathered bottom by pinching it firmly together. The goal is a perfectly smooth top with all the seams hidden on the bottom. Repeat with all pieces, working methodically until you have 20 shaped balls.
- Arrange rolls and let them rise again:
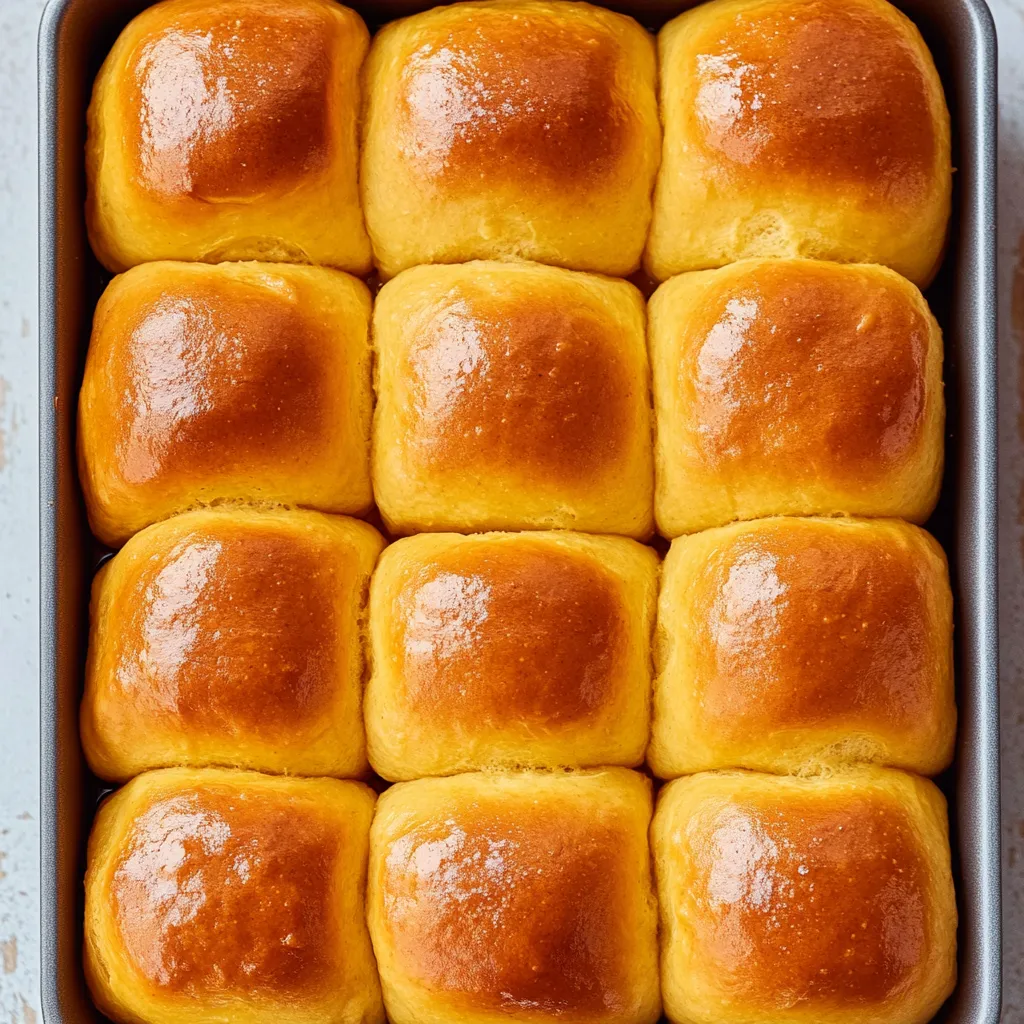
- Grease a 9x13-inch baking pan generously with butter or cooking spray. Arrange your shaped rolls in the pan in 4 rows of 5 rolls each, spacing them relatively evenly with small gaps between each one—they'll expand and touch during rising and baking, which creates those appealing soft sides. Alternatively, you can use two 9-inch round or square pans, or arrange them with space between on a lined baking sheet if you want free-standing rolls with crusts all around. Cover the arranged rolls loosely with plastic wrap or a clean kitchen towel and let them rise again for 30 to 45 minutes until they're puffy, noticeably larger, and touching each other. This second rise is shorter than the first because the dough is already active and warm from handling.
- Bake until golden brown:
- While the rolls complete their second rise, position an oven rack in the center and preheat your oven to 375°F. Once the rolls are puffy and have risen nicely, uncover them and transfer the pan to the preheated oven. Bake for 20 to 25 minutes until the tops are deep golden brown and the rolls sound hollow when tapped. An instant-read thermometer inserted in the center of a middle roll should register about 190°F when they're fully baked. The edges might brown slightly faster than the centers, which is normal and creates appealing color variation. Your kitchen will smell absolutely incredible during baking—that irresistible fresh bread aroma that draws everyone to the kitchen.
- Brush with butter and serve:
- As soon as the rolls come out of the oven, brush the tops generously with melted butter while they're still hot—the butter will soak in slightly and create gorgeous shine while adding extra rich flavor. If desired, sprinkle the buttered tops with flaky sea salt, which adds textural interest and enhances the subtle sweetness. Let the rolls cool in the pan for about 10 minutes before serving, though they're honestly delicious at any temperature. The flavor actually improves and deepens as they cool completely, so don't feel pressured to serve them piping hot. Pull apart the connected rolls and serve them warm or at room temperature with additional butter, honey butter, or cinnamon butter for spreading.
 Pin it
The technique that made the most dramatic difference in my results was learning to properly shape the rolls with tight, smooth tops rather than just rolling them into rough balls. My early attempts produced rolls that looked lumpy and uneven, with some rising tall while others stayed flat and spread sideways. Once I learned to really stretch the top surface while gathering and sealing the bottom—creating genuine surface tension that holds the ball shape—my rolls became uniformly tall and beautifully domed. That stretching motion on top creates a tight skin that traps gases during rising and baking, forcing the rolls to rise upward into impressive height rather than spreading outward into flat pucks. Now I take the extra 30 seconds per roll to shape them properly with smooth tops and well-sealed bottoms, and the visual improvement is remarkable. They look professionally made rather than homemade, and they rise much more uniformly during both the second rise and baking.
Understanding Potato Starch in Bread Baking
The addition of potato to bread dough fundamentally changes the texture and shelf life through the unique properties of potato starch compared to wheat starch. Potatoes are among the starchiest vegetables available, containing significantly more starch than wheat flour by volume. When you incorporate mashed potato into dough, you're dramatically increasing the total starch content, which affects the finished bread in several beneficial ways. Higher starch content creates tenderer crumb because starch granules don't form the tough, elastic networks that wheat gluten creates. The bread becomes softer and more tender without losing structure.
Potato starch also has exceptional water-holding capacity—it absorbs and retains moisture far more effectively than wheat starch. This characteristic means bread made with potato stays moist and fresh-tasting for much longer than bread made with only wheat flour. Regular dinner rolls often become dry and stale within 24 hours, while potato rolls remain soft and tender for days when stored properly. The retained moisture prevents the starch from crystallizing (retrogradation), which is the process that makes bread go stale. This extended freshness makes potato rolls particularly valuable for holiday entertaining when you need to prepare ahead.
Sweet potatoes specifically add nutritional benefits beyond what regular potatoes provide. They contain high levels of vitamin A from beta-carotene, which gives them that gorgeous orange color. The vitamin A content in one medium sweet potato exceeds your daily requirements. Sweet potatoes also provide more potassium than white potatoes and contribute fiber, making these rolls comparable to whole wheat bread nutritionally despite using refined white flour. The natural sugars in sweet potato are higher than white potato, contributing subtle sweetness without requiring excessive added sugar in the recipe.
Enriched vs. Lean Dough Characteristics
Understanding the difference between enriched and lean doughs helps you predict how bread will turn out and explains why certain recipes use specific ingredients. This sweet potato roll recipe uses enriched dough, which means it contains significant amounts of fat (butter), sugar (honey), eggs, and milk beyond the basic flour, water, yeast, and salt that constitute lean dough. Each enriching ingredient serves specific purposes and creates characteristic soft, tender texture with rich flavor.
Butter coats flour particles and interferes with gluten development, preventing the formation of strong, elastic gluten networks that would make the bread chewy and tough. This results in tender crumb that tears easily and melts in your mouth rather than requiring extensive chewing. The butter also contributes rich, buttery flavor that makes the rolls taste indulgent. Eggs provide structure through protein coagulation while the fat in yolks adds richness and contributes to fine, even crumb with small, uniform air pockets. Milk adds moisture and contributes sugars that help with browning, while the proteins and fats create tender texture and rich flavor.
The trade-off with enriched dough is that all these added ingredients slow gluten development and yeast activity compared to lean doughs, which is why enriched breads typically require longer mixing and kneading. The fats coat the yeast cells and slow their fermentation, extending rising times. However, the potato starch in this particular recipe actually accelerates yeast activity enough to offset some of the slowing effects from the butter and eggs, which is why these rolls rise faster than typical enriched doughs. Understanding these principles helps you troubleshoot if something goes wrong and explains why you can't simply add butter and eggs to lean dough recipes without adjusting other factors.
Make-Ahead and Storage Strategies
Sweet potato dinner rolls offer exceptional flexibility for advance preparation, which makes them ideal for holiday meals when oven space and time are at a premium. The most convenient approach is baking them completely the day before serving, letting them cool fully, then storing them in an airtight container or plastic bag at room temperature. Contrary to what you might expect, these rolls actually taste better after sitting overnight as the flavors meld and develop. On serving day, simply warm them in a 300°F oven for 5 to 10 minutes until heated through but not dried out, or serve them at room temperature since they're genuinely delicious without reheating.
For even more advance planning, you can freeze the rolls at various stages with excellent results. To freeze shaped unbaked rolls, arrange them in the pan as directed for the second rise, but instead of letting them rise, cover tightly with plastic wrap and freeze immediately. They'll keep frozen for up to one month. When ready to bake, remove from freezer and let thaw and rise at room temperature for 2 to 3 hours until puffy and doubled, then bake as directed. This method gives you fresh-baked rolls with minimal day-of effort.
Alternatively, freeze fully baked and cooled rolls wrapped tightly in plastic wrap and placed in freezer bags for up to 3 months. Thaw overnight at room temperature or in the refrigerator, then warm in a 300°F oven for about 10 minutes before serving. The texture after freezing and reheating is remarkably close to fresh, making this an excellent strategy for preparing well in advance of busy holidays. You can even freeze individual rolls wrapped separately for grabbing one or two at a time for quick breakfasts or lunches throughout the month.
 Pin it
These sweet potato dinner rolls have completely replaced regular dinner rolls in my household because they're simply better in every measurable way—softer texture, better flavor, longer freshness, and more nutritious without tasting healthy or virtuous. The make-ahead capability means I can bake them when convenient rather than scrambling on the day I need them, and the fact that they taste better after cooling removes all pressure to serve them immediately. I love that one batch makes 20 generous rolls, which feeds my whole extended family at holidays with some leftover for sending people home with extras. The subtle sweetness works beautifully with both savory dishes like roasted turkey and gravy and sweet accompaniments like honey butter or jam, making them incredibly versatile for any meal. Once you experience how these stay soft and delicious for days while regular rolls go stale overnight, and how that gorgeous golden color and tender crumb impresses everyone at the table, you'll understand why these have earned permanent status in my holiday menu rotation and why I make them multiple times every fall and winter season.
Frequently Asked Questions
- → Can I use regular potatoes instead of sweet potatoes?
- Yes, regular white potatoes work perfectly fine in this recipe. You don't need to change anything else in the ingredients or instructions.
- → Can I make these rolls ahead of time?
- Absolutely. You can refrigerate the shaped rolls overnight for up to 15 hours, then let them rise at room temperature for 1-2 hours before baking.
- → How do I store leftover rolls?
- Keep them covered at room temperature for up to 3 days, or store in the fridge for up to a week. They also freeze beautifully for up to 3 months.
- → Do I need a stand mixer for this recipe?
- No, you can mix and knead the dough by hand using a wooden spoon or sturdy spatula. It just requires a bit more arm work.
- → Can I use all-purpose flour instead of bread flour?
- Yes, all-purpose flour works great. Bread flour makes the rolls slightly chewier, but both types create soft and fluffy rolls.
- → Why are my rolls not rising?
- Make sure your yeast is fresh and your milk isn't too hot (should be around 110°F). Also, give the dough enough time to double in size during the first rise.