
 Pin it
These crispy air fryer banana chips deliver that perfect satisfying crunch you crave from a chip but with the natural sweetness of banana. The low and slow cooking method ensures they dehydrate properly, creating that ideal crisp texture rather than ending up burnt yet somehow still soft in the middle. With just a light coating of oil and a sprinkle of cinnamon, these banana chips make a delicious snack you can feel good about enjoying.
I stumbled upon this recipe after many failed attempts at making crispy banana chips. My kids kept begging for those expensive packaged ones from the store, and I was determined to make a healthier version at home. After several batches that either burned to a crisp or remained frustratingly soft, I finally cracked the code! The secret really is the lower temperature and longer cooking time – patience definitely pays off here.
Ingredients
- 2-3 firm bananas: Using slightly underripe bananas (green-yellow) works best as they're firmer and easier to slice cleanly without turning to mush
- 1 tablespoon avocado oil or olive oil: The thin coating helps the chips crisp up nicely without adding too much fat or calories
- ½ teaspoon ground cinnamon: This warm spice complements the natural sweetness of the bananas perfectly, but it's optional if you prefer plain chips
Step-by-Step Cooking Instructions
- Step 1: Preheat your air fryer:
- Set your air fryer to 300°F and let it preheat for 5 minutes. This step is crucial for getting even cooking from the start and helps achieve that perfect crisp texture. Many people skip preheating, but I've found it makes a significant difference in the final result.
- Step 2: Prepare the bananas:
- While the air fryer preheats, peel your bananas and slice them into rounds approximately ¼ inch thick. Try to make the slices as uniform as possible to ensure even cooking. If you have a mandoline slicer, it works beautifully for this, but a sharp knife works just fine too. Place all the slices in a medium bowl, being careful not to break them.
- Step 3: Make the cinnamon oil:
- In a small separate bowl, combine the tablespoon of oil with the cinnamon and stir until well mixed. This extra step ensures the cinnamon distributes evenly over all the banana slices rather than clumping in spots. I learned this trick after making several batches with unevenly distributed cinnamon.
- Step 4: Coat the banana slices:
- Pour the cinnamon-oil mixture over the banana slices in the bowl. Using a rubber spatula or your hands, gently toss until all slices are lightly and evenly coated. Be gentle to avoid breaking the slices, especially if your bananas are on the riper side.
- Step 5: Arrange in the air fryer:
- Place the coated banana slices in your air fryer basket in a single layer, making sure they don't overlap. Depending on the size of your air fryer, you may need to cook these in 2-3 batches. Overcrowding will result in steaming rather than crisping, so resist the temptation to pile them in.
- Step 6: Cook the banana chips:
- Air fry the banana slices at 300°F for 25-28 minutes total, pausing halfway through (around the 12-14 minute mark) to flip each slice over. This ensures even dehydration and crisping on both sides. The edges may start to brown slightly toward the end of cooking, which is perfectly fine.
- Step 7: Cool completely:
- Once the cooking time is up, remove the banana chips from the air fryer and let them cool completely on a wire rack for at least 5-10 minutes. This cooling period is essential as the chips continue to crisp up as they cool. The first time I made these, I got impatient and tried one right away – they're much better after cooling!
- Step 8: Enjoy or store:
- Once completely cooled, enjoy your crispy banana chips immediately or store them in an airtight container for up to 5 days (though they rarely last that long in my house). If they lose some crispness over time, you can refresh them with a quick 1-2 minute stint in the air fryer.
 Pin it
Perfecting Your Banana Chip Technique
The journey to perfect banana chips taught me a lot about dehydrating fruit in the air fryer. Unlike deep-fried banana chips, which get their crunch from hot oil, air fryer chips need time to properly dehydrate. That's why the lower temperature of 300°F works better than the higher temperatures many recipes suggest.
I've found that the thickness of your banana slices is crucial too. While ¼ inch works reliably well, if you're confident in your slicing abilities, going slightly thinner (about ⅛ inch) creates even crispier chips. Just be warned that thinner slices are more delicate to handle and can burn more easily, so you'll need to reduce the cooking time and watch them closely.
My daughter's friend has several food allergies, and these banana chips have become my go-to snack when she visits. Her mom was so impressed that she bought an air fryer specifically to make these! The fact that they contain no preservatives or added sugar makes them popular with health-conscious parents at our school.
Beyond Basic Banana Chips
While the cinnamon version is my family's favorite, I've experimented with several variations that have been big hits. For a tropical twist, try adding a pinch of ground coconut to the oil mixture before coating. The subtle coconut flavor pairs beautifully with the banana and reminds me of our vacation to Hawaii last year.
For special occasions, I'll sometimes make a dessert version by drizzling the cooled chips with a small amount of melted dark chocolate. The combination of crispy banana with a hint of chocolate is absolutely divine and feels much more indulgent than it actually is.
These chips also make a wonderful topping for oatmeal or yogurt in the morning, adding a satisfying crunch and natural sweetness without the refined sugar of granola or store-bought toppings. I often make a double batch specifically to have on hand for breakfast bowls throughout the week.
I've been making these banana chips for nearly three years now, and they've become such a staple in our house that the kids notice immediately when the banana chip jar is empty. What started as a money-saving alternative to store-bought chips has become one of our favorite healthy snacks, and I hope your family enjoys them as much as mine does!
Frequently Asked Questions
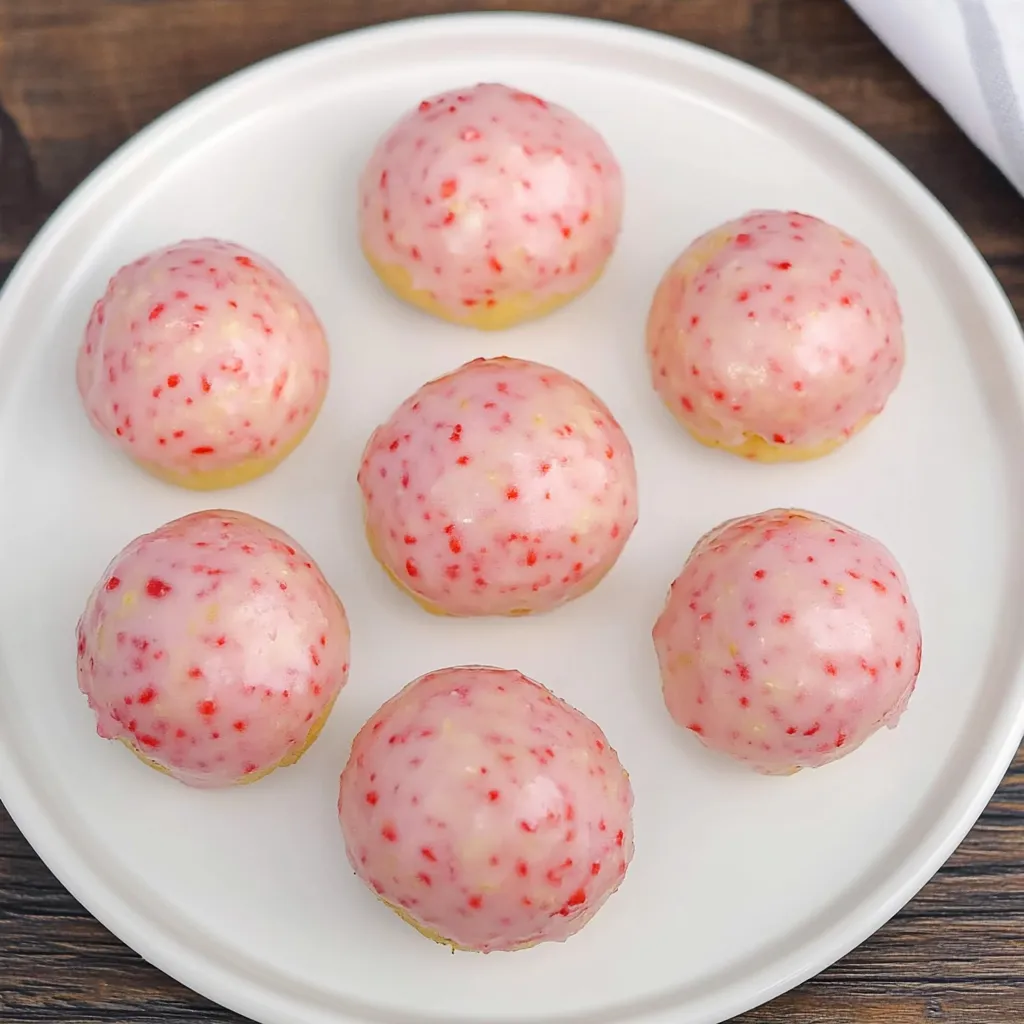
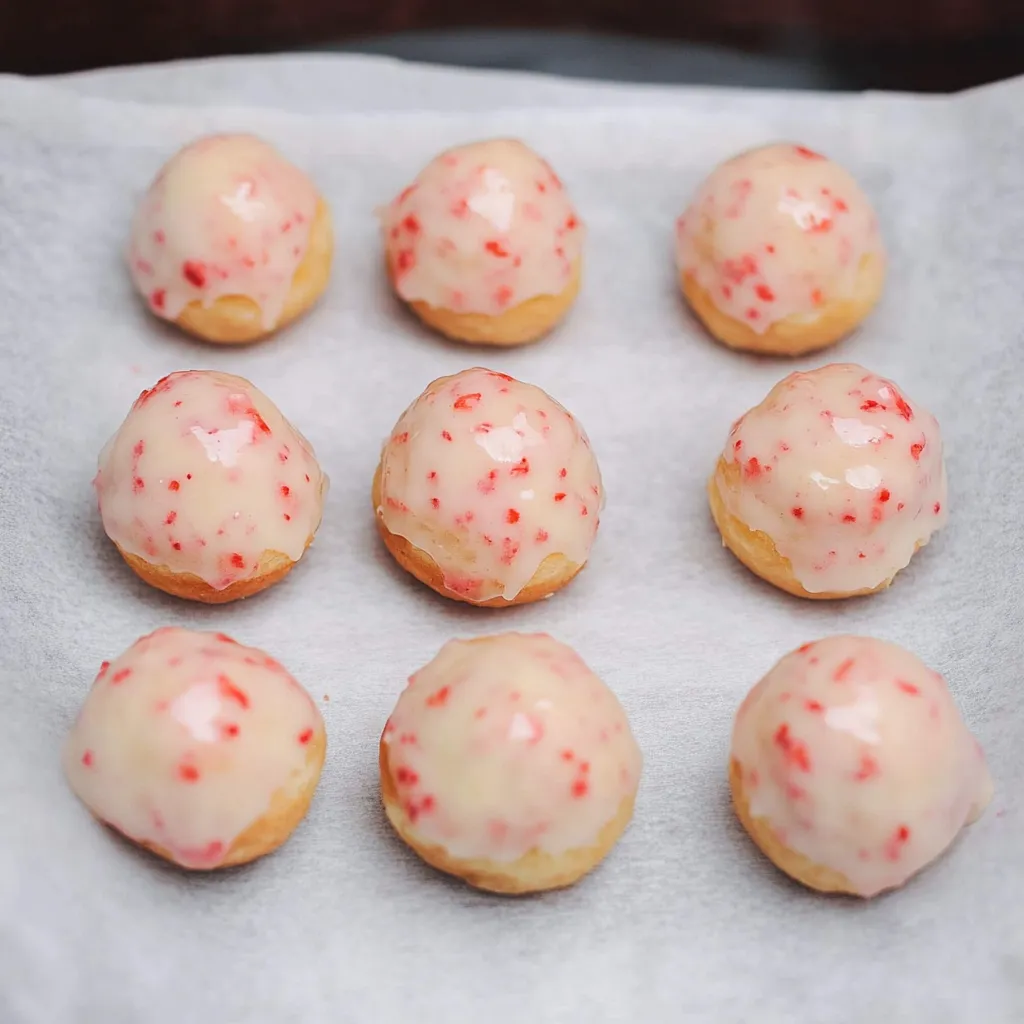
- → Can I use frozen strawberries instead of fresh?
- Yes, but thaw and drain them well first to remove excess moisture. Pat them dry before adding to the batter to prevent it from becoming too wet.
- → How do I store these donut holes?
- Store in an airtight container at room temperature for 1-2 days or refrigerate for up to 4 days. The glaze might soften slightly over time.
- → Can I make these without a mini muffin tin?
- Yes, you can use a regular muffin tin for larger donuts, but increase the baking time to 12-15 minutes or until a toothpick comes out clean.
- → Why didn't my donut holes turn pink?
- The pink color comes from the strawberries. If yours aren't pink enough, your strawberries might not be very ripe or deeply colored. You can add a drop of red food coloring if desired.
- → Can I make these dairy-free?
- Replace the milk with almond milk, the yogurt with dairy-free yogurt, and use plant-based butter. For the glaze, substitute coconut cream for the heavy cream.