
 Pin it
Mashing cooked sweet potato with flour and salt creates pliable dough that rolls into soft, pliable tortillas with subtle sweetness and beautiful orange color. Microwaving the sweet potato dries it out more than roasting, which means less flour needed and easier dough handling. Rolling thin and cooking in a hot skillet for just a minute per side creates flexible wraps perfect for quesadillas, burritos, or even sweet fillings like peanut butter and banana. These come together in 20 minutes with three ingredients and add vegetables to something kids already love eating.
Sweet potato tortillas became my solution for sneaking vegetables into my picky eater's diet after discovering that the orange color actually makes them more appealing rather than suspicious. The first time I made these, I tried oven-roasting the sweet potato and ended up with wet, sticky dough that required so much extra flour the tortillas became tough. Learning that microwaving creates drier flesh that needs less flour was the breakthrough. Now I make these constantly because they're genuinely easy while adding nutrition to tacos and quesadillas my kids already love.
Ingredients and Why They Matter
- Sweet potato (1 large, about 8 ounces): Orange-fleshed variety; should be firm and unblemished
- All-purpose flour (1½ cups plus more for rolling): Structure; gluten-free 1:1 flour substitutes
- Salt (½ teaspoon): Enhances flavor; can add other seasonings
How To Make It
- Cook the sweet potato:
- Use a fork to poke 6-8 holes all over the sweet potato - this allows steam to escape and prevents explosions in the microwave. Place on a microwave-safe plate and microwave on high power for 6-7 minutes, flipping halfway through. The sweet potato is done when it feels very soft when squeezed with an oven mitt and a fork slides through easily with no resistance. Let it cool for 2-3 minutes until you can handle it comfortably. The microwave method is essential here - it creates drier flesh than oven roasting, which means you'll need less flour and get more pliable dough.
- Measure and mash:
- Cut the cooked sweet potato in half lengthwise and use a spoon to scoop all the orange flesh into a medium bowl, discarding the skin. Use a fork or potato masher to mash it completely smooth with no lumps remaining - lumps create uneven texture in the dough and weak spots in the tortillas. Measure out exactly ½ cup of mashed sweet potato and place it in a large mixing bowl. This measurement is critical for proper dough consistency. Too much sweet potato makes sticky, unworkable dough. Too little makes dry, crumbly dough that tears. Save any extra mashed sweet potato for another use.
- Mix the dough:
- Add the flour and salt to the bowl with the measured ½ cup sweet potato. Use a fork to stir everything together, breaking up the sweet potato and incorporating the flour. The mixture will look dry and crumbly at first - this is correct. Keep stirring until most of the flour is incorporated but the mixture still looks shaggy and crumbly rather than smooth. Once it reaches this point, use your hands to knead it together, pressing and folding the dough until it comes together into a cohesive ball. The dough should be soft and pliable, similar to Play-Doh, and only slightly tacky to the touch. If it's very sticky and won't form a ball, add 1 tablespoon more flour at a time, kneading after each addition, until it reaches the right consistency.
- Divide and shape:
- Lightly flour a clean work surface and your hands. Place the dough ball on the floured surface and use a knife or bench scraper to cut it into 4 equal pieces for larger tortillas (about 8 inches diameter) or 6 pieces for smaller tortillas (about 6 inches diameter). Roll each piece between your palms to form a smooth ball. The surface tension from rolling helps create uniform, crack-free tortillas. Keep the dough balls covered with a damp towel while you work to prevent drying.
- Roll out thin:
- Generously flour your work surface and a rolling pin. Take one dough ball and flatten it slightly with your hand. Use the floured rolling pin to roll from the center outward, rotating the dough 90 degrees after each roll to maintain a circular shape. Keep rolling, flouring the surface and pin as needed to prevent sticking, until the tortilla is very thin - about 1/16 inch thick or roughly the thickness of a quarter. Roll it thinner than you think you should - the tortillas will puff slightly during cooking. If the edges crack while rolling, the dough is too dry - wet your hands slightly and pat the dough ball before rolling. Aim for as circular as possible but don't stress about perfect circles.
- Cook in skillet:
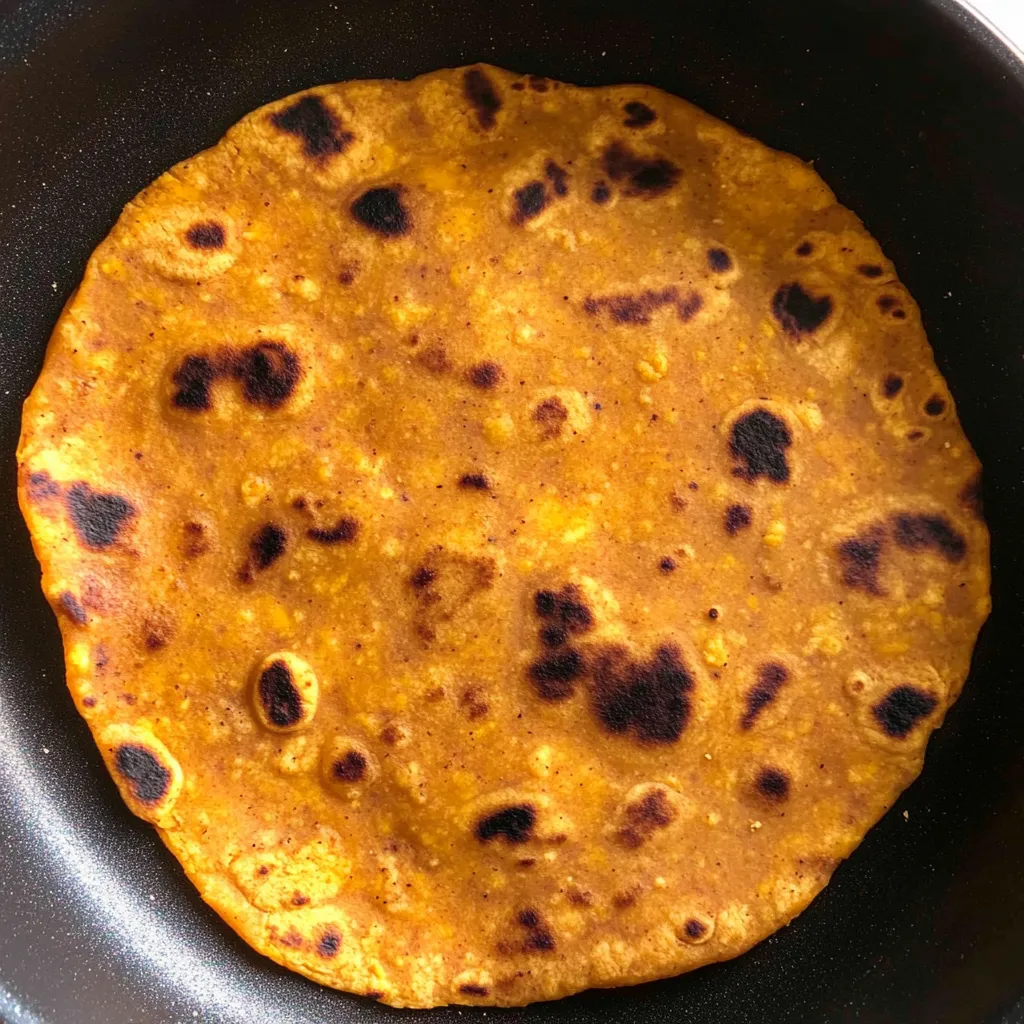
- Heat a large nonstick skillet or cast iron pan over medium-high heat for 2-3 minutes until hot. Don't add oil unless your pan is prone to sticking - these should cook dry. Carefully transfer one rolled tortilla to the hot pan. Cook for about 1 minute until light brown spots and slight charring appear on the bottom. The tortilla may puff up slightly in spots - this is perfect. Use a spatula to flip and cook the other side for another 45 seconds to 1 minute until it also has light char marks. The tortilla should feel flexible when done, not crispy or hard. Transfer to a plate and cover with a clean kitchen towel to keep warm and pliable. Repeat with remaining dough balls, adjusting heat if they're browning too quickly or not browning enough.
- Serve or store:
- Use the warm tortillas immediately for tacos, quesadillas, wraps, or burritos. They're most pliable when fresh. Store cooled tortillas in an airtight container or zip-top bag at room temperature for up to 2 days, refrigerated for up to 5 days, or frozen for up to 3 months with parchment paper between each tortilla to prevent sticking. Reheat briefly in a dry skillet or wrapped in a damp paper towel in the microwave for 15-20 seconds before using.
 Pin it
Microwave versus oven for sweet potatoes confused me until testing both methods side-by-side. Oven roasting at 400°F for an hour creates sweet, caramelized sweet potato with moist, almost syrupy flesh - delicious for eating but too wet for tortilla dough. The excess moisture requires significantly more flour to achieve workable consistency, which makes the tortillas tough and dense. Microwaving for 7 minutes creates drier flesh that needs minimal flour, resulting in soft, pliable tortillas. The microwave's rapid cooking doesn't allow time for moisture to concentrate.
The Magic Ratio
The ½ cup sweet potato to 1½ cups flour ratio (roughly 1:3 by volume) creates optimal texture. More sweet potato makes the dough sticky and difficult to roll without adding excessive flour. Less sweet potato makes it dry and prone to cracking. This ratio provides enough sweet potato for color, flavor, and moisture while maintaining workability. Unlike traditional wheat flour tortillas that use fat for pliability, these rely on the sweet potato's natural moisture and starches.
Why So Thin
Rolling tortillas very thin - about 1/16 inch - is crucial because they thicken slightly during cooking as the dough puffs and sets. Tortillas rolled too thick become dense and doughy rather than flexible. They also won't char properly - thick tortillas burn on the outside before cooking through. The thinness creates that characteristic flexibility that lets you fold, wrap, and roll them without cracking. It takes practice to roll consistently thin, but using plenty of flour on the surface and pin prevents sticking.
Dough Consistency Troubleshooting
Perfect tortilla dough should feel soft, smooth, and pliable - similar to Play-Doh or earlobe consistency. It should hold together in a ball without crumbling but not stick excessively to your hands. Too sticky means too much moisture - add flour 1 tablespoon at a time. Too dry and crumbly means not enough moisture - wet your hands and knead that moisture into the dough, or add water 1 teaspoon at a time. The dough should be forgiving and easy to work with once you achieve the right consistency.
Cooking Temperature
Medium-high heat creates the light charring and brown spots that give tortillas their characteristic flavor and appearance. Too low and they dry out without browning. Too high and they burn before cooking through. The pan should be hot enough that a drop of water sizzles immediately. Cast iron holds heat well and creates excellent char marks. Nonstick works but may not char as dramatically. Avoid adding oil - the tortillas should cook dry, which creates better texture.
Gluten-Free Adaptation
For gluten-free tortillas, substitute 1:1 gluten-free all-purpose flour (like Bob's Red Mill or King Arthur brands) in equal amounts. The texture will be slightly different - less stretchy since gluten provides elasticity - but they still work well. Handle the dough gently as gluten-free versions are more delicate. You may need slightly more flour since gluten-free blends absorb moisture differently. Roll carefully as gluten-free tortillas are more prone to tearing.
Flavor Variations
While the base recipe uses just salt, endless customizations exist. Add ½ teaspoon garlic powder or onion powder for savory depth. Mix in 1 teaspoon cumin and ½ teaspoon chili powder for Mexican-inspired flavor. Incorporate 1 tablespoon nutritional yeast for cheesy taste. Add dried herbs like oregano or basil. For sweet versions, add cinnamon and a touch of honey. The neutral sweet potato base accepts any seasonings you love.
Storage and Reheating
Homemade tortillas don't contain preservatives like commercial versions, so they won't last as long. Room temperature storage works for 2 days - keep them tightly wrapped so they don't dry out. Refrigeration extends life to 5 days but can make them slightly tough - warm before using. Freezing works beautifully for up to 3 months. Stack with parchment between each tortilla, seal in a freezer bag, and freeze flat. Thaw overnight in the refrigerator or at room temperature for an hour. Warm in a dry skillet for 30 seconds per side to restore flexibility.
Serving Suggestions
These versatile tortillas work with countless fillings. Make cheese quesadillas by filling with shredded cheese and folding in half. Use for breakfast burritos with scrambled eggs and vegetables. Fill with beans, rice, and salsa for simple burritos. Try sweet fillings like peanut butter and sliced bananas, or almond butter with strawberries and honey. Cut into triangles and bake for tortilla chips. Use as pizza crust topped with sauce and cheese. The subtle sweetness pairs beautifully with both savory and sweet applications.
 Pin it
These sweet potato tortillas represent the kind of recipe that proves homemade versions of everyday foods can taste better while adding nutrition. The combination of soft texture, subtle sweetness, and beautiful orange color creates tortillas that work for any meal from breakfast to dinner. When you watch kids enthusiastically eat vegetables disguised as their favorite wraps, you know you've created something that makes healthy eating easier. Sometimes the best recipes are the ones that upgrade familiar favorites through simple additions, and these sweet potato tortillas definitely accomplish that goal perfectly every single time you make them.
Frequently Asked Questions
- → Can I use regular potatoes instead of sweet potatoes?
- Sweet potatoes work best for this recipe because of their natural sweetness and texture. Regular potatoes might make the tortillas too bland and could require different flour ratios.
- → How do I store leftover tortillas?
- Keep them in an airtight container or ziplock bag in the fridge for up to 3 days. You can also freeze them with parchment paper between each tortilla for up to 2 months.
- → Why is my dough too sticky?
- If your sweet potato was very moist, you'll need extra flour. Add it one tablespoon at a time and knead until the dough stops sticking to your hands.
- → Can I make these ahead of time?
- Yes! Cook all the tortillas, let them cool completely, then stack them with parchment paper in between. Store in the fridge and reheat in a pan for 30 seconds per side when ready to use.
- → Do I need a rolling pin?
- A rolling pin makes it easier, but you can also use a clean wine bottle or even press the dough flat with your hands if you're careful to get it thin enough.
- → Can I make these gluten-free?
- You can try using a gluten-free flour blend instead of all-purpose flour. The texture might be slightly different, but it should still work with the same measurements.