
 Pin it
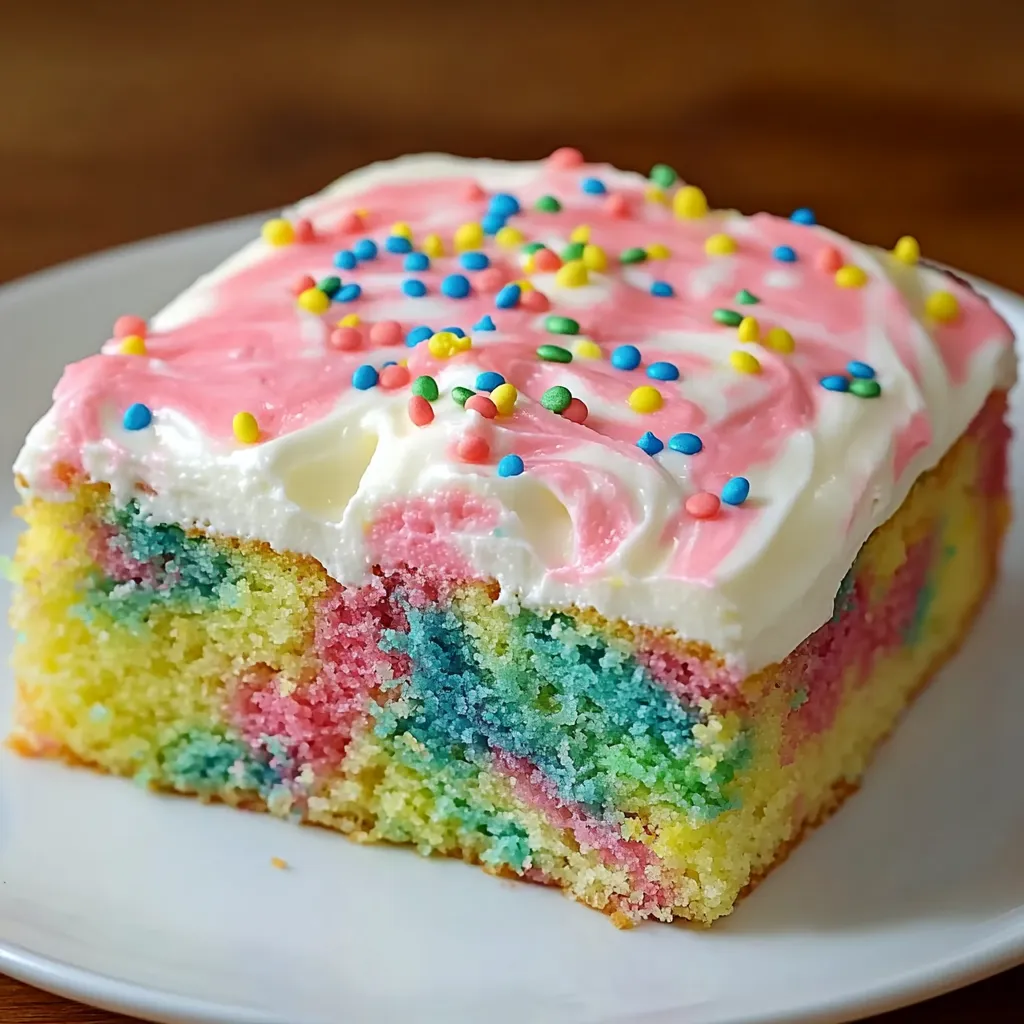
The vibrant surprise inside this Swirled Easter Cake creates instant joy when sliced, revealing beautiful pastel swirls that capture the cheerful spirit of spring. Despite its impressive appearance, this celebration cake requires minimal effort—starting with a boxed mix that's elevated to bakery quality with a few simple additions. Topped with fluffy homemade vanilla buttercream and festive sprinkles, it's the perfect centerpiece for Easter gatherings that looks like you spent hours in the kitchen, when in reality, the active prep time is less than 30 minutes.
I first made this cake for a last-minute Easter brunch where I needed something impressive without spending the entire morning in the kitchen. When I sliced into it, the table fell silent for a moment before erupting in delighted exclamations. Now it's requested not just for Easter, but for birthdays, baby showers, and any celebration that calls for a little extra color and fun!
Ingredients That Make All The Difference
- Sour cream: The secret ingredient that transforms a humble boxed mix into a cake with bakery-quality moisture and texture. Don't substitute with yogurt—sour cream's higher fat content is key.
- Egg whites: Using only the whites creates a lighter, fluffier texture and ensures the cake's white base won't interfere with your pastel colors.
- Vanilla extract: A generous amount in both cake and frosting elevates the flavor beyond what you'd expect from a boxed mix. Use pure rather than imitation for the best taste.
- Softened butter: The foundation of your homemade buttercream. Proper softening (about an hour at room temperature) ensures smooth, lump-free frosting.
- Food coloring: Gel food coloring produces more vibrant colors with less liquid that could affect the cake's texture. Start with just a drop or two for true pastel shades.
Step-by-Step Instructions
- Begin:
- by properly preparing your baking dish. Preheat your oven to 350°F (175°C), then thoroughly grease a 9×13-inch baking dish with butter or cooking spray, paying special attention to the corners where cake tends to stick. Some bakers also line the bottom with parchment paper for extra insurance, though this is optional. Having your pan ready before mixing ensures your batter won't sit and lose volume while you prepare the pan.
- In a large mixing bowl:
- combine the boxed white cake mix, water, egg whites, vegetable oil, sour cream, and vanilla extract. Using an electric mixer, beat on low speed for just 30 seconds to incorporate the ingredients without creating too much air or gluten development. This gentle initial mixing prevents a tough cake texture. Scrape down the sides of the bowl with a rubber spatula to ensure all dry ingredients are incorporated.
- Increase your mixer speed:
- to medium and beat the batter for an additional 2 minutes, stopping occasionally to scrape down the sides of the bowl. This extended mixing time incorporates air into the batter, creating a lighter texture. The batter should become smooth, slightly thick, and noticeably increased in volume. Its consistency should be fluid enough to pour but thick enough to hold the swirled colors in place.
- Pour approximately 2 cups:
- of the plain white batter into your prepared baking dish, spreading it into an even layer that covers the bottom of the pan. This white base layer ensures your colorful swirls will stand out beautifully when the cake is sliced. Divide the remaining batter evenly among three medium bowls for coloring.
- Add a few drops of food coloring:
- to each bowl—blue, pink, and yellow—to create traditional Easter pastel colors. Start with just one or two drops per bowl, stirring thoroughly after each addition. Add more coloring gradually until you achieve the desired pastel shade. Remember that the colors will appear somewhat lighter in the baked cake than in the batter.
- Using a tablespoon:
- randomly drop spoonfuls of each colored batter on top of the white base layer. Alternate colors and placement to create a random pattern across the surface. Don't worry about making it perfect—the beauty of this cake comes from its naturally random swirls. Continue until you've used all the colored batters, distributing them relatively evenly across the cake.
- Take a butter knife or thin skewer:
- and gently draw it through the batter in a swirling motion to create the marbled effect. Move the knife in figure-eight patterns, S-curves, or loose spirals, being careful not to over-swirl. The key is to create distinct swirls without completely mixing the colors together, which would result in muddy-looking batter. Six to eight passes with the knife is usually sufficient.
- Bake the cake:
- in your preheated oven for 30-35 minutes, or until a toothpick inserted into the center comes out clean or with just a few moist crumbs. The cake's surface should spring back when lightly touched. Avoid opening the oven during the first 25 minutes of baking, as temperature fluctuations can cause the cake to sink in the middle. Place the cake on a wire rack and allow it to cool completely before frosting, which usually takes about 1-2 hours.
- While the cake cools:
- prepare your buttercream frosting. In a clean mixing bowl, beat the softened butter with an electric mixer for 1-2 minutes until it becomes light and fluffy. This initial beating incorporates air into the butter, creating a lighter frosting texture. Gradually add the powdered sugar and salt, beating on low speed initially to prevent a sugar cloud, then increasing to medium speed once incorporated. The mixture will look crumbly at first but will come together as you continue mixing.
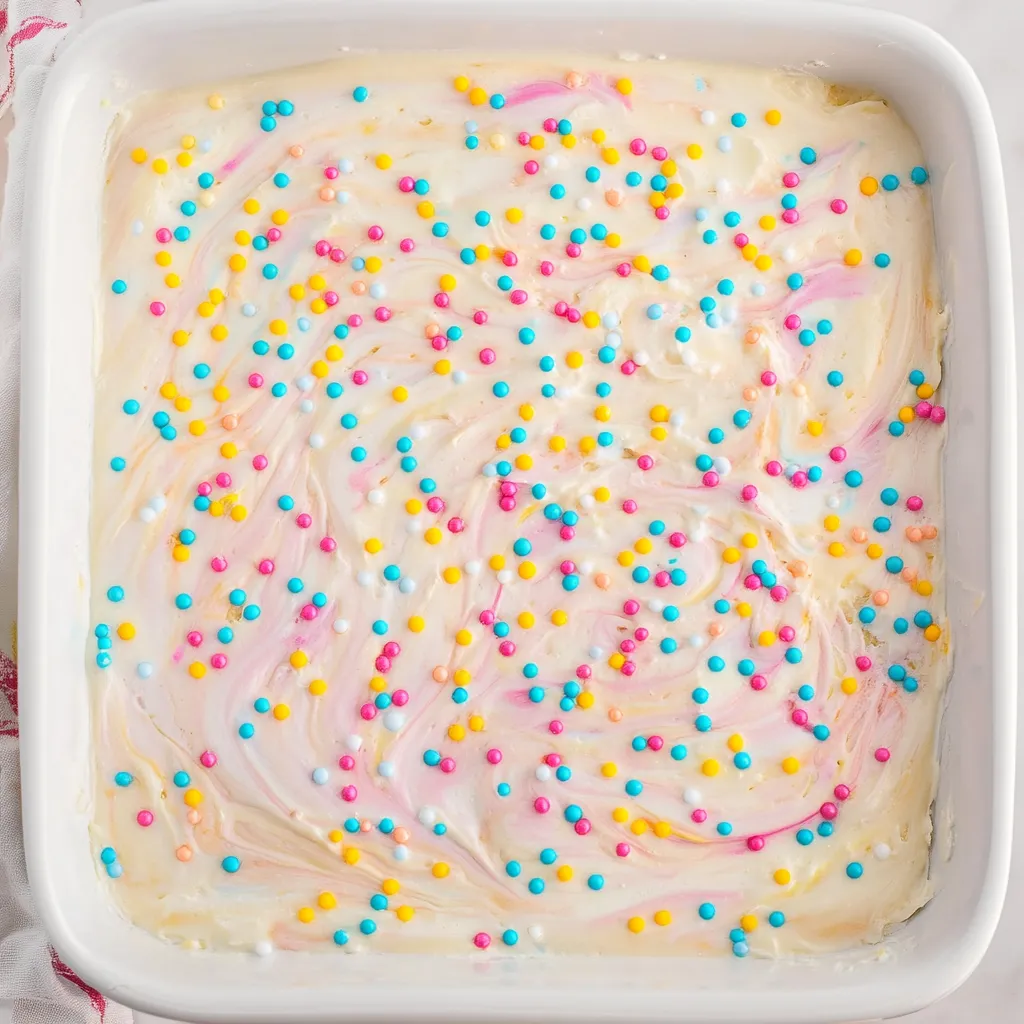
- Add the vanilla extract and heavy cream:
- (or milk) to the frosting, then beat for another minute until the frosting becomes light, fluffy, and easily spreadable. If the frosting seems too thick, add additional cream, one teaspoon at a time, until you reach your desired consistency. Once the cake has completely cooled, spread the frosting evenly across the top using an offset spatula or the back of a spoon. Finish by decorating with Easter-themed sprinkles before slicing and serving.
 Pin it
I learned the importance of gentle swirling through a memorable kitchen failure. In my enthusiasm to create dramatic swirls in my first attempt, I over-mixed the colors until they essentially created a strange grayish-purple cake. Now I remind myself "less is more" when running the knife through the batter, resulting in those beautiful, distinct swirls of color that make this cake so special.
Perfect for Celebrations Year-Round
While this recipe is designed with Easter in mind, its versatility makes it perfect for countless occasions. For a birthday celebration, use the birthday person's favorite colors and top with coordinating sprinkles. Create a patriotic version with red, white, and blue swirls for summer holidays. Baby showers call for classic pink and blue or gender-neutral yellows and greens. The technique remains the same—simply adjust the colors to suit your celebration!
Make-Ahead Tips
This cake can be prepared 1-2 days in advance of your gathering. Bake and cool the cake completely, then wrap it tightly in plastic wrap without frosting. Store at room temperature until the day of serving, then prepare the frosting fresh and decorate. If you need to make the entire cake ahead, store the frosted cake in the refrigerator, covered loosely with plastic wrap (being careful not to disturb the frosting). Remove from the refrigerator 1-2 hours before serving to allow it to come to room temperature for the best flavor and texture.
Frosting Variations
While the vanilla buttercream complements the cake beautifully, don't be afraid to experiment with other frosting flavors. Cream cheese frosting adds a tangy contrast that works especially well with this sweet cake. For chocolate lovers, a chocolate buttercream provides delicious contrast to the colorful interior. Lemon or almond-flavored frostings offer subtle variations that can complement the occasion or your personal preferences.
I've come to treasure this recipe not just for its delicious results, but for how it brings joy to both making and sharing it. There's something magical about cutting into what appears to be a simple white cake to reveal a rainbow of colors inside—it never fails to elicit smiles around the table. The fact that it's so simple to prepare is our little secret, allowing us to create gorgeous, celebration-worthy desserts even on our busiest days.
Frequently Asked Questions
- → Can I make this cake ahead of time?
- Yes, you can make this cake 1-2 days ahead. Store covered at room temperature for best freshness.
- → Can I use a different size pan?
- You can use two 8-inch round pans instead of a 9x13, but you'll need to reduce baking time to about 25-30 minutes.
- → What if I don't have sour cream?
- Plain Greek yogurt works great as a substitute for sour cream in this recipe.
- → Can I make this cake without food coloring?
- Yes, you can skip the food coloring for a plain white cake, or use natural food dyes from beet juice, turmeric, or blueberries.
- → How do I store leftover cake?
- Store covered at room temperature for up to 4 days, or refrigerate for up to a week. Let refrigerated slices come to room temperature before serving.