
 Pin it
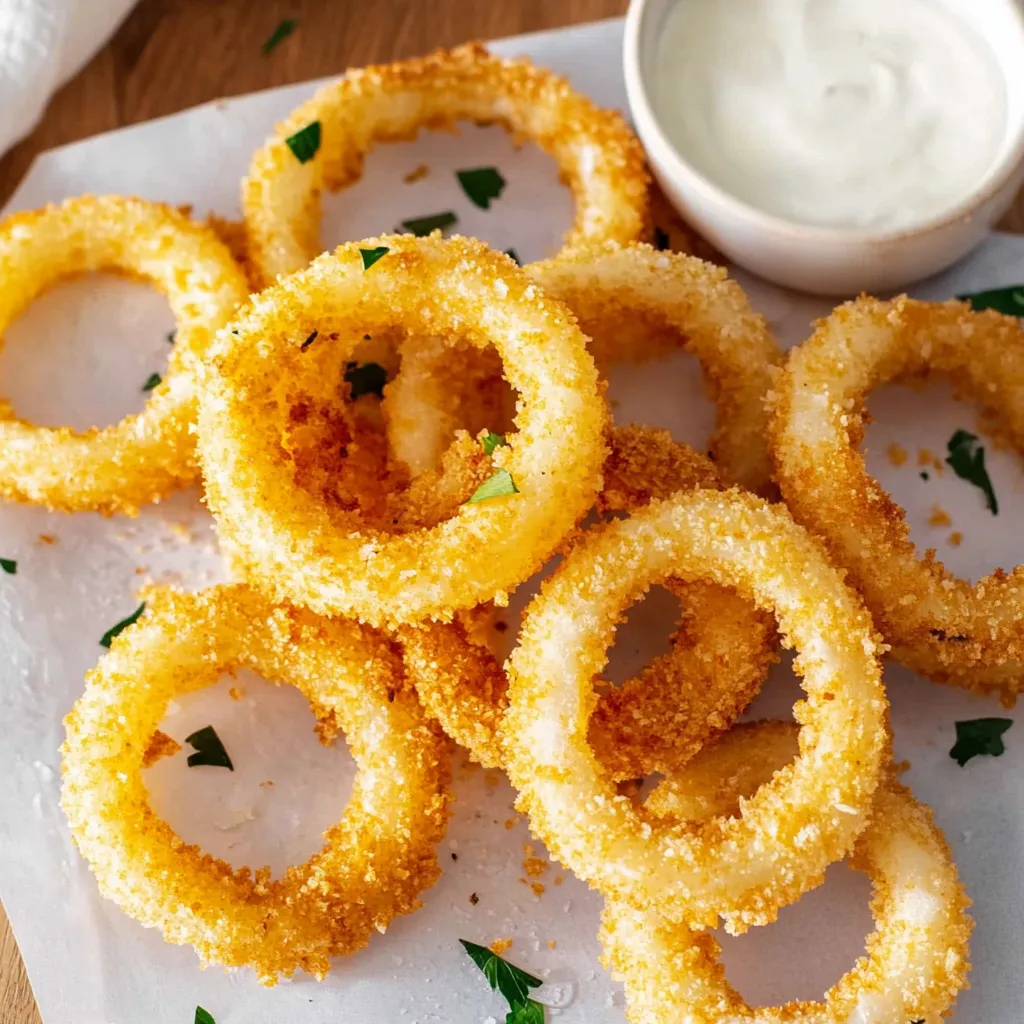
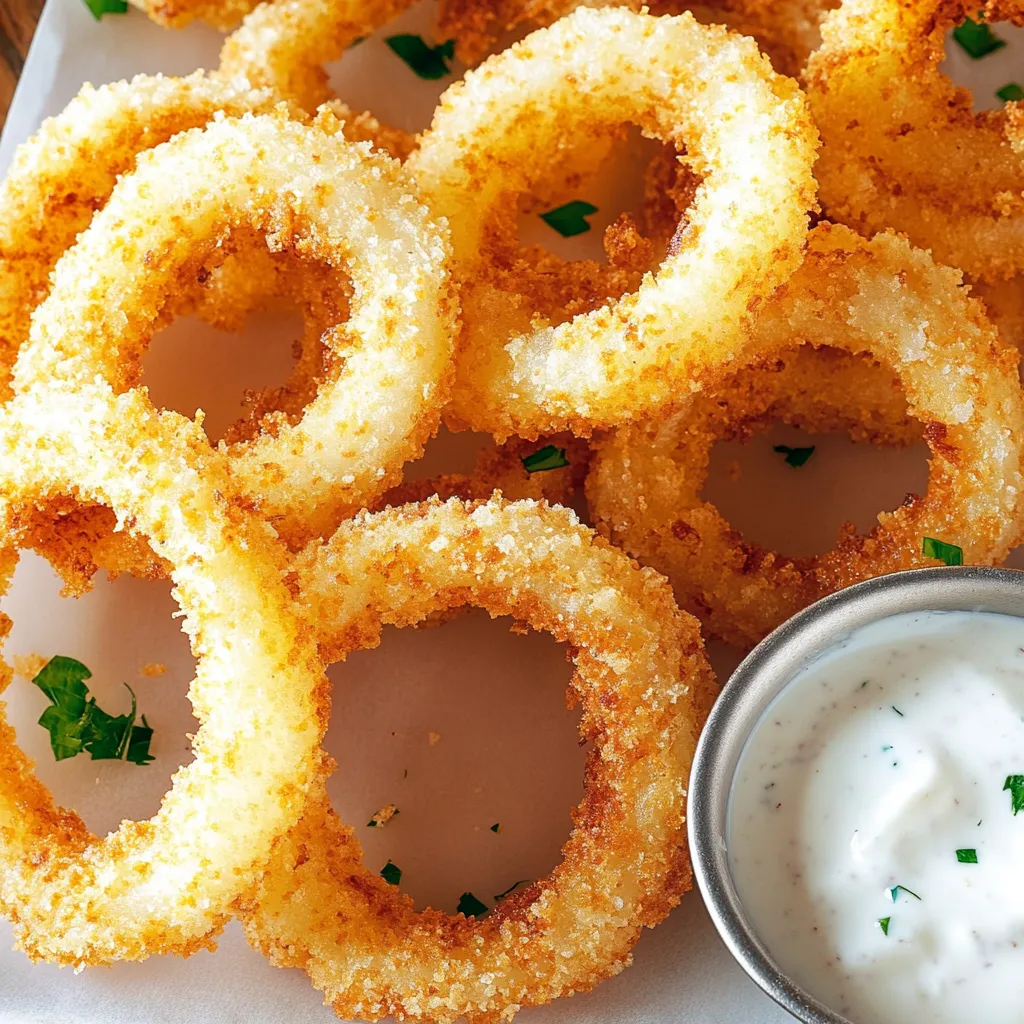
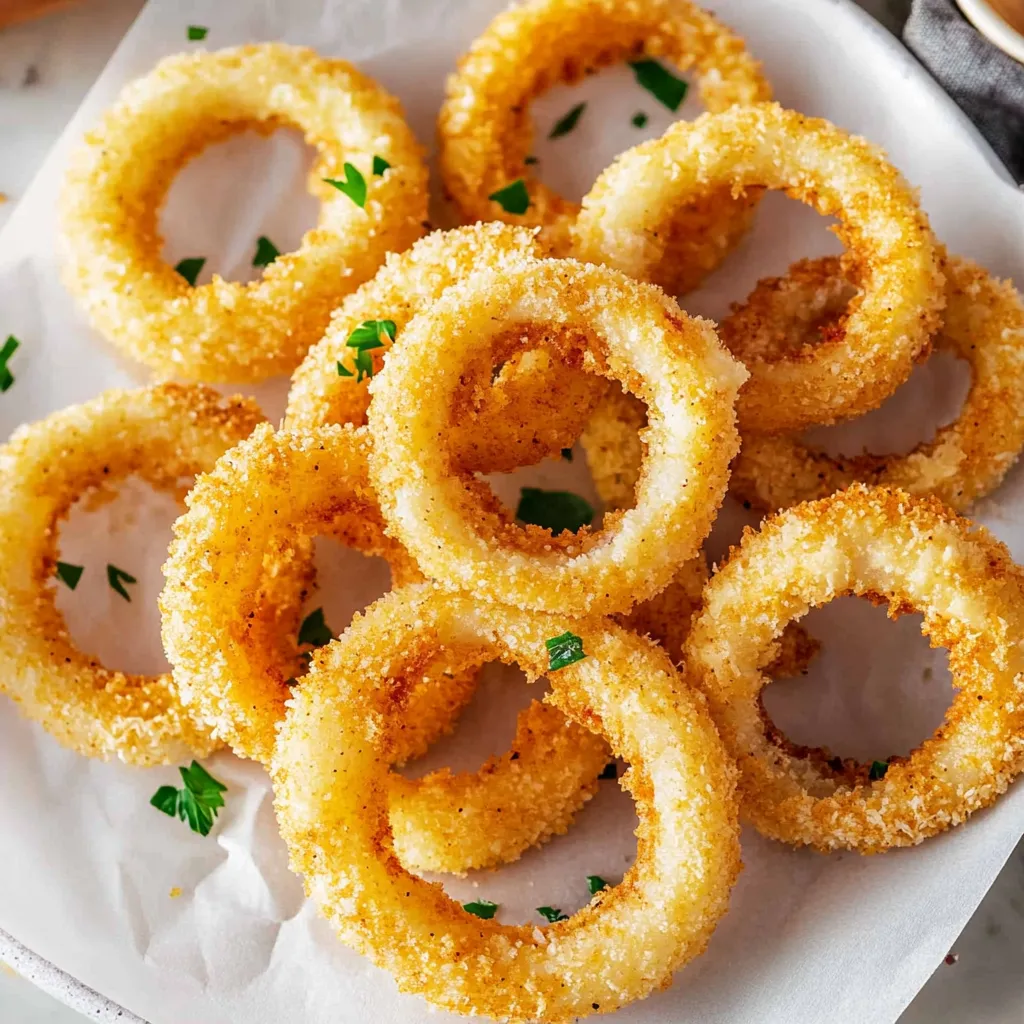
These air fryer onion rings deliver everything you crave from the classic appetizer - golden-brown, shatteringly crispy panko coating giving way to tender, sweet onion rings that pull apart into soft, caramelized layers - but achieve it with minimal oil and zero deep-frying hassle. The triple-dredging technique coating each onion ring first in flour (which creates a dry surface for eggs to grip), then beaten eggs (providing sticky glue for breading), and finally seasoned panko breadcrumbs mixed with garlic and onion powder creates that restaurant-quality crunch, while the air fryer's circulating hot air crisps the coating evenly on all sides without requiring you to stand over bubbling oil or deal with disposal afterward. What makes these so brilliant is how they're genuinely better than traditional deep-fried versions - lighter and less greasy since they use just a drizzle of olive oil rather than submerging in fat, yet somehow crispier because the air fryer's intense, circulating heat dehydrates the coating more effectively than oil frying, creating texture that stays crunchy even as they cool slightly. The sweet yellow onion mellows and caramelizes during cooking, transforming from sharp and pungent raw to tender and almost candy-like, creating that perfect contrast between crispy exterior and soft, sweet interior that makes onion rings so addictive you can't stop at just one.
The first time making these in the air fryer rather than deep-frying reveals what a game-changer this cooking method is - no hot oil splattering everywhere, no lingering fried food smell in your house, no anxiety about oil temperature fluctuations or grease fires. Pulling that first batch from the air fryer basket and seeing perfectly golden-brown onion rings with visibly crispy coating, then biting through the crunch into sweet, tender onion creates instant gratification. Having a plate of these disappear within minutes at a party while everyone asks how you made them confirms you've discovered a recipe worth keeping in regular rotation.
Ingredients - What You Need and Why
- Large yellow onion: provides the sweet, mild base that caramelizes beautifully during cooking; one large onion yields about twelve to fifteen rings depending on size; yellow onions (also called Spanish onions) offer the best balance of sweetness and savory flavor while maintaining structural integrity during cooking; white onions work similarly though they're slightly sharper, while sweet onions like Vidalia or Walla Walla create even sweeter results; red onions are too strong and sharp for this application
- All-purpose flour: about half a cup creates the initial dry coating layer that helps eggs adhere; the flour absorbs surface moisture from the onions, creating a tacky surface that eggs can grip rather than sliding off; this first coating is essential for the breading process to work - without it, eggs and breadcrumbs won't stick properly
- Large eggs: two eggs beaten together create the sticky, protein-rich layer that glues panko to the floured onions; eggs provide both adhesive properties through their proteins and richness that helps browning; beaten until uniform (no streaks of white or yolk), they coat evenly and create consistent coverage
- Panko breadcrumbs: about one and a half cups of these Japanese-style breadcrumbs create dramatically crispier coating than regular breadcrumbs; panko's larger, flakier, airier structure with more surface area crisps up lighter and crunchier, staying crispy longer than dense regular breadcrumbs that can become soggy; avoid Italian-seasoned breadcrumbs which contain herbs that might burn
- Garlic powder: about one teaspoon adds savory, aromatic depth to the coating without the moisture that fresh garlic would introduce; powder distributes evenly throughout the dry panko mixture, ensuring every bite has garlicky notes
- Onion powder: about one teaspoon reinforces and amplifies the natural onion flavor, creating more pronounced oniony taste throughout the coating rather than just in the center; this layering of onion flavor (fresh onion plus onion powder) creates more complex, satisfying results
- Sea salt or kosher salt: about one teaspoon seasons the coating; salt is crucial for making all flavors pop and preventing bland breading; season generously as the coating needs more salt than you'd expect since it's coating relatively large volume
- Extra-virgin olive oil: about two to three tablespoons drizzled or sprayed over the breaded rings provides the fat necessary for browning and crisping; while air fryers work without oil, a light coating dramatically improves browning, flavor, and that fried texture; olive oil's fruity flavor enhances rather than masking the onions; avocado oil or vegetable oil substitute if preferred
How to Make Air Fryer Onion Rings - Step by Step
- Slice and separate the onion into rings:
- Begin by peeling your large yellow onion, removing the papery outer layers and any dry or discolored portions underneath until you reach fresh, firm onion. Using a sharp chef's knife on a cutting board, slice off the root end and stem end, creating flat, stable surfaces. Stand the onion on one flat end and slice it horizontally into rounds about half an inch thick - not thinner or they'll shrink too much and become too crispy, not thicker or the center won't cook through properly while the coating browns. You should get about six to eight slices from a large onion. Now gently separate each slice into individual rings by pushing the centers out with your fingers - the rings naturally separate at their layers. You'll end up with rings of varying sizes from very small innermost rings to large outer rings. The smallest rings (those under about one and a half inches diameter) are too tiny to coat effectively and will overcook, so save them for another use like sautéing or adding to soups. The largest rings and all the medium rings are perfect for this recipe. You should end up with about twelve to fifteen usable rings. Pat them gently with paper towels if they seem very wet, though a bit of moisture helps the flour adhere.
- Set up the breading station with three stages:
- Creating an efficient breading station with everything arranged in logical order makes the coating process smooth and prevents messy hands fumbling with multiple bowls. Set out three shallow bowls, wide dinner plates, or pie dishes in a row on your counter. In the first container, place about half a cup of all-purpose flour. In the second container, crack two large eggs and beat them thoroughly with a fork or whisk until completely uniform with no streaks of white or yolk visible - well-beaten eggs coat more evenly. In the third container, combine about one and a half cups of panko breadcrumbs with one teaspoon of garlic powder, one teaspoon of onion powder, and one teaspoon of salt. Stir the panko mixture thoroughly with a fork to distribute the seasonings evenly throughout - you don't want some rings getting all the garlic while others get none. Have a large plate or baking sheet lined with parchment paper nearby for holding the breaded rings before air frying. This assembly-line setup allows you to work efficiently with one hand staying relatively clean for handling unbreaded rings while the other hand does the messy coating work.
- Bread the onion rings using proper technique:
- Now comes the satisfying, somewhat messy process of coating each ring. Working with one onion ring at a time, drop it into the flour, using your clean hand to flip it and press gently so both sides and edges get coated. Shake off excess flour - you want a light, even coating, not clumps. Transfer the floured ring to the beaten eggs, again flipping to coat all surfaces. Let excess egg drip off for a moment, then immediately transfer to the panko mixture. Here's where technique matters: use your other hand (which should be dry from only touching breaded ingredients) to sprinkle panko over the ring, then press gently but firmly to help breadcrumbs adhere to all surfaces. Flip and press the other side, ensuring complete, even coverage with no bare spots where you can still see egg or onion. Place the fully breaded ring on your prepared plate. Continue this process with all remaining rings - flour, egg, panko, press firmly, transfer to plate. Your hands will inevitably get messy; resist the urge to touch your face or anything else. When finished breading all rings, you can wash your hands before proceeding to cooking. The breaded rings can sit for about five to ten minutes before cooking, which actually helps the coating set and adhere better.
- Air fry in batches until golden and crispy:
- Preheat your air fryer to 370 degrees Fahrenheit for about three minutes - preheating ensures immediate crisping when rings go in rather than gradual heating that can make coating soggy. Arrange onion rings in a single layer in the air fryer basket with space between them - they shouldn't overlap or touch, as this prevents proper air circulation and creates soggy spots where they touch. Depending on your air fryer's size, you'll likely fit about four to six rings per batch, meaning you'll need to work in two to three batches. Drizzle or spray the rings generously with olive oil, ensuring all visible panko gets some oil - you can use a spray bottle, oil mister, or just drizzle from a spoon and use your fingers to spread it around. Don't skip the oil or use too little, as it's essential for browning and crisping. Set the timer for eight minutes initially. After eight minutes, check the rings - they should be golden brown and visibly crispy. If they need more time, continue cooking in one to two-minute increments, checking frequently to prevent burning. Smaller rings cook faster than larger ones, so remove any that are done while leaving others to continue cooking. Total cooking time is usually eight to eleven minutes depending on ring size and your specific air fryer model. Remove finished rings to a serving plate and immediately repeat the process with the next batch.
- Keep warm and serve while hot:
- Air fried foods are always best consumed immediately while the coating is at maximum crispiness, but if you want to serve all the onion rings at once rather than in batches, here's how to manage it: as each batch finishes cooking, transfer the rings to a plate and cover loosely with aluminum foil to keep them warm (don't cover tightly or steam will make them soggy). After your final batch cooks, return all the previously cooked rings to the air fryer basket - at this point they're all cooked, so you don't need to arrange them in a single layer; they can overlap. Air fry for just one to two minutes to warm everything through and re-crisp any coating that softened while sitting. Transfer to a serving platter and serve immediately with your choice of dipping sauces. The rings are best within about twenty to thirty minutes of cooking - after that, the coating begins to soften from the moisture inside the onions. If you do have leftovers, you can attempt to reheat them in the air fryer at 370°F for about three minutes, though they'll never quite match the original crispiness.
 Pin it
Understanding that air fryers work through rapid air circulation (similar to a convection oven but more intense) explains why spacing and oil matter - the hot air needs to contact all surfaces to create even browning, and the oil facilitates heat transfer and browning reactions that create that fried taste and texture without submerging food in fat.
Understanding Air Fryer Technology and How It Works
Air fryers aren't actually fryers in the traditional sense - they're essentially small, powerful convection ovens that cook food by circulating extremely hot air at high speed around the food from all directions. A heating element generates heat while a fan pushes that hot air around rapidly, creating a convection effect that cooks food quickly and evenly while driving moisture out of the surface, creating crispiness. This technology works exceptionally well for foods that would traditionally be deep-fried because the rapid air movement mimics the heat transfer efficiency of hot oil (oil is a better heat conductor than still air, but rapidly moving air bridges that gap). The compact size of air fryer baskets compared to conventional ovens means the heating element is close to the food and the small space heats up quickly, allowing for faster preheating and cooking times. The perforated basket design allows hot air to circulate underneath and around food from all angles simultaneously, which is why proper spacing matters - food touching blocks air circulation and creates soggy spots. The Maillard reaction (browning) that creates flavor and color still occurs in air fryers through a combination of heat and minimal oil, though with less oil than traditional frying. Understanding this mechanism helps explain why certain techniques matter - why oil is still needed (for browning), why spacing is crucial (for air circulation), and why these work so well for breaded items (which benefit from surface dehydration).
Creating Flavor Variations and Seasoning Options
While the basic garlic and onion powder seasoning is delicious, exploring variations keeps onion rings interesting and accommodates different flavor preferences or meal pairings. For spicy onion rings, add one to two teaspoons of cayenne pepper or chipotle powder to the panko mixture, creating heat that builds with each bite. Cheesy onion rings incorporate one-half cup of finely grated Parmesan cheese into the breadcrumb mixture, adding savory, nutty, umami depth. Italian-style rings use one tablespoon of Italian seasoning blend (basil, oregano, thyme) in the panko for herbaceous Mediterranean flavor. Ranch-seasoned rings add two tablespoons of ranch seasoning mix to breadcrumbs for that tangy, herby taste. Cajun onion rings incorporate two teaspoons of Cajun or Creole seasoning for complex, spicy Southern character. BBQ onion rings mix one tablespoon of smoked paprika and one teaspoon of brown sugar into panko for sweet-smoky flavor. Beer-battered style substitutes the egg dip with beer mixed with a bit of flour for tangy, yeasty notes. Each variation maintains the fundamental breading technique while exploring different flavor directions that pair with specific meals or satisfy particular cravings.
Troubleshooting Common Air Fryer Onion Ring Problems
Even with straightforward technique, sometimes air fried onion rings don't turn out perfectly, but understanding what went wrong helps you prevent issues next time. If your breading falls off during cooking, leaving bare onion rings, you either didn't press the panko firmly enough during coating, skipped the flour step which provides adhesion base, or didn't let the breaded rings rest for a few minutes before cooking to allow coating to set - ensure each coating layer adheres properly and consider refrigerating breaded rings for ten minutes before air frying. When rings are pale and not golden brown, you either didn't use enough oil, your air fryer temperature was too low, or you undercoked them - increase oil application, verify temperature accuracy, and cook longer until visibly golden. If the coating is hard and dried out rather than crispy and tender, you used too high a temperature or overcooked them - reduce temperature to 370°F and watch timing carefully. Onion rings that are burnt on the outside but raw inside indicate temperature was too high or rings were too thick - slice thinner and reduce temperature. When coating is soggy rather than crispy, you either overcrowded the basket preventing air circulation, used fresh breadcrumbs instead of panko, or didn't drain excess egg properly - work in smaller batches with proper spacing. If the onions shrink dramatically and pull out of the breading when you bite them, they were sliced too thin or overcooked - aim for half-inch thickness and don't exceed cooking time.
Creating Perfect Dipping Sauces
While these onion rings are delicious plain, understanding classic and creative dipping sauces elevates them from good to exceptional. Classic ketchup needs no explanation but homemade versions (tomato paste, vinegar, honey, spices simmered until thick) taste dramatically better than bottled. Mayo-based sauces work beautifully - plain mayo, garlic aioli (mayo with roasted garlic and lemon), chipotle mayo (mayo with chipotle peppers in adobo), or sriracha mayo for heat. Ranch dressing (buttermilk, mayo, sour cream, dill, garlic, onion) is traditional onion ring pairing, providing cooling creaminess against crispy coating. BBQ sauce offers sweet-tangy-smoky contrast - choose your preferred style from vinegar-based Carolina to sweet Kansas City to spicy Texas. Comeback sauce (mayo-based Southern sauce with chili sauce, Worcestershire, hot sauce, garlic) creates complex flavor perfect for onion rings. Honey mustard (Dijon mustard, honey, mayo) provides sweet-tangy balance. Blue cheese or ranch dip with crumbled cheese adds pungent, creamy richness. Remoulade (mayo with pickles, capers, mustard, herbs) offers tangy complexity. For something different, try curry ketchup (ketchup with curry powder), peri-peri sauce for heat, or even marinara for Italian twist. Having multiple dipping options lets guests customize their experience and keeps things interesting through the plate.
Serving Suggestions and Meal Integration
While onion rings excel as standalone appetizers or snacks, understanding how to incorporate them into complete meals creates more versatile use cases. As appetizers at parties, arrange them on a large platter with small bowls of various dipping sauces, garnished with fresh parsley for color. For game day spreads, serve alongside buffalo wings, mozzarella sticks, loaded nachos, and other finger foods. As burger or sandwich sides, onion rings replace traditional fries - they pair particularly well with veggie burgers, black bean burgers, BBQ pulled pork, fried chicken sandwiches, or classic beef burgers. For build-your-own burger bars, some people even put onion rings directly on their burgers for extra crunch and onion flavor. As components in other dishes, chop leftover onion rings and use them as salad toppers for textural contrast, scatter them over mac and cheese for crunchy topping, or layer them in casseroles. For brunch, serve alongside breakfast sandwiches or as part of a savory breakfast board. At cookouts and barbecues, these complement grilled meats without requiring grill space. The key is recognizing that onion rings' sweet-savory flavor and crispy texture make them surprisingly versatile side dishes that work beyond just bar food context.
Storage, Reheating, and Quality Considerations
While these onion rings taste dramatically better fresh, understanding proper storage and reheating helps you handle leftovers without complete quality loss, though expectations should be realistic. Store leftover onion rings in an airtight container in the refrigerator for up to two days, though the coating softens significantly from moisture released by the onions. Don't store them while still hot or steam will make coating soggy immediately - let them cool to room temperature first. To reheat, return them to the air fryer at 370°F for three to four minutes until warmed through and coating crisps up somewhat. The texture never quite matches fresh onion rings - the coating becomes slightly tougher rather than shattering crispy - but reheating in the air fryer is far superior to microwaving which makes them hopelessly soggy. You cannot successfully freeze breaded onion rings after cooking - freezing and thawing destroys the coating's texture completely. However, you can freeze them before cooking: bread the rings, arrange on a baking sheet in a single layer, freeze until solid, then transfer to freezer bags. Cook from frozen, adding two to three minutes to the cooking time. This make-ahead approach works well for entertaining when you want components prepped in advance. For best results, always plan to cook only what you'll consume immediately, treating these as a fresh preparation rather than something that keeps well.
Understanding Dietary Modifications and Alternatives
While the basic recipe isn't suitable for all dietary restrictions, understanding modifications helps accommodate various needs while maintaining good results. For gluten-free versions, substitute gluten-free panko breadcrumbs (which exist and work well) or use crushed gluten-free corn flakes or rice cereal for the coating, and use gluten-free all-purpose flour for dredging - the results are virtually indistinguishable from regular versions. For egg-free or vegan adaptations, replace beaten eggs with a mixture of non-dairy milk (almond, oat, soy) whisked with one tablespoon of ground flaxseed or chia seeds per quarter cup of milk, letting it sit five minutes to thicken - this creates sufficient stickiness for panko to adhere. Buttermilk also works for vegetarians who eat dairy. For lower-carb versions, substitute the panko with crushed pork rinds (surprisingly effective for creating crispy coating), almond flour, or a combination of almond flour and Parmesan cheese, though these create different texture that's more dense than airy panko. For nut-free needs, the basic recipe is already nut-free as written. Each modification changes results somewhat - gluten-free versions are virtually identical, while egg-free versions may have slightly less golden color, and low-carb versions create different but still delicious texture.
The Science of Breading and Why Three Steps Matter
Understanding the chemistry and physics of breading helps explain why the three-step process (flour, egg, breadcrumbs) produces superior results compared to shortcuts. The flour coating serves multiple crucial functions: it absorbs surface moisture from the onions, creating a dry surface that eggs can adhere to rather than sliding off; the proteins and starches in flour create a sticky paste when hydrated by the eggs, forming a glue layer; and flour particles create physical texture that mechanical interlocks with both the onion surface and the egg layer. The egg coating provides proteins that coagulate (solidify) when heated, creating a cement-like layer that permanently binds breadcrumbs to the flour-coated onion; the fats in egg yolk add richness and contribute to browning; and the liquid egg carries seasonings from the breadcrumbs into contact with the food. The panko coating creates the crispy exterior through dehydration during cooking - the large surface area and irregular shape of panko flakes provide maximum contact with hot air, allowing moisture to evaporate quickly while the starch and proteins brown through the Maillard reaction. Attempting to skip steps - like going straight from onion to egg, or onion to breadcrumbs - fails because you lose these chemical and physical interactions that create proper adhesion and texture. Understanding the science helps you troubleshoot when things go wrong and appreciate why seemingly fussy techniques actually matter.
Teaching Breading Techniques and Kitchen Skills
This recipe provides excellent opportunity to learn or practice fundamental breading techniques that transfer to countless other fried or baked items. The three-stage breading station (flour-egg-breadcrumbs) represents a classical technique called "standard breading procedure" used professionally for everything from chicken cutlets to mozzarella sticks to fish fillets. Learning to keep one hand relatively clean (for handling unbreaded food) while the other hand gets messy (for handling wet ingredients) prevents having both hands covered in sticky breading and makes the process more efficient. Understanding proper coating technique - thoroughly covering all surfaces, pressing breading firmly rather than lightly, shaking off excess at each stage - creates professional-looking results with even, complete coverage. Recognizing how different breadcrumb types create different textures (panko versus regular versus seasoned) teaches you to select appropriate coatings for different applications. The skill of working in batches while managing cooking multiple sets simultaneously builds time management and coordination abilities. Learning to judge doneness by visual cues (golden color, visible crispiness) rather than just timing builds cooking intuition. These fundamental skills make you more confident tackling any breaded recipe, from chicken parmesan to schnitzel to fried pickles, by understanding the underlying principles rather than just following specific instructions blindly.
The Economics of Homemade Versus Restaurant Appetizers
Understanding cost comparisons between making these at home versus ordering similar restaurant appetizers reveals substantial savings that accumulate over time. One large onion costs about one to two dollars. Panko breadcrumbs in a bag cost about three to four dollars but you use only a portion. Eggs, flour, and seasonings represent maybe one dollar total. Olive oil is pennies per batch. Total ingredient cost for twelve to fifteen onion rings works out to approximately four to six dollars, or about thirty to forty cents per ring. Restaurant onion rings typically cost eight to twelve dollars per appetizer serving of six to eight rings, making them about one dollar to one-fifty per ring - three to four times more expensive than homemade. Bar and grill onion ring baskets often cost even more, especially at upscale restaurants or trendy gastropubs. Beyond monetary savings, homemade offers control over onion quality, coating thickness, seasoning preferences, and oil type. You avoid the excessive grease and salt that characterize most restaurant versions. The satisfaction of creating restaurant-quality appetizers at home adds value beyond just cost. For families who love onion rings, making them at home once or twice monthly instead of ordering saves roughly one hundred to one hundred fifty dollars annually while providing fresher, customized versions you control completely.
Historical Context and Cultural Significance
Understanding onion rings' origins and cultural place adds appreciation beyond just eating them. The exact origin is disputed, but onion rings likely emerged in early 20th century America, with one of the earliest known recipes appearing in a 1933 Crisco advertisement. They gained popularity at drive-in restaurants and diners in the 1960s-70s, becoming quintessential American casual dining and bar food. Unlike many fried foods that have ancient origins, onion rings are relatively modern inventions that emerged from America's mid-century car culture and casual dining revolution. They represent the American tendency to take simple ingredients (onions, breading) and transform them through frying into indulgent treats. Onion rings occupy a specific cultural niche - they're seen as slightly more upscale than French fries (often costing more as menu items) but still casual and approachable. They're associated with burger joints, sports bars, seafood restaurants, and cookouts. Regional variations exist - beer-battered versus breaded, thick-cut versus thin, various seasoning approaches. The recent air fryer adaptation represents contemporary health-consciousness meeting nostalgia - people want the foods they grew up enjoying but prepared in ways that align with modern nutritional awareness. Understanding this context helps you appreciate how a simple preparation became an American classic.
 Pin it
These air fryer onion rings represent the perfect intersection of classic American comfort food and modern healthy cooking technology, proving that you don't have to sacrifice flavor, texture, or satisfaction to avoid deep-frying's mess and excessive fat. What makes this recipe genuinely valuable is how it demystifies air fryer cooking for people intimidated by this relatively new appliance, showing that the technique is actually simpler and more forgiving than traditional frying while producing results that are legitimately better in texture and lightness. The transformation from humble onion slices into golden, crispy, restaurant-quality appetizers through basic breading technique and circulating hot air demonstrates that impressive cooking doesn't require professional equipment or advanced skills - just understanding proper procedure and being willing to work in batches. Whether you're hosting game day parties and want crowd-pleasing finger foods without standing over hot oil for hours, trying to recreate restaurant favorites at home with less guilt and more control, introducing children to cooking through a fun, approachable recipe they can help with, or simply craving onion rings but wanting to avoid the drive-through or the deep fryer setup, these deliver completely. The customizable coating means you can adjust seasonings to pair with specific meals or accommodate different taste preferences, while the technique transfers to countless other foods you can air fry using the same breading procedure. Once you've experienced how easy and clean air frying is compared to deep frying - no oil disposal, no splatter cleanup, no lingering fried smell - while producing onion rings that are somehow crispier and less greasy than traditional versions, you'll find yourself making these repeatedly for parties, casual dinners, or whenever you want that satisfying combination of crispy coating and sweet, tender onion that makes onion rings so universally beloved, wondering why you ever bothered with the hassle and mess of deep frying when this method is simpler, healthier, and produces superior results.
Frequently Asked Questions
- → Can I use a different type of onion?
- Yes! While yellow onions work great, you can also use sweet onions like Vidalia for a milder, sweeter flavor. White onions work too but have a sharper taste.
- → Do I need to spray the onion rings with oil?
- A light drizzle of olive oil helps them get extra crispy and golden. You can use a spray bottle or just drizzle it on before air frying.
- → How do I keep the first batch warm while cooking the rest?
- Keep finished rings on a plate in a warm oven at 200°F, or just toss all batches back in the air fryer for 1-2 minutes at the end to reheat them together.
- → Can I make these ahead of time?
- You can bread the onion rings ahead and refrigerate them for up to 2 hours before cooking. For best results, air fry them fresh so they stay crispy.
- → What dipping sauces go well with these?
- Tartar sauce is classic, but they're also great with ranch, BBQ sauce, ketchup, sriracha mayo, or honey mustard. Pick your favorite!
- → Why are my onion rings soggy?
- Make sure not to overcrowd the air fryer basket. The rings need space around them for air to circulate. Also, don't skip the oil drizzle for crispiness.