
 Pin it
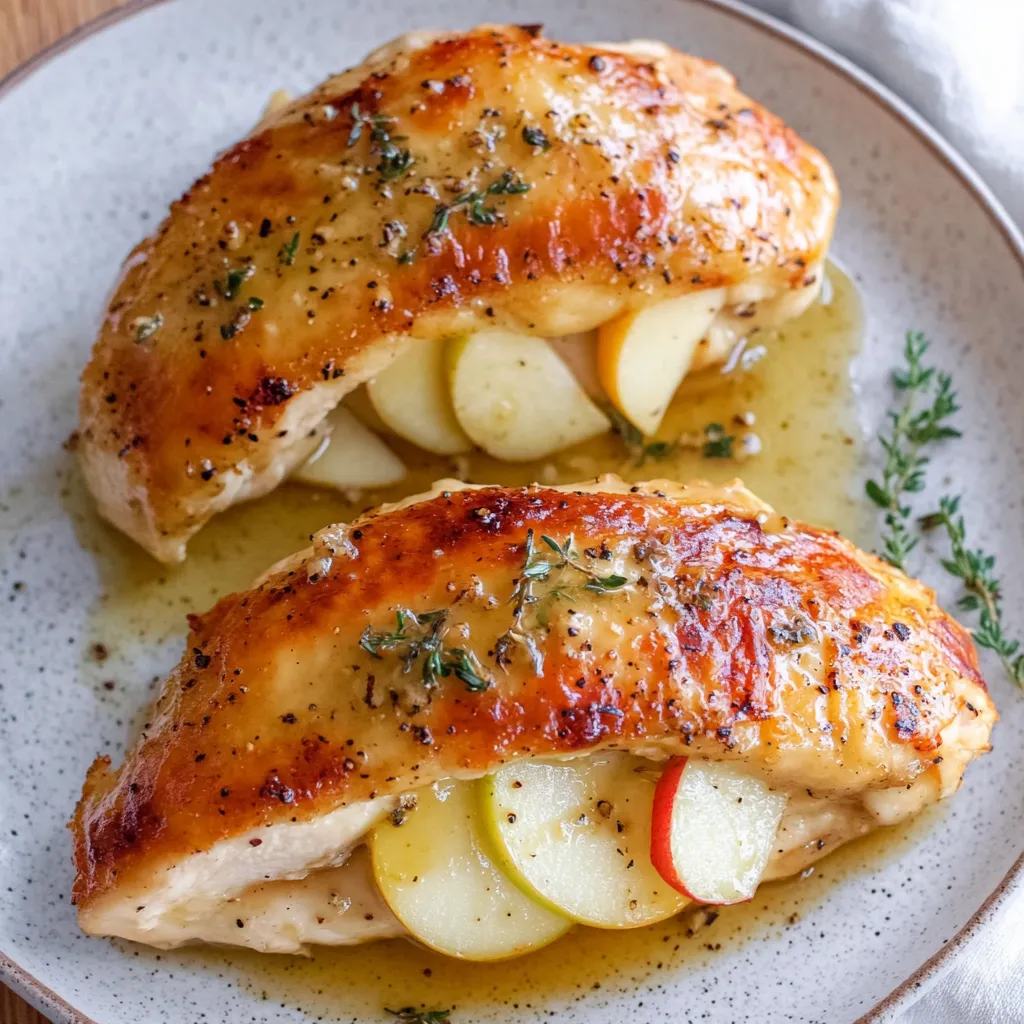
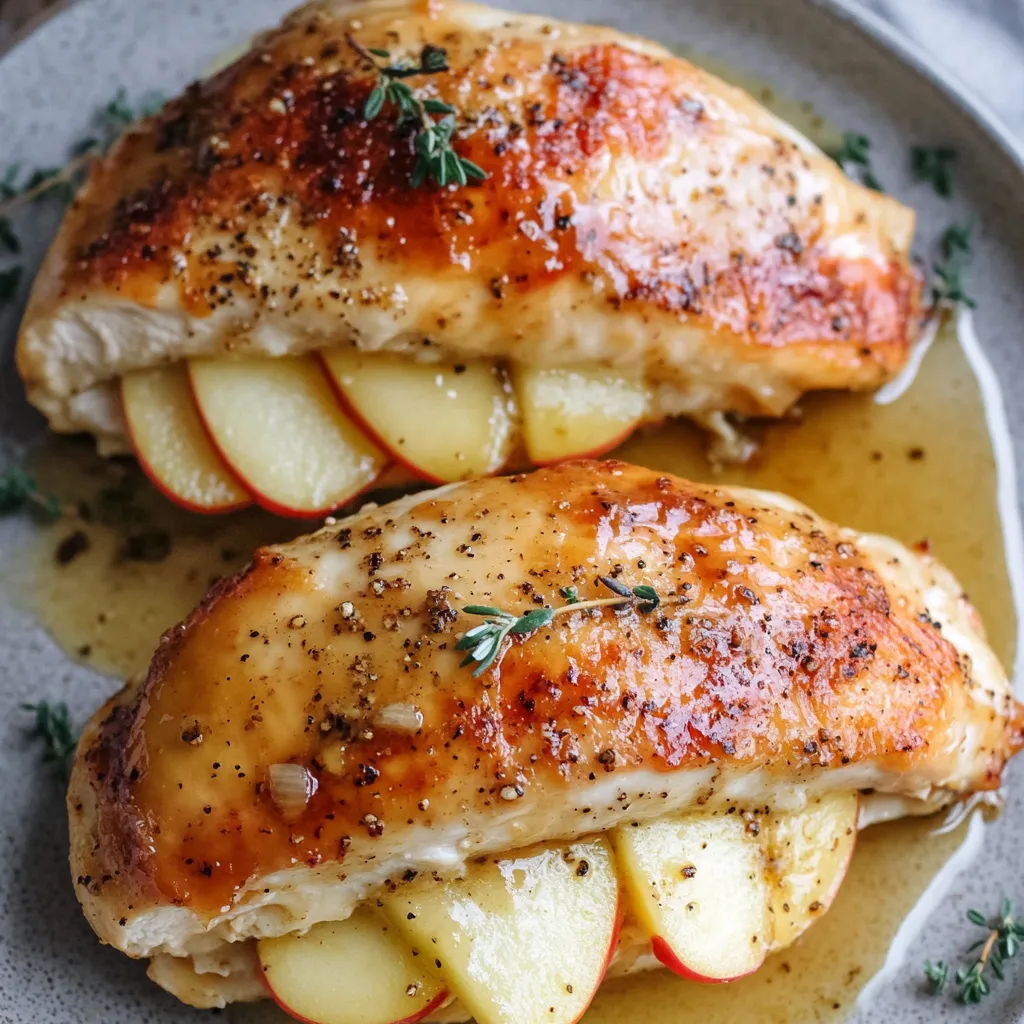
Apple and brie stuffed chicken breast is one of those recipes that sounds fancy and restaurant-worthy - boneless chicken breasts butterflied open, filled with sliced sweet apples and creamy brie cheese, then seared until golden and roasted with a maple-Dijon glaze until the chicken is cooked through and the cheese is melted. The combination of flavors hits every note - sweet from the apples and maple syrup, savory from the chicken and garlic, tangy from the Dijon, rich and buttery from the brie - creating this complex taste experience that seems like it should require professional cooking skills but actually comes together in about forty minutes with straightforward technique. What makes this particularly appealing is how it transforms plain chicken breasts into something impressive enough for dinner parties while being practical enough for weeknight cooking, and how the filling stays inside the chicken instead of leaking everywhere if you understand the proper butterflying and searing technique.
I started making apple and brie stuffed chicken about eight years ago after eating something similar at a wedding and being determined to recreate it. The first attempt was a disaster because I stuffed the raw chicken then tried to sear it, which caused all the filling to fall out and created a mess. After learning that you sear the chicken first, stuff it while it's hot, then immediately bake it, the filling stays contained and everything works perfectly. Now I make this constantly throughout fall when apples are at their peak because it's one of those dishes that makes regular weeknight chicken feel like an occasion.
Ingredients and What Makes Them Essential
- Boneless Skinless Chicken Breasts (4, about 6-8 ounces each): Choose chicken breasts that are similar size so they cook evenly. Look for breasts that aren't overly thick - about 1 to 1½ inches thick is ideal. Thinner breasts are easier to butterfly cleanly.
- Sweet Apples (1 large, preferably Honeycrisp or Fuji): Sweet, crisp apples like Honeycrisp or Fuji provide sweetness and maintain some texture during baking. Granny Smith works if you prefer tart flavor. The apple should be firm and fresh, not mealy.
- Brie Cheese (6-8 ounces): Brie's creamy texture and mild, buttery flavor melt beautifully and don't overpower the apples. Buy a wedge rather than a whole wheel for easier slicing. The rind is edible and adds complexity, so leave it on.
- Real Maple Syrup (¼ cup): Pure maple syrup provides authentic sweetness and complex flavor. Don't substitute pancake syrup which is corn syrup with artificial flavoring and tastes completely different.
- Dijon Mustard (2 tablespoons): Smooth Dijon mustard adds tangy depth and helps balance the sweetness. Don't substitute yellow mustard which is too sharp, or grainy mustard which has different texture.
- Garlic (2 cloves, minced): Fresh garlic adds aromatic, savory depth. Mince it finely so it distributes throughout the glaze.
- Dried Thyme (1 teaspoon): Thyme adds herbal notes that complement chicken, apples, and brie beautifully. You can substitute fresh thyme (use 1 tablespoon).
- Kosher Salt and Black Pepper (to taste): Season generously. Freshly ground pepper tastes better than pre-ground.
- Olive Oil (2 tablespoons, for searing): Use a neutral oil with high smoke point. Avocado oil works well too.
Step-by-Step Instructions
- Preheat and Prep:
- Preheat your oven to 400°F and position a rack in the center. Place your brie in the freezer for about 10 minutes - this firms it up and makes slicing much easier. While it chills, prepare everything else.
- Make the Glaze:
- In a small bowl, whisk together ¼ cup of maple syrup, 2 tablespoons of Dijon mustard, 2 cloves of minced garlic, and 1 teaspoon of dried thyme until smooth and well combined. Set aside. If you want extra glaze for serving (highly recommended), make a double batch and keep them in separate bowls - one for brushing on raw chicken, one for serving.
- Slice the Apple:
- Core your apple and slice it into thin rounds about ⅛ inch thick. You want them thin so they stack nicely inside the chicken without creating bulky pockets that prevent the chicken from closing. You'll need about 12-16 slices total (3-4 per chicken breast).
- Slice the Brie:
- Remove the chilled brie from the freezer. Using a sharp knife, cut it into thin slices about ¼ inch thick. You need 12 slices total (3 per chicken breast). The rind is edible, so leave it on - it adds flavor and helps the cheese hold shape during cooking.
- Butterfly the Chicken:
- Place one chicken breast flat on a cutting board. Put your non-knife hand flat on top of the chicken to hold it steady. Using a sharp knife held parallel to the cutting board, carefully slice into the thick side of the breast horizontally, cutting about ¾ of the way through but not all the way. You want to create a pocket that opens like a book but remains connected on one side. The goal is an even thickness throughout when opened. Repeat with remaining chicken breasts. Season both sides of each butterflied breast generously with salt and black pepper.
- Sear the Chicken:
- Heat a large cast iron skillet or oven-safe skillet over medium-high heat. Add 2 tablespoons of olive oil and let it heat until shimmering. Carefully place the seasoned chicken breasts in the hot skillet, opened flat like a book. Sear for 2 to 3 minutes on the first side without moving them - you want a golden-brown crust. Flip and sear the second side for another 2 to 3 minutes until golden. The chicken won't be cooked through yet - that's correct. Remove the skillet from heat.
- Stuff the Chicken:
- Working quickly while the chicken is still hot in the skillet, open each breast like a book. Place 3 slices of brie on one side of the opening, then layer 3 to 4 apple slices on top of the brie. Fold the other side of the chicken over to close it, pressing gently. The hot chicken will start melting the brie slightly, which helps everything stick together. If you're nervous about filling falling out, you can secure each breast with 2 to 3 toothpicks inserted horizontally through the opening. Just remember to remove them before serving.
- Glaze and Bake:
- Brush the maple-Dijon glaze generously over the top of each stuffed chicken breast, using about half the glaze. Reserve the remaining glaze for basting during cooking or serving. Place the skillet with the glazed, stuffed chicken breasts in the preheated 400°F oven. Bake for 20 to 22 minutes until the chicken is cooked through and reaches 165°F internal temperature when checked with a meat thermometer inserted into the thickest part (not hitting the filling). The chicken should be golden brown and the juices should run clear. If desired, brush with more glaze halfway through baking.
- Rest and Serve:
- Remove the skillet from the oven and let the chicken rest for 5 minutes before serving. This allows the juices to redistribute throughout the meat. If you used toothpicks, remove them carefully. Serve each breast whole or sliced on the diagonal to show the apple and brie filling. Drizzle with extra glaze if you made a double batch.
 Pin it
My brother-in-law who claims he only likes "regular" chicken and refuses to eat anything with "weird ingredients" tried this at a family dinner without asking what was in it. He ate the entire breast and asked for seconds before inquiring what made it so good. When I listed the brie, apples, and maple glaze, he looked betrayed and insisted those couldn't be the ingredients because he hates fancy food. Now he requests it regularly while maintaining he "just likes this specific chicken, not fancy food in general." Converting the plain-food-only person through proper flavor combinations feels like a cooking victory.
Understanding the Butterflying Technique
Butterflying chicken breasts - cutting them horizontally to create a pocket - serves multiple purposes beyond just creating space for filling. First, it creates more even thickness throughout the breast, which means more uniform cooking. Thick chicken breasts often overcook on the outside before the center reaches safe temperature, but butterflied breasts cook more evenly. Second, the pocket keeps filling contained rather than sitting on top where it can slide off. Third, it increases surface area for searing, creating more of that flavorful golden crust. The key is cutting ¾ of the way through, not completely - you want the breast to open like a book while remaining connected on one side. Use a sharp knife held parallel to the cutting board and cut slowly and carefully. If you accidentally cut all the way through, you can still make it work by overlapping the pieces slightly and securing with toothpicks.
Why Searing Before Stuffing Works Better
The order of operations - sear first, stuff second - is crucial to success. If you stuff raw chicken then try to sear it, several problems occur: the filling falls out when you flip the chicken, the heat doesn't penetrate the thick stuffed breast properly during searing, and you risk undercooking the chicken while overcooking the exterior. Searing unstuffed butterflied breasts first creates a golden crust on both sides quickly and evenly. The hot chicken then acts as a warming chamber for the filling when you stuff it - the residual heat starts melting the brie immediately, which helps everything stick together. Immediately transferring to the oven ensures the chicken cooks through properly while the filling has time to heat and meld with the chicken. This technique is borrowed from professional kitchen methods where efficiency and results matter more than following expected order.
The Chemistry of the Maple-Dijon Glaze
The glaze is what elevates this from good to exceptional, and understanding why it works helps you appreciate the flavor balance. Maple syrup provides sweetness but also complex flavor notes from the wood sugars present in real maple syrup. Dijon mustard contributes acidity and sharpness that balance the sweetness while also acting as an emulsifier that helps the glaze cling to the chicken. Garlic adds pungent, savory depth. Thyme provides herbal, slightly floral notes. Together, these ingredients create a glaze that's sweet but not cloying, tangy but not harsh, complex but not overwhelming. The glaze also serves a practical purpose - it creates a glossy, caramelized exterior during baking through the Maillard reaction as the sugars and proteins interact with heat. Don't use pancake syrup (corn syrup with artificial flavoring) which lacks maple's complexity and tastes artificial.
Choosing the Right Apples
Apple variety matters significantly in this recipe because different apples behave differently when cooked. Sweet, crisp apples like Honeycrisp, Fuji, or Gala maintain some texture during the relatively brief cooking time and provide sweetness that complements the savory chicken. Granny Smith apples work if you prefer tartness, though they're more assertive and may overpower the mild brie. Avoid Red Delicious (which turn mealy), McIntosh (which become mushy), or any apples that are already soft or mealy when raw. The apples should be firm and fresh. Slicing them thinly (⅛ inch) is important because thick slices don't soften enough during the 20-minute baking time and create awkward bulges that prevent the chicken from closing properly. The thin slices soften just enough while maintaining some texture and don't release excessive moisture that would make the chicken soggy.
Storage, Reheating, and Make-Ahead
This dish is definitely best served fresh from the oven when the chicken is juicy and the cheese is melted, but you can handle leftovers and do some advance prep. Let leftover chicken cool completely, then store in an airtight container in the refrigerator for up to 3 days. To reheat, place in a baking dish, cover with foil, and warm in a 325°F oven for about 15 minutes until heated through. Don't microwave if avoidable - it makes the chicken rubbery. For make-ahead convenience, you can butterfly the chicken, make the glaze, and slice the apples and brie up to 1 day ahead. Store everything separately in the refrigerator. When ready to cook, let the chicken come to room temperature for 15 minutes, then proceed with searing and stuffing. Don't assemble the stuffed chicken more than 15 minutes before cooking or the raw chicken will start absorbing apple moisture and the brie will warm too much.
Variations and Customization Ideas
While the classic apple-brie combination is perfect, you can create variations. For cranberry version, add dried cranberries with the apples. For bacon-enhanced, wrap each stuffed breast with 2 slices of bacon before baking. For different cheese, try goat cheese for tanginess, camembert for similar creaminess, or sharp cheddar for more intense flavor. For nut addition, add chopped walnuts or pecans with the filling. For herb variations, use fresh rosemary instead of thyme for more piney flavor, or add sage for earthiness. For spicy version, add red pepper flakes to the glaze. For pear version, substitute pears for apples for slightly different sweetness. Each variation maintains the stuffed technique while creating different flavor profiles for various preferences or what you have available.
Troubleshooting Common Problems
When apple and brie stuffed chicken doesn't turn out right, there's usually a fixable cause. If filling falls out during cooking, you didn't sear before stuffing or cut all the way through instead of ¾ - sear first and use toothpicks if needed. If chicken is dry, you overcooked it or didn't let it rest - cook to exactly 165°F and rest 5 minutes. If chicken is undercooked, your breasts were too thick or oven temperature is off - use thinner breasts and verify oven temperature. If glaze is too sweet, add more Dijon or reduce maple syrup next time. If apples are still hard, you sliced them too thick - use ⅛-inch slices. If the bottom burns, your pan was too hot - reduce to medium heat for searing. Most issues relate to butterflying technique, searing order, or cooking temperature.
 Pin it
After making apple and brie stuffed chicken probably fifty times over the past eight years, it's become one of my most reliable impressive dinners because it consistently wows people while being genuinely practical for weeknight cooking. I appreciate how the sweet-savory-tangy flavor combination creates complexity that makes every bite interesting, and how the butterflying technique transforms plain chicken into something elegant. The ability to do most prep ahead and then just sear, stuff, and bake removes stress from dinner parties. Knowing the simple secrets - sear before stuffing, butterfly carefully, use real maple syrup - transforms something that seems complicated into something genuinely achievable. This represents exactly what weeknight cooking should be - special enough to feel like an occasion, practical enough to make regularly, delicious enough that people request it specifically, and impressive enough that you feel like a competent cook even when you're tired and would rather order takeout.
Frequently Asked Questions
- → Can I use a different type of apple?
- Yes, Gala, Fuji, or Granny Smith apples work great. Pick whatever you like or have available in your kitchen.
- → What if I don't have a cast iron pan?
- Just sear the chicken in any regular skillet, then move it to a baking dish before putting it in the oven.
- → How do I know when the chicken is done?
- Use a meat thermometer to check that the inside reaches 165°F. This makes sure it's cooked through and safe to eat.
- → Can I make this ahead of time?
- You can prep and stuff the chicken earlier in the day, then keep it covered in the fridge until you're ready to cook it.
- → What should I serve with this chicken?
- Roasted vegetables, mashed potatoes, or a simple green salad all pair nicely with this dish.
- → Can I substitute the Brie with another cheese?
- Sure, try camembert for something similar, or use goat cheese or fontina if that's what you prefer.