
 Pin it
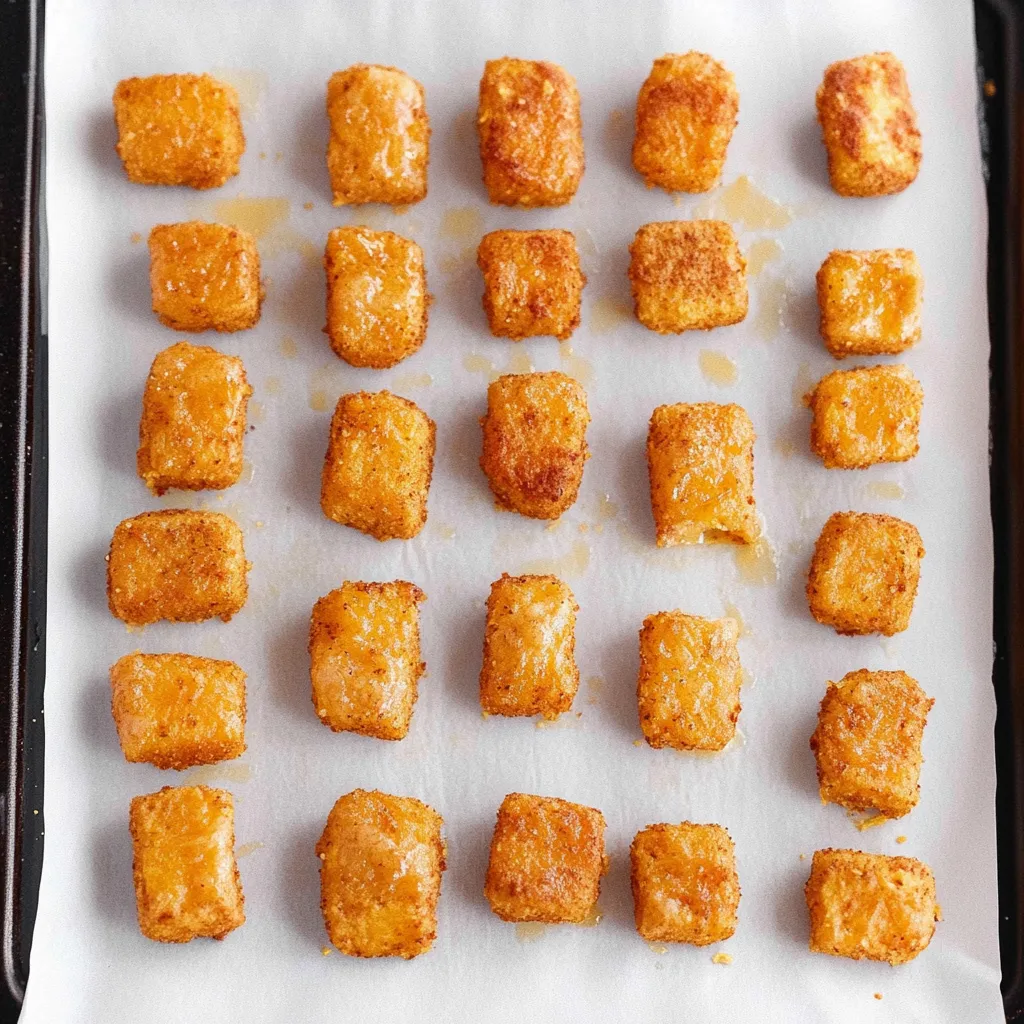
These baked sweet potato tots transform humble sweet potatoes into crispy-on-the-outside, tender-on-the-inside finger foods that babies, toddlers, and adults all devour with equal enthusiasm. Made with just four simple ingredients - roasted sweet potatoes, cheese, breadcrumbs, and optional egg - these tots bake up golden and delicious in the oven without any deep frying or complicated techniques. What makes these so brilliant is their versatility - they work as a healthy snack, a side dish for dinner, a lunch box addition, or even a vehicle for introducing vegetables to picky eaters who might resist plain sweet potatoes but enthusiastically grab these fun, tot-shaped bites. The natural sweetness of the sweet potatoes pairs beautifully with savory cheese and whatever seasonings you choose to add, creating little nuggets of flavor that satisfy without being overly salty or processed like store-bought frozen tots.
Having a recipe that kids genuinely get excited about eating while also being nutritious feels like winning the parenting lottery. Sweet potatoes have this natural sweetness that most children find appealing, unlike bitter vegetables that require acquired tastes. Watching little ones independently grab these orange tots and munch away, getting that good nutrition without any battles or bribing, makes the small effort of mixing and shaping completely worthwhile. The fact that they also work as a side dish for adults means you're not making separate foods for different family members, which simplifies meal planning enormously.
Ingredients - What You Need and Why
- Sweet potatoes: the foundation providing natural sweetness, beautiful orange color, and loads of nutrition; jewel or garnet varieties work best with their moist, sweet flesh that mashes easily, though any variety works in a pinch; you'll need about two medium sweet potatoes which yield roughly two cups mashed; choose potatoes that are firm without soft spots or sprouting
- Grated cheese: adds savory flavor, helps bind the tots together, and creates those irresistible melty pockets throughout; cheddar is classic with its sharp flavor that complements sweet potato beautifully, though mozzarella, Colby Jack, Monterey Jack, or even Parmesan all work depending on what you have; about one cup shredded provides the right balance without overwhelming the sweet potato; dairy-free cheese substitutes work fine for allergies
- Breadcrumbs: provide structure and help absorb excess moisture so tots hold their shape during baking; regular breadcrumbs, panko for extra crunch, or gluten-free breadcrumbs all work; about half a cup gives you the right consistency; if the mixture seems too wet, add more breadcrumbs a tablespoon at a time
- Egg (optional but recommended): binds everything together more securely and helps achieve crispier exteriors during baking; one large egg is all you need; if dealing with egg allergies, you can omit it entirely and the tots will still work, though they'll be slightly softer and more delicate; flax eggs don't work as well here as they add moisture without the binding power of real eggs
- Seasonings: salt and black pepper are the basics, but this is where you get creative; garlic powder, onion powder, smoked paprika, cumin, curry powder, dried oregano, or chili powder all add different flavor dimensions; start with about half a teaspoon of whatever seasonings appeal to you, knowing you can adjust to taste
How to Make Easy Baked Sweet Potato Tots - Step by Step
- Roast or cook the sweet potatoes:
- The first step happens well before you actually make the tots, and it's cooking your sweet potatoes until completely tender. Roasting is the preferred method because it intensifies the natural sweetness through caramelization and removes excess moisture, creating better flavor and texture than other cooking methods. Preheat your oven to 400 degrees Fahrenheit, wash your sweet potatoes thoroughly, pat them dry, and pierce them several times all over with a fork to allow steam to escape. Place them directly on the oven rack or on a foil-lined baking sheet and roast for about forty-five to sixty minutes depending on size, until they're completely soft when squeezed and a knife slides through with no resistance. Let them cool until you can handle them comfortably. If you're short on time, microwaving works in a pinch though the flavor won't be quite as developed. Wash and pierce the sweet potatoes, wrap in a damp paper towel, place on a microwave-safe plate, and microwave one or two at a time for five to seven minutes, turning halfway through, until tender when pierced. Either way, the sweet potatoes need to cool to room temperature before mixing with other ingredients - hot sweet potatoes would melt the cheese prematurely and scramble the egg, creating a mess rather than a cohesive mixture.
- Mash and combine all ingredients:
- Once your sweet potatoes are cooked and cooled to room temperature, slice them in half and scoop the orange flesh out of the skins directly into a large mixing bowl, discarding the skins. Using a fork or potato masher, roughly mash the sweet potatoes - and this is important - you want a chunky, rough mash with some texture remaining, not a smooth puree. If you mash too much, the mixture becomes too wet and sticky to shape properly. The mashed sweet potato should have visible chunks and pieces rather than being completely smooth. Add your cup of shredded cheese, half a cup of breadcrumbs, and if using, crack in one egg. Add your seasonings at this stage - at minimum, a half teaspoon of salt and a quarter teaspoon of black pepper, plus any other spices or herbs you're using. Using clean hands or a sturdy spoon, mix everything together thoroughly, squeezing and folding until the cheese, breadcrumbs, and seasonings are evenly distributed throughout the orange sweet potato. The mixture should hold together when squeezed into a ball but still have visible texture and bits. If it seems too wet and sticky to shape, add more breadcrumbs a tablespoon at a time until it's workable. If it seems dry and won't hold together, you may have mashed the sweet potatoes too much and evaporated too much moisture - try adding a teaspoon or two of milk to help it bind.
- Shape into tot forms:
- Preheat your oven to 400 degrees Fahrenheit and line a large baking sheet with parchment paper or a silicone baking mat to prevent sticking and make cleanup effortless. Have a small bowl of water nearby for dipping your hands if the mixture gets sticky. Take about one tablespoon of the sweet potato mixture - a cookie scoop works perfectly for consistent sizing, or just use a regular tablespoon. Roll the mixture between your palms first into a ball, then gently squeeze and roll it into a tot shape - basically a small cylinder or oval about one and a half inches long and three-quarters inch wide, similar to the shape of commercial tater tots. The mixture should hold together well when shaped; if it's falling apart or won't stick together, add another tablespoon of breadcrumbs to the whole mixture and try again. If it's too sticky and coating your hands, dip your fingers in water between shaping each tot. As you form each tot, place it on the prepared baking sheet, spacing them about an inch apart - they don't spread or expand during baking, so they don't need much room. Continue shaping until you've used all the mixture, which should yield about twenty-four to thirty tots depending on size. If you want extra-crispy tots, pour additional breadcrumbs into a shallow bowl and roll each shaped tot in the breadcrumbs to create a coating before placing on the baking sheet, then lightly spray or brush each one with olive oil.
- Bake until golden and slightly crispy:
- Place your baking sheet of shaped tots in the preheated 400-degree oven. Set a timer for fifteen minutes, then check on them. The tots should be starting to turn golden brown on the bottom and around the edges. Gently flip each tot over using a spatula or tongs - they should be firm enough to handle at this point without falling apart. Return the pan to the oven and bake for another ten to fifteen minutes, for a total baking time of twenty-five to thirty minutes. You're looking for tots that are golden brown on the outside with slightly crispy edges while staying tender inside. The exact timing depends on your oven and how large you made the tots, so watch them in the final minutes and remove when they look golden and appetizing. If you want them even crispier, you can turn on the broiler for the last minute or two, watching very carefully so they don't burn. Remove from the oven and let them cool on the baking sheet for about five minutes, which allows them to firm up slightly and makes them easier to handle. They're best served warm when the cheese is still melty inside and the exterior has that slight crispness, but they're also good at room temperature, making them perfect for lunch boxes.
 Pin it
Sweet potatoes have earned their reputation as one of the most versatile and forgiving vegetables to cook with, especially when feeding children. That natural sweetness makes them inherently appealing to young palates without requiring any added sugar or manipulation. The beautiful orange color created by beta-carotene is visually attractive and indicates the powerful antioxidants and vitamins inside. Having a batch of these tots ready in the fridge means easy snacks, quick sides for dinner, or lunch box additions that provide real nutrition without relying on processed convenience foods. The fact that kids can help make them creates ownership and excitement around eating vegetables, which is invaluable for building healthy eating habits.
Understanding Sweet Potato Varieties and Selection
While the recipe works with any sweet potato variety, understanding the differences helps you choose the best ones for making tots. Jewel and Garnet sweet potatoes are the most common in American supermarkets, with moist, orange flesh and sweet flavor that's perfect for these tots. These varieties have enough moisture to bind well without being waterlogged, and their sweetness is pronounced without being cloying. Japanese sweet potatoes have purple skin and white or pale yellow flesh that's drier and less sweet, which actually works beautifully for savory preparations and creates a different but equally delicious tot. Hannah sweet potatoes are tan-skinned with pale yellow flesh that tastes less sweet and more potato-like, appealing to people who find orange sweet potatoes too sugary. Purple sweet potatoes have dramatic purple flesh that creates stunning purple-colored tots, though the flavor is earthier and less sweet than orange varieties. When selecting sweet potatoes at the store, look for ones that are firm all over without soft spots, sprouts, or cracks in the skin. Small to medium sizes work better than enormous ones, which can have woody cores or excessive moisture. Store sweet potatoes in a cool, dark place like a pantry rather than the refrigerator, where cold temperatures convert their starches to sugars too quickly and can cause off flavors.
Creating Different Flavor Profiles Through Seasonings
The basic recipe with just salt and pepper creates delicious tots, but adding different seasonings transforms them into completely different flavor experiences. For a Mexican-inspired version, add cumin, chili powder, and garlic powder, serving with salsa or guacamole for dipping. Italian-seasoned tots incorporate dried oregano, basil, and garlic powder, paired with marinara sauce for dipping. Curry powder with a touch of ginger creates an Indian-inspired version that's incredible with yogurt-based dips. Smoked paprika adds a subtle smoky quality that mimics bacon or grilled flavors without any meat. Cinnamon and a tiny pinch of nutmeg play up the natural sweetness, creating almost dessert-like tots that kids particularly enjoy. Garlic and herb versions use garlic powder, onion powder, dried parsley, and dried dill for an everything-bagel vibe. For older kids and adults, adding a pinch of cayenne or red pepper flakes brings gentle heat. Fresh herbs like chopped rosemary, thyme, or parsley folded into the mixture just before shaping add bright, aromatic notes. The key is not overdoing it - start with small amounts of seasonings, remembering you can always add more but can't remove them once mixed in. Taste the mixture before shaping (it's safe since the sweet potatoes are already cooked) and adjust seasonings as needed.
Making These Work for Different Ages and Stages
These sweet potato tots adapt beautifully to serve everyone from babies just starting solids to elderly grandparents and everyone in between. For babies six months and older doing baby-led weaning, shape the mixture into longer, thicker logs about two inches long and an inch wide, which are easier for small hands to grasp and hold. Omit salt and any spicy seasonings for babies under one year, relying on the natural sweetness of the sweet potatoes and mild cheese for flavor. For toddlers and young children, the standard tot size works perfectly and you can add mild seasonings like garlic powder gradually to expand their palate. Preschoolers often enjoy helping shape the tots themselves, even if they're imperfect and irregular - the pride they feel in making their own food translates to eagerness to eat it. For school-age kids, make them slightly larger and add more adventurous seasonings based on individual preferences. Teenagers and adults appreciate these as healthier alternatives to fast-food sides or as vehicles for interesting dipping sauces. For elderly individuals who may have difficulty chewing, you can make them slightly smaller and bake them a few minutes less so they're more tender. The beauty of this recipe is how it scales across ages and abilities without requiring completely different preparations for different family members.
Exploring Different Cooking Methods
While baking in the oven produces consistently good results with minimal effort and added fat, other cooking methods create different textures and flavors worth exploring. Air frying creates incredibly crispy exteriors while keeping insides tender, using even less oil than oven baking - cook at 375 degrees Fahrenheit for about twelve to fifteen minutes, shaking the basket halfway through. Pan-frying in a cast-iron or nonstick skillet with a tablespoon of oil over medium-high heat creates golden, crispy crusts in just two to three minutes per side, though you'll need to work in batches and it requires more attention than baking. For camping or outdoor cooking, you can actually grill these tots on a preheated grill over medium heat using a grill basket or foil, which adds subtle smoky flavor. The toaster oven works beautifully for small batches or reheating, following the same temperature and timing as a regular oven. Some people even report success making these in the Instant Pot using the air fryer lid attachment. Each method has advantages - baking is hands-off and makes large batches easily, air frying creates maximum crispiness with minimal fat, pan-frying gives you the most control over browning and creates the most crust, and grilling adds unique flavor. Experiment to find your preferred method, or use different techniques depending on what equipment you have available and how much time you want to spend actively cooking.
Storage, Reheating, and Meal Prep Strategies
These sweet potato tots are excellent candidates for batch cooking and meal prep since they store and reheat beautifully. Once completely cooled after baking, transfer them to an airtight container and refrigerate for up to five days. For reheating, the toaster oven or air fryer produces the best results, crisping up the exteriors while heating them through in about five minutes at 350 degrees. A regular oven works too - arrange tots on a baking sheet and warm for about ten minutes at 350 degrees. Avoid the microwave if possible, as it makes them soggy and chewy rather than crispy, though it works in a pinch for children who don't care about texture. Many kids actually prefer these cold, making them perfect for packed lunches or after-school snacks eaten straight from the fridge. For longer storage, freeze baked and cooled tots in a single layer on a baking sheet until solid, then transfer to a freezer bag where they keep for up to three months. Reheat from frozen in the oven or air fryer, adding a few extra minutes to the cooking time. You can also freeze the mixture before shaping, which keeps for about a month and lets you shape and bake fresh tots whenever you want them. To maximize meal prep efficiency, roast multiple sweet potatoes at once on your weekly meal prep day, using some immediately for these tots and storing the rest for other recipes throughout the week.
Serving Suggestions and Dipping Sauce Ideas
While these tots are delicious plain, pairing them with various dips turns them into complete snacks or makes them more appealing to reluctant eaters. For babies and toddlers, plain Greek yogurt provides protein and calcium while cooling down any lingering heat from seasonings. Yogurt mixed with finely mashed avocado creates a creamy, nutrient-dense dip. Hummus - regular, roasted red pepper, or any variety - offers protein and healthy fats. Homemade or store-bought ranch dressing is a classic that most kids love. Ketchup works for traditionalists, and offering familiar dips can encourage children to try new foods by pairing them with known favorites. BBQ sauce adds sweet and tangy notes that complement the sweet potatoes nicely. For healthier options, try pureed black beans mixed with Greek yogurt and lime juice, beetroot dip for vibrant color and nutrition, or pumpkin seed spinach hummus that sneaks in extra vegetables. Salsa provides fresh, bright flavors for older kids and adults. Sour cream or Greek yogurt mixed with fresh herbs like dill or chives creates a simple but delicious dip. Melted cheese sauce turns these into loaded sweet potato tot bites. The key is offering variety so picky eaters have options while gradually introducing new flavors through different dips over time.
Troubleshooting Common Issues
Even straightforward recipes sometimes don't turn out perfectly, but most problems have simple solutions. If your tots fall apart during baking and won't hold their shape, several factors could be at fault - the sweet potatoes may have been too wet or mashed too smooth, you didn't add enough egg or breadcrumbs to bind everything, or they needed more chilling time before baking. Next time, mash less thoroughly leaving chunks, add an extra tablespoon or two of breadcrumbs, and refrigerate the shaped tots for thirty minutes before baking. When tots come out soggy and won't crisp up, the mixture contained too much moisture - either from steaming the sweet potatoes which adds water, or from not draining/drying cooked potatoes properly. Roasting removes moisture better than other cooking methods, and make sure sweet potatoes are completely cool before mixing which also reduces moisture. If tots taste bland despite adding seasonings, you simply didn't use enough - sweet potatoes can handle quite a bit of seasoning since they're naturally mild, so be more generous next time. Tots that stick to the pan weren't placed on parchment or a baking mat, or the pan wasn't sprayed with oil - proper preparation of the baking surface is essential. When tots are hard and dry rather than tender inside, they were overbaked - check them earlier next time and remove when just golden rather than deeply browned.
 Pin it
These easy baked sweet potato tots have earned their place as one of those invaluable recipes that solves multiple problems simultaneously - they use up sweet potatoes, provide healthy nutrition that tastes good, work for various ages and dietary needs, involve kids in cooking, and create minimal cleanup thanks to baking rather than frying. What makes this recipe genuinely valuable beyond just this specific preparation is how it demonstrates that homemade versions of convenience foods aren't necessarily more difficult or time-consuming than opening a bag of frozen tots, while being infinitely more nutritious and customizable to your family's preferences. The natural sweetness of sweet potatoes makes these inherently kid-friendly without relying on added sugars or excessive salt, and the cute tot shape provides that fun factor that makes children excited to eat vegetables. Whether you're a parent trying to expand your child's vegetable acceptance, someone who loves sweet potatoes and wants new ways to enjoy them, or anyone looking for healthy finger foods that work for snacking or side dishes, these tots deliver on taste, nutrition, and simplicity. The combination of slightly crispy exteriors, tender sweet potato centers, melty cheese pockets, and whatever seasonings you choose creates satisfying bites that disappear quickly from plates, proving that healthy food doesn't have to be boring or feel like a compromise when it's prepared with attention to flavor and texture.
Frequently Asked Questions
- → Can I make these tots without eggs?
- Yes, you can skip the egg entirely. The tots will still hold together, but they might be slightly less crispy. The egg just helps bind everything and adds extra crunch.
- → How do I store leftover sweet potato tots?
- Keep them in an airtight container in the fridge for up to 4 days. Reheat in the oven at 375°F for about 10 minutes to crisp them back up. Avoid microwaving as they'll get soggy.
- → Can I freeze these tots for later?
- Absolutely! Freeze them on a baking sheet first, then transfer to a freezer bag. They'll keep for up to 3 months. Bake from frozen at 400°F for about 35 minutes.
- → What can I use instead of breadcrumbs?
- Almond flour works great and makes them gluten-free. You can also try crushed cornflakes, oat flour, or even grated parmesan for extra flavor.
- → Why are my tots falling apart?
- The mixture might be too wet. Try chilling it in the fridge for 30 minutes before shaping. Also, make sure you're not over-mashing the sweet potatoes into a puree.
- → Can I air fry these instead of baking?
- Yes! Air fry at 375°F for about 15-18 minutes, shaking the basket halfway through. They'll come out super crispy with less oil.