
 Pin it
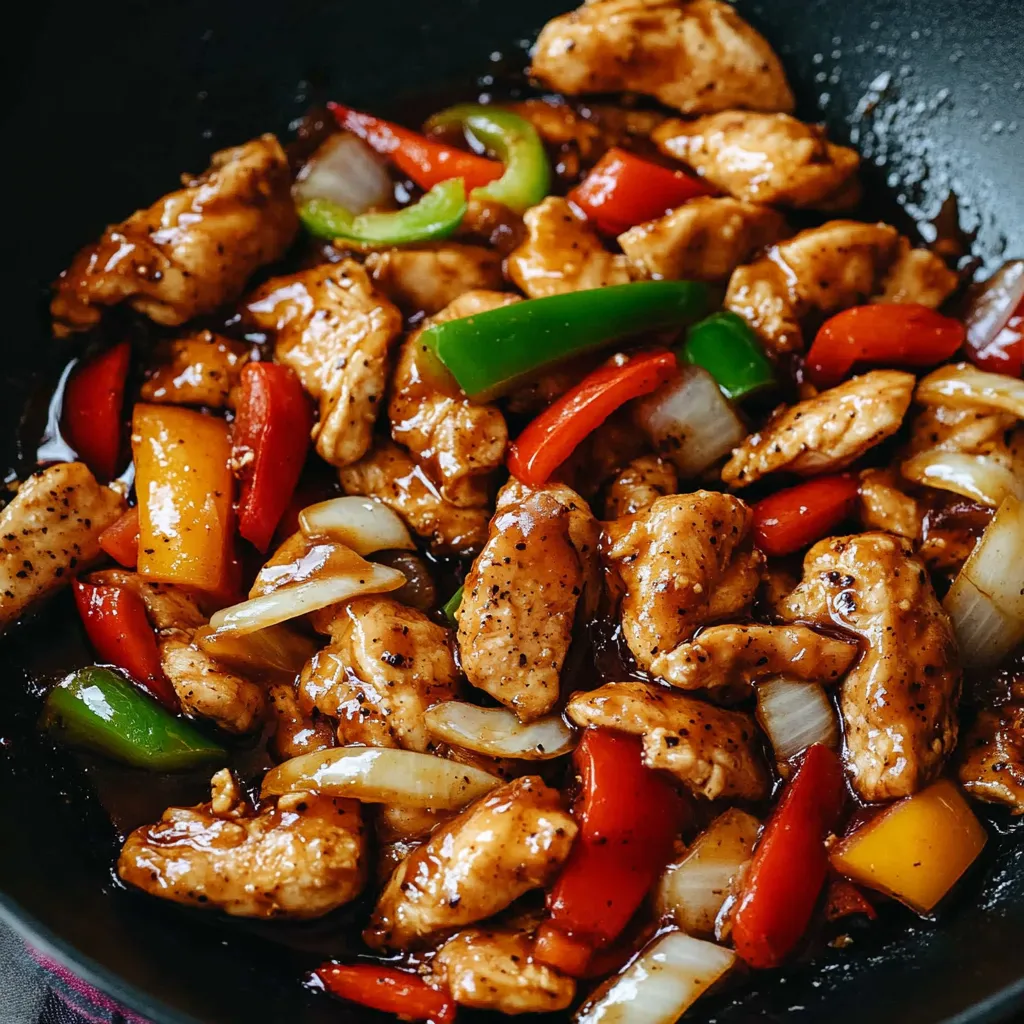
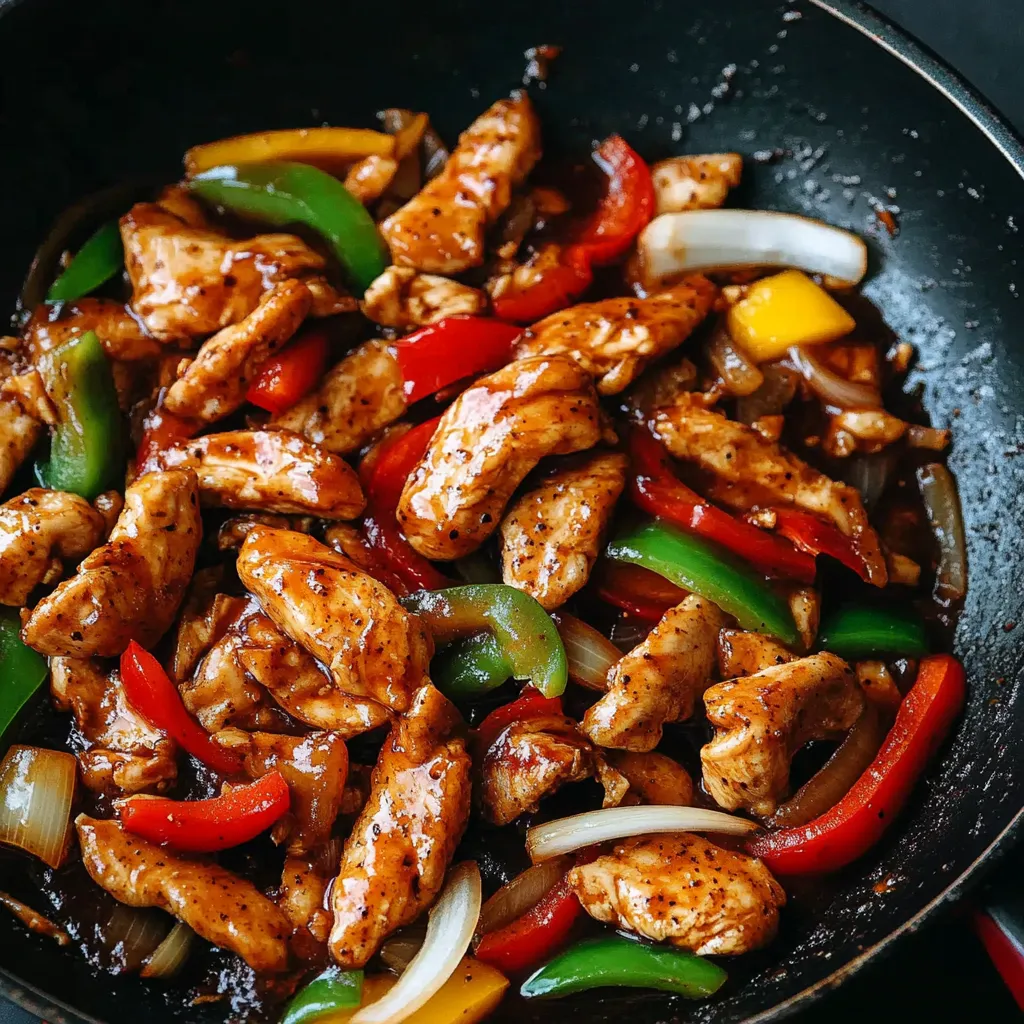
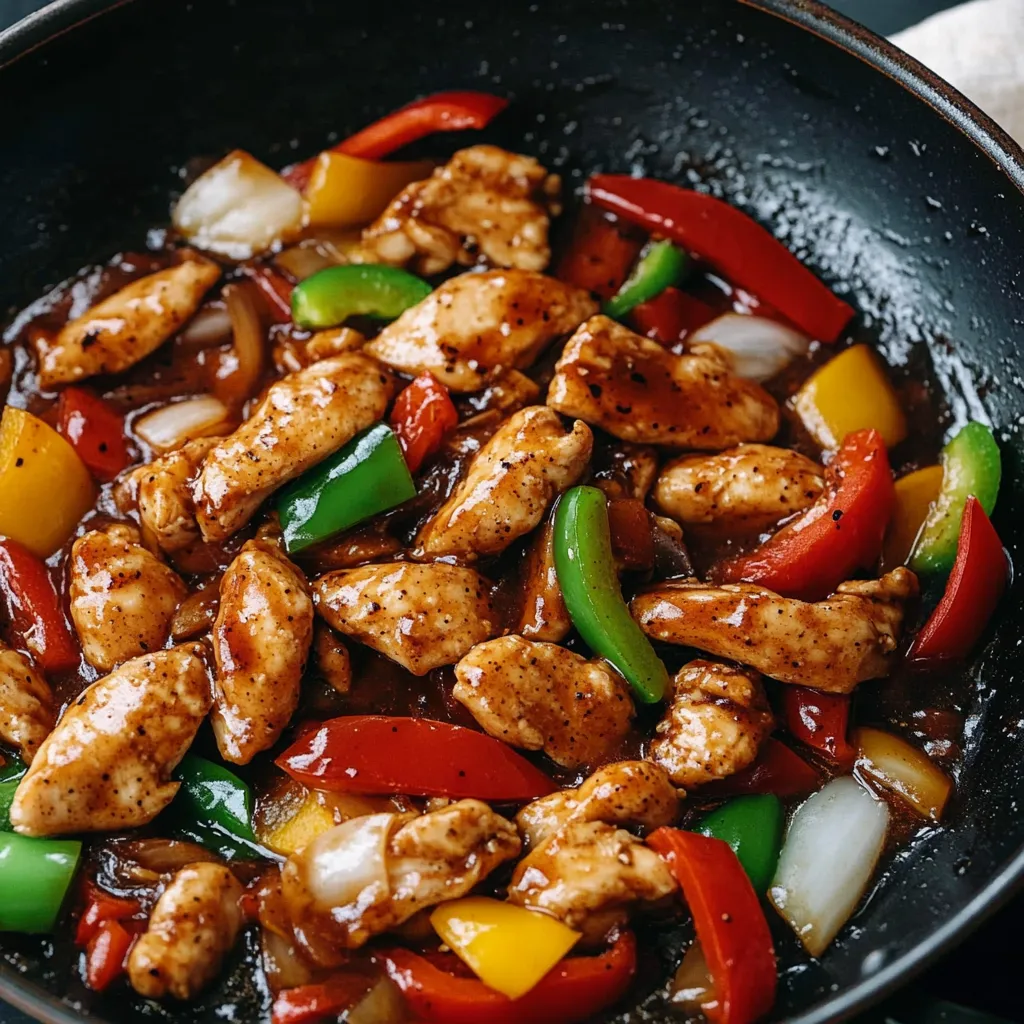
This black pepper chicken delivers everything you want from Chinese takeout but with cleaner ingredients and bolder, fresher flavors that you can control completely. Tender chicken pieces get coated in a savory, aromatic black pepper sauce that's got just the right amount of heat, while crisp vegetables add color, crunch, and nutrition to make it a complete meal in one pan. The whole dish comes together in about 15 minutes once you start cooking, which is faster than ordering delivery and waiting for it to arrive. The technique might seem intimidating if you've never done Chinese stir-frying before, but the process follows a logical sequence that becomes second nature after you've made it once or twice.
I was genuinely nervous the first time I attempted this recipe because I'd always assumed Chinese restaurant cooking required special equipment or skills I didn't have. My initial attempt was chaotic—I hadn't prepped everything ahead, so I kept pausing mid-cooking to chop vegetables while the chicken dried out in the pan. But the second time, I followed the instructions about having everything ready before starting, and suddenly the whole process clicked. The chicken came out silky and tender, the vegetables stayed crisp and bright, and my family couldn't believe I'd made it at home. Now I make black pepper chicken at least twice a month, and it's become my signature dish when I want to impress guests without spending hours in the kitchen.
Ingredients and What Makes Them Essential
- Chicken breast or thighs (1 to 1½ pounds): These provide the lean protein base for your dish, and either cut works though they offer different qualities. Chicken breast is leaner with milder flavor and a slightly firmer texture when cooked properly, while thighs have more fat and stay juicier with richer, deeper flavor that some people prefer. Choose chicken that looks pink and fresh without any gray patches or off smells. You'll slice this against the grain into thin strips about a quarter-inch thick, which is crucial for tenderness.
- Cornstarch (2 tablespoons for marinade, 1 tablespoon for sauce): This is the secret ingredient that gives restaurant-style Chinese chicken its signature velvety coating. The cornstarch in the marinade forms a protective barrier around each piece of meat that seals in moisture and creates that slippery, tender texture called "velveting." It also helps the sauce cling to the chicken rather than sliding off. In the sauce, cornstarch acts as a thickener that gives you that glossy, coating consistency. Make sure your cornstarch is fresh and lump-free for best results.
- Soy sauce (3 tablespoons total): This provides the salty, umami-rich base flavor that defines Chinese cooking. Use regular soy sauce for deeper color and more robust flavor, or low-sodium if you're watching salt intake. Dark soy sauce adds even richer color and slight sweetness if you have it available, though it's not essential. The soy sauce goes into both the marinade and the sauce, building layers of savory depth throughout the dish. Look for naturally brewed soy sauce rather than chemical versions for cleaner, more authentic flavor.
- Black pepper (1 to 2 tablespoons, freshly ground): This is the star ingredient that gives the dish its name and distinctive flavor. Freshly cracked black pepper is absolutely critical here—pre-ground pepper that's been sitting in your cabinet for months has lost most of its aromatic oils and will taste dusty and flat. Crack whole peppercorns in a pepper mill or mortar and pestle right before cooking to release those sharp, piney, floral notes that make black pepper so special. The amount seems like a lot compared to typical recipes, but that bold pepper flavor is what makes this dish memorable.
- Garlic (4 to 5 cloves): Fresh garlic brings pungent, aromatic heat that mellows as it cooks and creates the foundation of flavor along with the ginger. Choose firm garlic bulbs with tight cloves and no green sprouts, since sprouted garlic can taste bitter. Mince it finely so it distributes evenly and doesn't burn during the quick, high-heat cooking. Garlic burns easily at stir-fry temperatures, so you'll add it after reducing the heat slightly.
- Fresh ginger (1-inch knob): Ginger provides bright, warm, slightly spicy notes that balance the richness of the sauce and cut through any heaviness from the oil. Fresh ginger is completely different from powdered—it's more vibrant, complex, and aromatic. Choose ginger that's firm with smooth, tight skin rather than wrinkled or moldy pieces. Peel it with the edge of a spoon, which removes just the thin skin without wasting the flavorful flesh underneath, then mince it as finely as the garlic.
- Bell peppers (1 red, 1 green): These add sweet crunch, vibrant color, and nutritional value to the dish. Red peppers are sweeter and milder than green, which have a slightly bitter, vegetal taste that provides nice contrast. Cut them into bite-sized pieces roughly the same size as your chicken strips so everything cooks at the same rate. Choose peppers that are firm, glossy, and heavy for their size without soft spots or wrinkles.
- Onion (1 medium): Onion brings sweetness and aromatic depth that becomes more pronounced as it cooks quickly over high heat. Yellow or white onions work best since they have the right balance of sharpness and sweetness, while red onions can be too mild and sweet onions might not provide enough bite. Cut it into chunks similar in size to your peppers for even cooking and visual appeal.
- Shaoxing wine (2 tablespoons): This Chinese rice cooking wine adds complex, slightly sweet, fermented depth that you simply can't replicate with other ingredients. It's a staple in Chinese cooking and worth seeking out at Asian markets. If you absolutely can't find it, dry sherry is the closest substitute, though the flavor won't be identical. Avoid "cooking wine" from regular supermarkets since it contains added salt and tastes nothing like the real thing.
- Oyster sauce (2 tablespoons): This thick, brown sauce made from oyster extracts provides deep umami flavor, subtle sweetness, and body to the sauce. Despite its name, it doesn't taste fishy—it's savory and rich with complex depth. Vegetarian oyster sauce made from mushrooms works perfectly if you're avoiding seafood or want to keep the dish vegetarian. Once opened, store oyster sauce in the refrigerator where it keeps for months.
- Chicken stock (⅓ cup): Adding liquid creates enough sauce to coat everything generously and helps deglaze the pan, picking up all those flavorful browned bits. Homemade stock is ideal, but good-quality store-bought works fine. Low-sodium stock gives you more control over the final saltiness. You could substitute water in a pinch, though you'll lose some depth of flavor.
- Cooking oil (3 to 4 tablespoons): High-heat cooking requires oil with a high smoke point like vegetable, canola, or peanut oil. These neutral oils won't interfere with the other flavors or burn at the high temperatures needed for proper stir-frying. Olive oil is not suitable here since it smokes and turns bitter at stir-fry heat. You need more oil than typical Western cooking because stir-frying happens fast at very high temperatures where oil acts as a heat conductor.
Step-by-Step Instructions
- Prepare and marinate the chicken:
- Start by placing your chicken on a clean cutting board and examining the meat to identify which direction the muscle fibers run—they'll look like long parallel lines running through the meat. Position your knife perpendicular to those lines and slice the chicken into thin strips about a quarter-inch thick and two inches long, cutting against the grain. This is crucial because cutting against the grain shortens the muscle fibers, making the cooked chicken much more tender and easier to chew. Try to keep all pieces roughly the same size so they cook evenly. Transfer the sliced chicken to a medium bowl and add one tablespoon of soy sauce, one tablespoon of Shaoxing wine, and two tablespoons of cornstarch. Use your hands to massage the marinade into the chicken, making sure every piece is thoroughly coated. The cornstarch will feel powdery at first but will quickly absorb the liquid and create a slightly sticky coating. Let the chicken sit at room temperature for at least 15 minutes while you prepare everything else, or cover and refrigerate it for up to a few hours if you're working ahead. This marinating time allows the soy sauce and wine to penetrate the meat while the cornstarch forms that protective coating that keeps moisture locked inside during cooking.
- Prepare all your ingredients:
- This step is absolutely critical for successful stir-frying—Chinese cooks call it "mise en place," and it means having absolutely everything prepped, measured, and within arm's reach before you turn on the heat. Peel and mince your garlic and ginger finely, keeping them together on a small plate since they'll go in at the same time. Cut your bell peppers and onion into bite-sized pieces about one to one-and-a-half inches across, arranging them together in a bowl. In a small bowl or measuring cup, combine the remaining two tablespoons of soy sauce, one tablespoon of Shaoxing wine, two tablespoons of oyster sauce, one-third cup of chicken stock, one tablespoon of cornstarch, and your freshly cracked black pepper. Whisk this sauce mixture thoroughly until the cornstarch dissolves completely with no lumps remaining. Keep a small spoon nearby because the cornstarch will settle to the bottom and you'll need to stir it again right before adding it to the pan. Have your marinated chicken ready in its bowl, and measure out your cooking oil. Everything should be arranged near your stove in the order you'll use it.
- Heat your pan properly:
- This is where home cooks often go wrong—you need genuinely high heat for proper stir-frying, much higher than typical Western cooking. Place your largest skillet or wok on the stove over high heat and let it heat for two to three full minutes until it's extremely hot. You want the pan so hot that a drop of water sizzles and evaporates immediately on contact. This high heat is what creates that characteristic "wok hei" or breath of the wok flavor—the slight charring and caramelization that makes restaurant stir fry taste different from home cooking. Add two tablespoons of your cooking oil to the hot pan and swirl it around to coat the entire bottom surface. Let the oil heat for about 30 seconds until it shimmers and flows like water across the pan. The oil should be hot enough that it's almost smoking but not quite—if you see wisps of smoke, you've gone slightly too far, but it's still fine.
- Cook the chicken in batches:
- Take your marinated chicken and spread the pieces out across the hot pan in a single layer without overlapping—this might mean cooking in two batches if your pan isn't large enough. Resist the overwhelming urge to stir or move the chicken immediately. This is one of the hardest things for home cooks to learn, but it's essential. Let the chicken sit undisturbed for about 30 seconds so the bottom can sear and caramelize. If you try to move it too soon, the cornstarch coating will stick to the pan and tear the meat apart, leaving you with shredded chicken and a messy pan. After 30 seconds, use a spatula to flip the pieces over or stir them, breaking up any that have stuck together. Continue cooking for another one to two minutes, stirring occasionally, until the chicken is about 80 percent cooked—the outside should be lightly golden and no longer pink, but the center can still be slightly underdone. Transfer the chicken to a clean plate and set aside. It will seem slightly underdone at this point, which is exactly right. If there's more chicken than will fit in a single layer, cook it in two batches rather than crowding the pan, which causes steaming instead of searing.
- Cook the aromatics carefully:
- Reduce your heat to medium to prevent burning the garlic and ginger, which happens easily at high temperatures and creates bitter, acrid flavors. Add another tablespoon of oil to the pan if it looks dry. Toss in your minced garlic and ginger and stir them constantly for about 15 to 20 seconds until they become fragrant and release their aromas—you'll smell a wonderful perfume rising from the pan. Watch carefully and keep stirring because they can go from perfectly cooked to burnt in just seconds. The pan will still be extremely hot from the high heat earlier, so this step happens fast. Don't let the aromatics turn brown; you just want them softened and fragrant.
- Stir-fry the vegetables quickly:
- Immediately after the aromatics become fragrant, add your bell peppers and onions to the pan. Crank the heat back up to high and start stir-frying vigorously, tossing and stirring constantly so everything cooks evenly without burning. The vegetables will sizzle dramatically when they hit the hot pan—this is good. Keep them moving almost constantly for about two to three minutes. You want the vegetables to soften slightly and develop some charred spots on the edges, but they should still maintain significant crunch and vibrant color. If you cook them until they're completely soft, they'll be overcooked and mushy by the time the dish is finished. The high heat creates light charring on the vegetables' surface while keeping the interior crisp, which gives you that perfect balance of textures that defines good stir-fry.
- Add the sauce and thicken:
- Give your sauce mixture one final stir since the cornstarch will have settled to the bottom, then pour it all into the pan with the vegetables. The sauce will immediately start bubbling and steaming as it hits the hot pan. Stir everything together constantly, scraping the bottom of the pan to pick up any stuck bits. The sauce will seem very thin initially, but as you continue stirring and the mixture comes to a boil, the cornstarch will activate and thicken everything into a glossy, coating consistency. This transformation takes about one to two minutes. You'll see the sauce change from watery and translucent to thick and shiny. If your sauce seems too thick, splash in a tablespoon of water or stock. If it's too thin, let it cook for another 30 seconds to reduce and concentrate.
- Finish with the chicken:
- Once your sauce has thickened properly and coats the back of a spoon, add the partially cooked chicken back to the pan along with any juices that have accumulated on the plate. Stir everything together thoroughly, making sure every piece of chicken and every vegetable gets coated in that glossy black pepper sauce. Continue cooking for another one to two minutes, stirring frequently, until the chicken is completely cooked through with no pink remaining in the center. To check doneness, cut into one of the larger pieces—it should be white all the way through and the juices should run clear, not pink. The chicken will finish cooking during this final step, and because you removed it earlier when it was slightly underdone, it will be perfectly cooked now instead of dry and overdone. Turn off the heat and give everything one final toss to combine. Taste a piece and adjust the seasoning if needed—you might want to add a pinch of salt or an extra crack of black pepper depending on your preference.
 Pin it
The ingredient I'm most passionate about in this dish is definitely the black pepper, and I've learned that quality makes a tremendous difference. For my first several attempts, I used pre-ground black pepper from a jar that had probably been sitting in my spice drawer for a year, and while the dish was okay, it lacked that punchy, aromatic pepper flavor that should be the star. Once I bought whole peppercorns and cracked them fresh right before cooking, the transformation was incredible. The pepper had this bright, almost floral quality with genuine heat that built gradually rather than just tasting dusty and flat. My husband actually stopped mid-bite during dinner to ask what I'd done differently, and when I explained about the fresh pepper, he immediately went online and ordered us a good pepper mill. Now I crack pepper fresh for almost everything, but especially for this dish where it's the defining flavor. The difference between stale pre-ground and freshly cracked is like comparing dried herbs to fresh—technically the same ingredient, but worlds apart in impact.
Understanding Stir-Fry Techniques and Equipment
Stir-frying is fundamentally different from Western cooking methods in both technique and philosophy. The defining characteristic is extremely high heat combined with constant motion, which cooks food rapidly while preserving color, texture, and nutrients. Professional Chinese restaurants use commercial wok burners that produce 50,000 to 100,000 BTUs of heat—several times more powerful than home stoves. This intense heat is what creates "wok hei," which translates to "breath of the wok" and refers to that slightly smoky, charred flavor that's impossible to replicate at lower temperatures. While home stoves can't match restaurant heat, you can approximate the results by using your highest heat setting and working in smaller batches that don't overwhelm your burner's output.
The shape and material of your cooking vessel matters significantly for stir-frying success. Traditional round-bottomed woks work brilliantly over specialized wok burners but don't sit properly on flat Western stovetops, which is why flat-bottomed woks or large skillets are more practical for home cooking. Carbon steel woks and pans are ideal because they heat quickly and evenly while being light enough to lift and toss with one hand. Cast iron retains heat well but is too heavy for the tossing motion that defines stir-frying. Nonstick pans can work but shouldn't be heated to the extreme temperatures that proper stir-fry requires since the coating can break down and release fumes. A 12 to 14-inch pan gives you enough surface area for ingredients to spread out and sear rather than steam.
The constant motion during stir-frying serves multiple purposes beyond just preventing burning. Tossing and stirring ensures even heat distribution so every piece of food gets equal exposure to the hottest part of the pan. It also prevents ingredients from sitting in one spot long enough to stick or burn. The motion creates friction that helps develop that slightly crispy exterior on vegetables and proteins while keeping interiors tender. Additionally, the tossing action helps distribute the sauce evenly and incorporates air, which creates the characteristic glossy sheen on properly finished stir-fries.
Velveting Chicken for Restaurant Texture
The velveting technique used in this recipe is a cornerstone of Chinese cooking that creates the incredibly tender, almost slippery texture associated with restaurant-prepared chicken. The process involves marinating meat in a mixture of cornstarch, soy sauce, and wine, which creates a protective coating that seals in moisture during cooking. The cornstarch gelatinizes when it hits hot oil, forming a thin barrier that prevents the chicken's natural juices from escaping. This coating also provides a slightly slick surface that sauce clings to beautifully, giving you that characteristic glossy appearance.
The marinating time, while brief, is essential for allowing the cornstarch to fully hydrate and adhere to the meat. As the chicken sits in the marinade, the cornstarch absorbs the liquid ingredients and forms a paste-like coating around each piece. Some traditional recipes call for briefly blanching the coated chicken in oil or water before stir-frying, which pre-cooks the coating and makes it even more effective. This recipe skips that step for simplicity, but the principle remains the same—the cornstarch creates a protective layer between the meat and the high heat that would otherwise cause moisture loss and toughness.
Cutting chicken against the grain is equally important for tenderness and works synergistically with the velveting process. Muscle fibers in chicken run in parallel lines, and when you chew cooked chicken, you're essentially trying to break those fibers apart. Cutting perpendicular to the fiber direction pre-shortens them, which means your teeth have less work to do and the meat feels more tender. Combined with the moisture-retaining properties of the cornstarch coating, this cutting technique ensures incredibly tender results even from lean chicken breast that would normally dry out quickly at high heat.
Managing Heat and Timing
Heat control is arguably the most challenging aspect of stir-frying for Western cooks accustomed to gentler cooking temperatures. Chinese stir-frying happens so quickly that you measure cooking time in seconds rather than minutes, and every second counts at temperatures hot enough to sear meat immediately on contact. Most home stoves struggle to maintain high heat when you add cold food to the pan, which is why working in smaller batches produces better results than trying to cook everything at once. When you overload a pan, the temperature drops dramatically and food steams instead of searing, resulting in that soggy, grayed appearance instead of the lightly charred, vibrantly colored finish you want.
The staging technique of removing partially cooked chicken before adding vegetables might seem wasteful or inefficient, but it's based on solid cooking principles. Chicken requires several minutes to cook through completely, while vegetables need only one to two minutes to maintain their crisp texture. If you left the chicken in the pan for the entire cooking time, it would be overcooked and rubbery by the time the vegetables finished. By removing the chicken early, you give the vegetables the high-heat attention they need, then add the chicken back at the end just long enough to finish cooking without drying out.
Understanding visual and aromatic cues helps you time things properly even if your stove heats differently than the recipe assumes. When oil shimmers and flows freely across the pan, it's hot enough for cooking. When aromatics like garlic and ginger release their fragrance strongly enough to smell several feet away, they're ready for the next ingredient. When chicken pieces release easily from the pan without tearing, the sear is set and you can flip them. When sauce coats a spoon and leaves a clear trail when you drag your finger through it, the cornstarch has activated and thickened properly. These sensory indicators work regardless of whether your stove runs hot or cool.
Nutritional Benefits and Dietary Modifications
Black pepper chicken offers excellent nutritional value as written, packing lean protein, fiber-rich vegetables, and beneficial compounds from aromatics into a relatively low-calorie meal. Chicken breast provides about 30 grams of protein per serving with minimal fat, while thighs offer slightly less protein but more iron and zinc. The bell peppers contribute significant vitamin C—a single red pepper contains more than twice your daily requirement—along with vitamin A and various antioxidants. Onions provide quercetin and other anti-inflammatory compounds, while garlic and ginger have been associated with immune support and anti-inflammatory benefits for thousands of years.
The dish adapts easily to various dietary requirements without sacrificing flavor or satisfaction. For gluten-free diets, simply substitute tamari or coconut aminos for the soy sauce and ensure your oyster sauce is labeled gluten-free. For lower sodium, use low-sodium soy sauce and stock while skipping the oyster sauce or replacing it with hoisin sauce thinned with water. For keto or low-carb diets, serve the stir-fry over cauliflower rice instead of regular rice and you'll have a meal with minimal carbohydrates. Vegetarians can substitute firm tofu or tempeh for the chicken using the same velveting technique, while vegans should use vegetarian oyster sauce and ensure their Shaoxing wine doesn't contain animal products.
Compared to restaurant versions, homemade black pepper chicken typically contains about half the sodium and a third less oil, making it significantly healthier without tasting like "diet food." Restaurants use excessive amounts of oil both for flavor and to prevent sticking on their extremely hot burners, but home cooks can achieve excellent results with moderate oil quantities. The sauce in this recipe gets its body from cornstarch and oyster sauce rather than from sugar and additional sodium, which means you're getting authentic flavor without the excess that can make restaurant food feel heavy.
 Pin it
This black pepper chicken has become my benchmark for judging whether I've truly mastered stir-fry technique because it's deceptively simple but requires everything to come together perfectly. The ingredient list is short, the cooking time is brief, and there's nowhere to hide mistakes—either your chicken is tender and your vegetables are crisp, or they're not. Once I finally got the timing down and learned to trust the high heat instead of backing away from it nervously, my confidence in Chinese cooking grew exponentially. Now I can tackle more complex stir-fries knowing I understand the fundamental principles that make them work. This dish also taught me the value of proper mise en place, which has improved my cooking across all cuisines, not just Asian food. When you're forced to have everything ready before you start because the technique demands it, you develop habits that make all cooking more efficient and less stressful. The fact that this recipe produces restaurant-quality results in 15 minutes with ingredients I always have on hand makes it one of the most valuable additions to my repertoire.
Frequently Asked Questions
- → Can I use chicken thighs instead of breasts?
- Yes, chicken thighs work great and stay even more tender. Just slice them the same way against the grain.
- → What can I substitute for Shaoxing wine?
- Dry sherry is the best substitute. You can also use dry white wine or rice vinegar in a pinch.
- → How do I make this gluten-free?
- Use tamari instead of soy sauce and dry sherry instead of Shaoxing wine. Everything else is already gluten-free.
- → Can I prep this ahead of time?
- You can marinate the chicken and chop the vegetables a few hours ahead. Mix the sauce just before cooking for best results.
- → What should I serve with black pepper chicken?
- Steamed white or brown rice is perfect. Fried rice or noodles also work well to soak up the sauce.
- → Why is my sauce not thickening?
- Make sure to stir the cornstarch in the sauce right before adding it to the pan. It settles at the bottom quickly.