
 Pin it
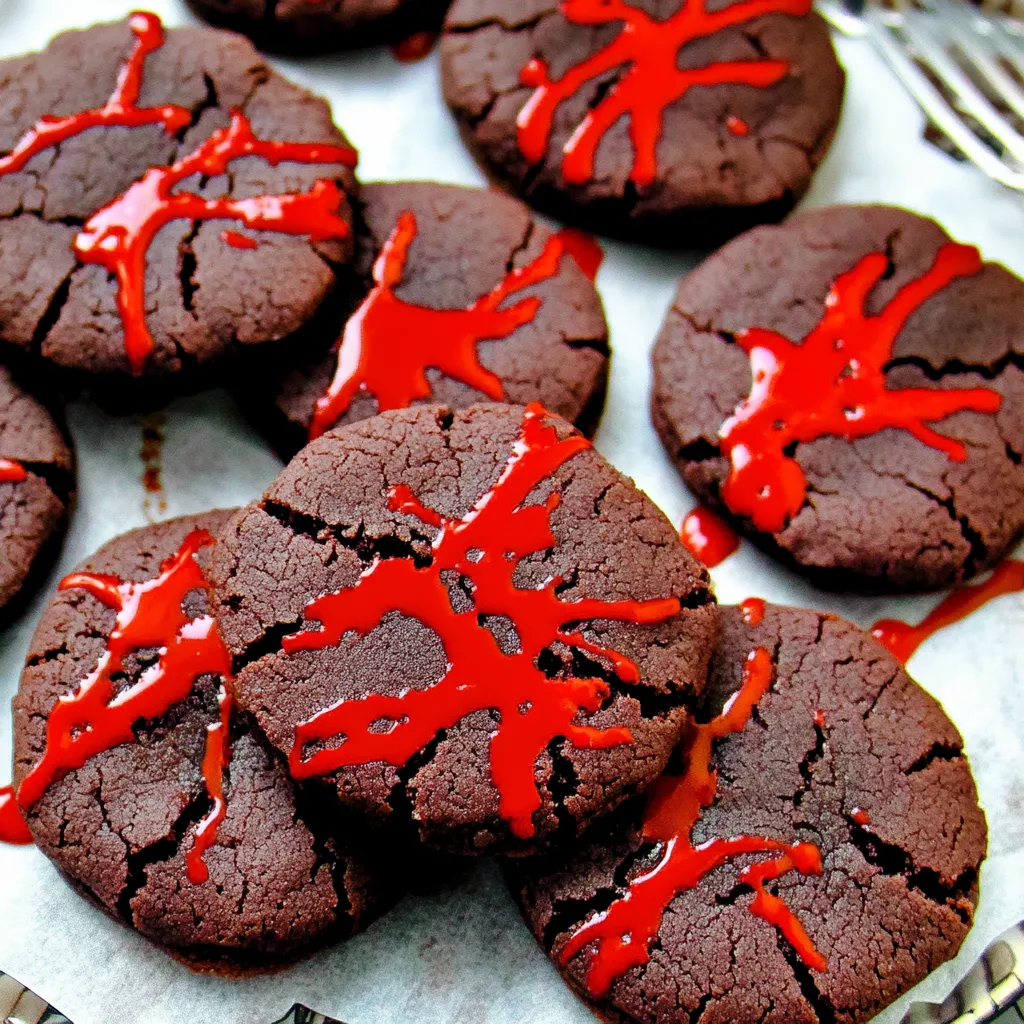
These blood splatter cookies deliver the perfect balance of deliciously rich chocolate flavor and genuinely creepy Halloween atmosphere that makes them absolutely irresistible for spooky season celebrations. The magic happens when soft, bakery-style chocolate cookies get artistically "splattered" with deep red royal icing to create an authentically gruesome appearance that's guaranteed to both delight and slightly horrify your guests. What makes this recipe particularly wonderful is how it combines serious baking technique with playful, messy decorating that lets you unleash your creative dark side.
I developed this recipe when I wanted to create something that would genuinely surprise people at a Halloween party - not just cute or mildly spooky, but something with real shock value that still tasted absolutely delicious. The combination of how impressive they look and how satisfying the splatter technique is made them an instant hit.
Essential Ingredients and Selection Tips
- Quality unsalted butter: Room temperature for proper creaming; provides the rich flavor foundation for these substantial cookies
- Dark cocoa powder: Hershey's dark cocoa creates the perfect deep chocolate base that contrasts beautifully with the red "blood"
- Pasteurized egg whites: Essential for food-safe royal icing since these contain raw egg whites
- Super red gel food coloring: Creates the most vibrant, blood-like color; liquid coloring won't achieve the same intensity
Detailed Step-by-Step Instructions
- Create the perfect cookie foundation:
- Preheat oven to 350 degrees Fahrenheit and line baking sheets with parchment paper. In a stand mixer, cream softened butter with brown sugar and granulated sugar until light and fluffy, about 4-5 minutes. This thorough creaming creates the tender texture.
- Build the chocolate base:
- Beat in room temperature eggs one at a time, followed by vanilla extract, mixing until completely incorporated. In a separate bowl, whisk together flour, unsweetened cocoa powder, cornstarch, baking soda, and salt until evenly combined.
- Combine with minimal mixing:
- Add the dry ingredients to the wet mixture, mixing just until combined. Overmixing develops too much gluten, creating dense cookies instead of the tender texture you want for these substantial treats.
- Shape for bakery-style results:
- Using a medium cookie scoop or scale to weigh 6-ounce portions, form dough into balls and place on prepared baking sheets. Lightly flatten each ball to ensure even baking. These are deliberately large, bakery-style cookies.
- Bake to perfect doneness:
- Bake for 15-18 minutes until cookies are firm around the edges but still slightly soft in the center. They'll continue cooking on the hot pan, so don't overbake. Cool completely before decorating.
- Master the royal icing technique:
- In a clean stand mixer bowl, beat pasteurized egg whites, cream of tartar, powdered sugar, and vanilla for 5-7 minutes until the mixture holds soft peaks and appears bright white. If too runny, add more powdered sugar gradually.
- Achieve blood-red perfection:
- Add 5-7 drops of super red gel food coloring, beating until the color resembles dark blood. Thin the icing with 2 tablespoons of water until it flows like lava when dripped from a spoon - this consistency is crucial for proper splattering.
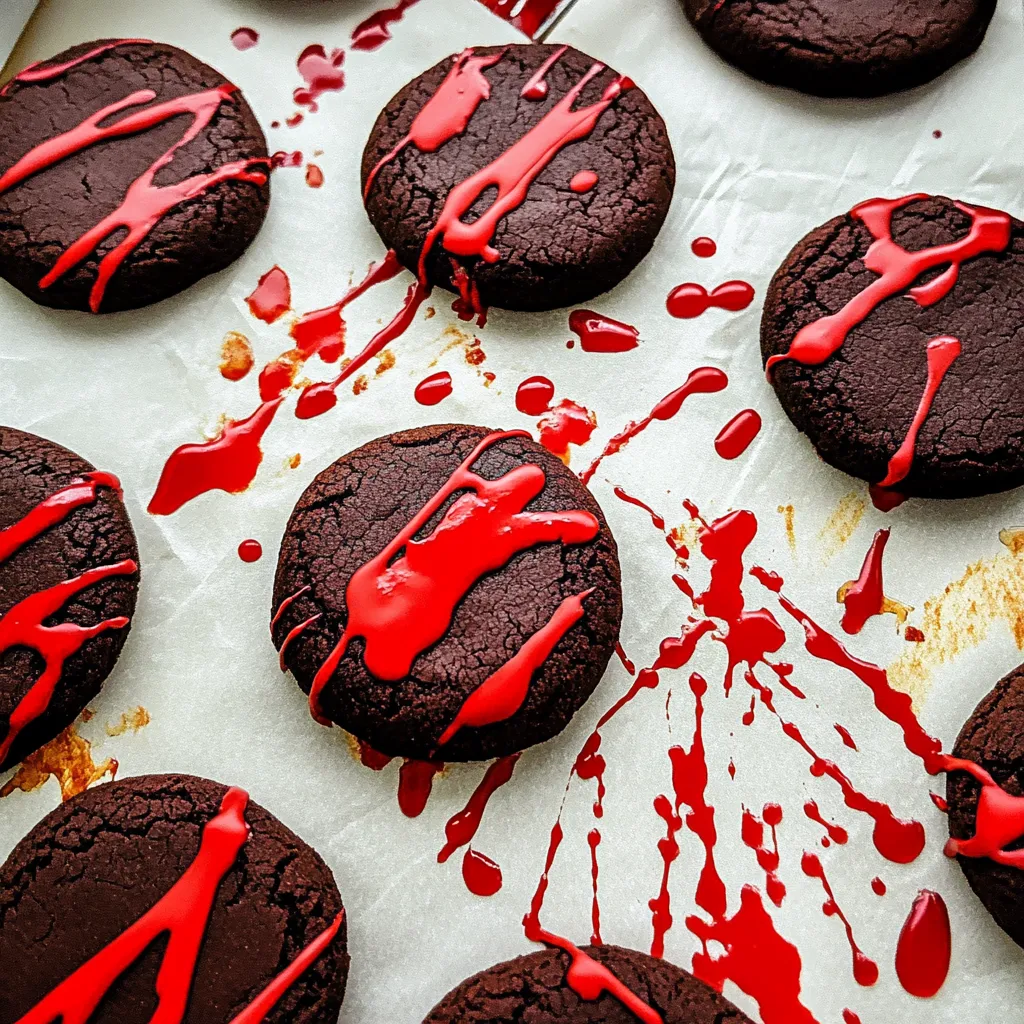
- Execute the splatter technique:
- Work outside or cover your workspace with plastic bags. Dip a fork into the red icing and fling it toward the cookies while maintaining a firm grip. The motion should be quick and controlled to create authentic splatter patterns. Continue until satisfied with the coverage.
- Allow proper setting:
- Let the icing dry for at least 1 hour before serving or storing. The royal icing needs this time to set completely and develop its characteristic smooth, hard finish.
 Pin it
My guests are always simultaneously impressed and slightly disturbed by these cookies, which is exactly the reaction you want for Halloween treats. The rich chocolate flavor keeps people coming back despite the gruesome appearance, creating that perfect Halloween contradiction.
Advanced Splatter Techniques
For more realistic blood effects, vary your splatter angles and distances. Close-range creates fine droplets, while farther distances produce dramatic streaks. Some decorators prefer using multiple tools - brushes for fine spray effects and spoons for larger splatters. Experiment with different implements for varied textures.
Royal Icing Mastery Tips
Perfect royal icing should be bright white before adding coloring, which indicates proper mixing and ingredient ratios. If your icing appears cream-colored or refuses to peak, continue beating and more powdered sugar gradually. The final consistency should flow smoothly but not be watery.
Storage and Make-Ahead Strategies
Store finished cookies at room temperature in airtight containers for up to one week, but only after the icing has completely set. The unfrosted cookies can be frozen for up to three months and decorated after thawing. Never freeze decorated royal icing cookies as the icing doesn't freeze well.
Scaling and Equipment Considerations
This recipe doubles easily for larger parties, though you may need to work in batches during the decorating phase. Invest in quality gel food coloring for the most vibrant results, and consider having multiple forks available for continuous splattering without stopping to clean.
Safety and Cleanup Considerations
The splatter technique is genuinely messy, so proper workspace preparation is essential. Use disposable plastic tablecloths or work outdoors when possible. Wear old clothes or aprons, and have cleanup supplies ready. The mess is part of the fun, but planning prevents permanent staining.
These blood splatter cookies represent the perfect Halloween treat because they combine genuine shock value with exceptional flavor and achievable techniques. They prove that the most memorable holiday foods don't shy away from being dramatic - sometimes the best treats are the ones that make people do a double-take before diving in for seconds. Whether you're hosting a horror movie night or just want to bring serious Halloween energy to your celebration, these cookies deliver that ideal combination of delicious indulgence and spine-tingling presentation.
Frequently Asked Questions
- → How long do these cookies stay fresh?
- Store them in an airtight container for up to 5 days. The icing will stay crisp if kept dry.
- → Can I make the dough ahead of time?
- Yes! Wrap the dough in plastic and refrigerate for up to 3 days or freeze for up to 3 months.
- → What if I don't have gel food coloring?
- Liquid food coloring works too, but you'll need more drops and the color might not be as vibrant.
- → How do I get the splatter effect right?
- The icing should flow like thick syrup off a spoon. If it's too thick, add water one teaspoon at a time.
- → Can kids help make these cookies?
- Absolutely! Kids love the messy splatter part. Just supervise the oven work and let them go wild with decorating.
- → Do I need a stand mixer?
- A hand mixer works fine for both the cookie dough and the icing. Just beat a bit longer to get the right texture.