
 Pin it
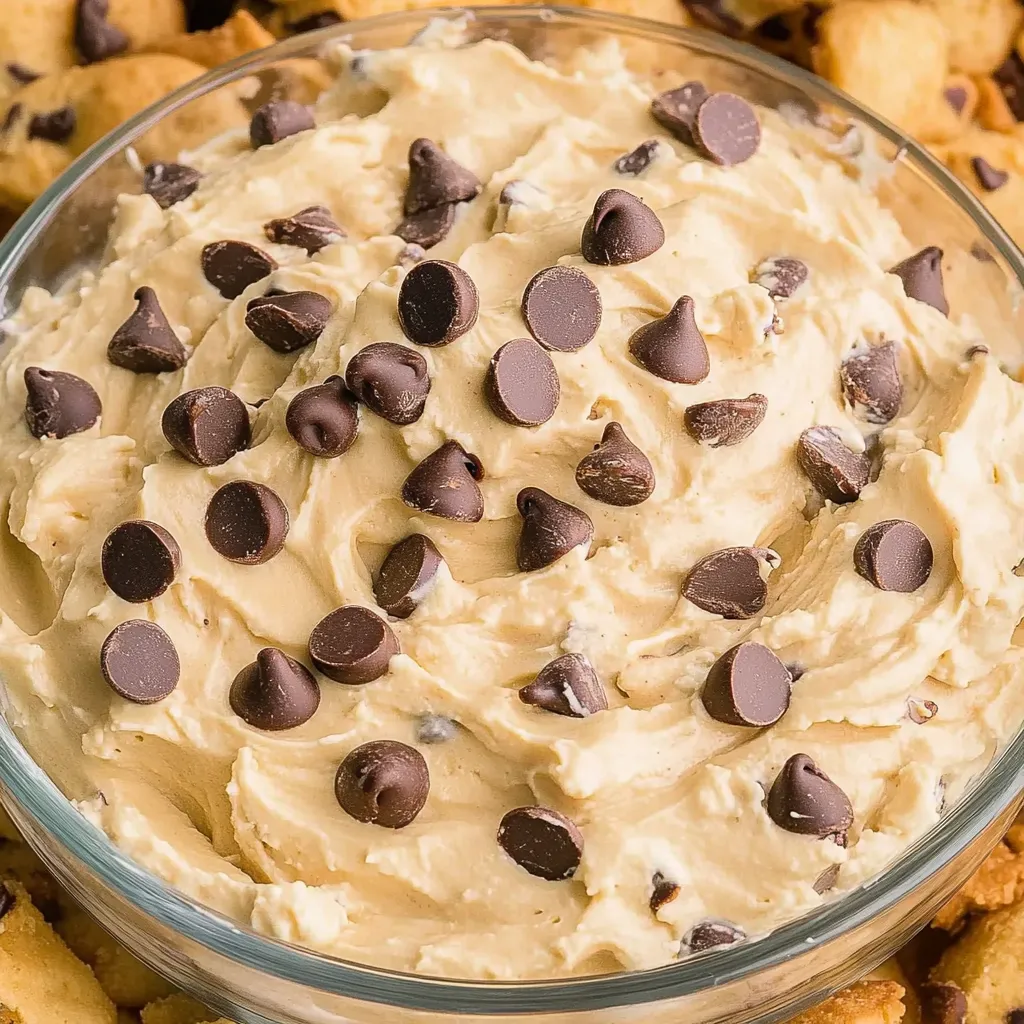
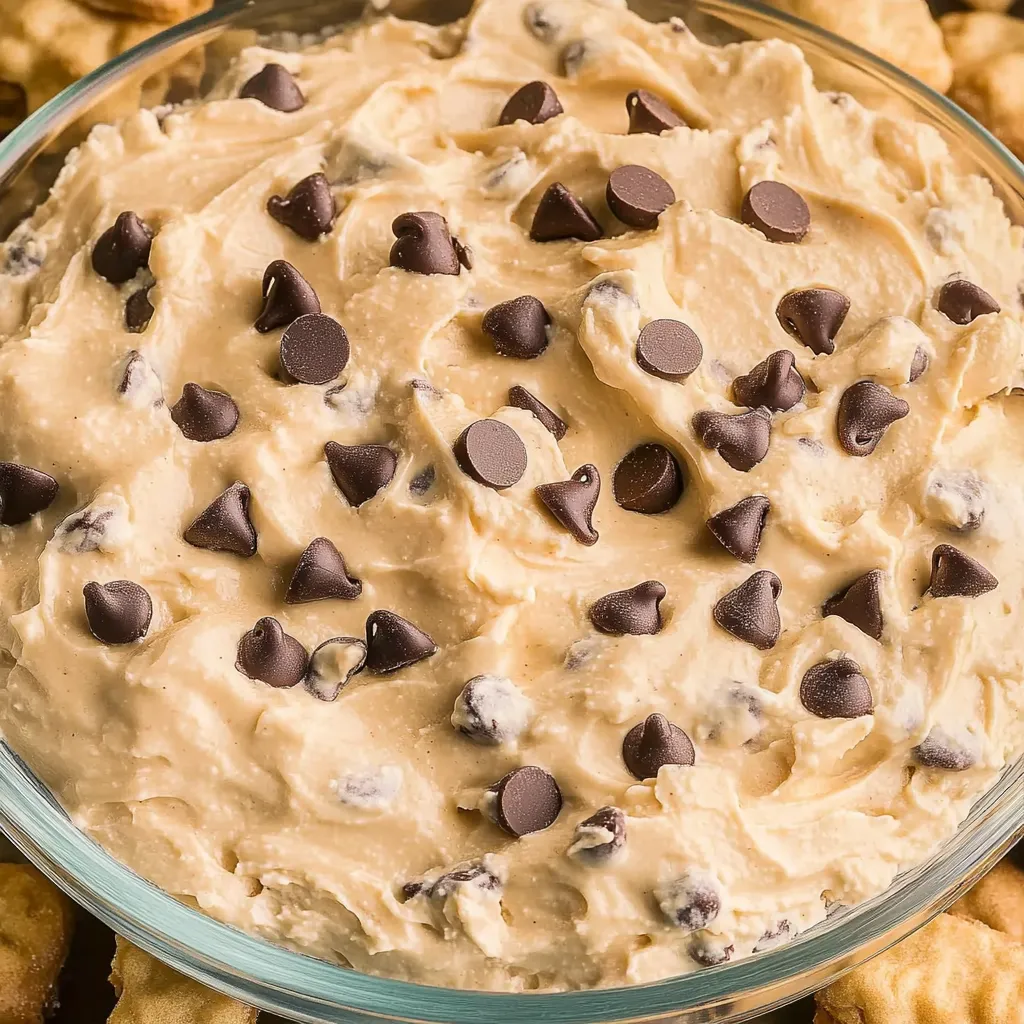
This buckeye dip captures everything you love about those classic peanut butter chocolate candies from Ohio and transforms them into a creamy, scoopable dessert that's perfect for sharing at parties. Sweet peanut butter blends with tangy cream cheese and fluffy whipped topping to create a mousse-like texture that's incredibly light yet satisfying, while mini chocolate chips add pockets of rich chocolate throughout. The combination tastes exactly like traditional buckeye candies but requires no rolling, dipping, or tempering chocolate, making it accessible even for people who've never made candy before. Serve this with graham crackers, fresh fruit, or pretzels and watch it disappear as guests keep returning for just one more sweet, creamy bite.
I first tried buckeye dip at a friend's Super Bowl party years ago and was immediately hooked by how it delivered all the flavor of traditional buckeye candies without any of the fussy work. When I got home, I tracked down a recipe and made my own batch, somewhat nervous that it wouldn't live up to my memory. The result was even better than the party version—creamy, sweet, perfectly balanced between peanut butter and chocolate, and so easy that I felt almost guilty calling it a recipe. Now I make this for every casual gathering, potluck, and holiday party because it's reliable, impressive-looking, and requires minimal effort. My family has started requesting it specifically, and I've given the recipe to at least a dozen friends who all report the same enthusiastic reception when they serve it.
Ingredients and What Makes Them Essential
- Cream cheese (8 ounces, softened): This provides the tangy base that balances the sweetness of the powdered sugar and keeps the dip from tasting cloying or one-dimensional. The cream cheese also contributes to that smooth, creamy texture that makes the dip luxurious and spreadable. Use full-fat cream cheese for best results—reduced-fat versions have different moisture content and won't blend as smoothly or taste as rich. The cream cheese absolutely must come to room temperature before you start, which takes at least 30 minutes on the counter, or it won't incorporate smoothly with the peanut butter and will leave you with lumps.
- Powdered sugar (2 cups, sifted): Also called confectioners' sugar, this sweetens the dip while maintaining a smooth, silky texture that granulated sugar couldn't provide. Powdered sugar dissolves instantly into the cream cheese mixture without any grittiness, and it's what gives buckeye candies their characteristic sweetness. Sifting the sugar before adding it is genuinely important because powdered sugar develops hard lumps during storage that won't break down during mixing, leaving you with gritty bits throughout the dip. The amount seems substantial, but it's necessary to achieve that candy-like sweetness that defines buckeyes.
- Creamy peanut butter (1½ cups): This is the star ingredient that provides the signature flavor and contributes to the thick, rich texture. Use regular creamy peanut butter like Jif or Skippy rather than natural varieties, which tend to be oily and separate, making the dip's texture unpredictable. Creamy works much better than crunchy here because you want smooth, uniform consistency throughout, and the mini chocolate chips already provide textural interest. Choose peanut butter that's fresh and hasn't been sitting open in your pantry for months, since old peanut butter can taste stale or rancid.
- Vanilla extract (1 teaspoon, pure): Pure vanilla extract adds aromatic depth and enhances all the other flavors without tasting obviously vanilla-forward. It rounds out the sweetness and keeps the dip from tasting flat or one-note. Pure vanilla extract tastes significantly better than imitation vanilla, which can have chemical undertones that become noticeable in simple recipes like this where there aren't many ingredients to mask it. The small amount makes a real difference in the final flavor complexity.
- Whipped topping (8 ounces, thawed): Cool Whip or similar whipped topping creates the light, fluffy texture that makes this dip feel like mousse rather than thick frosting. The whipped topping must be completely thawed before using—frozen or partially frozen topping won't fold in smoothly and will deflate as it melts. You can substitute homemade whipped cream if you prefer, which will give you slightly better flavor and less artificial taste, though Cool Whip is more stable and holds its texture longer in the refrigerator.
- Mini chocolate chips (1 cup): These provide pockets of rich chocolate throughout the dip and add visual appeal with their dark color contrasting against the tan peanut butter base. Mini chips work better than regular-sized chips because they distribute more evenly and give you chocolate in more bites. You can use milk chocolate for sweeter flavor, semi-sweet for balanced sweetness, or dark chocolate if you prefer less sweet and more intense chocolate taste. The chips stay firm even after refrigeration, creating nice textural contrast against the smooth, creamy dip.
Step-by-Step Instructions
- Prepare ingredients and bring to proper temperature:
- Before you start mixing anything, make sure your cream cheese has been sitting at room temperature for at least 30 minutes and is genuinely soft throughout when you press it with your finger. Also ensure your whipped topping is completely thawed if using frozen Cool Whip—transfer it from the freezer to the refrigerator several hours ahead or overnight. Get out your powdered sugar and sift it through a fine-mesh strainer into a bowl to remove any lumps that formed during storage. These preparatory steps seem minor but genuinely affect how smoothly everything combines and the final texture of your dip.
- Combine cream cheese and peanut butter:
- Place your softened cream cheese in a large mixing bowl—the bowl should be genuinely large since you'll be adding quite a bit more volume eventually. Add the peanut butter directly to the bowl with the cream cheese. Using an electric hand mixer or stand mixer fitted with the paddle attachment, beat the cream cheese and peanut butter together on medium speed for about one to two minutes. You want them completely combined into a uniform mixture with no streaks of white cream cheese or distinct peanut butter remaining. The mixture will be thick and somewhat stiff at this stage, which is completely normal. Scrape down the sides of the bowl with a rubber spatula partway through mixing to ensure everything incorporates evenly without leaving unmixed pockets stuck to the sides.
- Gradually incorporate powdered sugar and vanilla:
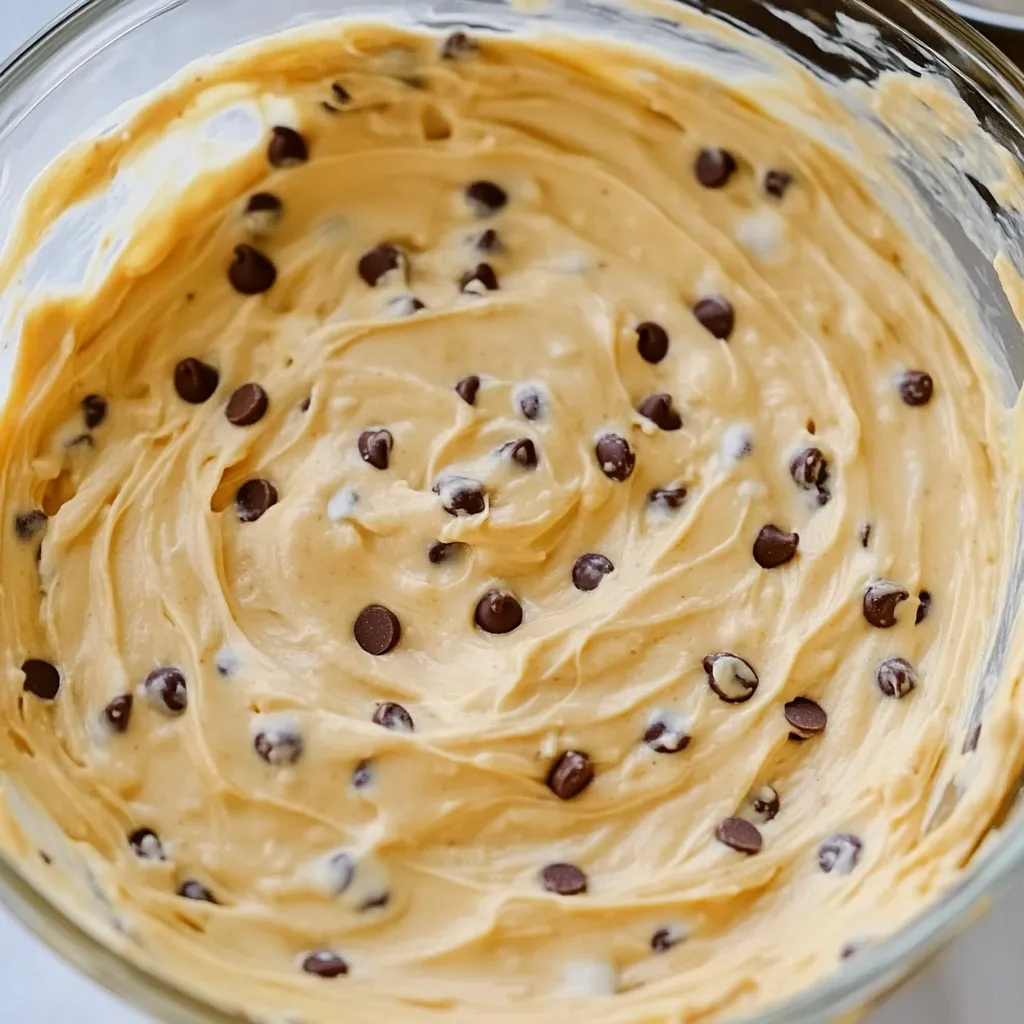
- With your mixer running on low speed to prevent a powdered sugar cloud from exploding across your kitchen, begin adding the sifted powdered sugar gradually—about half a cup at a time. Let each addition mix in for about 30 seconds before adding more, which prevents overwhelming the mixture and ensures smooth incorporation. After all the sugar is added, increase the mixer speed to medium and beat for another minute or two until the mixture becomes lighter in color and noticeably fluffy. Add the vanilla extract and beat for another 30 seconds to distribute it evenly. The mixture at this point will be very thick, sweet, and pale—almost like peanut butter frosting. Taste it if you want to check the sweetness level, though remember it will taste less intensely sweet once you add the whipped topping.
- Gently fold in whipped topping:
- This is where you need to switch from the electric mixer to hand mixing with a rubber spatula or large spoon to avoid deflating the whipped topping and losing that light, fluffy texture. Add about one-third of the thawed whipped topping to your peanut butter mixture and fold it in gently using broad sweeping motions—scrape along the bottom of the bowl, bring the spatula up through the center, and fold over the top. This initial portion lightens the dense peanut butter base and makes incorporating the rest easier. Add the remaining whipped topping in two more additions, folding gently but thoroughly after each addition until you see no streaks of white remaining. The mixture should increase dramatically in volume and become pale, fluffy, and mousse-like. Work carefully and patiently because aggressive mixing will knock out the air bubbles that make the dip light and appealing.
- Add chocolate chips carefully:
- Sprinkle the mini chocolate chips over the top of your fluffy mixture and fold them in gently using the same folding motion you used for the whipped topping. Distribute the chips evenly throughout the dip without overmixing, which would deflate the texture you've carefully created. You want the chocolate chips suspended throughout so every scoop contains some, but you don't want to stir so much that you lose the airy consistency. Reserve a small handful of chocolate chips if you want to sprinkle some on top for decoration before serving.
- Chill thoroughly before serving:
- Transfer the finished dip to your serving bowl or an airtight storage container if making ahead. Smooth the top with a spatula and sprinkle with reserved chocolate chips if desired. Cover the bowl tightly with plastic wrap or a lid and refrigerate for at least 2 full hours before serving. This chilling time is genuinely important—it allows all the flavors to meld together and marry, and it firms up the texture from soft and spreadable to more structured and scoopable. The dip can actually be made up to a week ahead and kept refrigerated, which makes it excellent for party planning. Just give it a gentle stir before serving if it seems separated, and let it sit at room temperature for about 10 minutes before serving if it's become very firm in the refrigerator.
 Pin it
The ingredient that makes the biggest difference in final quality is surprisingly the peanut butter, and I learned this after making the dip with whatever jar happened to be in my pantry. The first couple times, I used natural peanut butter because that's what I normally keep for sandwiches, and the dip consistently turned out somewhat oily and separated with pools of peanut butter oil on top. When I switched to regular processed peanut butter like Jif or Skippy that contains added stabilizers and emulsifiers, the texture improved dramatically and became smooth, stable, and creamy without any separation issues. The flavor was also more consistent and reliable since natural peanut butter can vary significantly in taste depending on how the oil distributes. My family actually preferred the version made with regular peanut butter, saying it tasted more like the classic buckeye candies they remembered from childhood. Now I specifically buy conventional peanut butter for this dip even though I use natural for other purposes, and the results have been perfect every single time.
Understanding No-Bake Desserts and Their Appeal
No-bake desserts have surged in popularity because they deliver impressive results without heating up your kitchen or requiring advanced baking skills. These desserts rely on refrigeration rather than oven heat to set and firm up, which means they're accessible to people who feel intimidated by traditional baking. The techniques are generally more forgiving since you're not dealing with chemical reactions like gluten development or egg coagulation that can go wrong with timing or temperature. This particular dip exemplifies why no-bake desserts work so well for entertaining—it requires minimal equipment, comes together quickly, and can be made entirely ahead of time without any loss of quality.
The texture of no-bake desserts like this buckeye dip depends on proper chilling and the interaction between ingredients at cold temperatures. The cream cheese and peanut butter provide structure and richness, the powdered sugar adds body while sweetening, and the whipped topping contributes airiness and light texture. When chilled, the fats in the cream cheese and peanut butter firm up slightly, giving the dip enough structure to hold its shape when scooped but remaining soft enough to spread easily on crackers or fruit. The whipped topping doesn't deflate during chilling because the stabilizers in commercial products like Cool Whip maintain the air bubbles even when cold.
Folding techniques matter significantly in no-bake desserts that incorporate whipped ingredients because aggressive mixing deflates the air bubbles that create light texture. When you fold whipped topping into a dense base like the peanut butter mixture, you're essentially trying to distribute the heavy ingredient throughout the light one without crushing all those tiny air pockets. The gentle lifting and turning motion of proper folding incorporates ingredients while preserving volume, which is why the recipe specifically tells you to stop using the electric mixer before adding the whipped topping. Understanding this principle helps you achieve the best possible texture.
Flavor Variations and Customization Options
The basic buckeye dip formula adapts easily to different flavor profiles and dietary preferences while maintaining the essential creamy, sweet character that makes it appealing. For a more intense chocolate version, you could add cocoa powder to the mixture—about a quarter cup stirred in with the powdered sugar creates chocolate peanut butter dip that resembles a Reese's cup even more closely. Swirling in some melted peanut butter on top creates visual interest and intensifies the peanut flavor for true peanut butter fanatics. Adding a tablespoon of maple syrup instead of vanilla creates subtle maple peanut butter flavor that's particularly nice in fall.
For people who prefer less sweet desserts, you can reduce the powdered sugar to one and a half cups instead of two, which makes the dip noticeably less candy-like but still plenty sweet enough for most palates. Using dark chocolate chips instead of milk chocolate also cuts the overall sweetness while adding more complex chocolate flavor. If you want to incorporate additional textures, try folding in crushed pretzels or graham crackers along with the chocolate chips for salty crunch that contrasts with the sweet, smooth dip.
Alternative nut butters work beautifully if you want to change the flavor profile entirely or need to accommodate peanut allergies. Almond butter creates a milder, slightly sweeter version that's equally delicious, while cashew butter makes an incredibly smooth, rich dip with less assertive flavor. Sunflower seed butter works for nut-free versions, though it tends to be more liquidy and you might need to reduce the whipped topping slightly. Each variation maintains the basic technique and structure while offering different flavor experiences that appeal to different preferences.
Serving Suggestions and Presentation Ideas
The dippers you choose significantly impact how people experience this dessert and can make it feel more or less indulgent depending on your selections. Graham crackers are classic and their honey-wheat flavor complements peanut butter beautifully—both chocolate and honey varieties work, and breaking them into sticks or squares makes them easy to dip. Vanilla wafers provide neutral sweetness that lets the buckeye flavor shine, while Nilla Wafer cookies add a nostalgic element many people love. Pretzels in any form—twists, rods, or squares—bring salty contrast that balances the sweetness and creates that addictive sweet-and-salty combination.
Fresh fruit transforms this from pure indulgence into something that feels at least partially healthy and adds refreshing contrast to the rich dip. Apple slices are perfect because their crisp texture and slight tartness cut through the creamy sweetness—use a mix of red and green varieties for visual appeal and flavor variety. Strawberries work beautifully, especially when they're in season and particularly sweet. Banana slices are another excellent option that makes sense given how well bananas pair with peanut butter naturally. Arrange the fruit attractively around the dip bowl and provide toothpicks for easy, mess-free serving.
For presentation, serve the dip in an attractive bowl that shows off the pale tan color and chocolate chip flecks—a white or cream-colored bowl provides nice contrast. You can make it look more finished by drizzling melted chocolate over the top in decorative patterns, or by arranging some of the dippers standing upright around the edge of the bowl. For parties, consider serving it in a hollowed-out bread bowl or even a graham cracker pie crust for dramatic presentation that gets people talking. Garnishing with a light dusting of cocoa powder or some chopped peanuts adds visual interest and hints at the flavors inside.
Make-Ahead Planning and Storage Tips
This buckeye dip is genuinely ideal for advance preparation because it actually improves after sitting in the refrigerator as the flavors meld and develop. You can make it up to five days ahead of your event, which spreads out your party preparation and reduces stress on the day of serving. Store the dip in an airtight container in the refrigerator where it will firm up and develop deeper, more integrated flavors. Before serving, let it sit at room temperature for about 10 minutes to soften slightly if it's become very firm, and give it a gentle stir to restore the creamy texture if any separation has occurred.
The dip keeps well for up to a week in the refrigerator when properly stored, making it excellent for meal prep or for having a ready dessert on hand for unexpected guests. The texture and flavor remain stable throughout this time period without any significant deterioration. If you notice any liquid separating out on top after several days, simply stir it back in before serving. The chocolate chips may sink slightly to the bottom over time due to gravity, which is why a quick stir before serving helps redistribute everything evenly.
Freezing this dip is possible but not ideal because the whipped topping and cream cheese both undergo textural changes when frozen and thawed. The dip becomes slightly grainy and less smooth after freezing, and some separation may occur. If you absolutely need to freeze it, do so in an airtight container for up to two months, then thaw it overnight in the refrigerator and stir well before serving. The flavor remains good even if the texture isn't quite as perfect as fresh, so it's acceptable if you're trying to preserve leftovers or make a large batch for a future event.
 Pin it
This buckeye dip has become one of my most reliable dessert recipes because it consistently delivers crowd-pleasing results with minimal effort or stress on my part. The combination of familiar flavors in an unexpected dip format creates interest and conversation at parties, while the no-bake preparation means I can make it even during hot summer months when turning on the oven feels unbearable. I've brought this to potlucks, served it at holiday gatherings, made it for casual family dinners, and prepared it for game day parties, and the reception is always enthusiastic regardless of the occasion or crowd. People who claim they don't like overly sweet desserts still enjoy this because the cream cheese tang balances the sugar, and those who avoid chocolate can simply make it without the chips. The recipe is so straightforward and forgiving that I've successfully made it while distracted by other tasks, and it still turns out perfectly. Once you experience how easy this is to make and how much people love it, you'll understand why it's earned a permanent spot in my dessert rotation and why I'm constantly sharing the recipe with friends who taste it and immediately ask for instructions.
Frequently Asked Questions
- → Can I make this dip ahead of time?
- Yes, you can make it up to 2 days in advance. Just keep it covered in the fridge until you're ready to serve.
- → What should I serve with buckeye dip?
- Graham crackers, apple slices, strawberries, pretzels, and vanilla wafers all work great. Pick whatever you like best.
- → Can I use natural peanut butter?
- Regular creamy peanut butter works best here. Natural peanut butter can make the dip too oily and it won't set up as nicely.
- → How long does this dip last in the fridge?
- It will keep for about 3 to 4 days when stored in an airtight container in the refrigerator.
- → Can I freeze buckeye dip?
- Yes, it freezes well for up to a month. Thaw it overnight in the fridge and give it a good stir before serving.
- → Do I have to chill it for 2 hours?
- Chilling helps the flavors blend and makes the texture better, but if you're in a hurry, 1 hour will work in a pinch.